
Hello,
It would be really great if everyone here could just post one or a few pictures showing the current state of their house.
I'll start right away.
For renovations, it’s best to provide a comparison of before and after the remodeling.
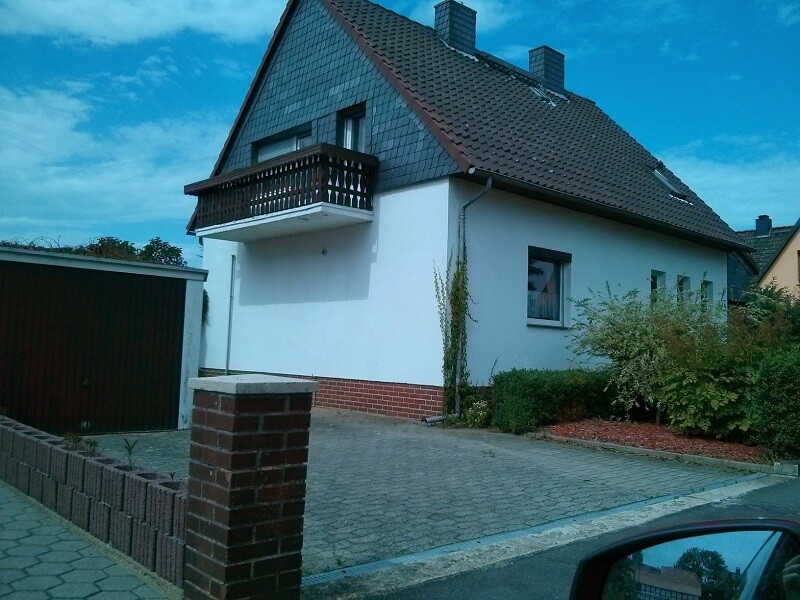
Before March 2014:
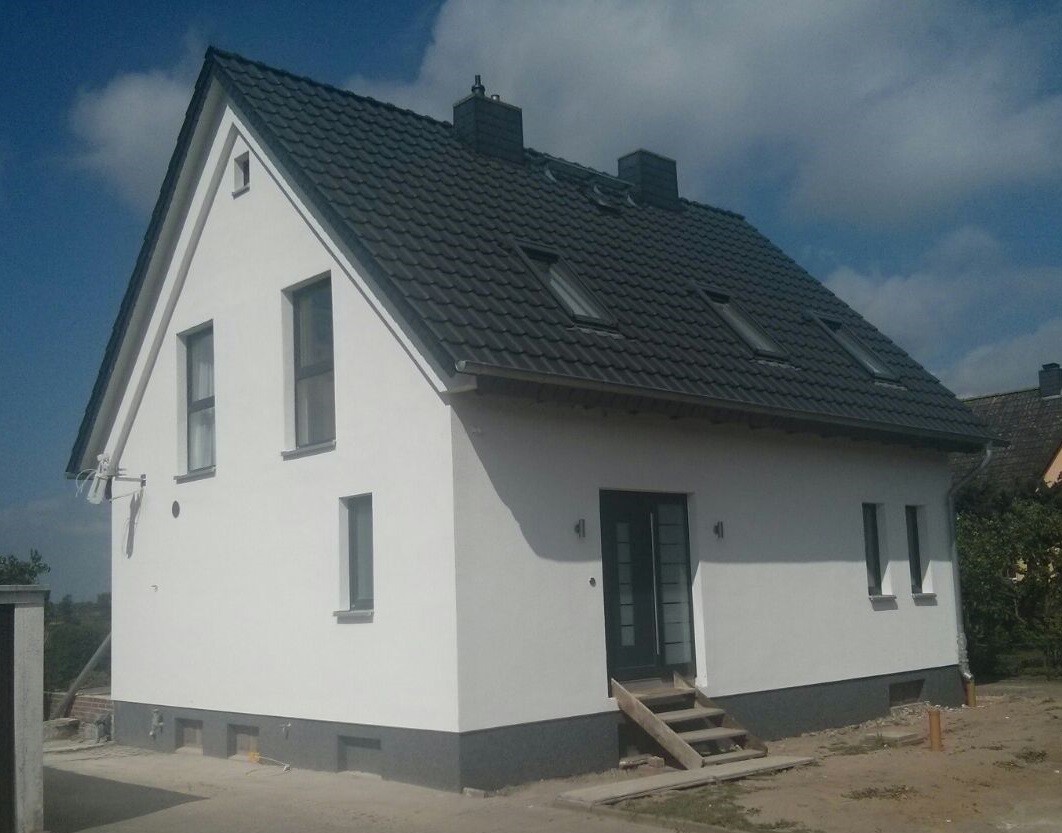
After May 2015:
It would be really great if everyone here could just post one or a few pictures showing the current state of their house.
I'll start right away.
For renovations, it’s best to provide a comparison of before and after the remodeling.
Before March 2014:
After May 2015:

So, after the last pictures from November 16th, here is an update with some new progress.
During the completion of the rough-in electrical installation, time got a bit tight before the plasterer started. There were two reasons for this. I spent a long time marking out the finished staircase and the stair spotlights so the electrician could install them. Because of the double-spiral staircase, I couldn’t find a proper arrangement for a while. After increasing the number of spots from 6 to 7, everything fit well. The second reason involved the window contact sensors. These can detect not only open/closed but also tilt. Originally, the contacts were to be wired in a ring circuit, which was already half done. At the last minute, I had it changed to a star (radial) wiring setup to avoid issues later.
The plasterer started two days later than planned but still finished as originally scheduled—the team really put in a solid effort. Today it was zero degrees Celsius (32°F), nice cold, dry air. I opened everything up and could literally watch the walls drying.
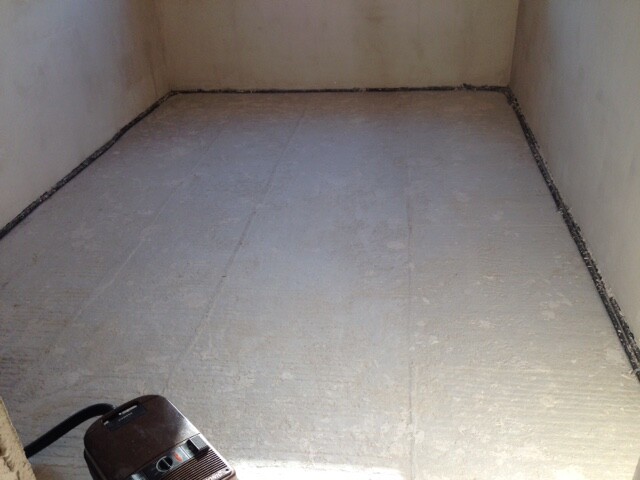
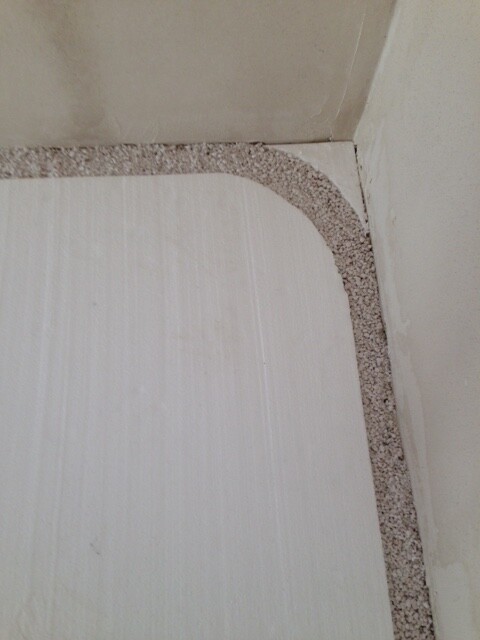
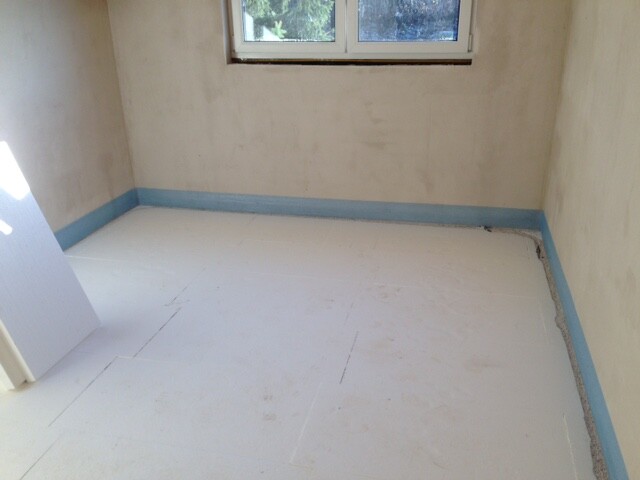
Today I started insulating under the underfloor heating. First, sweeping, vacuuming, chipping off plaster residue, and removing dirt from between the wiring. Then the installation could begin. The bottom layer is 30 mm (1.2 inches) of polystyrene insulation with a thermal conductivity of WLG 035, installed between the electrical cables. The second layer is 50 mm (2 inches). On top of that comes the carrier board for the underfloor heating (30 mm / 1.2 inches), then 65 mm (2.6 inches) of screed and the floor covering. This results in a total buildup height of 18 cm (7 inches). I’ve never done anything like this before—this is definitely a classic DIY task. I started with the simplest rooms to learn as I went. The first room took 3.5 hours, but with the second of the same size, I was down to 2 hours. In rooms with (insulated) water pipes, the 50 mm layer goes below, and the 30 mm layer goes on top. I took my time, cut everything precisely, and fitted it carefully. Consequently, I used very little of the “granulate” material. A professional doing this for money probably wouldn’t invest that time. The cost savings are modest, but I’d rather do it properly myself than have it done carelessly. I estimate I will spend 30–35 hours on the whole house, saving around 1000 EUR.
Doing things yourself is really enjoyable, but also demanding. After the roof frame and garage roof, insulation is my third “major task.” Once the underfloor heating and screed are installed, I will probably install the floor coverings myself too.


During the completion of the rough-in electrical installation, time got a bit tight before the plasterer started. There were two reasons for this. I spent a long time marking out the finished staircase and the stair spotlights so the electrician could install them. Because of the double-spiral staircase, I couldn’t find a proper arrangement for a while. After increasing the number of spots from 6 to 7, everything fit well. The second reason involved the window contact sensors. These can detect not only open/closed but also tilt. Originally, the contacts were to be wired in a ring circuit, which was already half done. At the last minute, I had it changed to a star (radial) wiring setup to avoid issues later.
The plasterer started two days later than planned but still finished as originally scheduled—the team really put in a solid effort. Today it was zero degrees Celsius (32°F), nice cold, dry air. I opened everything up and could literally watch the walls drying.
Today I started insulating under the underfloor heating. First, sweeping, vacuuming, chipping off plaster residue, and removing dirt from between the wiring. Then the installation could begin. The bottom layer is 30 mm (1.2 inches) of polystyrene insulation with a thermal conductivity of WLG 035, installed between the electrical cables. The second layer is 50 mm (2 inches). On top of that comes the carrier board for the underfloor heating (30 mm / 1.2 inches), then 65 mm (2.6 inches) of screed and the floor covering. This results in a total buildup height of 18 cm (7 inches). I’ve never done anything like this before—this is definitely a classic DIY task. I started with the simplest rooms to learn as I went. The first room took 3.5 hours, but with the second of the same size, I was down to 2 hours. In rooms with (insulated) water pipes, the 50 mm layer goes below, and the 30 mm layer goes on top. I took my time, cut everything precisely, and fitted it carefully. Consequently, I used very little of the “granulate” material. A professional doing this for money probably wouldn’t invest that time. The cost savings are modest, but I’d rather do it properly myself than have it done carelessly. I estimate I will spend 30–35 hours on the whole house, saving around 1000 EUR.
Doing things yourself is really enjoyable, but also demanding. After the roof frame and garage roof, insulation is my third “major task.” Once the underfloor heating and screed are installed, I will probably install the floor coverings myself too.

Thank you all. Since I had never done this before, I naturally started with the simple rooms to get a feel for it. Today I worked on another simple room and then began in the living room, where there are many more cables and the water pipe was also added. The outside was more difficult, but the central area has much simpler surfaces.
Similar topics