
ᐅ Window Installation – Using Expanding Foam Tape: Quick Fix or Worth the Wait?
Created on: 19 Dec 2020 08:04
A
annab377
Hello everyone,
Our general contractor actually managed to schedule a window installation appointment last week. The German-speaking window installer explained to me that they apply an external sealing tape / swelling tape. Due to the 2-3°C (36-37°F) temperature, it expands rather slowly. They started on Wednesday and by Thursday night it was supposed to have fully expanded. They also used a warm air blower because, according to him, they want to avoid the window installation foam getting underneath the swelling tape afterward. That’s why the swelling tape should be fully expanded (up to the masonry) before they can foam from the inside.
Yesterday evening, I was able to take photos of two different windows (doors) on the ground floor from the outside 🤨
According to the photos, it looks like they cut the swelling tape too short at its supposed expansion height. You can see the curves on the surface that should actually press against the window reveal, right? Doesn’t the installer use a uniform swelling tape with the same thickness for this?
The swelling tape is the gray one (in the front, since the photo is taken from outside) and behind it is the slightly different violet-gray of the installation foam.
Should I wait until next week, when a significant temperature increase of 8-9°C (14-16°F) is expected, and see if the swelling tape fully closes and contacts the window reveal everywhere? Or should I request fully closed swelling tape in all areas before final acceptance? That would probably require them to remove the affected windows again, right? Not all windows are like this. Most of the windows have swelling tape that sits completely against the reveal from the outside. I can’t see anything inside anymore because after the foam, a black adhesive tape (possibly with a cotton surface?) was applied over the joints.
What do the experts here think? I don’t want to create unnecessary thermal bridges due to such issues. Especially our window expert @11ant can surely tell me what is going on here.
In the third picture, it looks like the swelling tape was simply cut too short in length, leaving a roughly 1 cm (0.4 inches) tall gap in the tape. There it has expanded well and presses against the window reveal. Should I just foam that small gap closed? But the waves and curves on the swelling tape surface, which unfortunately are largely not in contact with the window reveal, seem outside the tolerance range, don’t they?
Thank you very much for your answers.
Have a great weekend and an early Merry Christmas.
Annab377
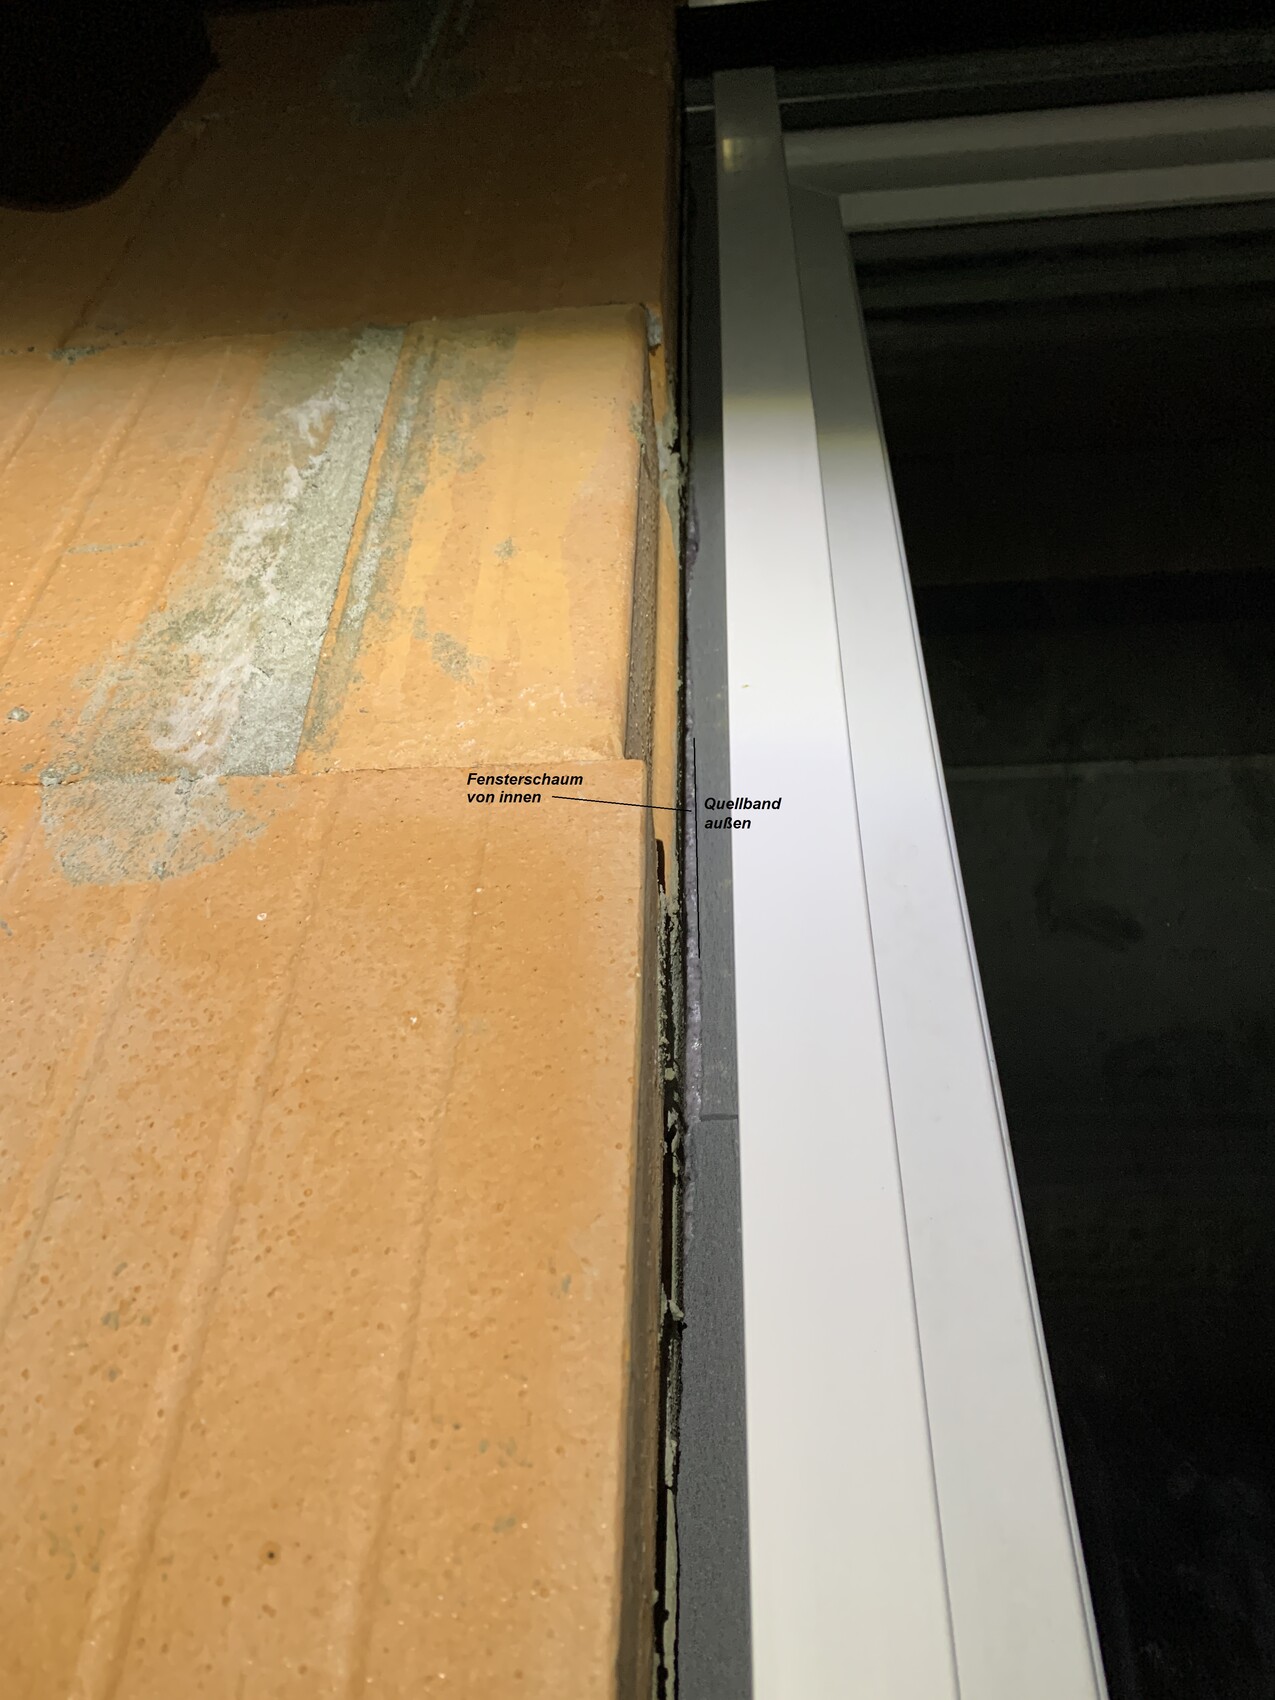
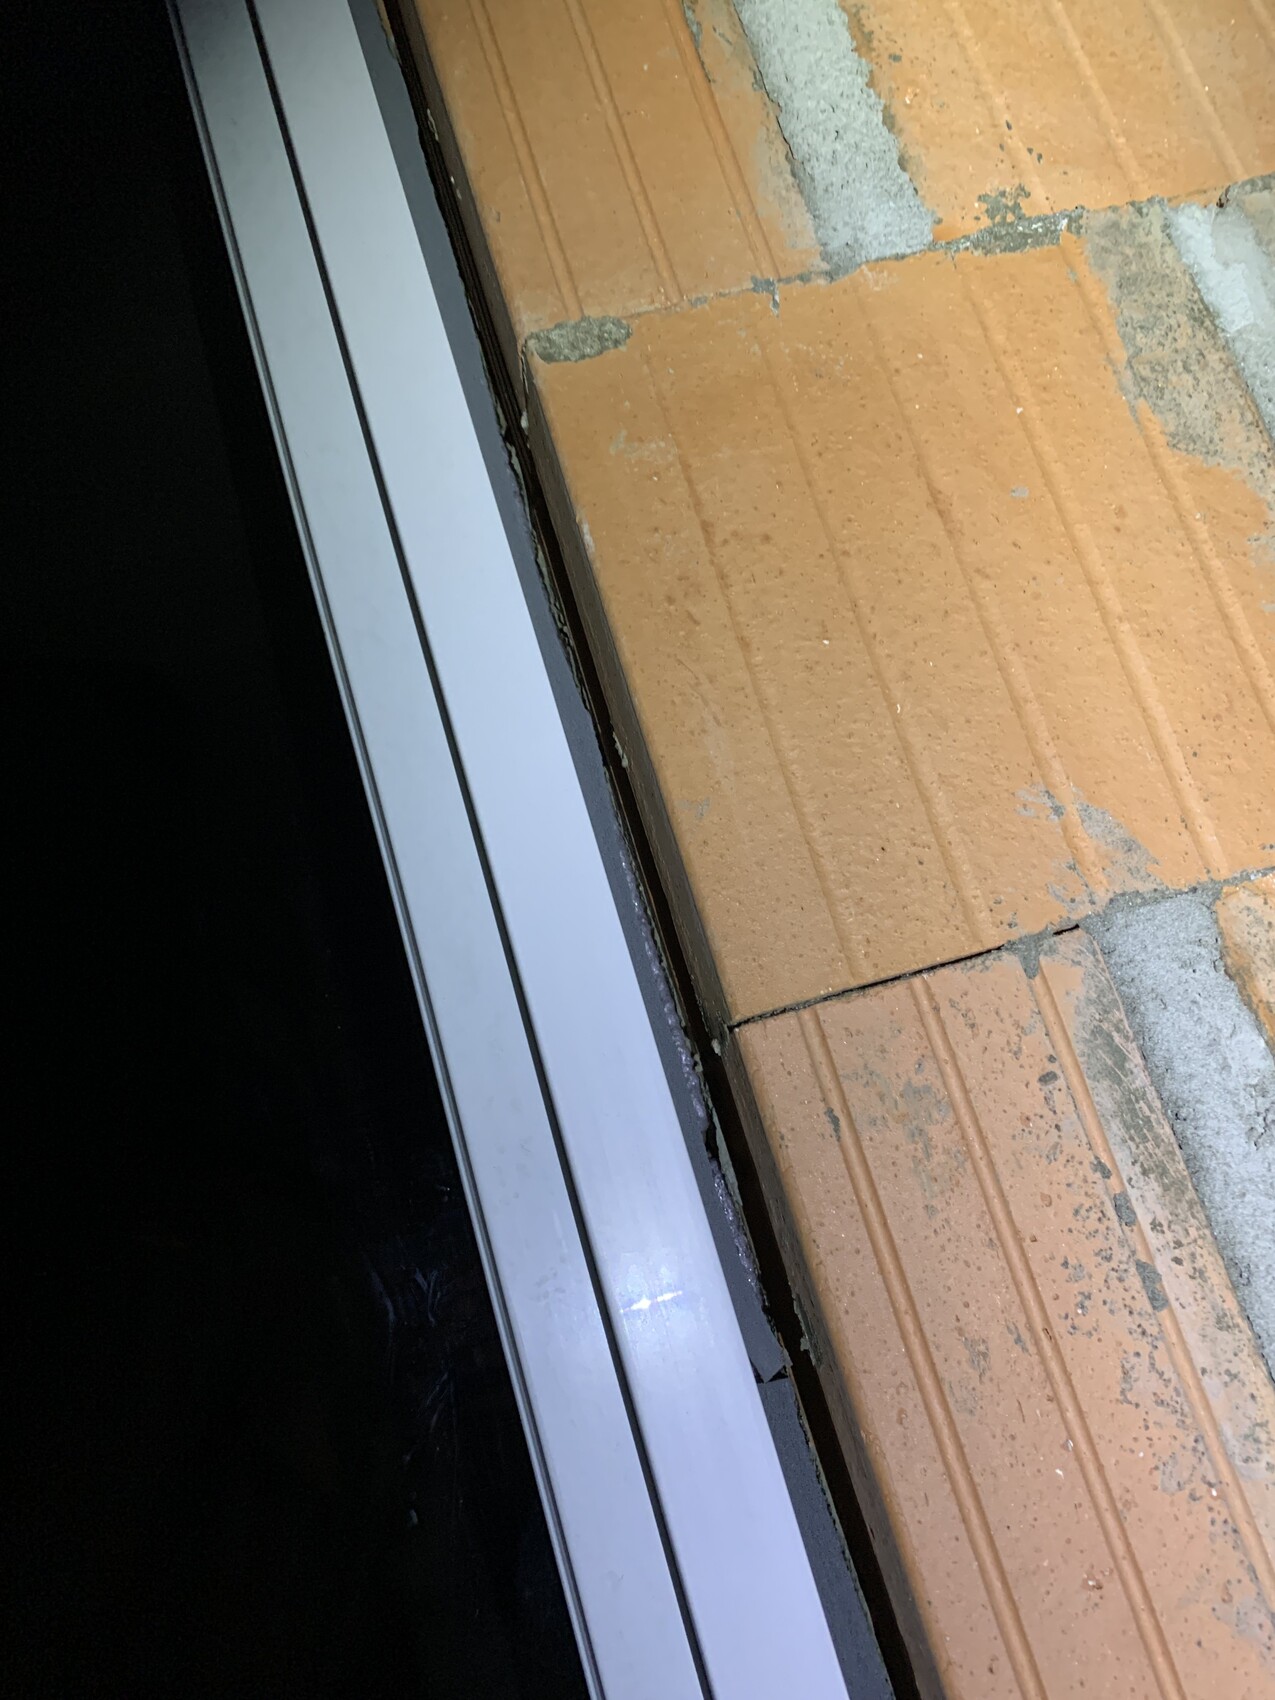
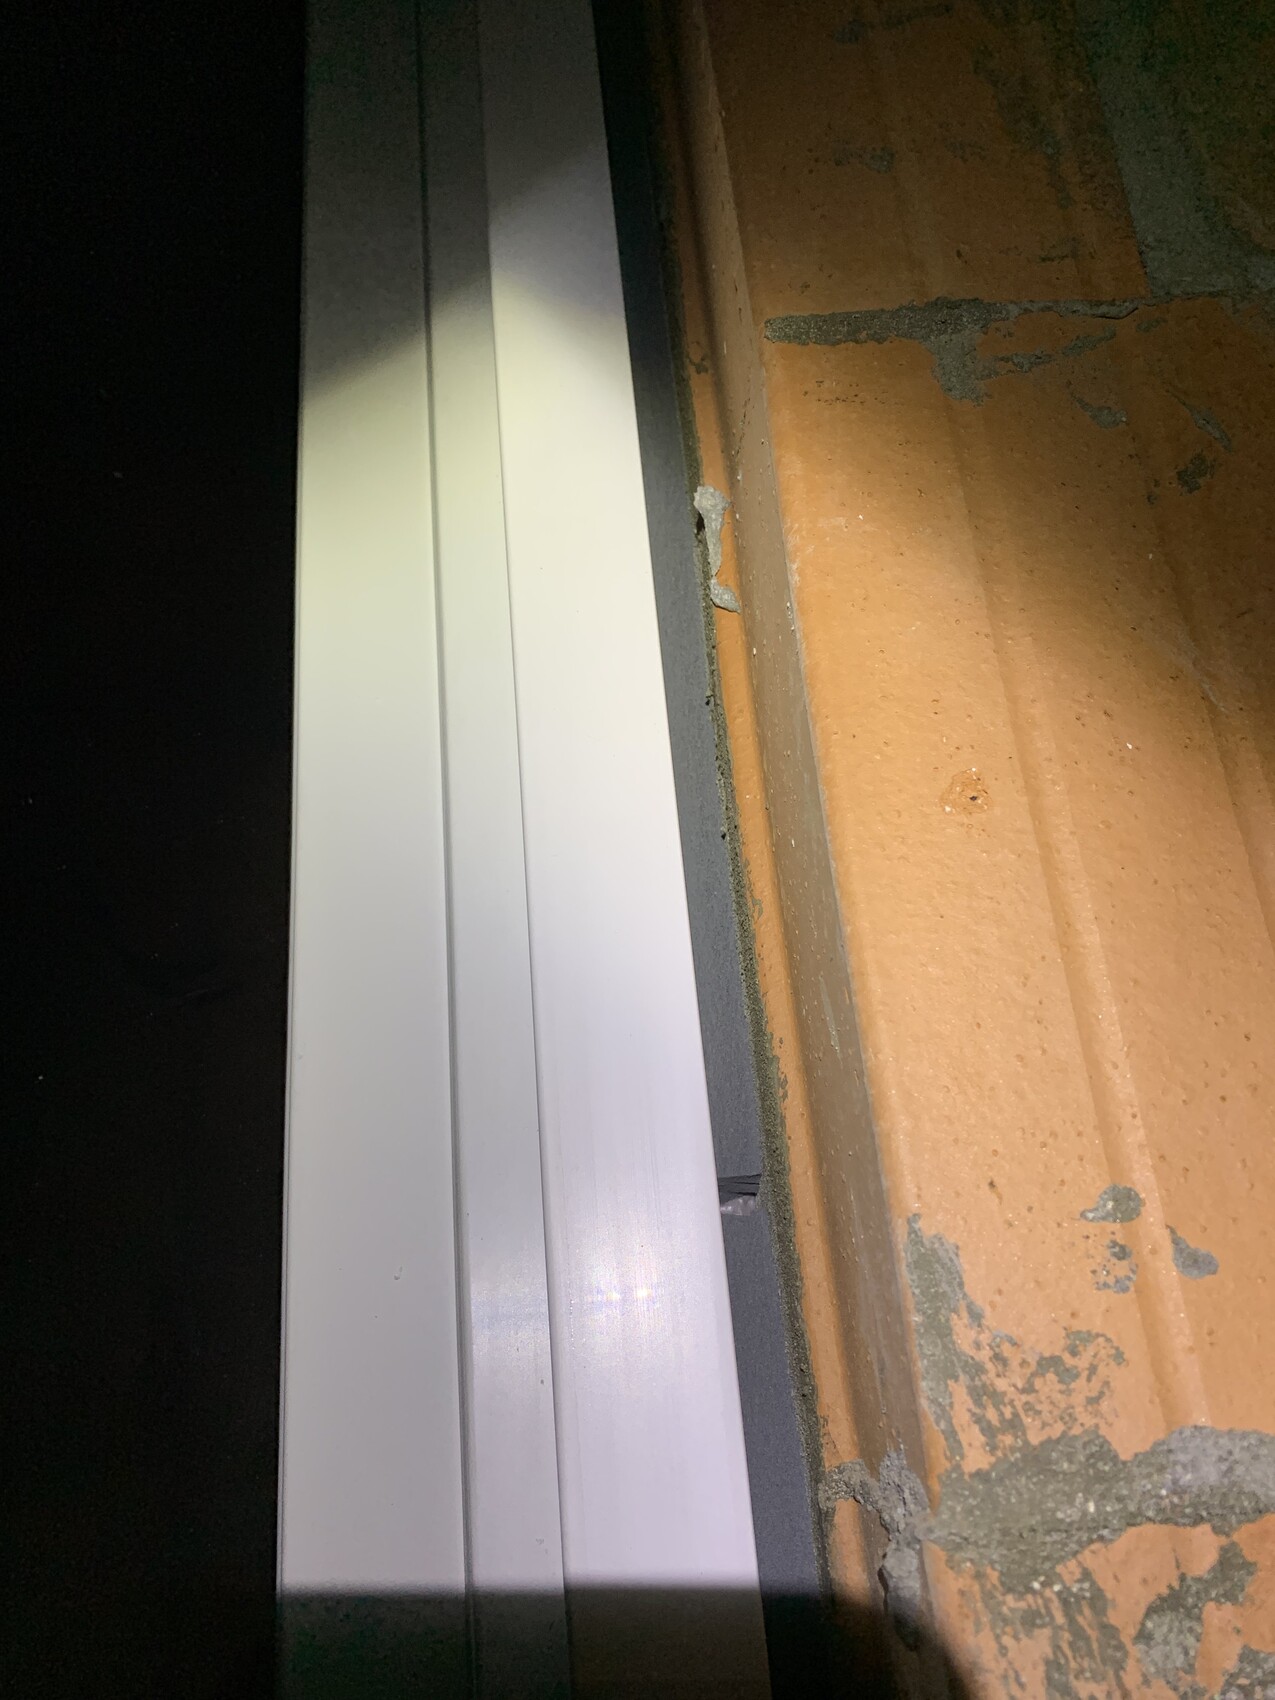
Our general contractor actually managed to schedule a window installation appointment last week. The German-speaking window installer explained to me that they apply an external sealing tape / swelling tape. Due to the 2-3°C (36-37°F) temperature, it expands rather slowly. They started on Wednesday and by Thursday night it was supposed to have fully expanded. They also used a warm air blower because, according to him, they want to avoid the window installation foam getting underneath the swelling tape afterward. That’s why the swelling tape should be fully expanded (up to the masonry) before they can foam from the inside.
Yesterday evening, I was able to take photos of two different windows (doors) on the ground floor from the outside 🤨
According to the photos, it looks like they cut the swelling tape too short at its supposed expansion height. You can see the curves on the surface that should actually press against the window reveal, right? Doesn’t the installer use a uniform swelling tape with the same thickness for this?
The swelling tape is the gray one (in the front, since the photo is taken from outside) and behind it is the slightly different violet-gray of the installation foam.
Should I wait until next week, when a significant temperature increase of 8-9°C (14-16°F) is expected, and see if the swelling tape fully closes and contacts the window reveal everywhere? Or should I request fully closed swelling tape in all areas before final acceptance? That would probably require them to remove the affected windows again, right? Not all windows are like this. Most of the windows have swelling tape that sits completely against the reveal from the outside. I can’t see anything inside anymore because after the foam, a black adhesive tape (possibly with a cotton surface?) was applied over the joints.
What do the experts here think? I don’t want to create unnecessary thermal bridges due to such issues. Especially our window expert @11ant can surely tell me what is going on here.
In the third picture, it looks like the swelling tape was simply cut too short in length, leaving a roughly 1 cm (0.4 inches) tall gap in the tape. There it has expanded well and presses against the window reveal. Should I just foam that small gap closed? But the waves and curves on the swelling tape surface, which unfortunately are largely not in contact with the window reveal, seem outside the tolerance range, don’t they?
Thank you very much for your answers.
Have a great weekend and an early Merry Christmas.
Annab377
Hi,
First of all, you need to check whether there is actually a technical defect. Based on the pictures, this is still a bit difficult to determine at the moment.
Then you should see if the defect can be fixed in an equivalent way. Depending on the sealing method used, for example, additional sealing from the inside (as is often done traditionally).
Replacing the gasket is not possible with an installed window. I don’t think removing the window is reasonable. There are definitely good ways to fix the defect if it actually exists. Don’t worry.
I might need to look at the pictures more closely on my computer tomorrow, as I don’t yet understand the extent and reason for the assembly foam. It’s a bit hard to see on the phone.
Best regards,
Jann
First of all, you need to check whether there is actually a technical defect. Based on the pictures, this is still a bit difficult to determine at the moment.
Then you should see if the defect can be fixed in an equivalent way. Depending on the sealing method used, for example, additional sealing from the inside (as is often done traditionally).
Replacing the gasket is not possible with an installed window. I don’t think removing the window is reasonable. There are definitely good ways to fix the defect if it actually exists. Don’t worry.
I might need to look at the pictures more closely on my computer tomorrow, as I don’t yet understand the extent and reason for the assembly foam. It’s a bit hard to see on the phone.
Best regards,
Jann
Hey @Jann St
do you know how firm the mounting tape should be in the finger pressure test? There are different hardness levels. In some areas, it’s really firm – but in others, it’s quite soft, and the mounting tape comes off the reveal easily with finger pressure.
Regards.
do you know how firm the mounting tape should be in the finger pressure test? There are different hardness levels. In some areas, it’s really firm – but in others, it’s quite soft, and the mounting tape comes off the reveal easily with finger pressure.
Regards.
Hi,
This is a bit hard to explain. It shouldn’t feel like an open-cell foam but rather somewhat firm. I would say it’s similar to pressing against the relaxed muscle under your thumb.
If the hinge comes loose from the window or door frame recess, then it’s not firm enough, or the gap was too wide for the thickness of the hinge.
If this only happens in small areas, I don’t consider it critical.
You could measure the gaps at the widest points and maybe find a packaging box from the manufacturer somewhere.
Best regards,
Jann
This is a bit hard to explain. It shouldn’t feel like an open-cell foam but rather somewhat firm. I would say it’s similar to pressing against the relaxed muscle under your thumb.
If the hinge comes loose from the window or door frame recess, then it’s not firm enough, or the gap was too wide for the thickness of the hinge.
If this only happens in small areas, I don’t consider it critical.
You could measure the gaps at the widest points and maybe find a packaging box from the manufacturer somewhere.
Best regards,
Jann
 Hausbau08154 Jan 2021 08:57
To me, this does not look like professional work. The expanding foam tape must be firmly attached to both the frame and the masonry; no foam should seep through. I am well familiar with the challenges of proper window sealing. We have had four window sealings so far, three of which were ineffective. The first one used only minimal sealing tape on the inside and foam on the outside; after complaining, sealing tapes were stuffed between the reveal and the frame from the outside while the windows were already installed. After the second complaint, everything was scraped out again and sprayed completely with foam from both inside and outside. After another complaint, a final deadline was set, requesting a three-layer sealing system. We begged a local window specialist to take on the job, but he was very reluctant because of the warranty responsibility for the windows and shutters, although he eventually did it.
Costs for the windows: €18,000; installation and first sealing: reportedly €10,000; second sealing: €3,000; third sealing: €5,000; and the fourth and final sealing cost nearly €7,000. The fourth sealing also took seven working days with three workers.
Now it is done properly. Regarding your question: No, the sealing tapes cannot be replaced on installed windows because they must be attached/glued to the window frame and must run continuously. This is not possible once the window is installed.
Costs for the windows: €18,000; installation and first sealing: reportedly €10,000; second sealing: €3,000; third sealing: €5,000; and the fourth and final sealing cost nearly €7,000. The fourth sealing also took seven working days with three workers.
Now it is done properly. Regarding your question: No, the sealing tapes cannot be replaced on installed windows because they must be attached/glued to the window frame and must run continuously. This is not possible once the window is installed.
Hausbau08154 Jan 2021 10:21Pictures 1 to 3 show the current waterproofing. This is how it should be done.
The other pictures show previous attempts and a behind-the-scenes look when you remove the decorative tapes that were quickly slapped on to hide the poor workmanship behind them.
The amount of expensive material used here is incredible. But if you don’t know what you’re doing, even the best material won’t help.
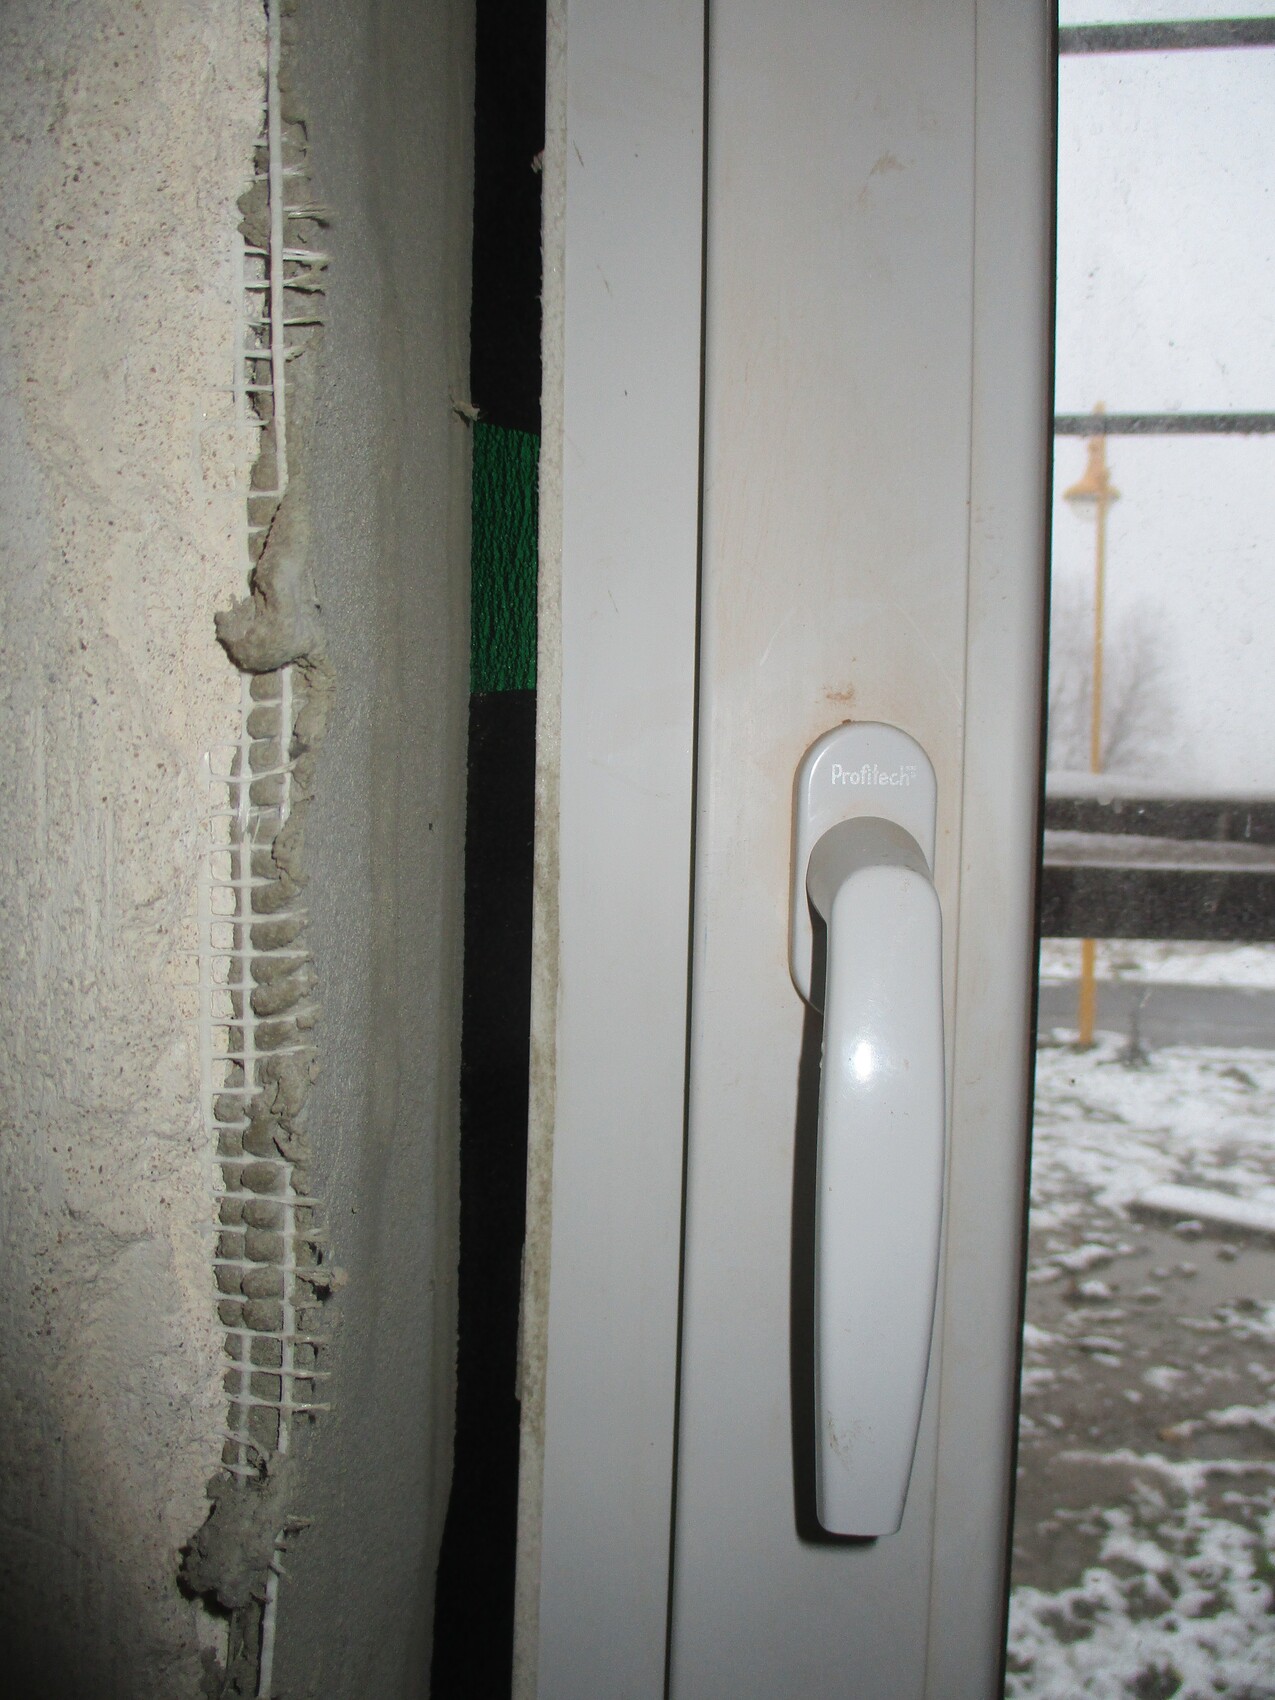
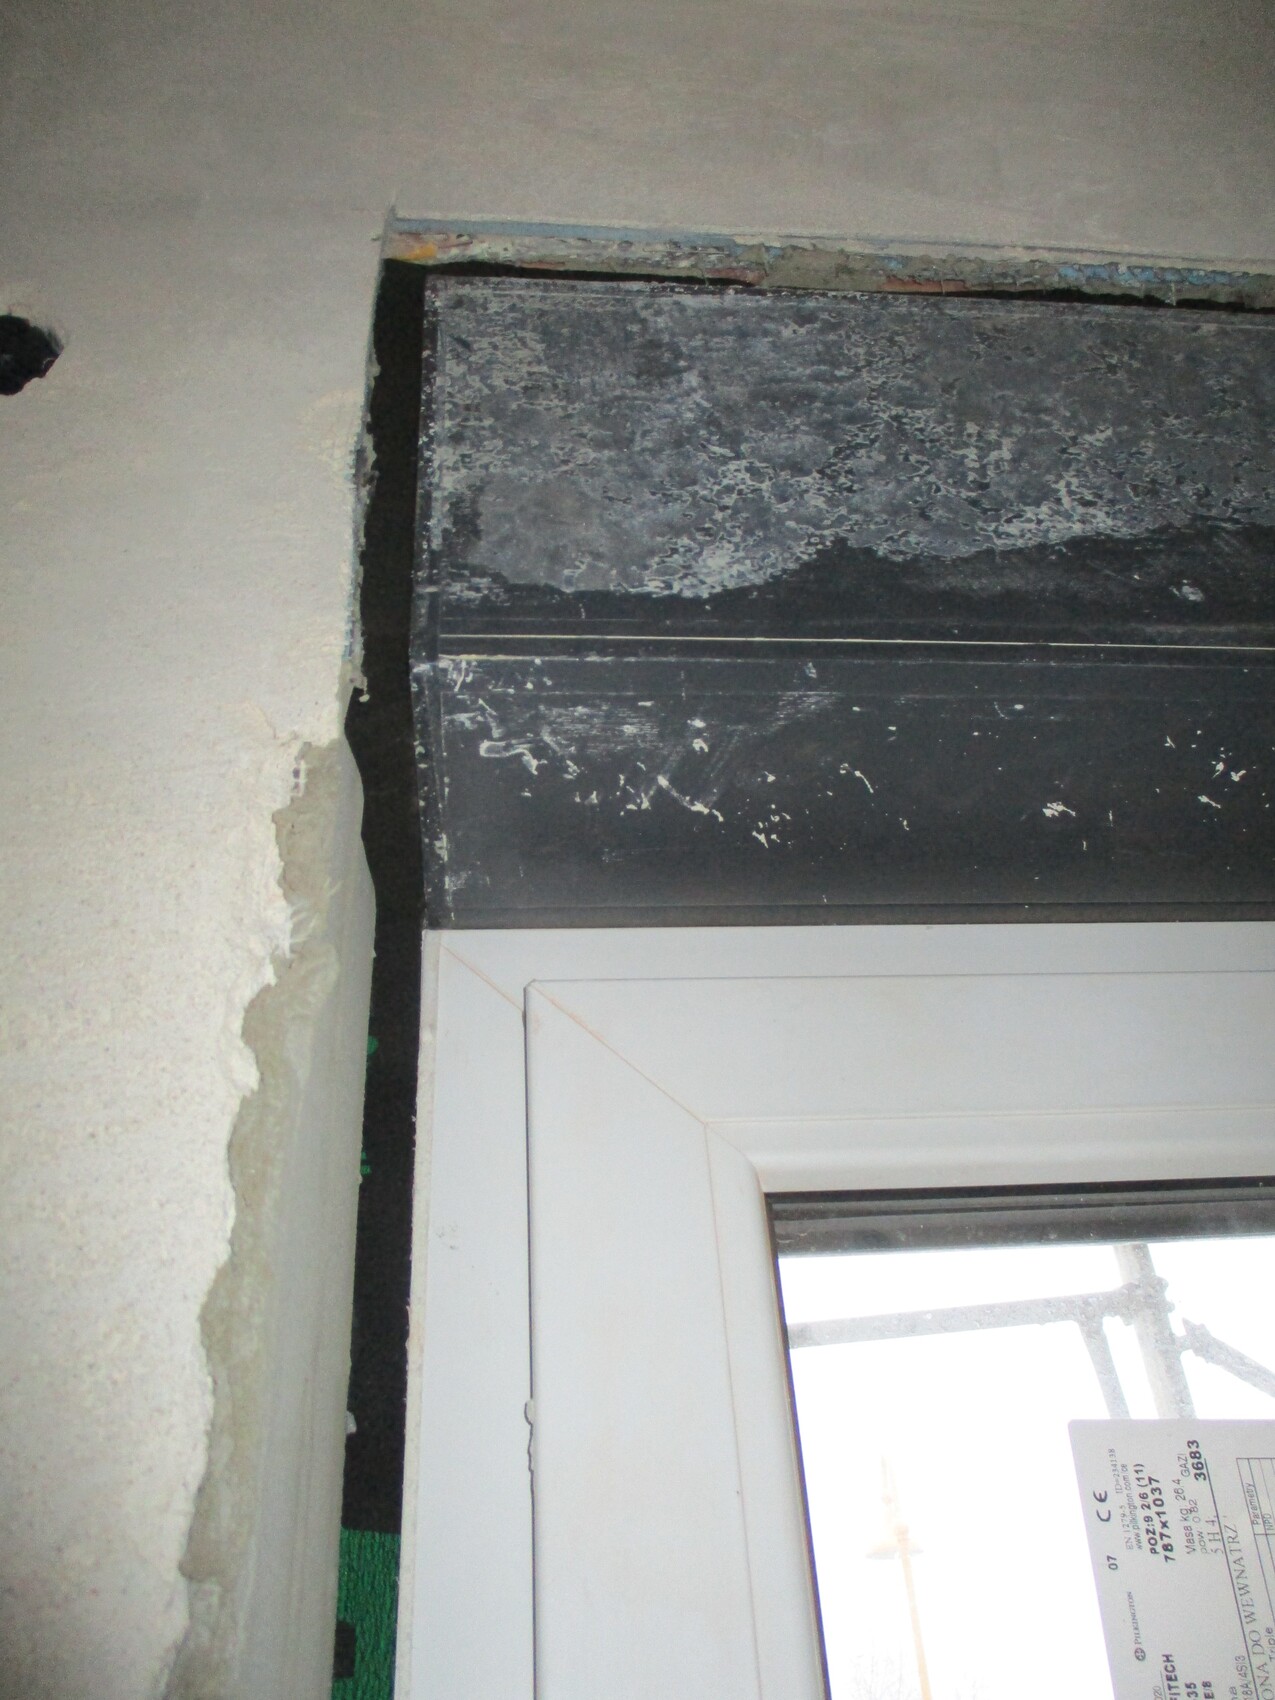
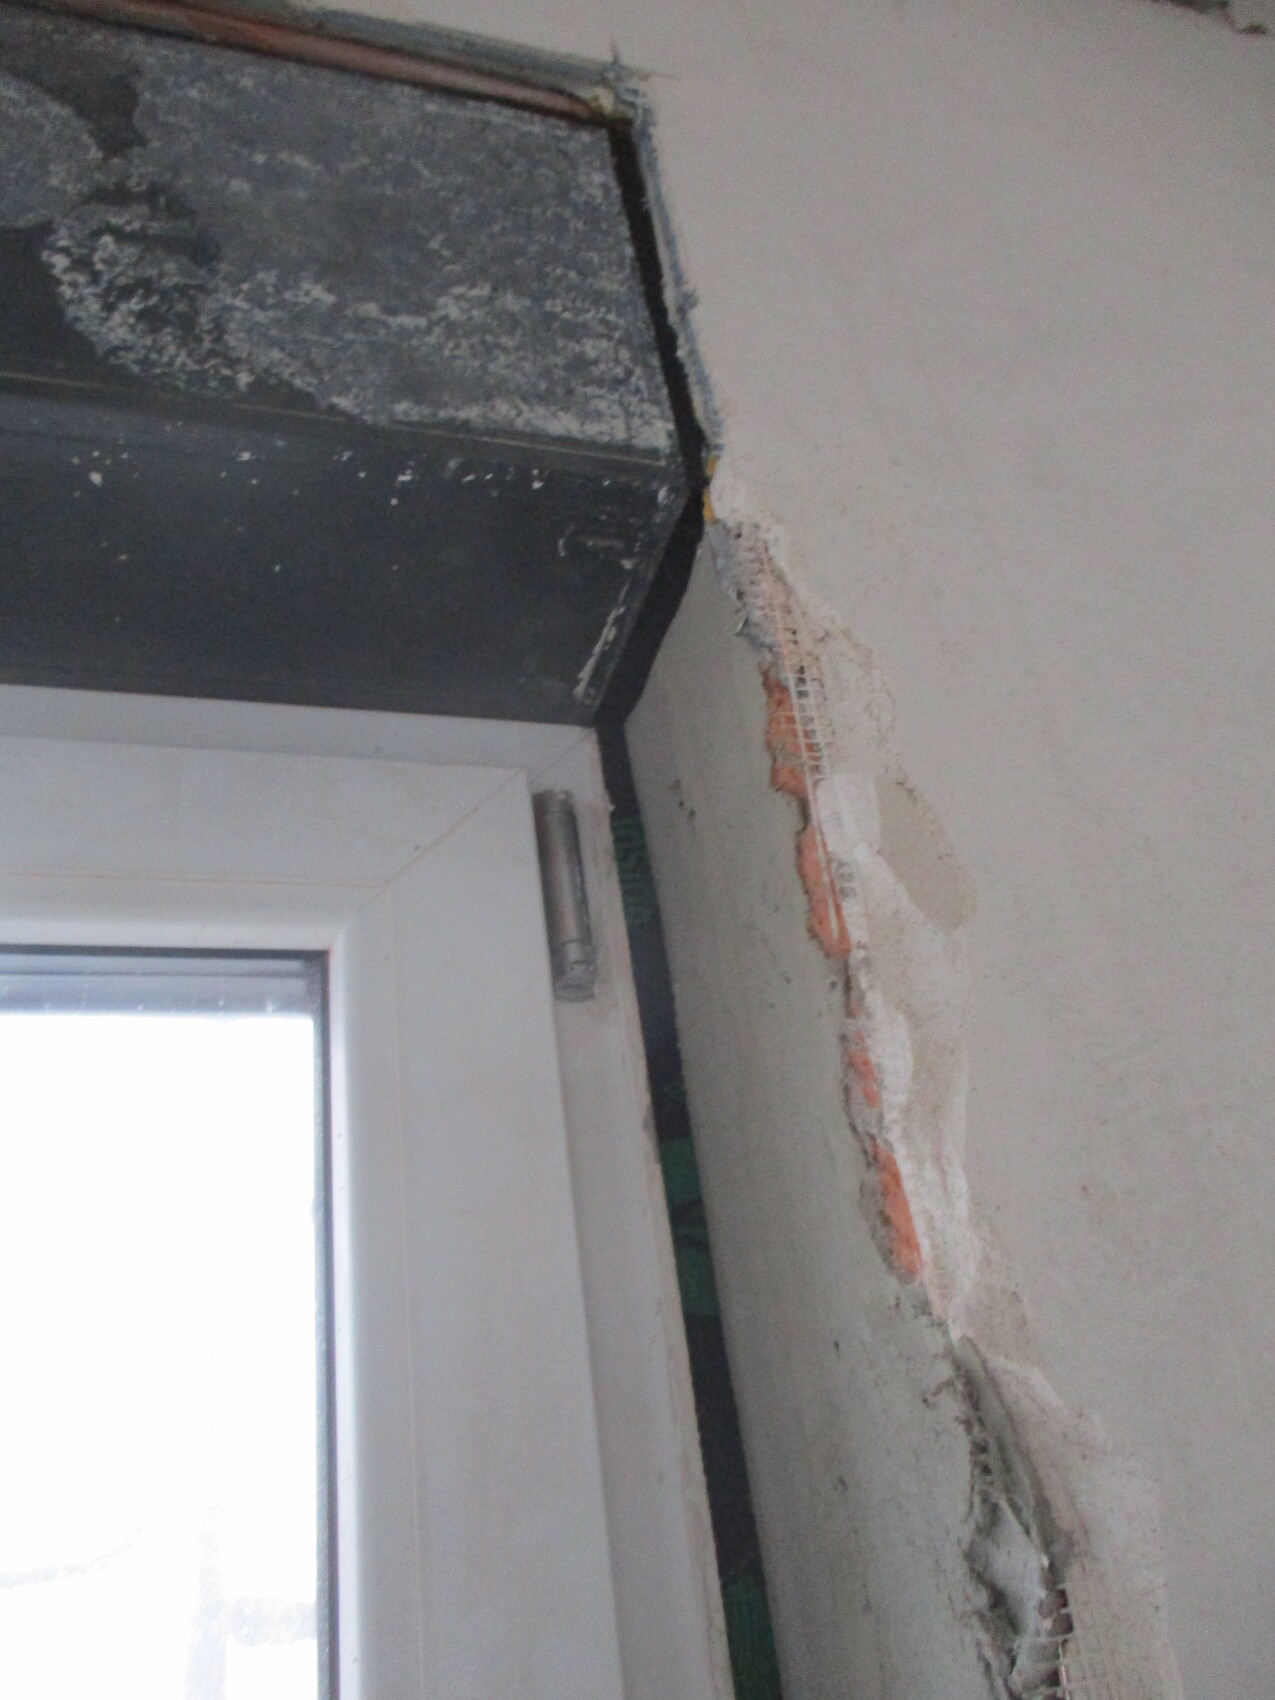
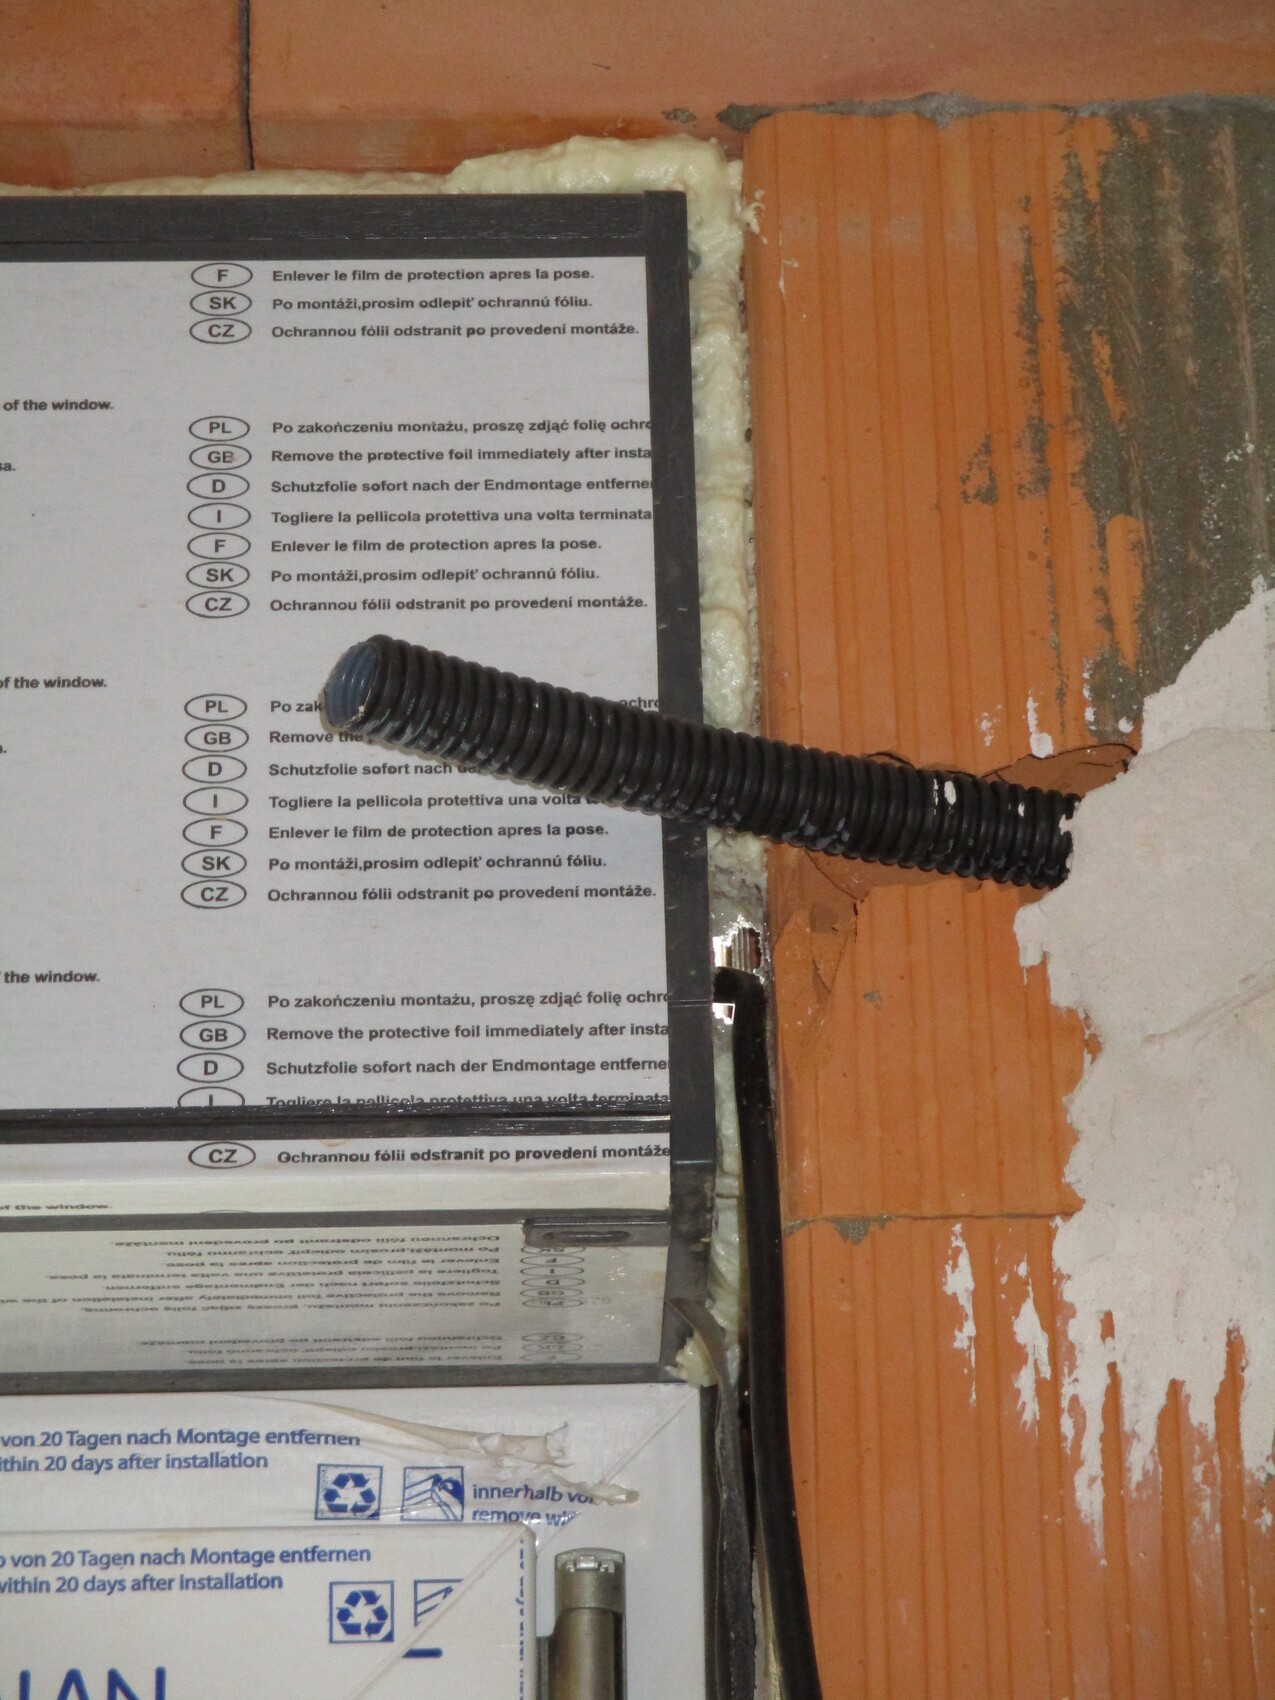
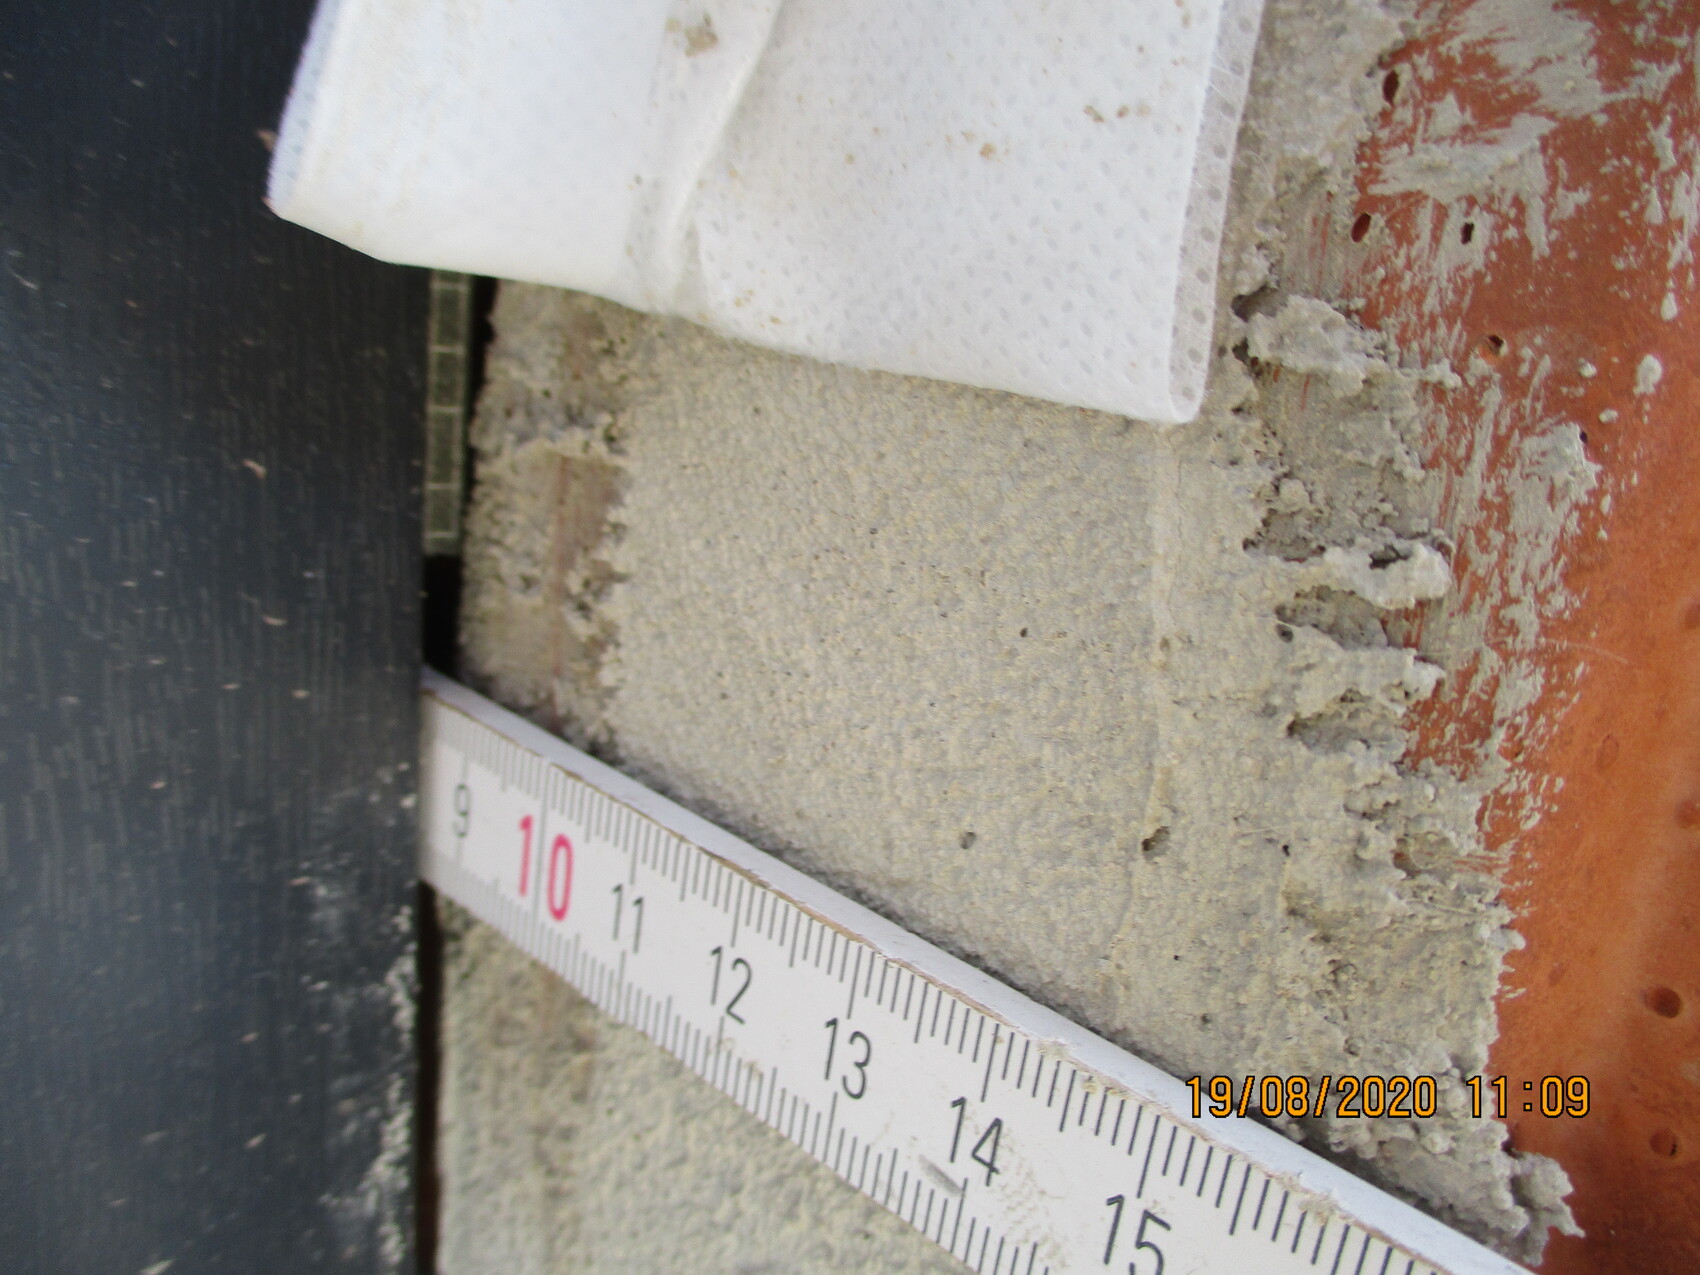
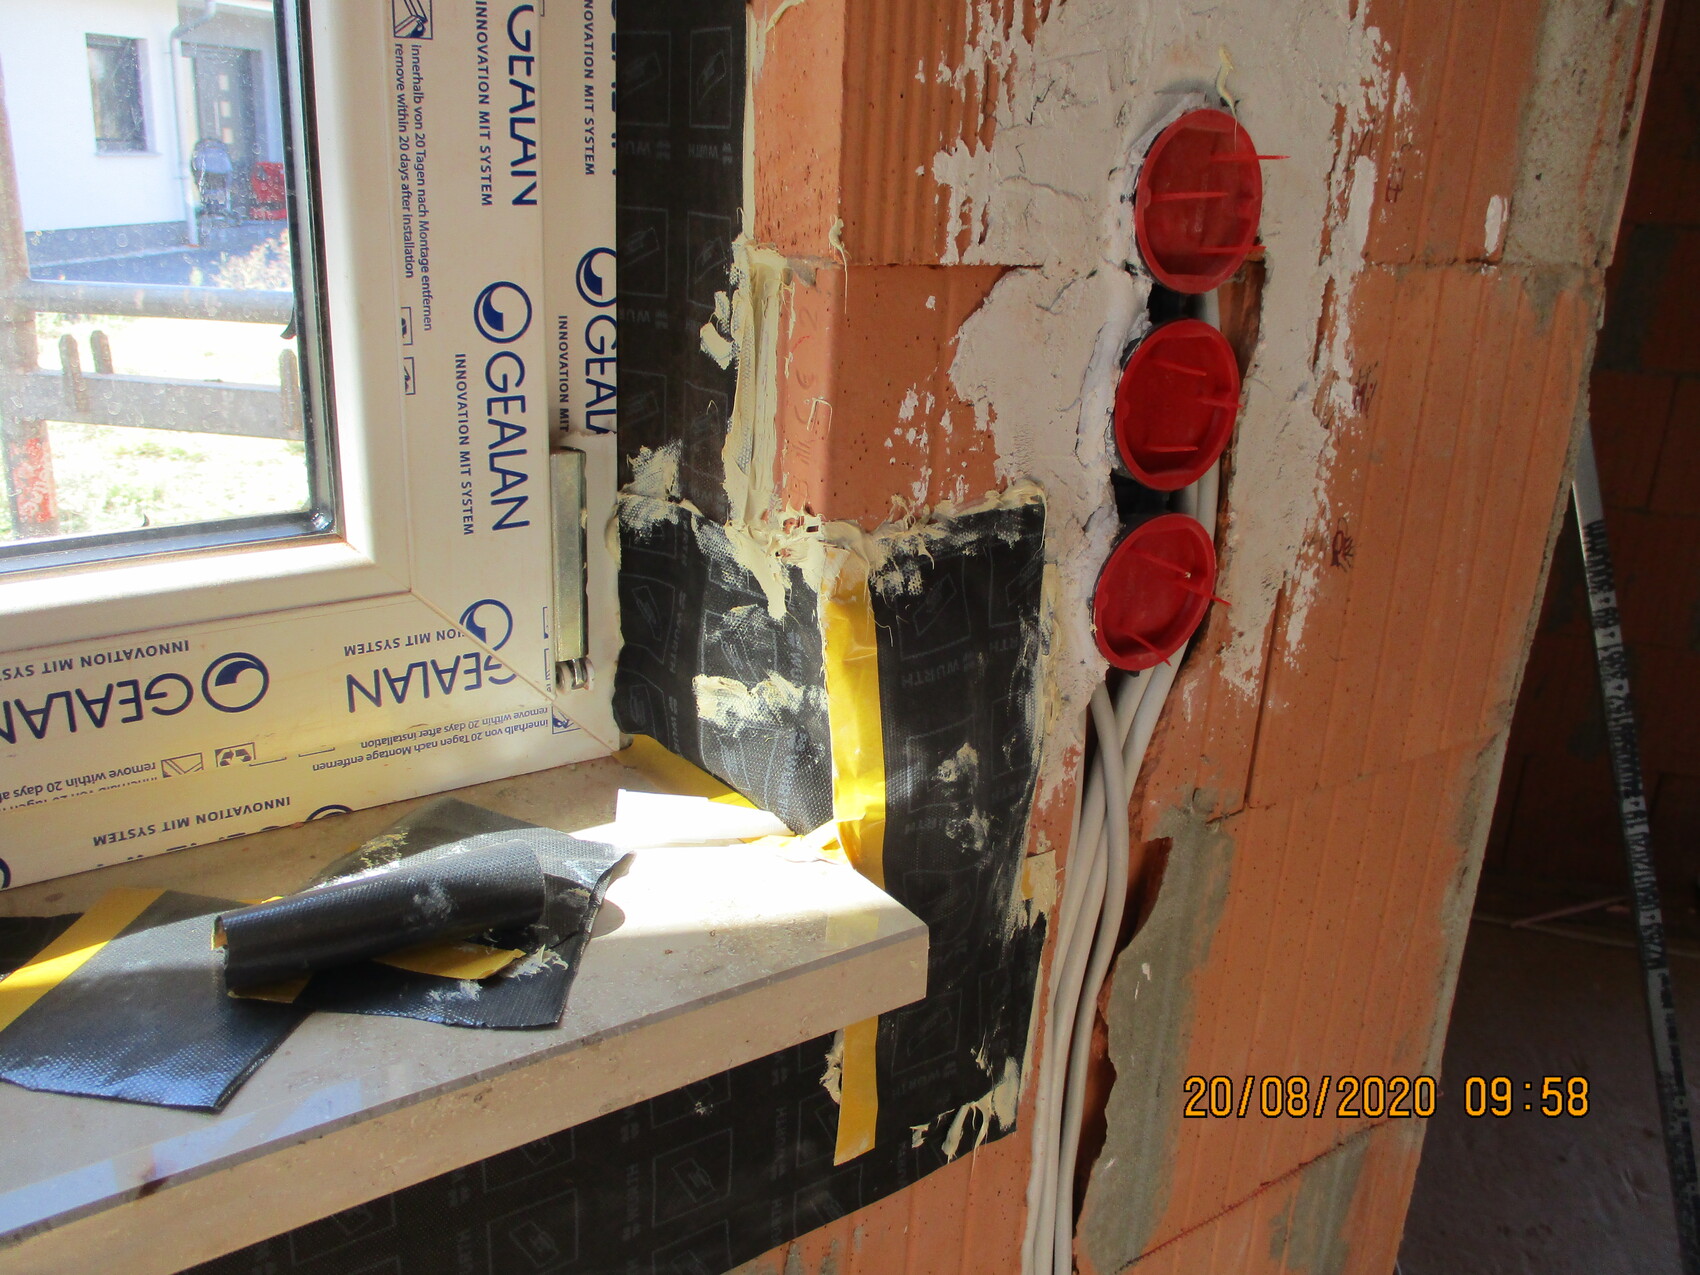

The other pictures show previous attempts and a behind-the-scenes look when you remove the decorative tapes that were quickly slapped on to hide the poor workmanship behind them.
The amount of expensive material used here is incredible. But if you don’t know what you’re doing, even the best material won’t help.
Similar topics