
ᐅ Tiling Shower Partition Walls at Different Heights – How to Create Smooth Transitions
Created on: 9 Oct 2022 20:58
J
junijulibautJ
junijulibaut9 Oct 2022 20:58We want to tile as little area as possible in our bathroom. That’s the plan so far, but we’re stuck with the partition wall between the shower and the bathtub.
On the shower side and the end of the drywall partition, the tiling should be 2.1 m high (7 feet). On the bathtub side, ideally only 1.2 m (4 feet), the same height as the rest of the bathtub area up to the door.
But how do you handle the edge/corner of the drywall wall so that there is no unsightly transition between the areas tiled at different heights and everything lines up neatly?
Are there specific techniques, trims, or profiles for this?
If necessary, could a third drywall board be added in the upper area on the bathtub side to make the wall flush?
How have you solved this problem?
Or is it really simple and I’m just overthinking it?
Thanks for any tips and advice.
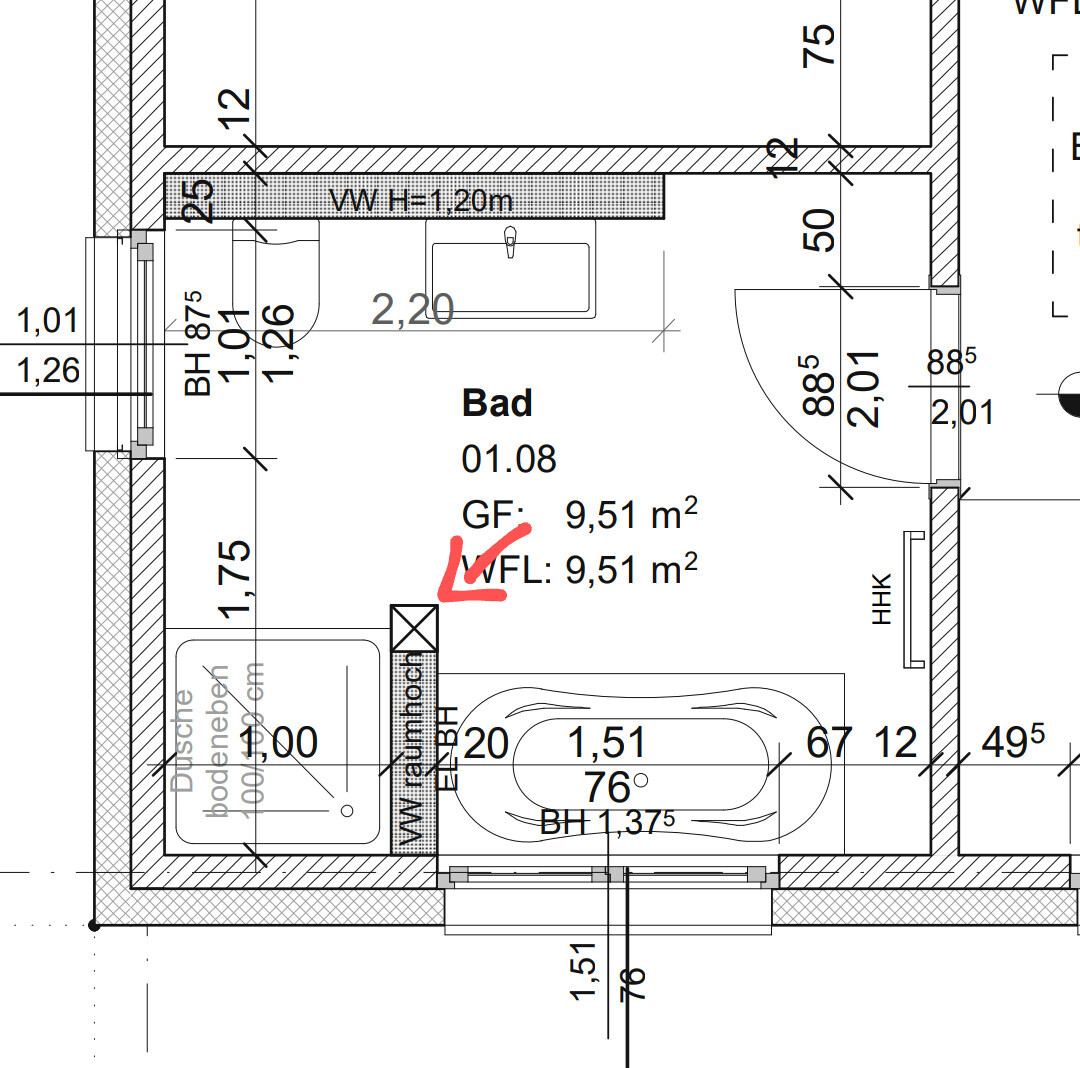
On the shower side and the end of the drywall partition, the tiling should be 2.1 m high (7 feet). On the bathtub side, ideally only 1.2 m (4 feet), the same height as the rest of the bathtub area up to the door.
But how do you handle the edge/corner of the drywall wall so that there is no unsightly transition between the areas tiled at different heights and everything lines up neatly?
Are there specific techniques, trims, or profiles for this?
If necessary, could a third drywall board be added in the upper area on the bathtub side to make the wall flush?
How have you solved this problem?
Or is it really simple and I’m just overthinking it?
Thanks for any tips and advice.
junijulibaut schrieb:
Are there specific techniques, profiles, etc.?There are corner profiles. Some people use them subtly, while others cover every tile edge with an additional profile. To be honest, I didn’t really think about it back then, and this is what resulted. The corner doesn’t bother me; I just like how it looks. This would be your corner too, just mirrored.Have you already started building your house?
B
Buschreiter9 Oct 2022 22:15There are attractive stainless steel trims, as well as so-called Jolly trims. You will surely find something suitable.
S
SaniererNRW1239 Oct 2022 22:24junijulibaut schrieb:
How did you solve this problem in your case?
Or is it really simple and I’m just missing something? There are various solutions for this. Talk to your tiler and have them show you.
ypg schrieb:
Some handle it subtly, while others cover every tile edge with an additional trim profile. In case the profile in my photo isn’t clearly visible: it is a stainless steel profile! 🙂
If your wall goes all the way up to the ceiling, tiling up to the top is better because of moisture.
J
junijulibaut9 Oct 2022 22:28Hello @ypg,
it shows up mirrored exactly like that. Your photo helps me visualize it better. Let the tiles on the front edge align flush with the wall, then add a trim profile at the bottom and another one at the top along the bathtub side. That could work.
From the toilet, you would see the small edge.... I need to think about whether I like that.
Are the exposed edges of the tiles painted or covered with filler on your end?
it shows up mirrored exactly like that. Your photo helps me visualize it better. Let the tiles on the front edge align flush with the wall, then add a trim profile at the bottom and another one at the top along the bathtub side. That could work.
From the toilet, you would see the small edge.... I need to think about whether I like that.
Are the exposed edges of the tiles painted or covered with filler on your end?
Similar topics