
Hello everyone,
I want to undertake the insulation of the top floor ceiling myself.
[Facts]:
- Semi-detached house built in 1972, two floors with heated basement rooms
- Upper floor ceiling made of reinforced concrete - B225, thickness according to plan 16cm (6.3 inches)
- Roof pitch is 18 degrees and cannot be converted into living space
- The purlins rest directly on the concrete ceiling
- The roof will not be insulated; instead, the floor will be insulated
- The attic space should be partially usable as storage and walkable
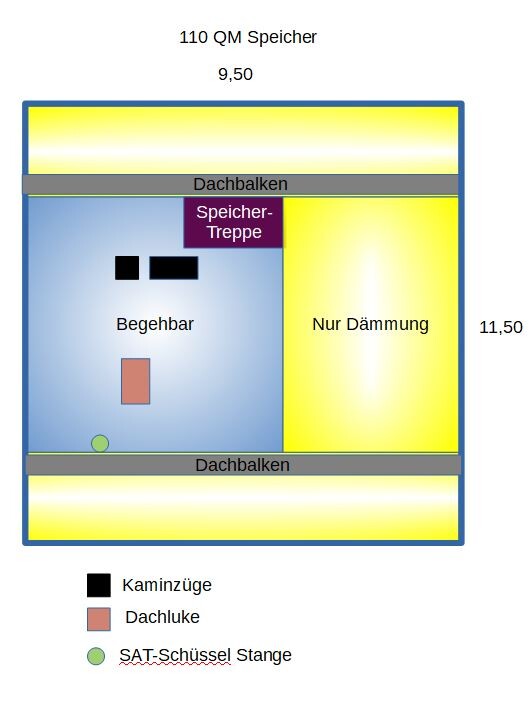
See sketch top view attic 110 sqm (1184 sq ft) area, approx. 40 sqm (430 sq ft) walkable
[Questions]:
1) Preparations:
What preparations do I need to make on the concrete before starting work? Thorough cleaning?
2) Vapor barrier:
Do I also need to install a vapor barrier foil on the reinforced concrete B225 at the upper floor?
3) Insulation material:
I plan to lay EPS 040 WI/DI/DZ 50mm (2 inch) polystyrene boards (width 500mm (20 inches) x length 1000mm (39 inches)) double-layered and staggered (without cross joints) everywhere.
This means about 9-10cm (3.5-4 inches) of insulation thickness. What U-value would I achieve with this?
Material cost comes to around 800 EUR including VAT.
Which affordable insulation boards would you recommend for my project? Has anyone had experience using polystyrene boards?
4) OSB boards (thickness - no idea - any recommendations)?
For the walkable area I would additionally install OSB-3 tongue and groove boards, 12mm (0.5 inch) thick, 205cm (80 inches) x 62.5cm (25 inches).
Material cost is approximately 200 EUR including VAT.
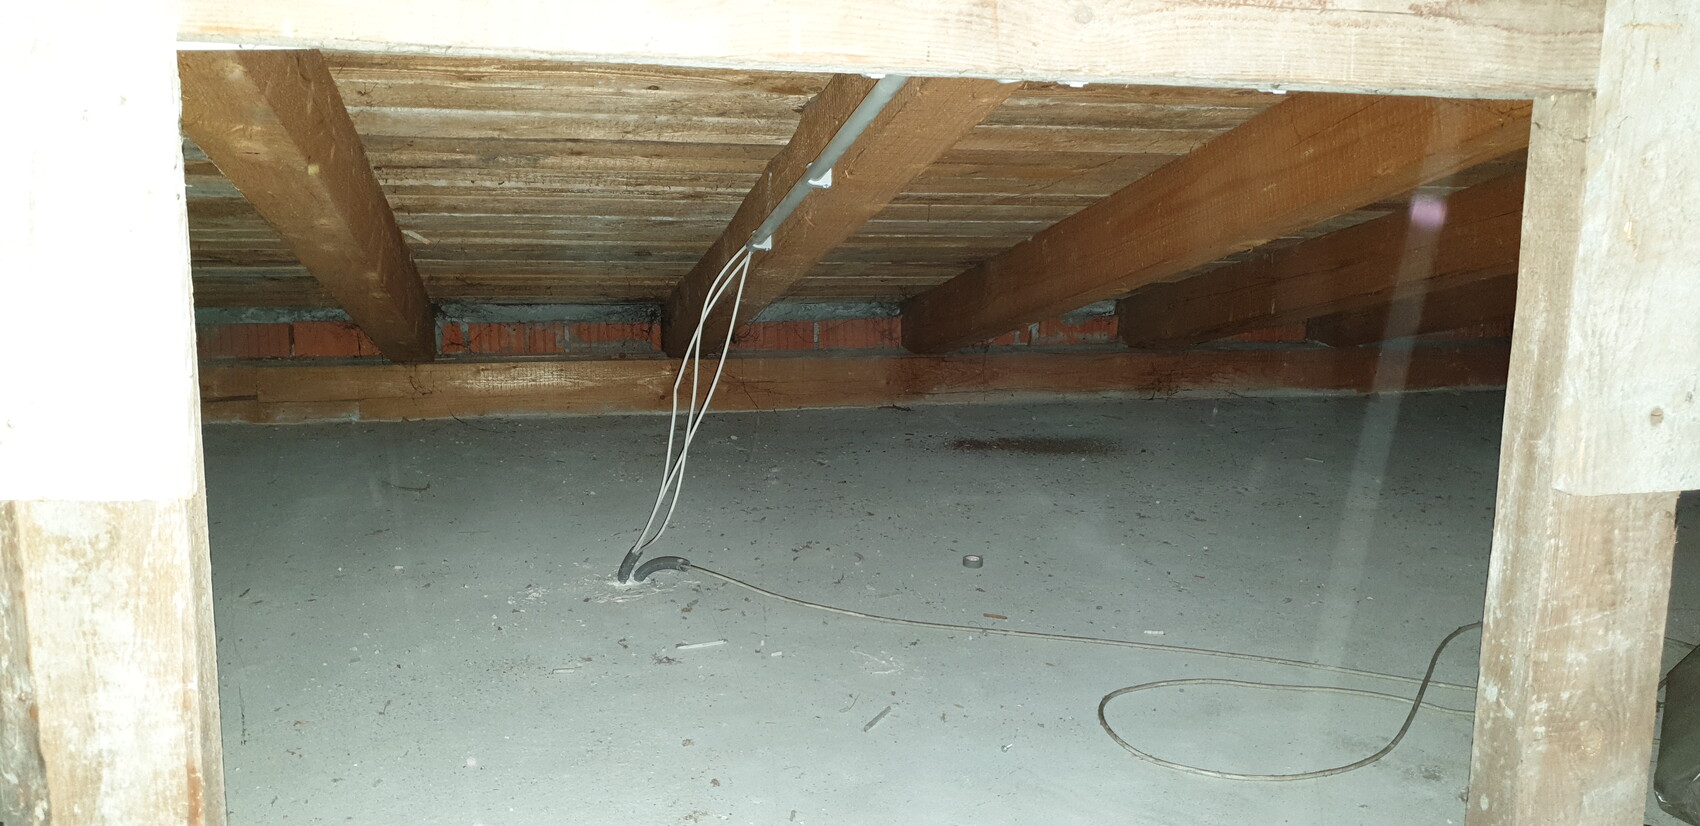
5) How should I deal with cables embedded in the concrete ceiling and around the purlins when insulating?
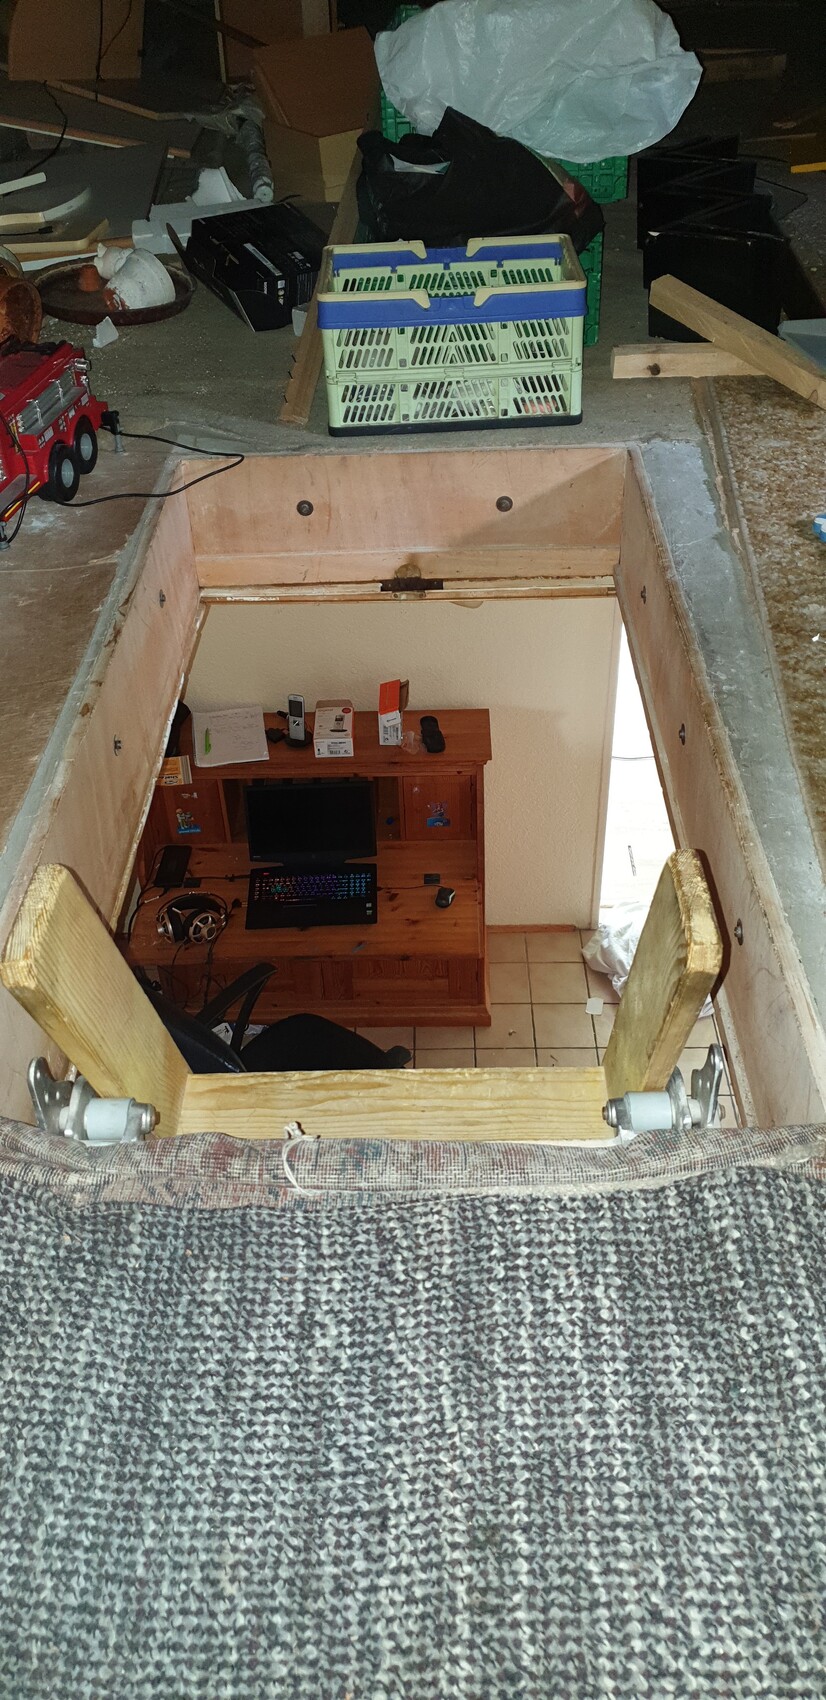
6) How should/could I insulate the attic stairs?
7) Are there any special considerations I might have overlooked?
Looking forward to your opinions/ideas/tips and tricks,
Chippy
I want to undertake the insulation of the top floor ceiling myself.
[Facts]:
- Semi-detached house built in 1972, two floors with heated basement rooms
- Upper floor ceiling made of reinforced concrete - B225, thickness according to plan 16cm (6.3 inches)
- Roof pitch is 18 degrees and cannot be converted into living space
- The purlins rest directly on the concrete ceiling
- The roof will not be insulated; instead, the floor will be insulated
- The attic space should be partially usable as storage and walkable
See sketch top view attic 110 sqm (1184 sq ft) area, approx. 40 sqm (430 sq ft) walkable
[Questions]:
1) Preparations:
What preparations do I need to make on the concrete before starting work? Thorough cleaning?
2) Vapor barrier:
Do I also need to install a vapor barrier foil on the reinforced concrete B225 at the upper floor?
3) Insulation material:
I plan to lay EPS 040 WI/DI/DZ 50mm (2 inch) polystyrene boards (width 500mm (20 inches) x length 1000mm (39 inches)) double-layered and staggered (without cross joints) everywhere.
This means about 9-10cm (3.5-4 inches) of insulation thickness. What U-value would I achieve with this?
Material cost comes to around 800 EUR including VAT.
Which affordable insulation boards would you recommend for my project? Has anyone had experience using polystyrene boards?
4) OSB boards (thickness - no idea - any recommendations)?
For the walkable area I would additionally install OSB-3 tongue and groove boards, 12mm (0.5 inch) thick, 205cm (80 inches) x 62.5cm (25 inches).
Material cost is approximately 200 EUR including VAT.
5) How should I deal with cables embedded in the concrete ceiling and around the purlins when insulating?
6) How should/could I insulate the attic stairs?
7) Are there any special considerations I might have overlooked?
Looking forward to your opinions/ideas/tips and tricks,
Chippy
Ah, okay, thanks, I’ll take a closer look at the staircase.
By the way, the insulation material comes in boards measuring 1200 x 500 millimeters (47 x 20 inches) with a step joint.
PUR/PIR rigid foam boards with aluminum, thickness 160 millimeters (6.3 inches)
Thermal conductivity WLG 023, second quality.
For an area of 111 square meters (1,195 square feet), I end up with about 2,230 euros gross, which means 20.10 euros gross per square meter (approximately 1.87 euros per square foot). Unfortunately, the delivery costs 415 euros net.
Best regards
By the way, the insulation material comes in boards measuring 1200 x 500 millimeters (47 x 20 inches) with a step joint.
PUR/PIR rigid foam boards with aluminum, thickness 160 millimeters (6.3 inches)
Thermal conductivity WLG 023, second quality.
For an area of 111 square meters (1,195 square feet), I end up with about 2,230 euros gross, which means 20.10 euros gross per square meter (approximately 1.87 euros per square foot). Unfortunately, the delivery costs 415 euros net.
Best regards
Update: The insulation materials have been delivered for 110 m² (1,184 sq ft). :-)
Questions:
- Should I ideally wear a mask and goggles when cutting and laying the insulation? I noticed that the PUR insulation boards are a bit dusty.
- Could I use old tongue-and-groove parquet flooring as walkable boards?
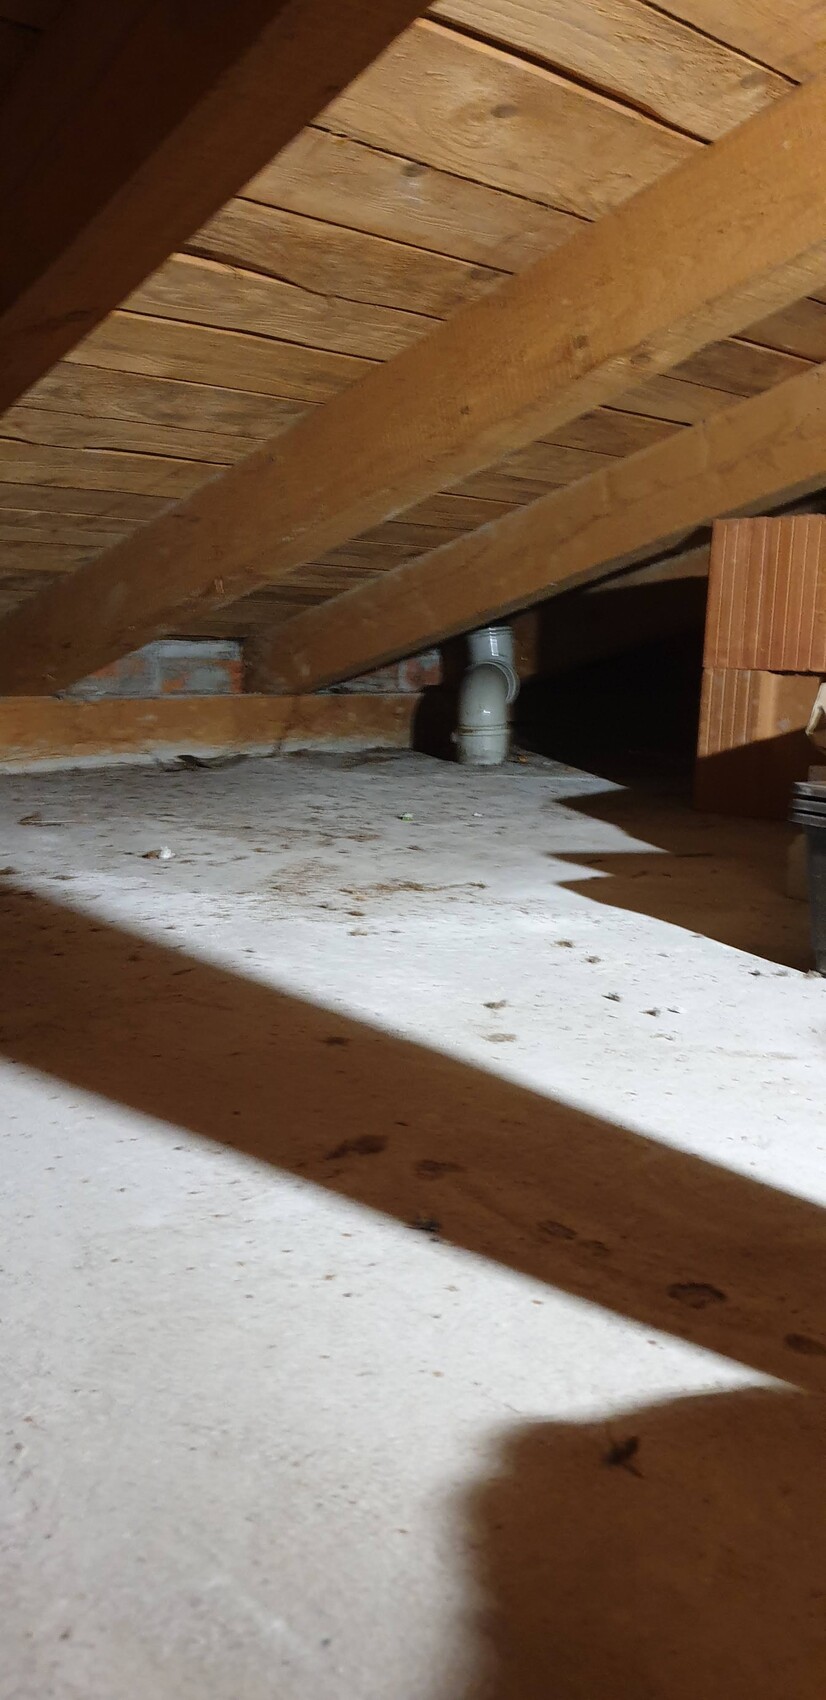
- And can you tell me what those strange pipes are that run from the concrete floor through the roof?
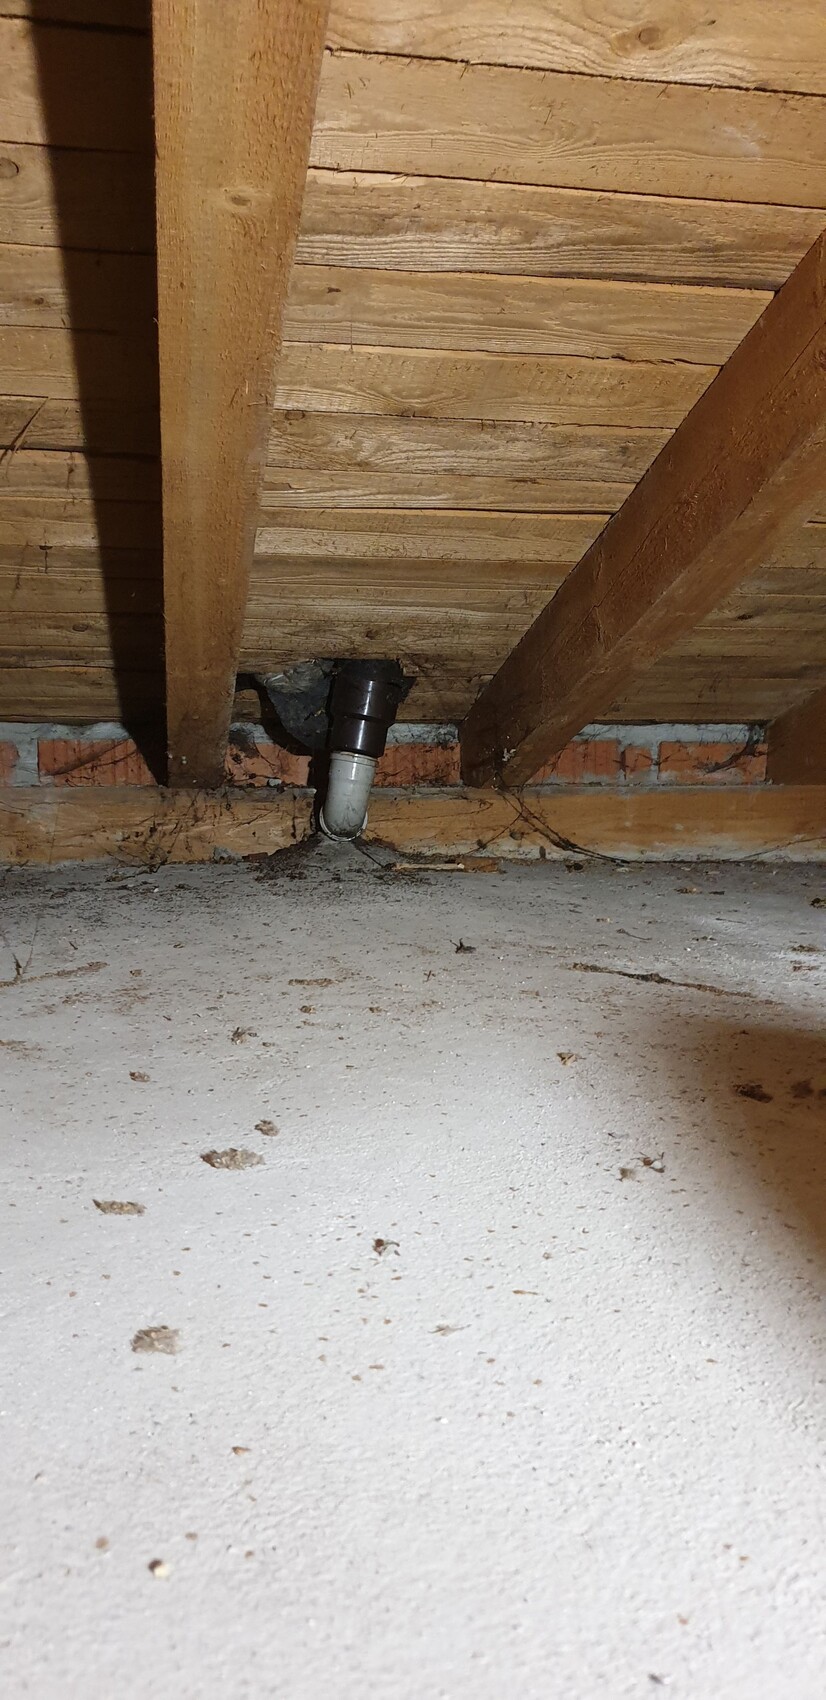
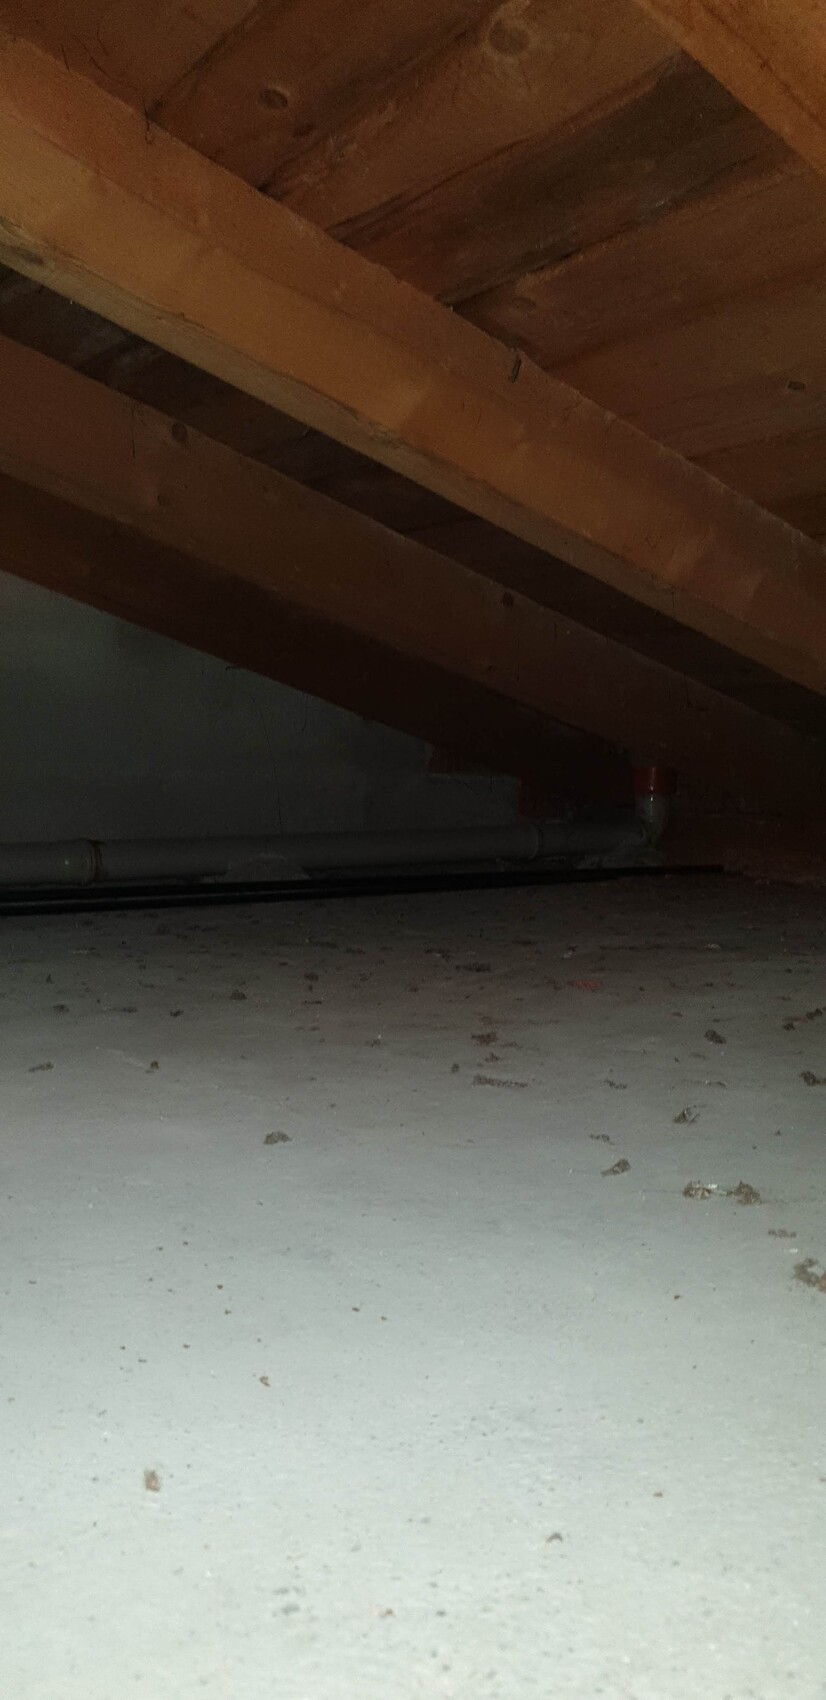
thx
Questions:
- Should I ideally wear a mask and goggles when cutting and laying the insulation? I noticed that the PUR insulation boards are a bit dusty.
- Could I use old tongue-and-groove parquet flooring as walkable boards?
- And can you tell me what those strange pipes are that run from the concrete floor through the roof?
thx
P
Piotr198130 Nov 2020 10:42chippy79 schrieb:
Update: The insulation materials have been delivered for 110 m² (1,184 sq ft). 🙂
Questions:
- Should I ideally wear a mask and goggles when cutting and installing? I noticed that the PUR insulation boards are a bit dusty.
- Could I use old tongue-and-groove parquet flooring as walkable boards?
- Also, can you tell me what those strange pipes are that run from the concrete floor through the roof?
thx The pipes you see are the vent stacks for your wastewater system. They run through the roof to the outside. I didn’t use a mask—only if you’re working with mineral wool insulation, then wearing one is definitely advisable. Otherwise, there’s nothing major to worry about with these insulation boards in my opinion. Have fun and good luck! 🙂
Piotr1981 schrieb:
The pipes you see are the corresponding vent stacks for your wastewater system. They are routed through the roof to the outside. Ah, okay, thanks for the information. When installing our photovoltaic modules on the roof, the installers from the solar company removed some of these ventilation caps on the roof. Is this now a problem for the ventilation of these wastewater pipes?
When cutting around these pipes in the panels, as well as around the wooden beams standing on the concrete floor and near the chimney, is there anything special I should consider? For example, is it sufficient to cut square openings around the pipes, or should the cuts fit as tightly as possible?
Thanks
P
Piotr198130 Nov 2020 10:56chippy79 schrieb:
Ah, okay, thanks for the information. During the installation of our photovoltaic panels on the roof, the installers from the solar company removed some of the vent caps on the roof. Could this now be a problem for the ventilation of the corresponding wastewater pipes?
Do I need to pay special attention to the cutouts in the panels around these pipes, but also around the wooden beams standing on the concrete floor, and near the chimney? For example, is it enough to cut square openings around the pipes, or should everything fit as tightly as possible?
Thanks If I understand correctly, you are insulating with a thickness of 16cm (6.3 inches), right?
Personally, I would recommend working in two layers.
1) First layer of 8cm (3.1 inches) fitted against the wall plate, covering the entire roof (lengthwise).
2) Second layer of 8cm (3.1 inches) placed over the first layer, covering the entire roof (crosswise).
This method helps to avoid thermal bridges between the individual insulation boards (at the joints).
Once you have finished with the two layers, I recommend placing compression fleece between the masonry wall and the wall plate to prevent thermal bridging through the wood. Take a look at image No. 1.
I now have the problem that the panels are 120cm x 50cm (47 inches x 20 inches), 16cm (6 inches) thick and have a stepped tongue-and-groove profile. They cannot be split in the middle, so they can only be installed as a single layer with 16cm (6 inches) thickness.
But basically, because of the stepped profile, the joints are already staggered, right?
For the insulation batt, should I use fiberglass insulation? What gap in centimeters should I leave around it? For example, should I leave a 10cm (4 inches) gap around the chimney up to the concrete floor? Then just fill that with 16cm (6 inches) of glass wool? I guess I’ll lose some thermal insulation effectiveness there, won’t I?
Looks nice how you installed it 🙂
But basically, because of the stepped profile, the joints are already staggered, right?
For the insulation batt, should I use fiberglass insulation? What gap in centimeters should I leave around it? For example, should I leave a 10cm (4 inches) gap around the chimney up to the concrete floor? Then just fill that with 16cm (6 inches) of glass wool? I guess I’ll lose some thermal insulation effectiveness there, won’t I?
Looks nice how you installed it 🙂
Similar topics