
Dear forum members,
For my new build, I chose 60x60 cm (24x24 inches) tiles for the bathroom. The room has the following dimensions: width at the sink area 213 cm (84 inches), width in the shower 182 cm (72 inches) due to a larger drywall partition, and bathroom length 388 cm (153 inches).
As can be seen in the pictures, exactly two whole tiles are placed in the center. The tiles on the left and right have been cut. In my opinion, with a width of 182 cm (72 inches), it would have been possible to lay three full tiles side by side.
Furthermore (harder to see in the photo), two tiles have been cut again in the middle of the room at the height of the half-height drywall partition, which could have been laid continuously.
Could one of you please take a look and advise me on what to do next?
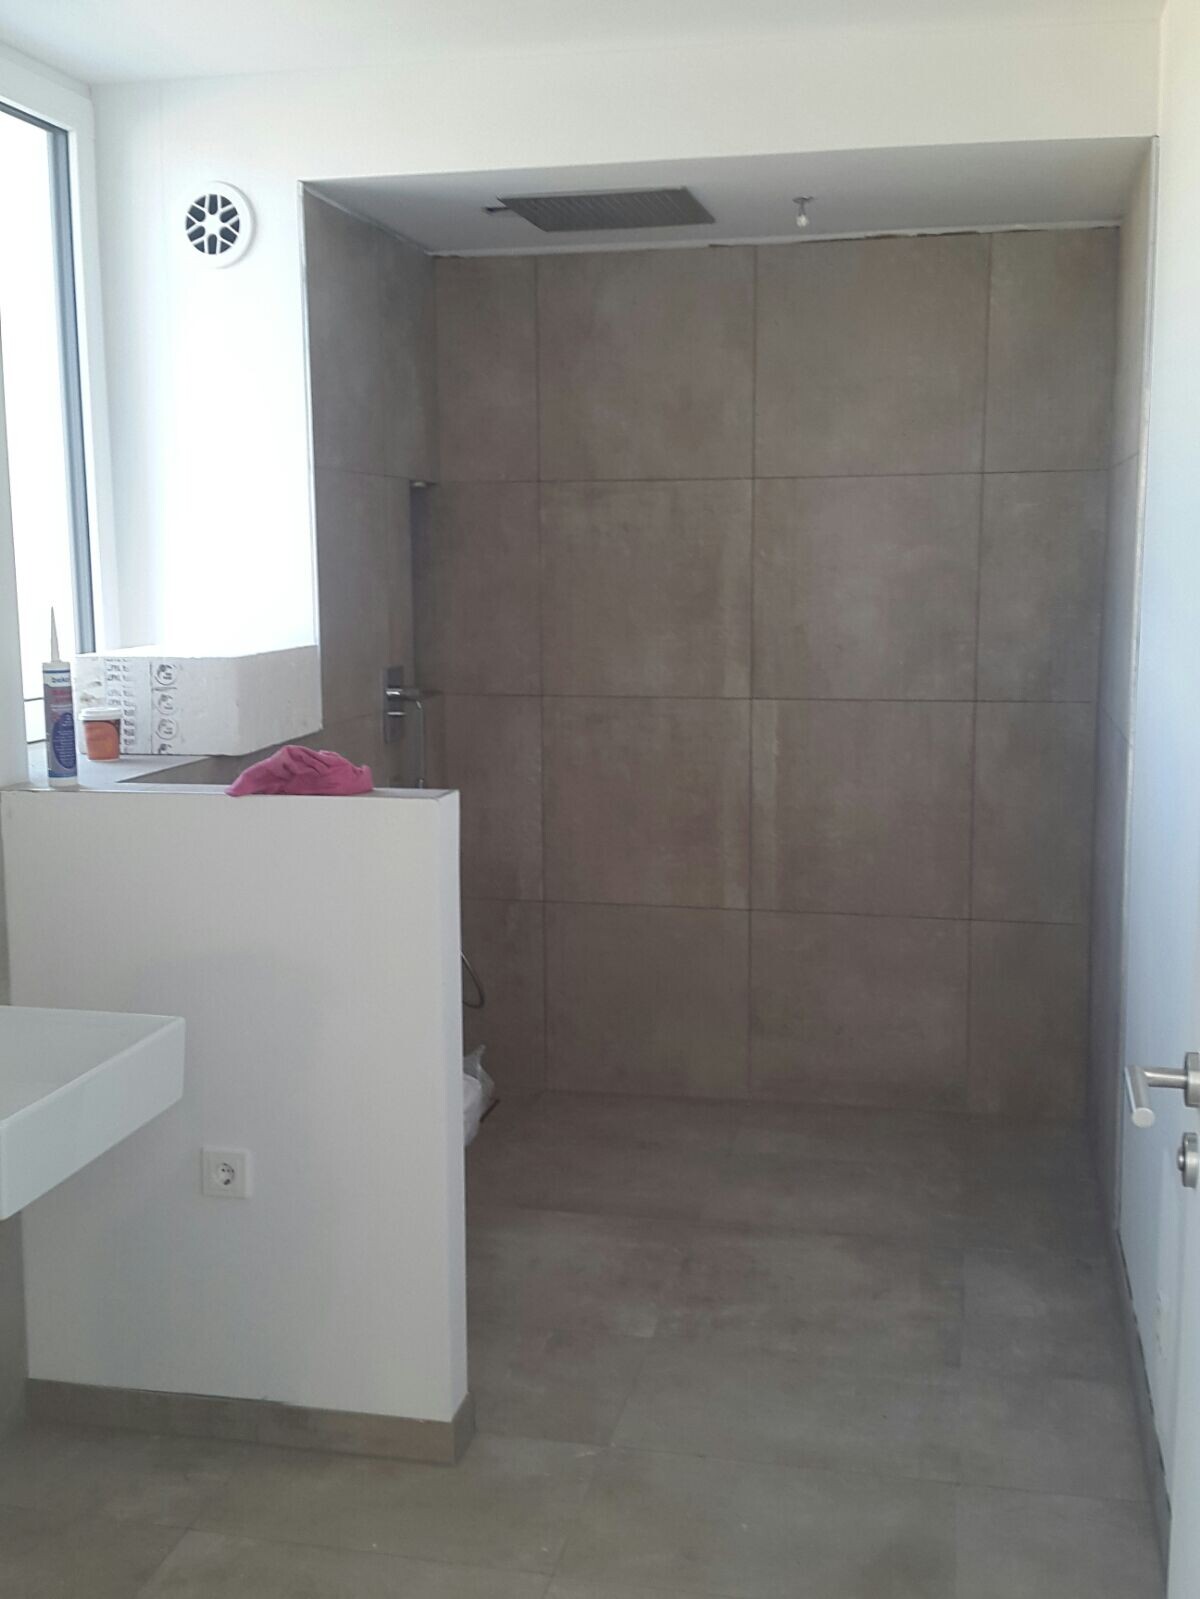
For my new build, I chose 60x60 cm (24x24 inches) tiles for the bathroom. The room has the following dimensions: width at the sink area 213 cm (84 inches), width in the shower 182 cm (72 inches) due to a larger drywall partition, and bathroom length 388 cm (153 inches).
As can be seen in the pictures, exactly two whole tiles are placed in the center. The tiles on the left and right have been cut. In my opinion, with a width of 182 cm (72 inches), it would have been possible to lay three full tiles side by side.
Furthermore (harder to see in the photo), two tiles have been cut again in the middle of the room at the height of the half-height drywall partition, which could have been laid continuously.
Could one of you please take a look and advise me on what to do next?
tomtom79 schrieb:
The niche could also have been framed with a chrome border. But the effect wouldn’t be nearly as good as it is now.
And the more I look at the picture, the more details I notice. For example, the rain shower panel on the ceiling (I think that’s what it is)? It fits perfectly with the tile orientation. Also, pay attention to the horizontal line of the tiles up to the window sill – someone really did a great job there. I think this will be one of those bathrooms where you sit on the toilet later, look around, and keep appreciating the alignment of the lines.
Hey, this forum is great. I didn’t expect so many replies.
@Neige: great sketch. I admit that three tiles can really feel overwhelming! Maybe I’m just too critical or too much of a layperson.
Regarding the outlet in the small utility room in front of the WC: a custom-made washbasin cabinet will be built by the carpenter. One will be placed directly under the sinks, then 40cm (16 inches) of clearance, followed by a hanging lowboard. Since no outlets should be visible “above” at the washbasin, they will be hidden on the sides near the floor.
@Neige: great sketch. I admit that three tiles can really feel overwhelming! Maybe I’m just too critical or too much of a layperson.
Regarding the outlet in the small utility room in front of the WC: a custom-made washbasin cabinet will be built by the carpenter. One will be placed directly under the sinks, then 40cm (16 inches) of clearance, followed by a hanging lowboard. Since no outlets should be visible “above” at the washbasin, they will be hidden on the sides near the floor.

The work is already tidy, and you can see that the tile skirting aligns perfectly with the grout lines. I have seen this done differently before.
However, the client had other expectations, which should have been communicated.
The horizontal line of the parapet should also form the first row. It is unclear whether it was cut at the bottom or ended like that.
However, the client had other expectations, which should have been communicated.
The horizontal line of the parapet should also form the first row. It is unclear whether it was cut at the bottom or ended like that.
Similar topics