
Hello everyone,
I am looking for a solution to cover 80 cm (31.5 inches) cabinet carcasses on the back side. In my L-shaped kitchen, one section stands freely in the room, likely a corner base cabinet (width 127.5 cm (50 inches)) and two 60 cm (24 inches) cabinets, totaling approximately 247.5 cm (97.5 inches). Since there is only one type of panel with an 80 cm (31.5 inches) dimension (62 x 80 cm (24.5 x 31.5 inches)), I will probably need to place four panels side by side, which comes to 248 cm (97.6 inches), attaching them with the "kitchen island mounting aids." How do you join the panels together? Should they be tightly butted without a gap ("knirsch"), or is there another recommended method...? I would, of course, need to trim them, but that’s not an issue because the cut edge of the last panel would face the wall.
I would appreciate any tips!
I am looking for a solution to cover 80 cm (31.5 inches) cabinet carcasses on the back side. In my L-shaped kitchen, one section stands freely in the room, likely a corner base cabinet (width 127.5 cm (50 inches)) and two 60 cm (24 inches) cabinets, totaling approximately 247.5 cm (97.5 inches). Since there is only one type of panel with an 80 cm (31.5 inches) dimension (62 x 80 cm (24.5 x 31.5 inches)), I will probably need to place four panels side by side, which comes to 248 cm (97.6 inches), attaching them with the "kitchen island mounting aids." How do you join the panels together? Should they be tightly butted without a gap ("knirsch"), or is there another recommended method...? I would, of course, need to trim them, but that’s not an issue because the cut edge of the last panel would face the wall.
I would appreciate any tips!
R
robi_aus_ffm25 Nov 2015 23:02You don’t necessarily have to use IKEA products for the back panels. For example, you can also use back panels with or without a design. I had my niche back panels from them, once with a design and once without. Everything worked out perfectly. This way, you only need one continuous piece.
Best regards, robi_aus_ffm
P.S. I measured and ordered only after everything was in place, so you can order with millimeter (inch) precision and don’t have to cut anything yourself.
Best regards, robi_aus_ffm
P.S. I measured and ordered only after everything was in place, so you can order with millimeter (inch) precision and don’t have to cut anything yourself.
What kind of look are you going for?
At lumberyards and many home improvement stores, you can find various types of cut-to-size panel materials, and you can also have the edges finished. However, these will usually be quite large and difficult to transport.
There are countless other options as well. Off the top of my head: you could turn the back panel into a seating bar, cover it with drywall and wallpaper it, or use cladding made from profile boards... it really depends on your initial idea.
Try posting some pictures of the rest of the room, so it’s easier to give specific advice. You’ll also need to find a solution for the back side of the countertop.
Best regards,
wolf2000
At lumberyards and many home improvement stores, you can find various types of cut-to-size panel materials, and you can also have the edges finished. However, these will usually be quite large and difficult to transport.
There are countless other options as well. Off the top of my head: you could turn the back panel into a seating bar, cover it with drywall and wallpaper it, or use cladding made from profile boards... it really depends on your initial idea.
Try posting some pictures of the rest of the room, so it’s easier to give specific advice. You’ll also need to find a solution for the back side of the countertop.
Best regards,
wolf2000
Thanks for the tips on alternatives.
- I would like to have a seating area / counter, but unfortunately that’s not possible because the space behind it is too narrow and needs to remain accessible (door to the adjacent room).
- Alternative suppliers: of course that’s always an option, but getting materials and colors identical to the IKEA parts is probably a gamble... that way I would have a seamless cladding without joints, but very likely a different color. Besides that, a 19mm (3/4 inch) particleboard of that size would already be quite heavy... I’ll post pictures once I’ve made more progress.
- I would like to have a seating area / counter, but unfortunately that’s not possible because the space behind it is too narrow and needs to remain accessible (door to the adjacent room).
- Alternative suppliers: of course that’s always an option, but getting materials and colors identical to the IKEA parts is probably a gamble... that way I would have a seamless cladding without joints, but very likely a different color. Besides that, a 19mm (3/4 inch) particleboard of that size would already be quite heavy... I’ll post pictures once I’ve made more progress.
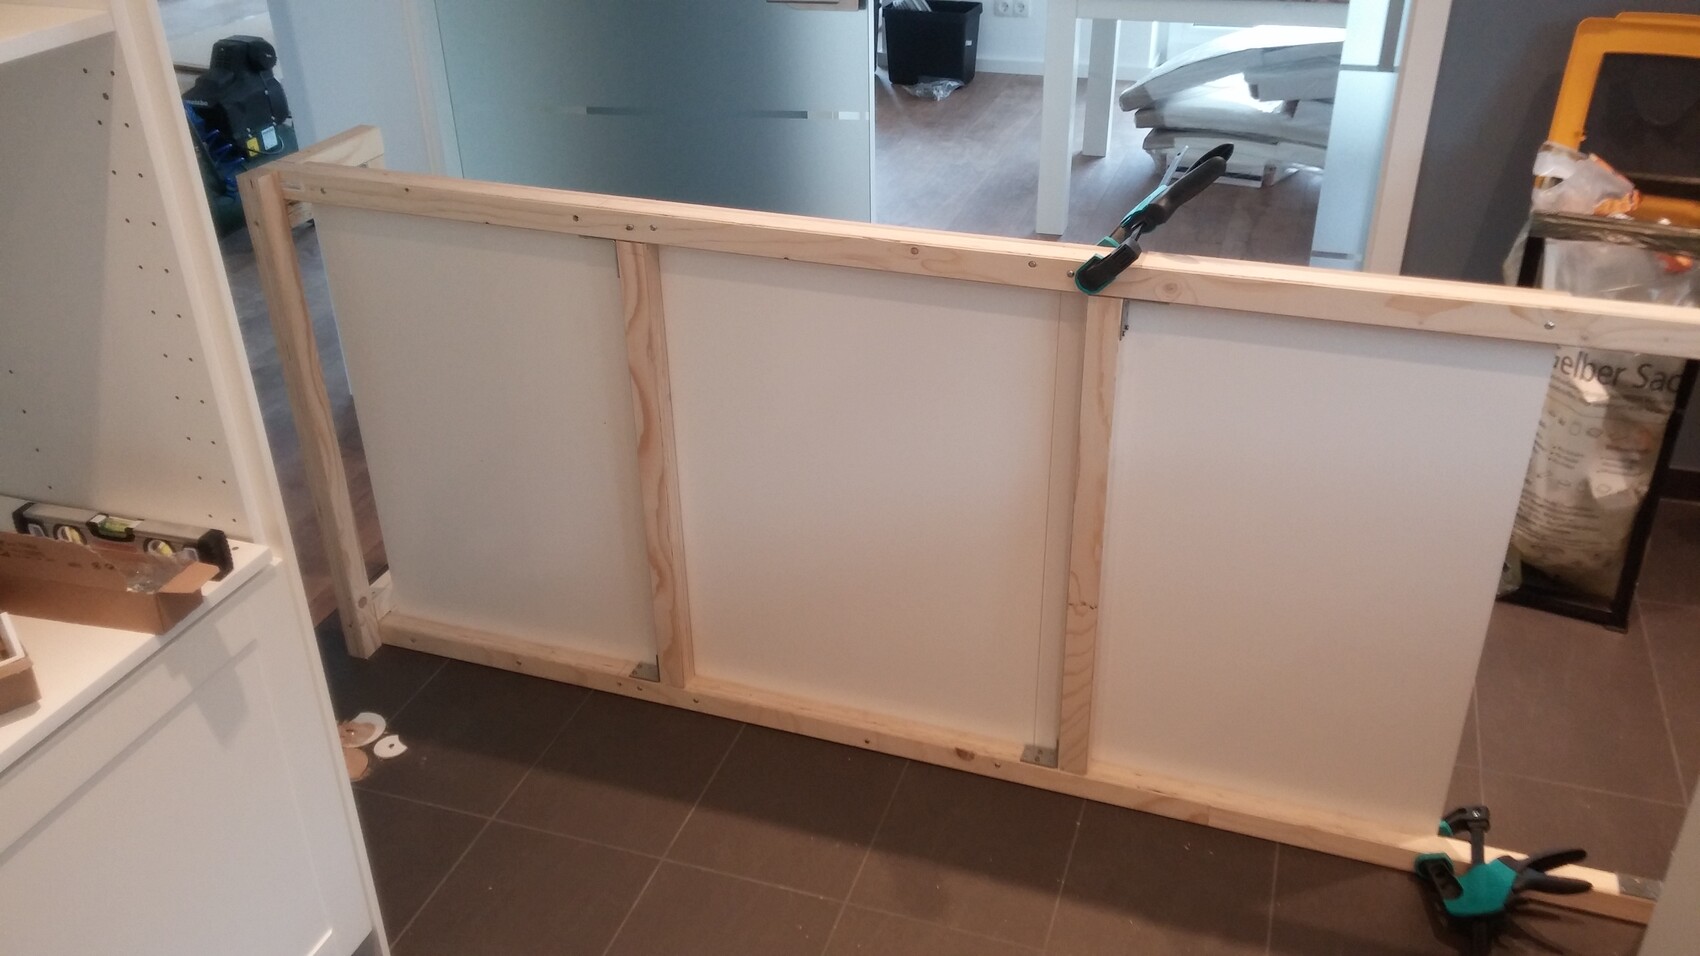
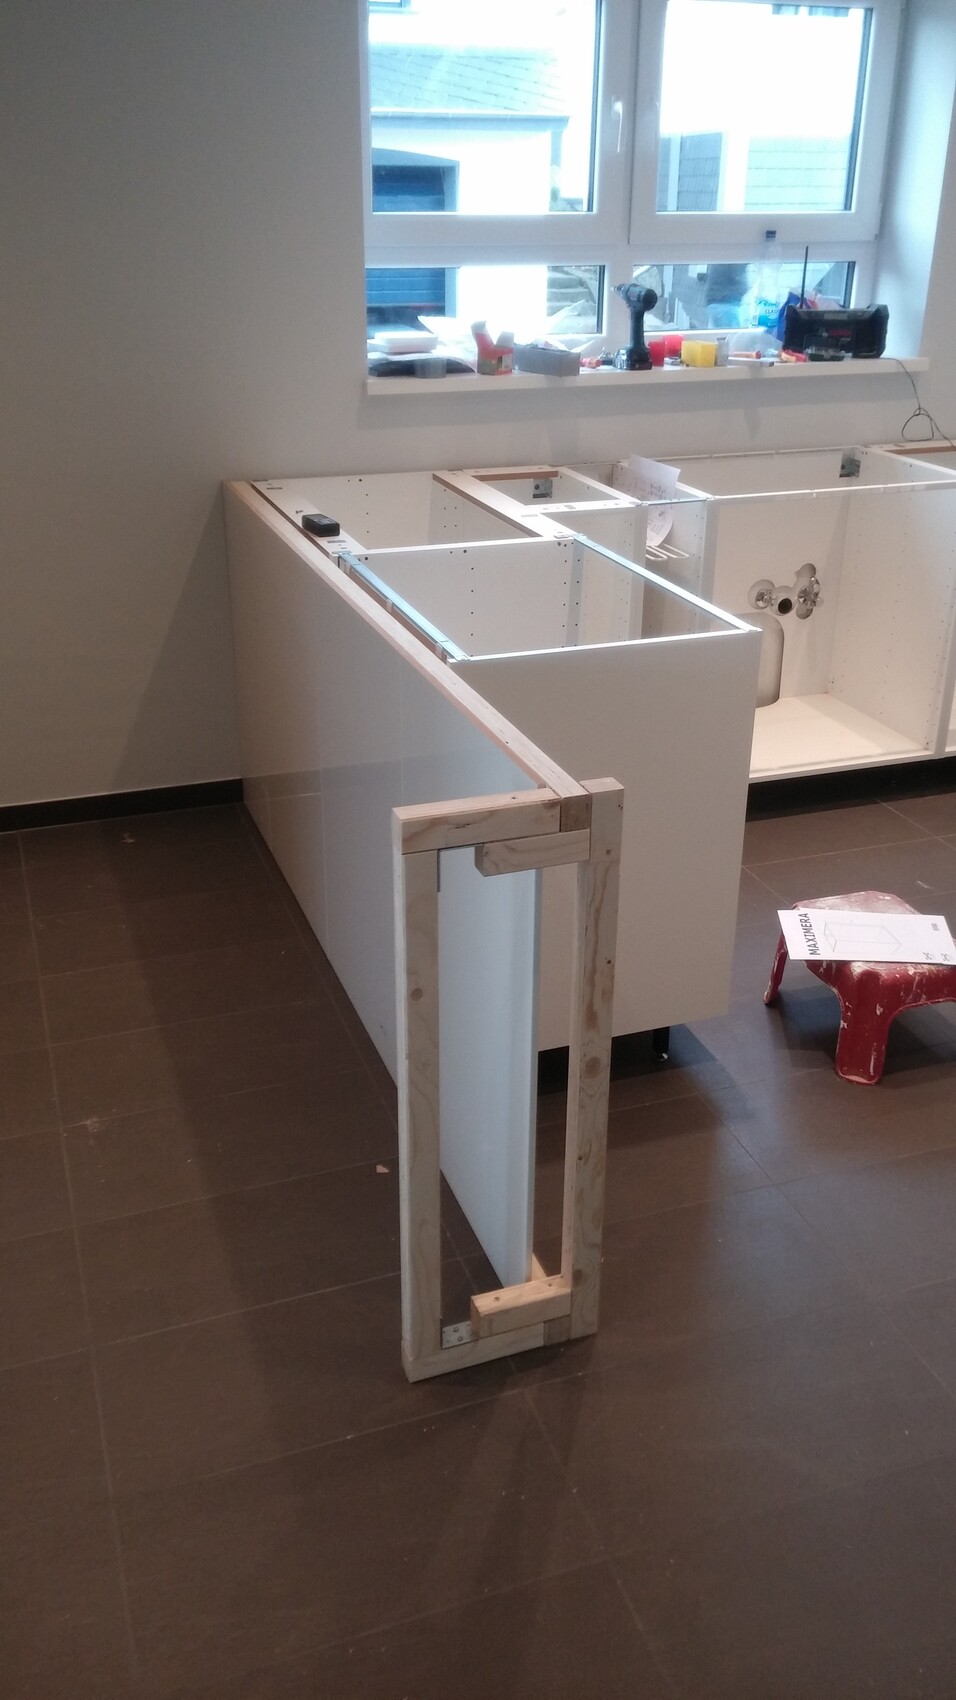
I built a subframe myself. The wood I used is from Hornbach, called WoodPro, and it is a laminated wood. Therefore, it is very dimensionally stable and straight.
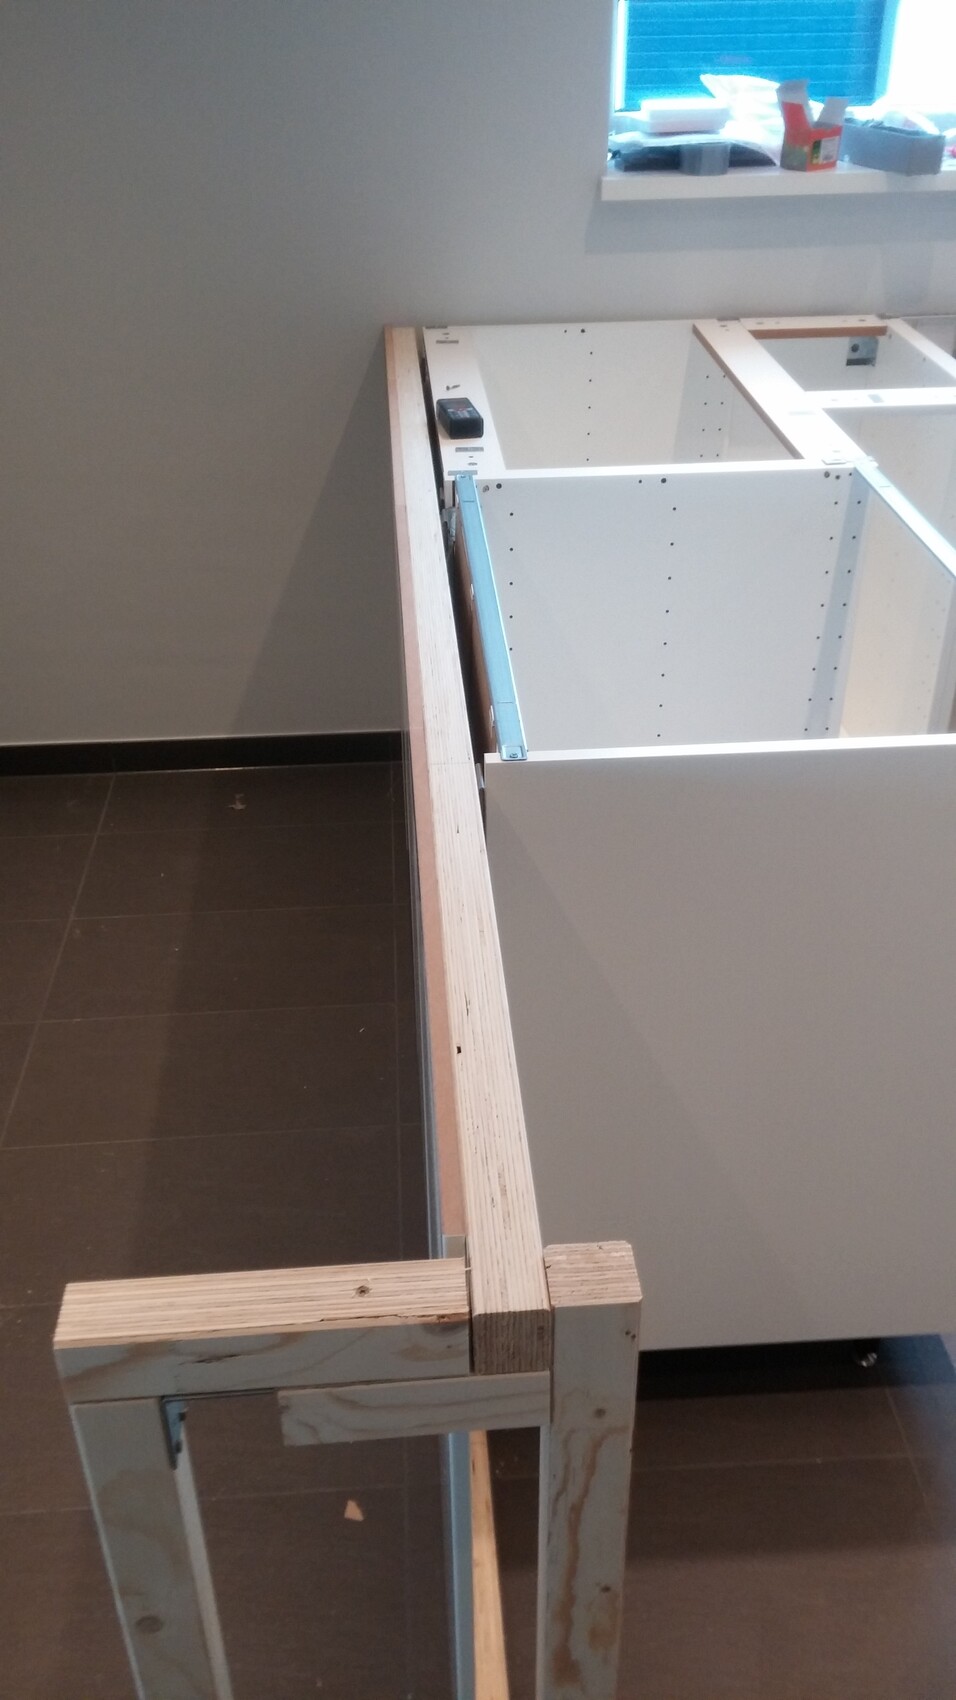
In the end, the subframe looks a bit odd, but there is a reason for that. If I had placed the last vertical beam like the other two between the two long horizontal beams, I would have had to connect the front side panel to the frame exactly where my panel joint is.
Since the dishwasher is located in that area, I could reduce the full depth from 60cm (24 inches) to 55cm (22 inches) and was able to place the vertical support next to the frame instead... so except for the appearance, everyone benefits from this. Now it does not matter anyway – the dishwasher is installed, and you can’t see anything anymore.
The subframe is then screwed to the cabinet body at the original mounting points.
I made the cladding from side panels, which I cut to size using a plunge saw and guide rail.
The connection method for joining the parts, already mentioned by the IKEA expert, I only applied at the front side because I ended up with an overall dimension of about 86cm (34 inches), which I couldn’t achieve with side panels without having a saw cut edge. Since there needed to be original edges on both sides, the saw cut had to be in the middle of the material.
For the back wall cladding, the saw cut is facing the wall, so it doesn’t matter.
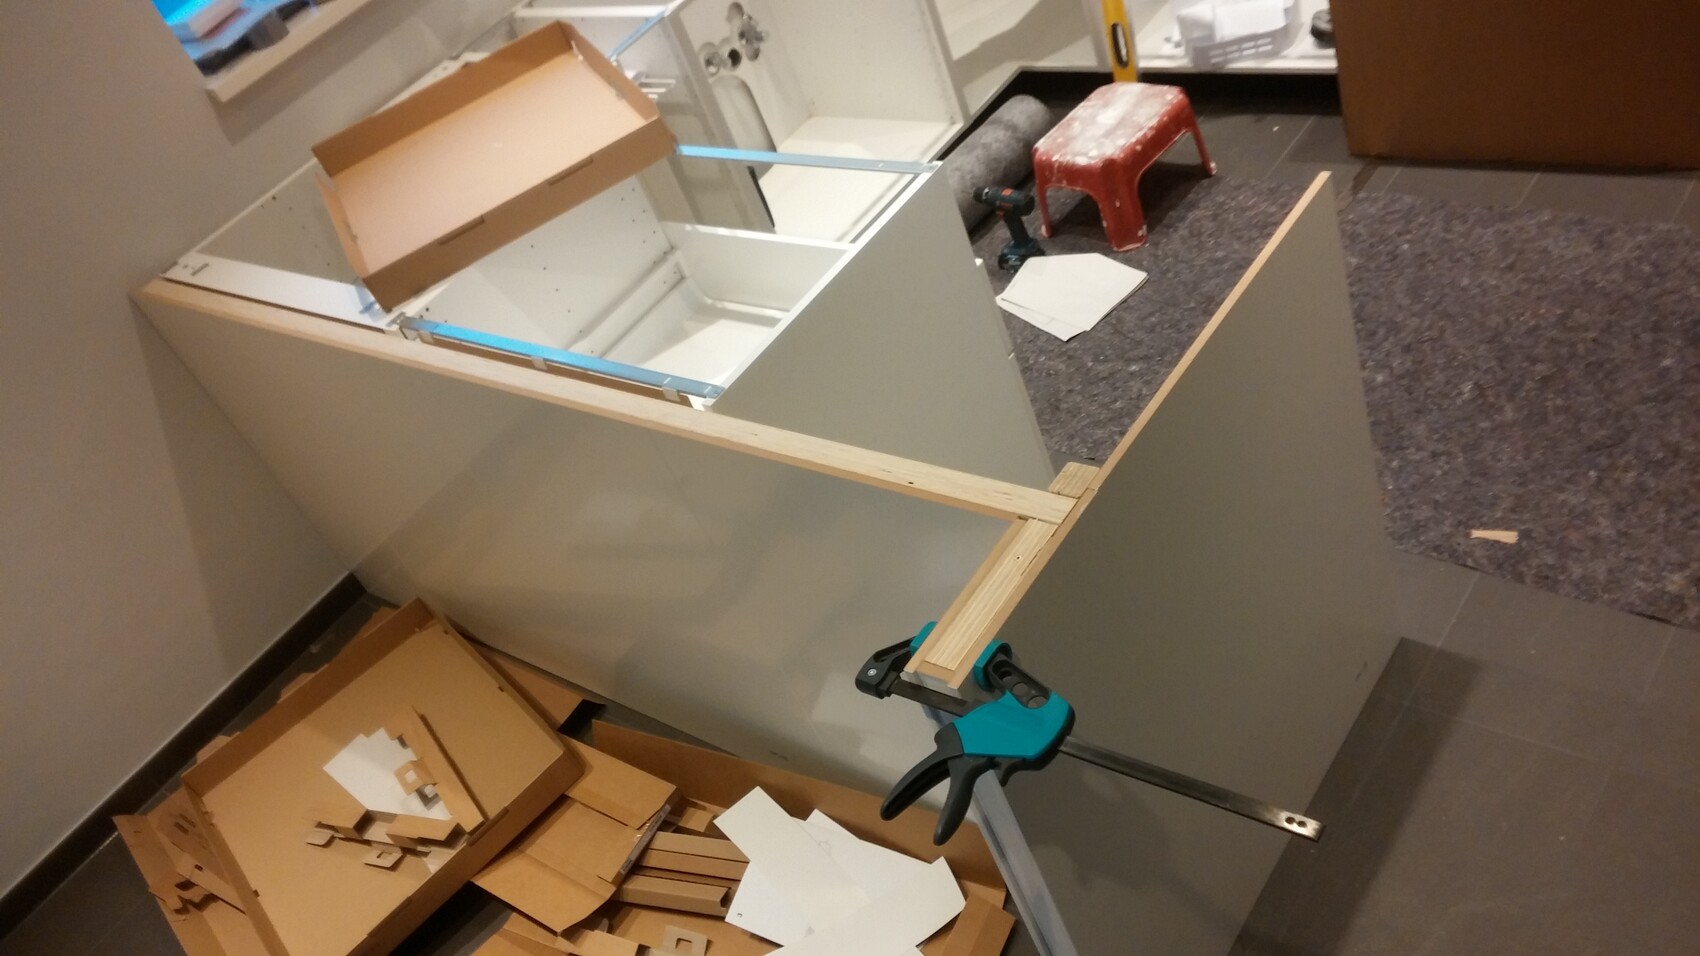
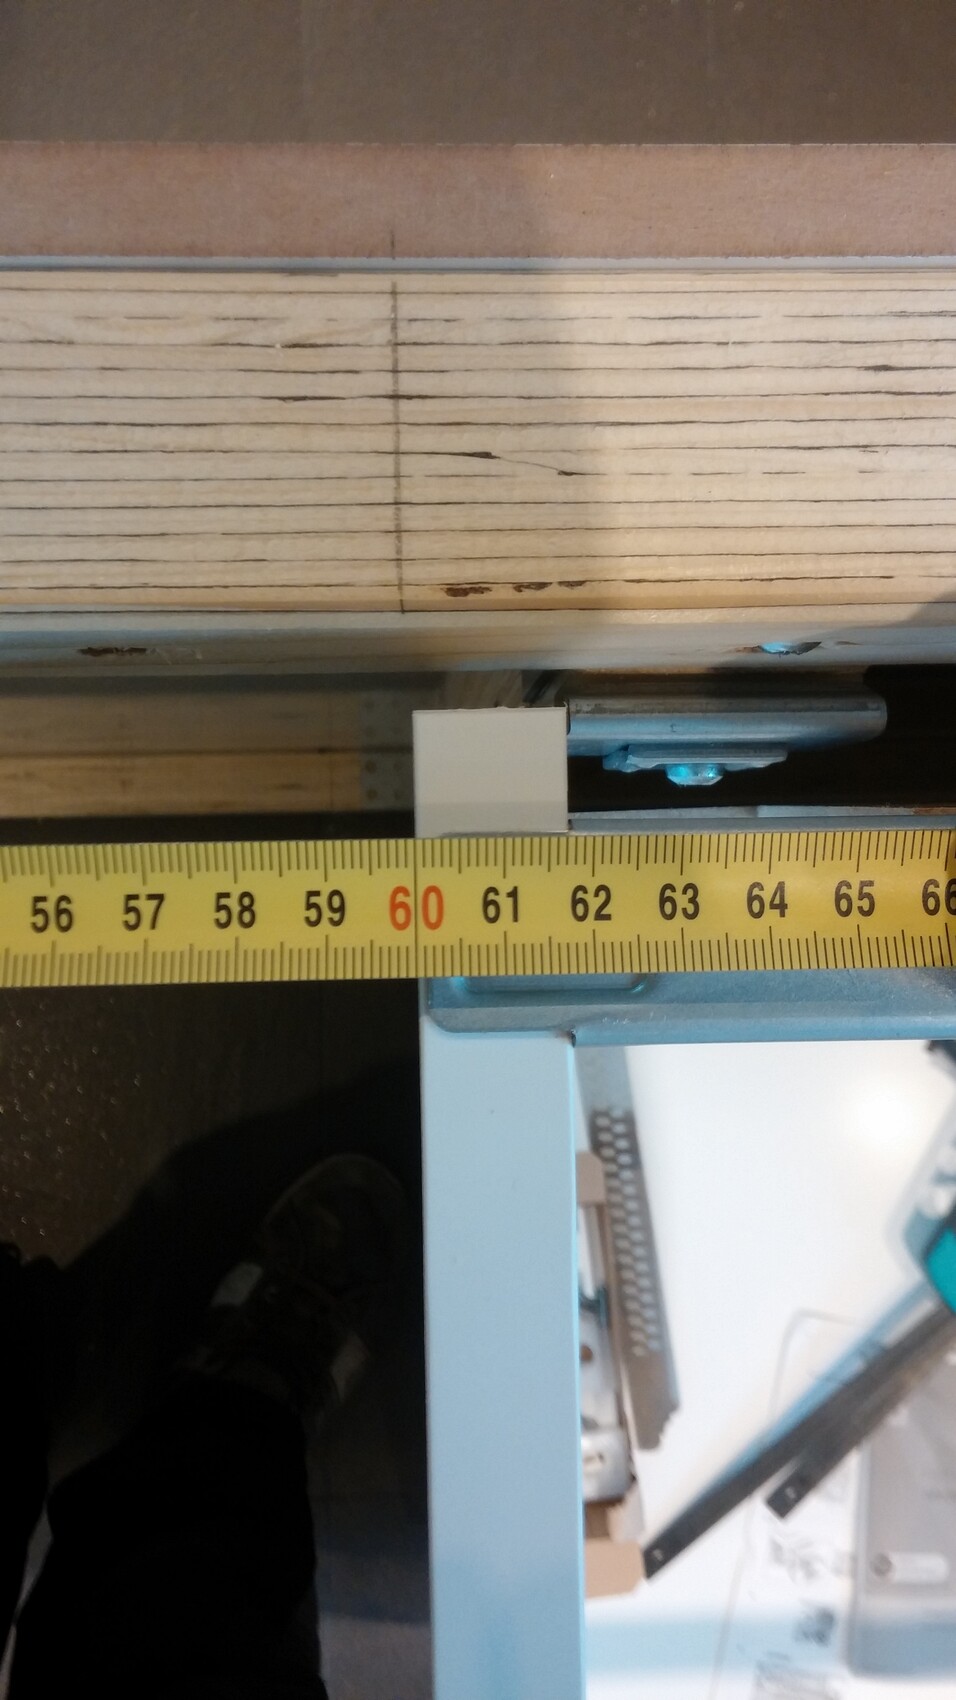
Here is the “trick” for joining side panels when you necessarily have to make a cut:
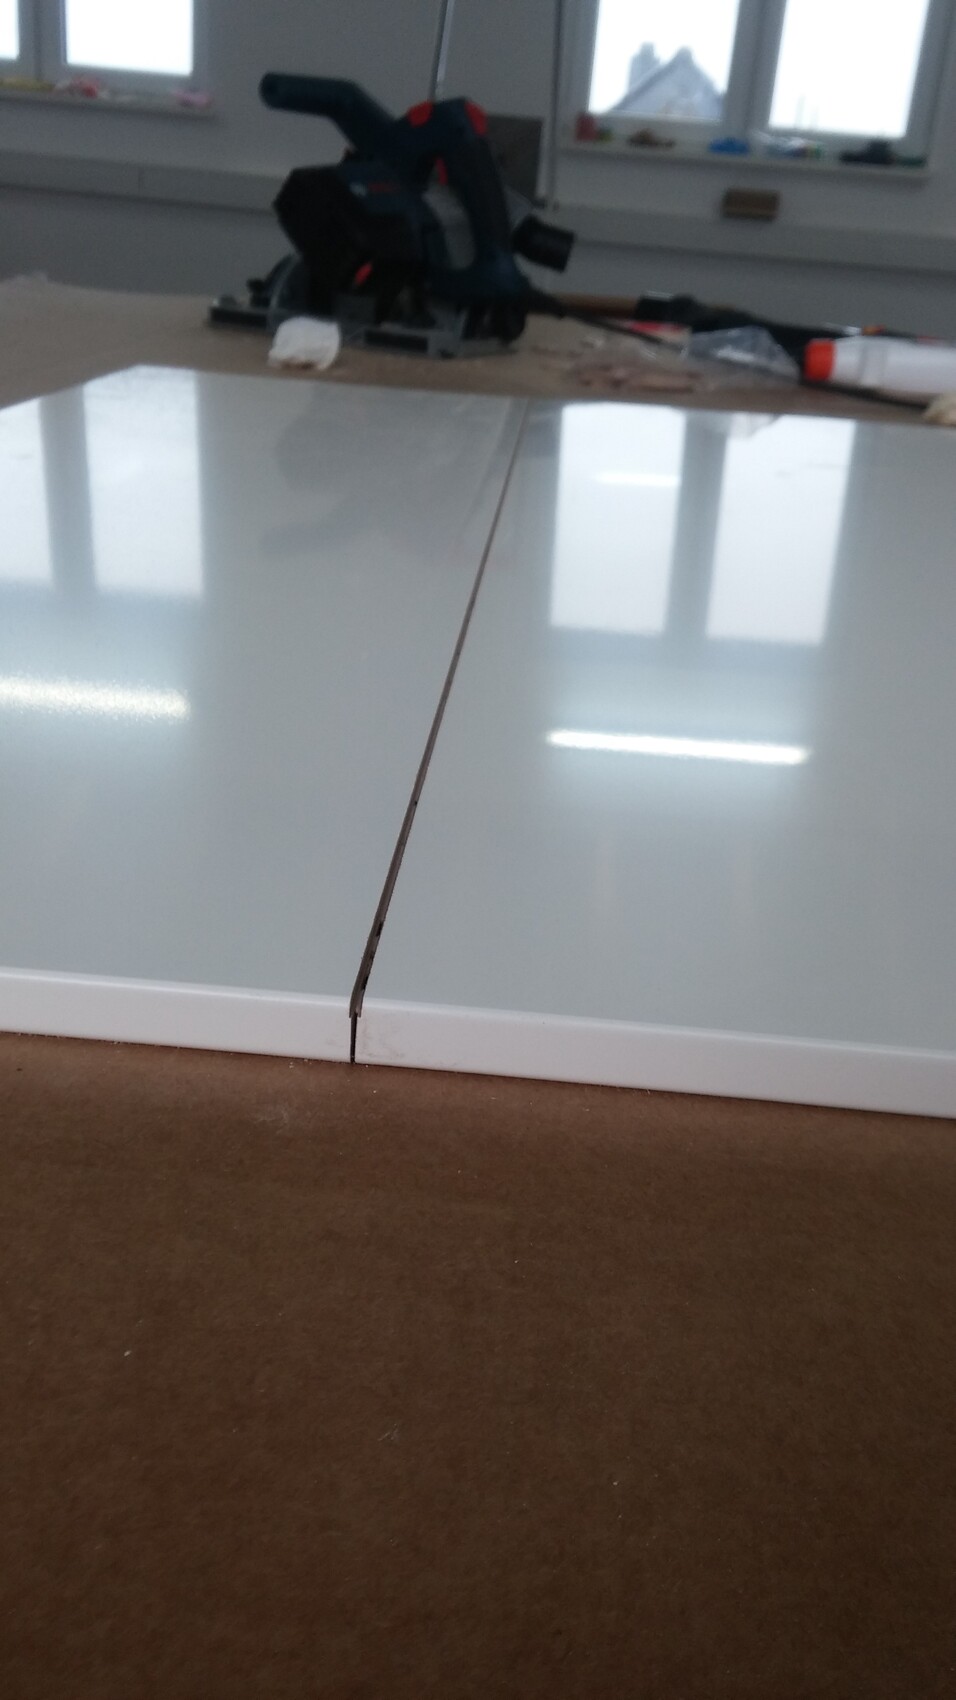
I filled the groove with white Clou wood filler.
In the end, the subframe looks a bit odd, but there is a reason for that. If I had placed the last vertical beam like the other two between the two long horizontal beams, I would have had to connect the front side panel to the frame exactly where my panel joint is.
Since the dishwasher is located in that area, I could reduce the full depth from 60cm (24 inches) to 55cm (22 inches) and was able to place the vertical support next to the frame instead... so except for the appearance, everyone benefits from this. Now it does not matter anyway – the dishwasher is installed, and you can’t see anything anymore.
The subframe is then screwed to the cabinet body at the original mounting points.
I made the cladding from side panels, which I cut to size using a plunge saw and guide rail.
The connection method for joining the parts, already mentioned by the IKEA expert, I only applied at the front side because I ended up with an overall dimension of about 86cm (34 inches), which I couldn’t achieve with side panels without having a saw cut edge. Since there needed to be original edges on both sides, the saw cut had to be in the middle of the material.
For the back wall cladding, the saw cut is facing the wall, so it doesn’t matter.
Here is the “trick” for joining side panels when you necessarily have to make a cut:
I filled the groove with white Clou wood filler.
So, I visited IKEA over the weekend and checked out how they handle the side panels in their displays—in this case, actual "sides." Of course, there is no open L-shape like I plan to have, but at least they have islands where, for example, four cabinets are placed back-to-back. In fact, the side panels used for covering the sides are butted together, which is hardly noticeable and mostly flush with the surface. I think I will try this method with kitchen island assembly supports, as described in my first post. Pictures will follow after completion (but it will take some time).
Similar topics