
Hello everyone,
three years ago we bought a house and completely renovated it. Now that all the living areas are finished, I am turning my attention to the basement to make it usable as well, because at the moment it resembles more of a storage room.
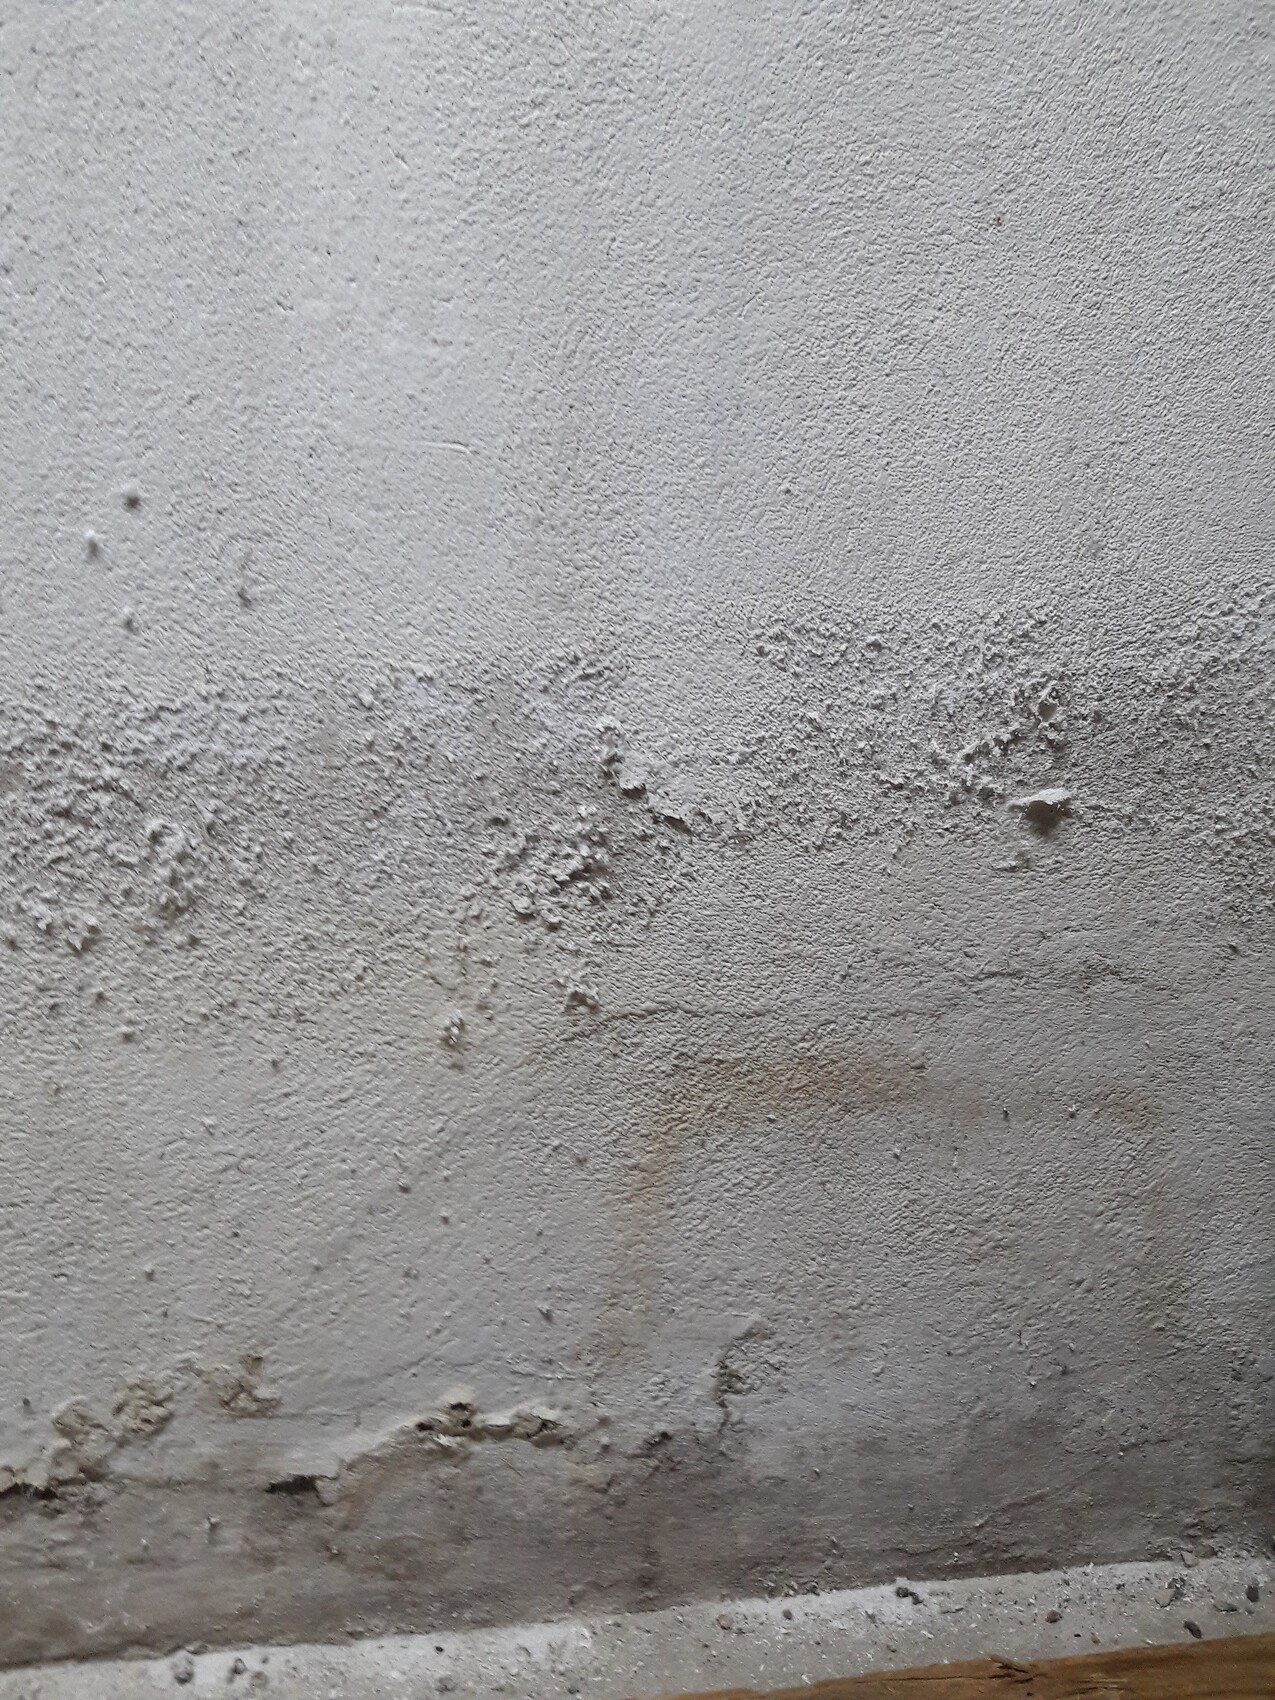
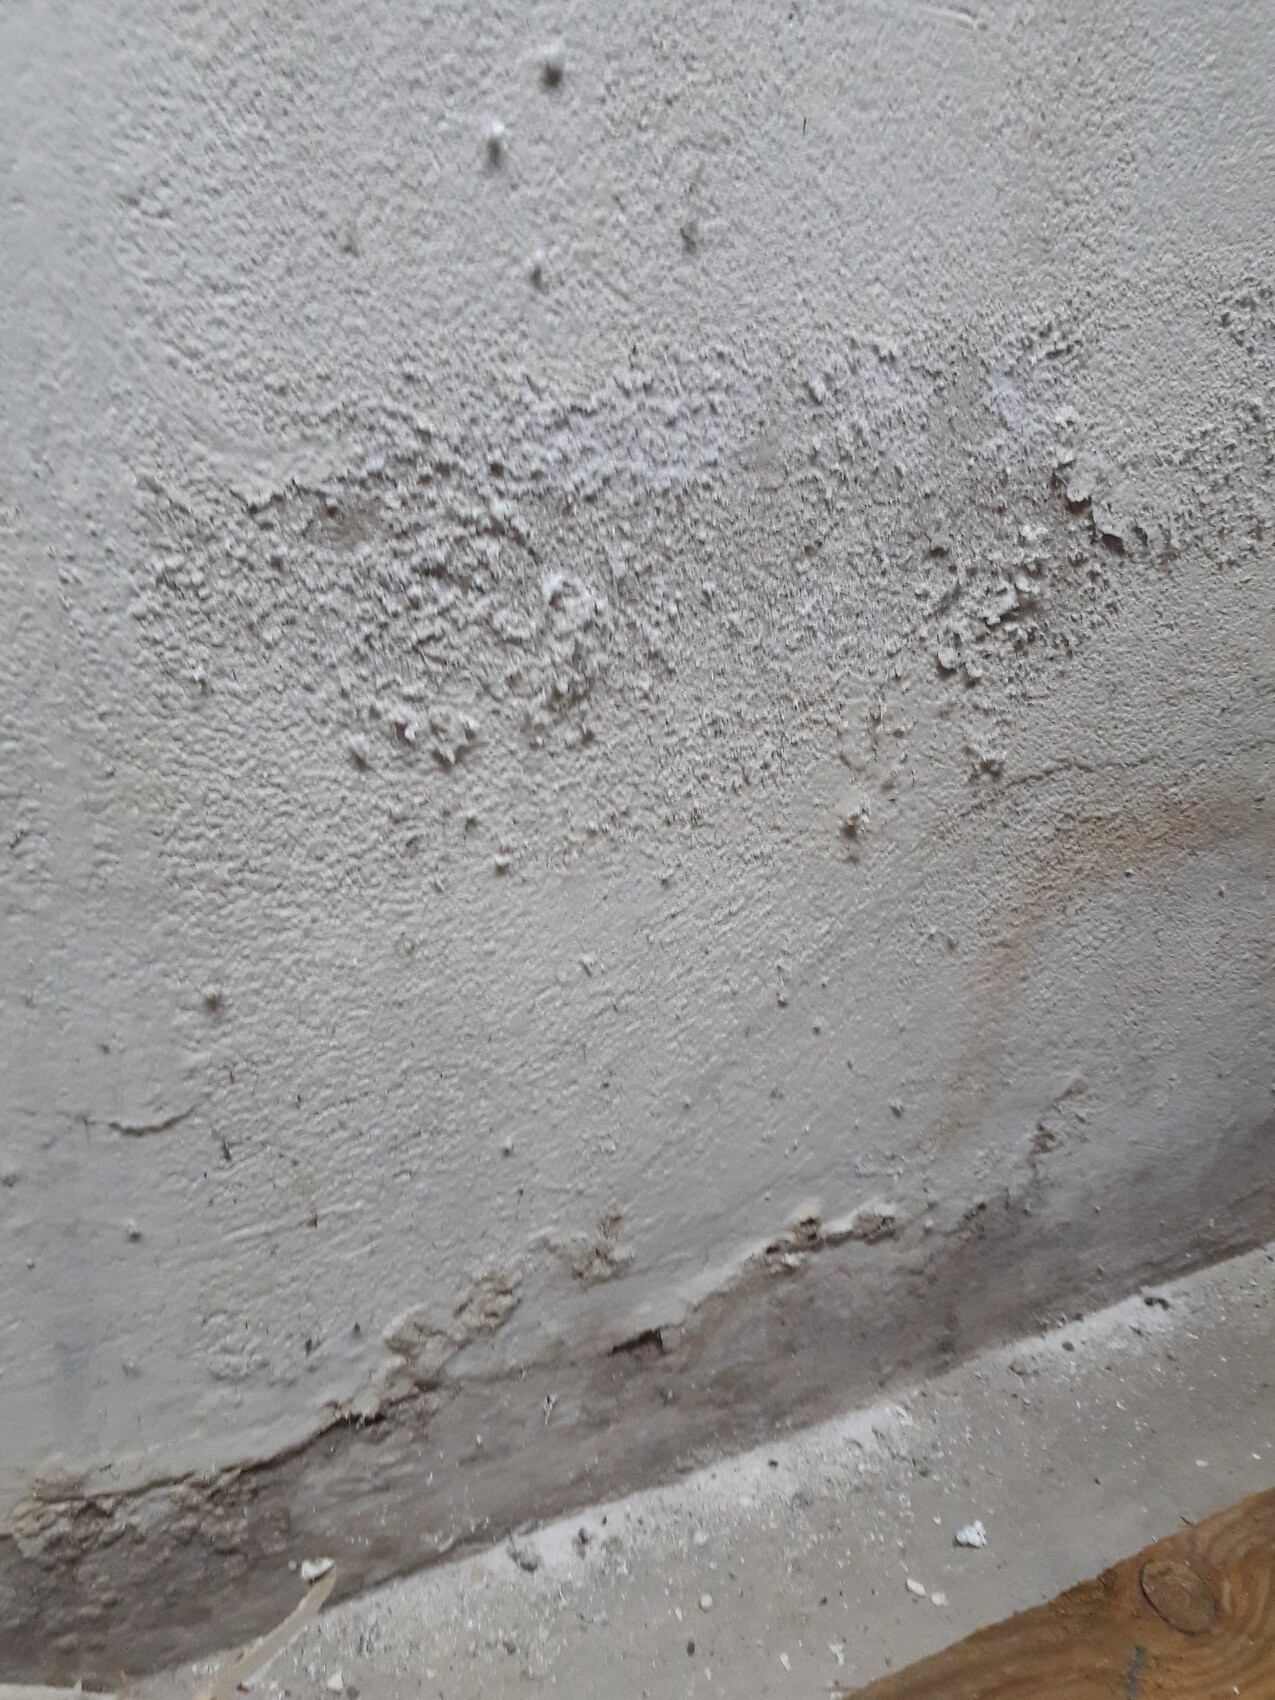
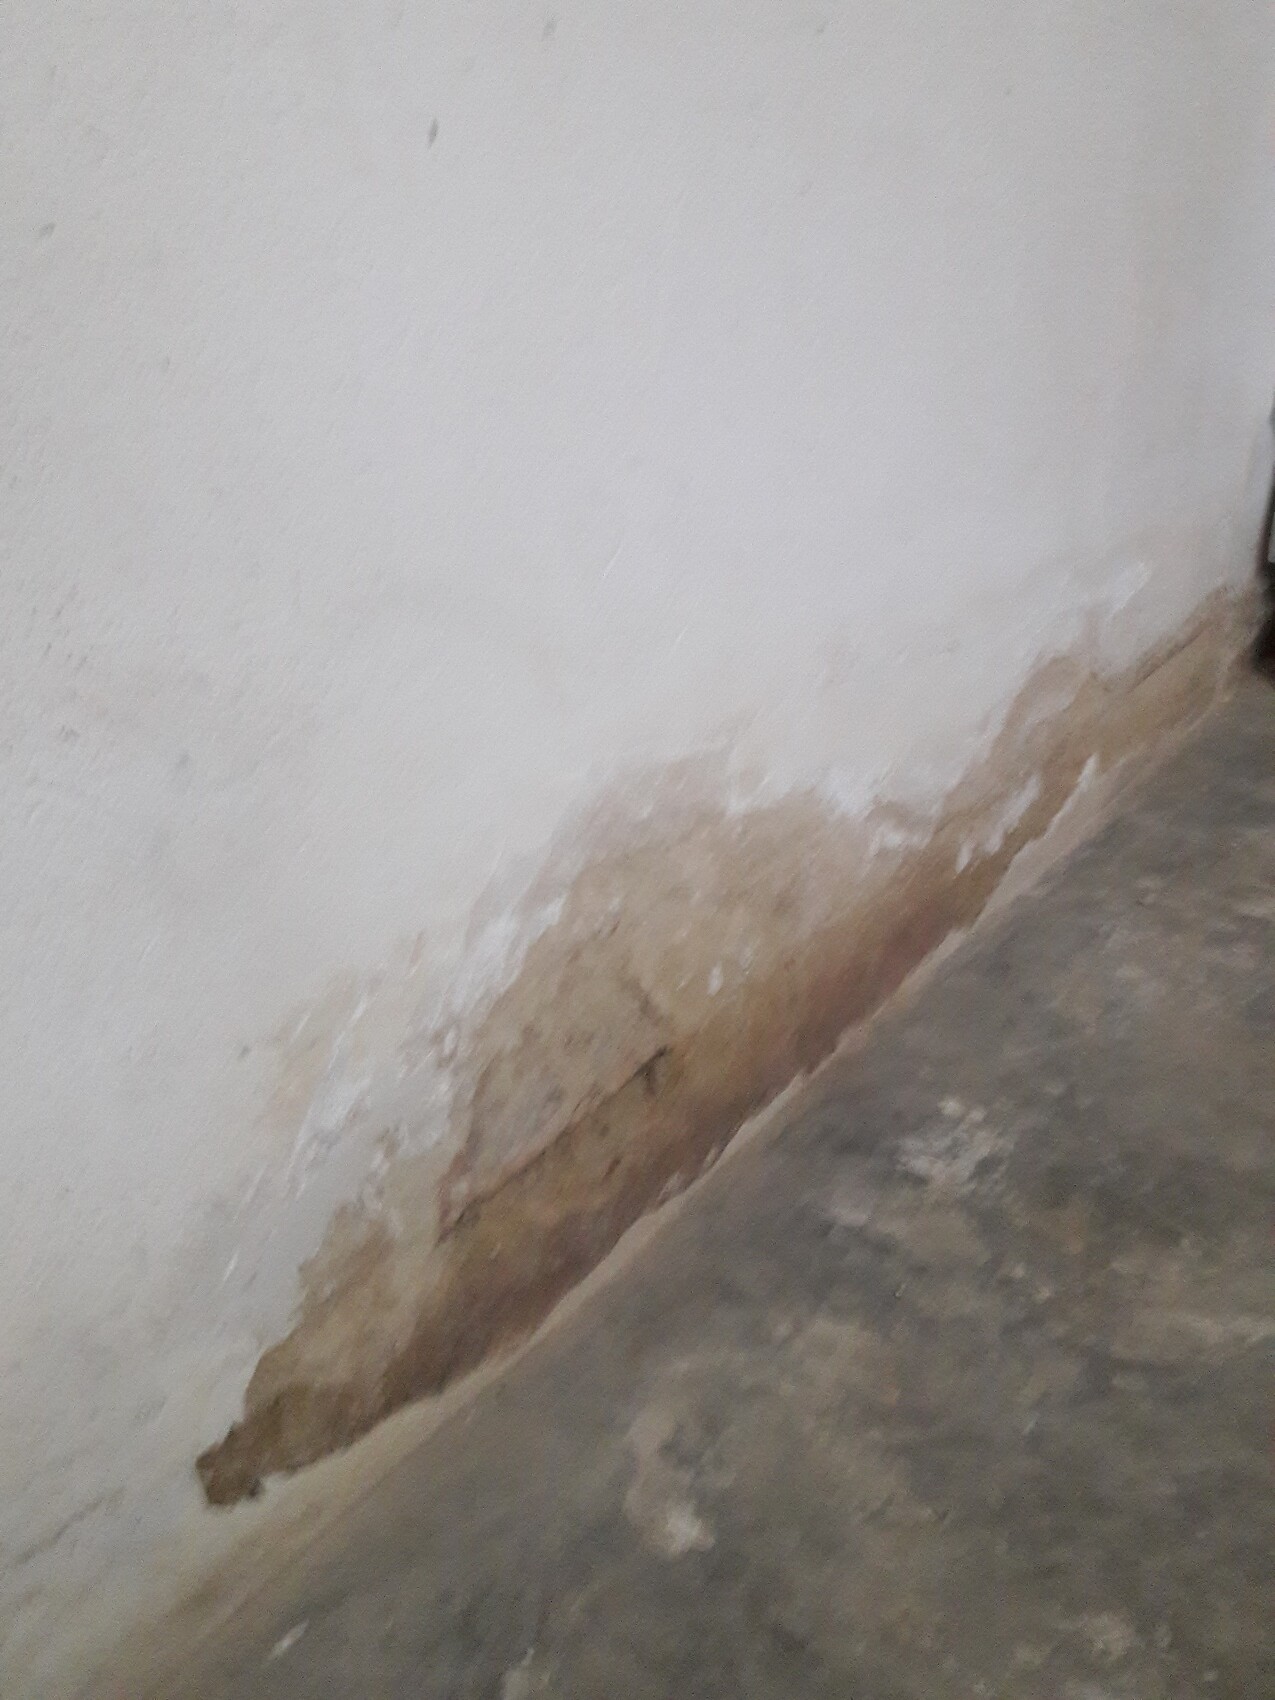
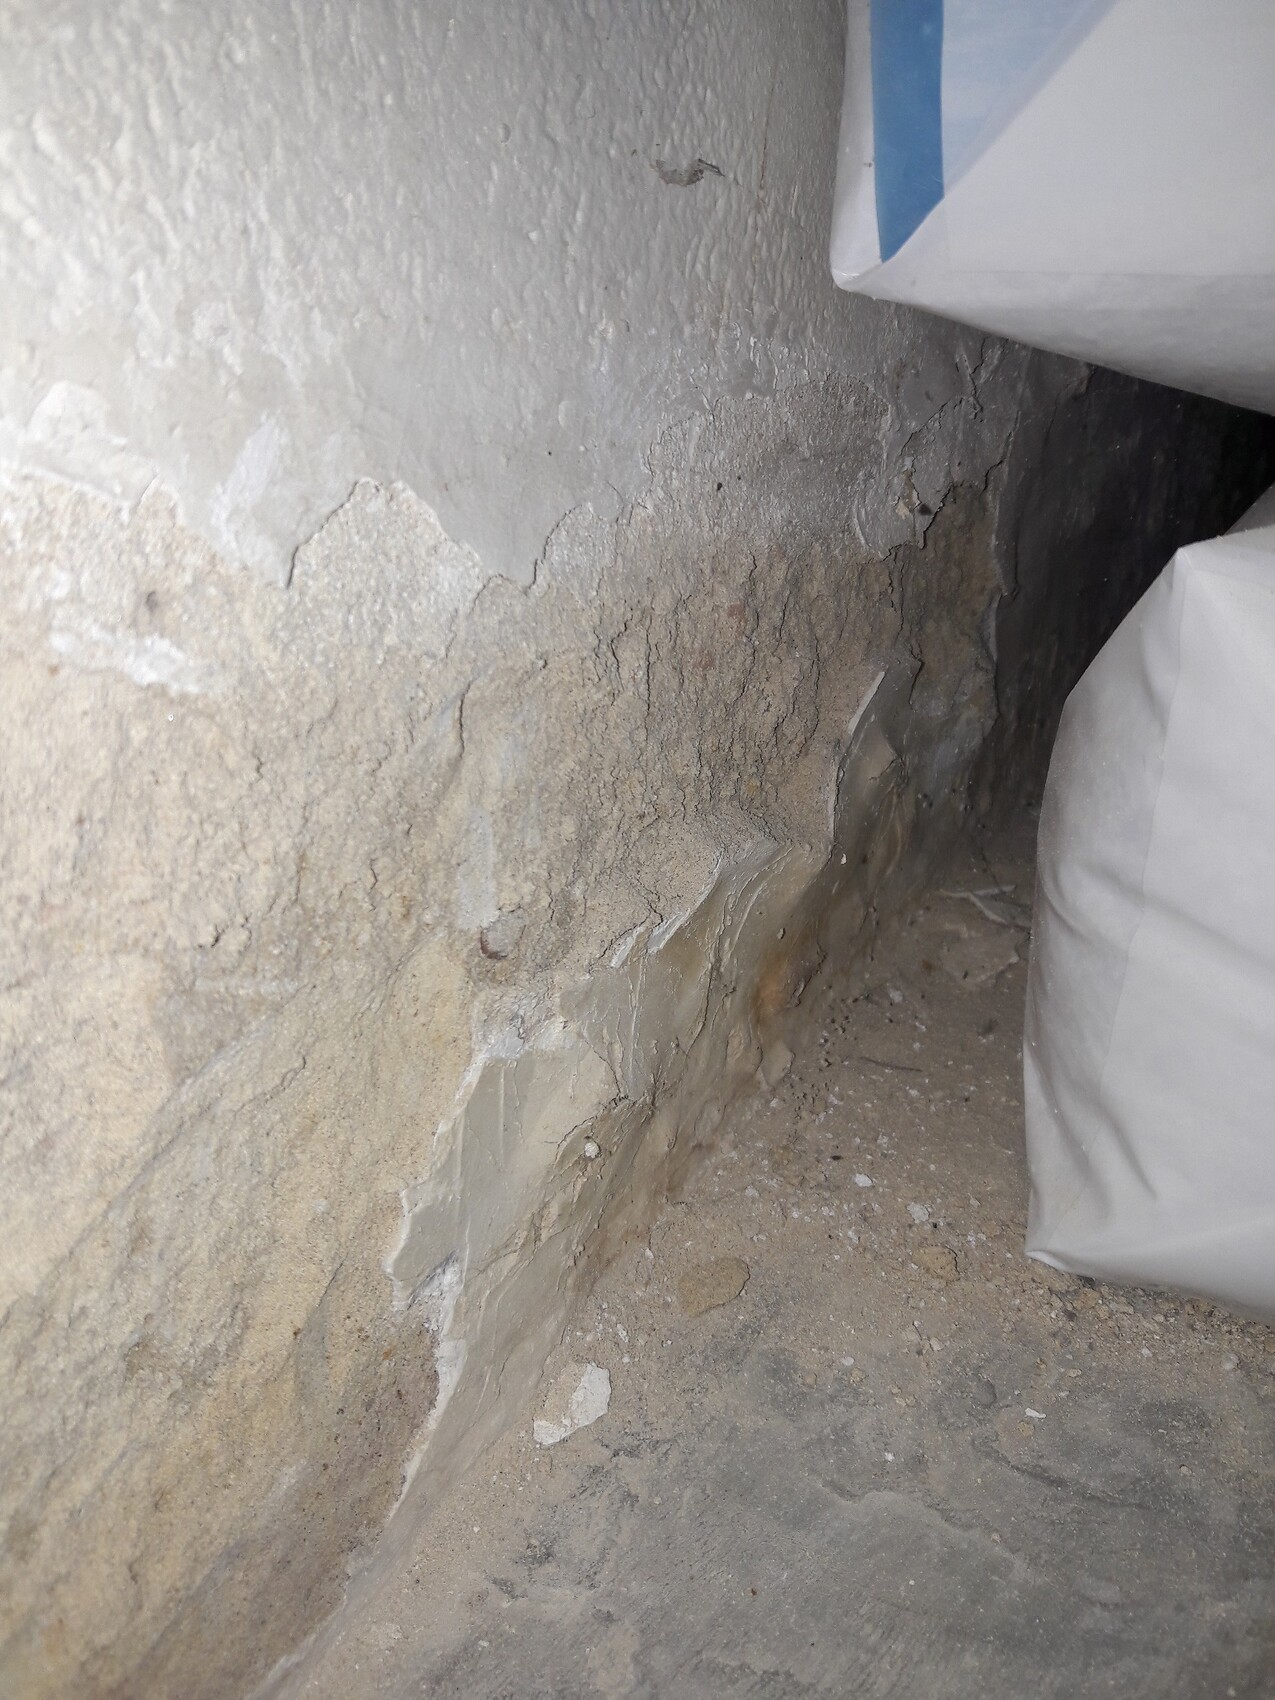
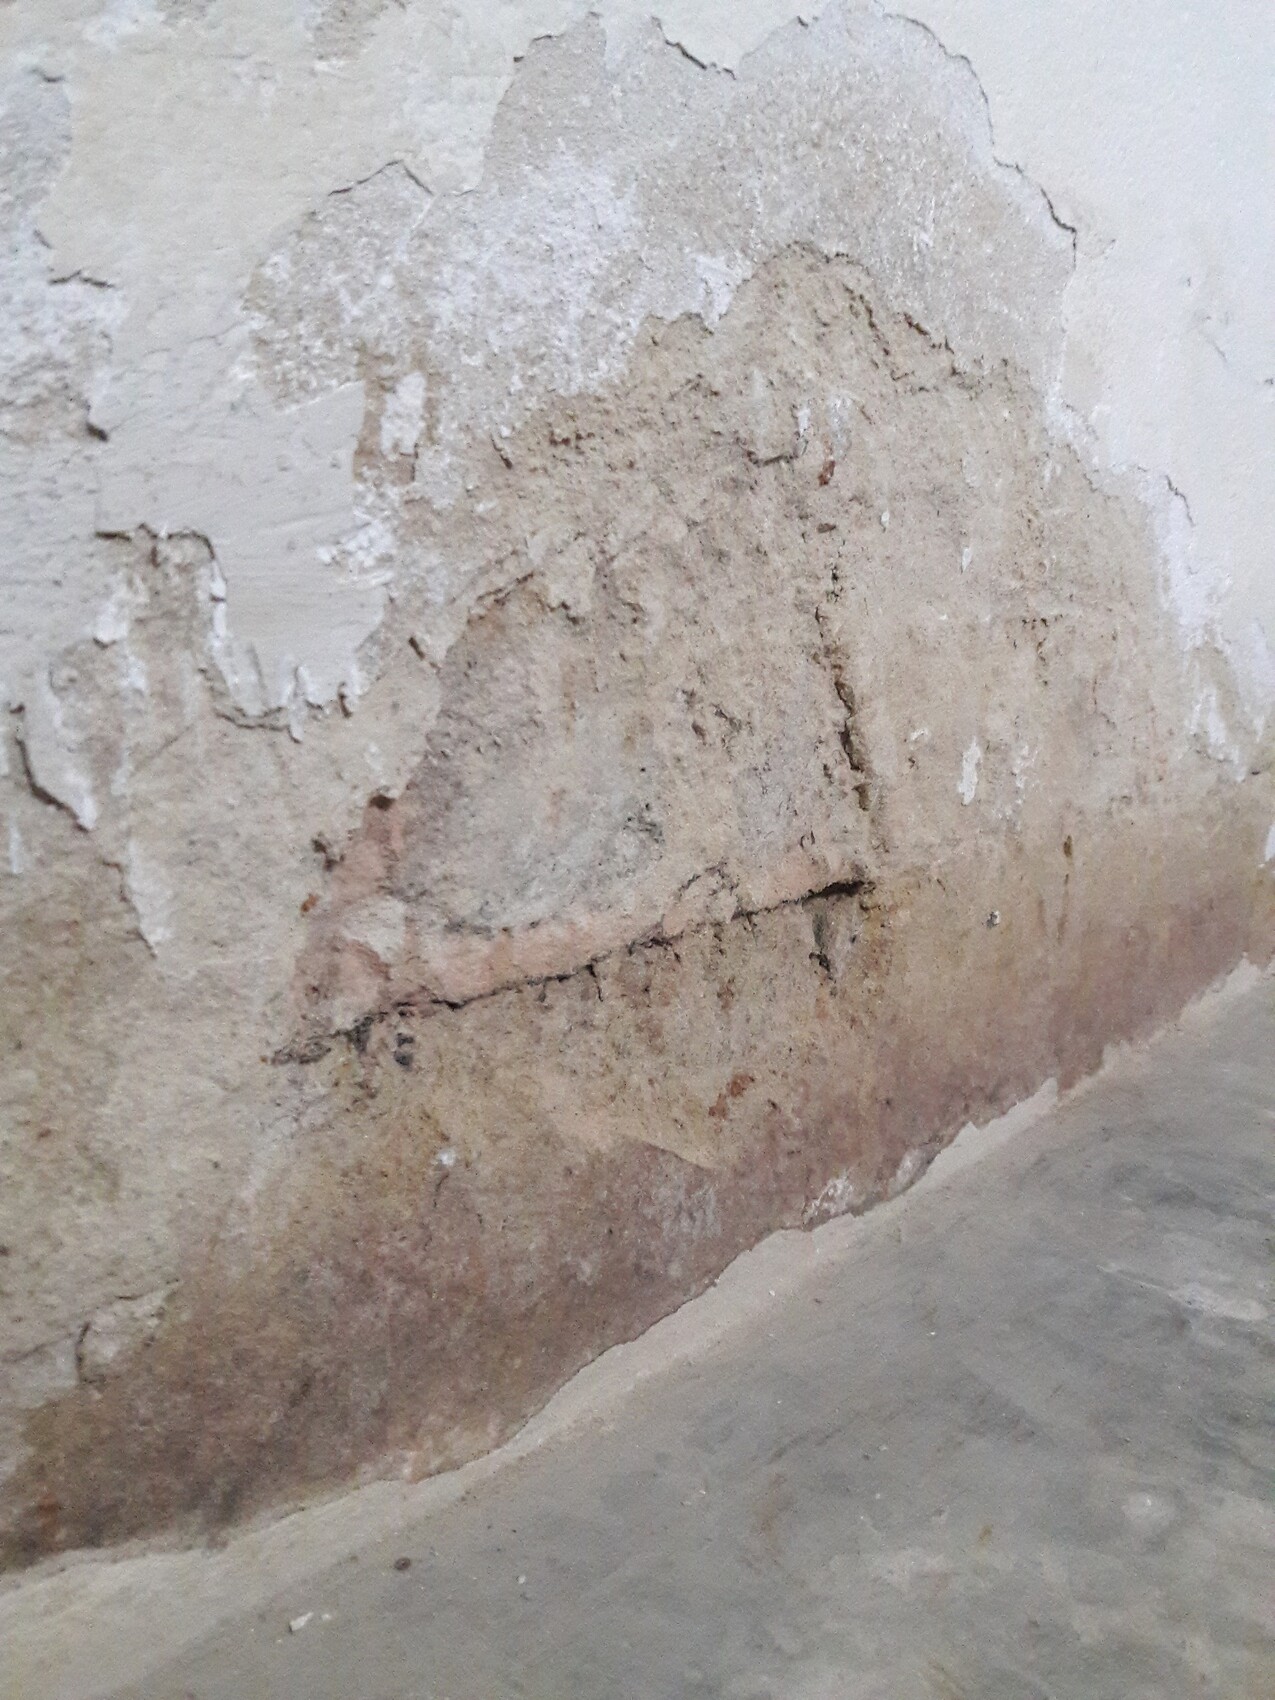
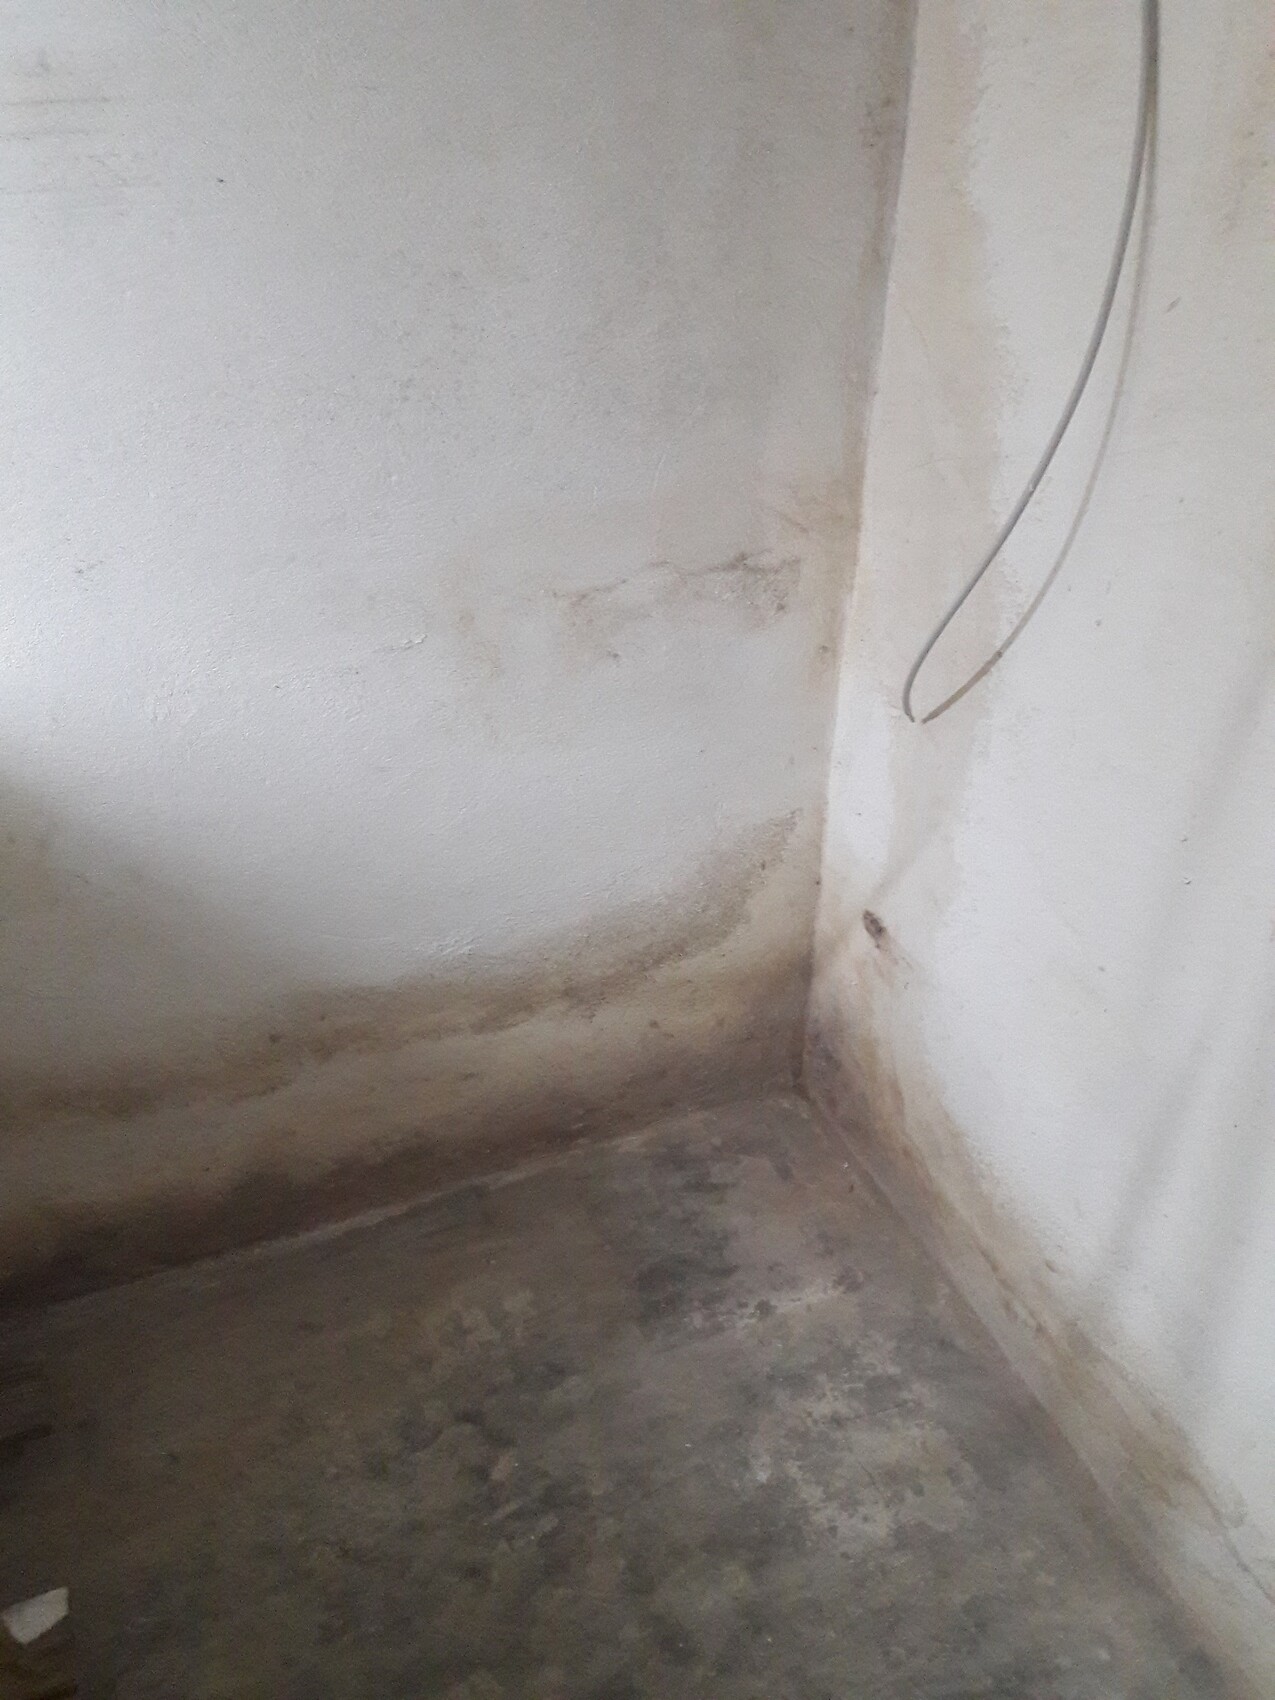
While clearing out items like paint cans, furniture, boxes, etc., I immediately noticed something concerning. Wherever something had been standing on the floor, there is a damp spot underneath. Under the moving boxes, the boxes have become so wet from below that the floor has cracked and is almost disintegrating. On the walls, I have seen that on the lowest row of blocks, the plaster is completely coming off and there is a sort of “mold”? on the walls. When I tapped the walls, it sounded hollow and the plaster detached. However, this only affects the bottom row of blocks. Above that, everything is solid and shows no discoloration.
This issue occurs both on the exterior walls that are in contact with the soil and on the interior walls, but not in all the basement rooms—only in 2 of the 4 rooms. The others are dry at both the walls and the floor.
I have attached some photos for you.
Now the important question... what is causing this? Rising groundwater? Missing insulation under the concrete slab? Missing waterproofing where the house meets the surrounding soil?
AND what measures should I take now to get this problem under control?
Additional info: The basement currently has single-glazed basement windows installed, and there is no heating in the basement. The walls are NOT sandstone.
I hope you can help me.
Thanks and best regards
three years ago we bought a house and completely renovated it. Now that all the living areas are finished, I am turning my attention to the basement to make it usable as well, because at the moment it resembles more of a storage room.
While clearing out items like paint cans, furniture, boxes, etc., I immediately noticed something concerning. Wherever something had been standing on the floor, there is a damp spot underneath. Under the moving boxes, the boxes have become so wet from below that the floor has cracked and is almost disintegrating. On the walls, I have seen that on the lowest row of blocks, the plaster is completely coming off and there is a sort of “mold”? on the walls. When I tapped the walls, it sounded hollow and the plaster detached. However, this only affects the bottom row of blocks. Above that, everything is solid and shows no discoloration.
This issue occurs both on the exterior walls that are in contact with the soil and on the interior walls, but not in all the basement rooms—only in 2 of the 4 rooms. The others are dry at both the walls and the floor.
I have attached some photos for you.
Now the important question... what is causing this? Rising groundwater? Missing insulation under the concrete slab? Missing waterproofing where the house meets the surrounding soil?
AND what measures should I take now to get this problem under control?
Additional info: The basement currently has single-glazed basement windows installed, and there is no heating in the basement. The walls are NOT sandstone.
I hope you can help me.
Thanks and best regards
abc12345 schrieb:
I am now going down to the basement to make it usable,To coordinate measures, it is important to know what you plan to do with the basement. You should be aware that with reasonable means, it can only become a dry storage room, not a living space, regardless of the ceiling height.
abc12345 schrieb:
Where something was standing on the floor, there is a damp spot underneath everywhere.The sealing of the slab-on-grade was rather poor in the 1950s and 60s, and capillary-breaking layers underneath were rarely installed. Ground moisture simply rises through the slab, probably penetrating a simple bitumen coating beneath. A classic test for this is to leave a newspaper covered with plastic foil for a few days – but you probably don’t need to do that anymore.
abc12345 schrieb:
On the lowest row of bricks, the plaster is completely coming off the walls and there is some kind of "mold"? on the walls.Rising moisture from the ground only reaches up to the damp-proof course. This was (and still is) installed just above the first row of bricks. Back then, it was usually 600 mm (24 inches) bitumen felt. It still appears intact, which is good and important. Moisture only rises to this point and does not go further up the wall. The "mold" you see is actually salt efflorescence, often mistakenly called nitrate efflorescence (unless you regularly urinate on the walls or keep cattle there). Ground moisture penetrates the slab and masonry, and especially on the masonry, this moisture evaporates on the basement surface. The salts dissolved by the moisture crystallize on the concrete surface. The plaster detachment is caused by the same issue. The water evaporates and dissolves the plaster. This effect is often worsened by additional, usually waterproof, interior coatings.
abc12345 schrieb:
It is a house built in 1963. The basement walls, like the rest of the house, are built with "normal" bricks.Even in the 1960s, clay or loam-containing bricks were rarely used for basement walls. Usually, sand-lime bricks or concrete blocks were used, with concrete often acting as bricks, not only cast-in-place concrete. Back then, affordable concrete units were often made from rubble from war ruins – rubble aggregate concrete. The color varies depending on the source.
abc12345 schrieb:
The dampness affects only the exterior walls that are in the ground and some interior walls, but only in 2 out of 4 basement rooms. The others are dry on both walls and floors.Whether it is interior or exterior walls does not matter much since the moisture comes from below, not horizontally from the side. Your horizontal barrier, usually a simple bitumen coating back then, still seems intact or the horizontal moisture ingress is not significant. With permeable soil, undamaged rainwater drainage pipes, and terrain sloping away from the house, the waterproofing does not need to do much. The fact that only some parts of the basement are damp can be due to the surrounding soil, which in some places is more permeable at lower levels. If the west side is damp, it may simply be because rainfall is heavier there and the soil below is wetter, among other reasons. It is impossible to say for sure from a distance.
Nordlys schrieb:
Dig around the house, re-seal the basement wall with bitumenThat would likely cost between 15,000 and 25,000 euros if done by contractors, destroy your entire garden, and have zero effect. But from a distance, with no access to the house or payment for the work, it is easy to make such guesses.
Rising moisture from the ground can be controlled quite well with your intact horizontal barrier.
First, remove all loose plaster and then smooth the surface again using waterproof, but not waterproofing, concrete repair mortar (e.g., Lugato R&R) or restoration plaster. At the junction with the slab, create a cove (fillet) from the mortar so that any sealing applied later will not have a sharp edge. Adhesion is poor on 90-degree corners. Then clean everything carefully (dust, dirt). After that, apply an interior waterproofing layer. Depending on the exposure (hard to assess remotely), a flexible mineral-based sealing slurry is often sufficient; in some cases, more may be needed. What definitely works (seals virtually all exposure scenarios from all directions) is a bitumen-free, two-component hybrid sealing slurry applied in two layers. Apply this on the entire floor and up the walls well above the damp-proof course. As mentioned, the cove helps here. Alternatively, instead of the cove, a flexible sealing tape can be installed (it does not need to be the very expensive 240 mm (9½ inches) wide one — the 120 mm (4¾ inches) wide one used in sanitary waterproofing works well on the inside). Follow the manufacturer’s instructions regarding wetting, working time, and drying time.
The sealing can be left as is after drying; it remains permanently firm. It can also be tiled over. I would advise against all other types of floor coverings.
What this does not prevent is condensation forming on walls and windows from the inside due to cold walls. However, this can be controlled by proper ventilation (opening windows when it is colder outside than inside the basement).
Excavating and widely insulating the exterior helps as well, but in your case, the cost-benefit ratio is definitely not favorable.
@dertill
Wow, thank you very much for the detailed explanation and clear presentation.
I just have two more questions.
After I have removed the loose plaster from the walls, should I let the room and the damp masonry dry first, or can I start repairing with the repair mortar right away?
Also, I’ve just looked up the waterproof slurry and found there are two different types. From the product descriptions, I can’t tell the difference. One is applied in basements, and the other is a bit more liquid and applied by brushing.
What is the difference between these two? I can’t tell from the descriptions when I compare the two products directly.
Wow, thank you very much for the detailed explanation and clear presentation.
I just have two more questions.
After I have removed the loose plaster from the walls, should I let the room and the damp masonry dry first, or can I start repairing with the repair mortar right away?
Also, I’ve just looked up the waterproof slurry and found there are two different types. From the product descriptions, I can’t tell the difference. One is applied in basements, and the other is a bit more liquid and applied by brushing.
What is the difference between these two? I can’t tell from the descriptions when I compare the two products directly.
abc12345 schrieb:
After I’ve removed the loose plaster from the walls, should I let the room or the damp masonry dry first, or can I start repairing with the repair mortar right away?It won’t dry because moisture is coming up from below. Repair mortars based on cement don’t mind that. You also don’t need a dehumidifier at the moment. It won’t help as long as the source of the moisture isn’t eliminated. After waterproofing, you can run a dehumidifier during summer months if your basement becomes too damp, but right now it’s not useful. The mortar data sheet includes drying times before applying the next layer, which you should definitely follow.
abc12345 schrieb:
There is one that is applied to the basement and another that is a bit more fluid for brushing. What is the difference?Most waterproofing slurries can be either brushed or rolled on, or applied with a trowel. They are just mixed with more or less water. The application method depends on the specific requirement, but for negative waterproofing like in your case, trowel application in two layers is generally recommended. Minimum (and maximum) layer thicknesses can be found in the respective technical data sheets. You can find these sheets online in most stores and always on the manufacturer’s website. This also helps you calculate how much material you need. To ensure correct application thickness, it’s recommended to use a notched trowel. This avoids areas that are too thin where moisture could penetrate again. As mentioned before, a two-layer application of bitumen-free hybrid waterproofing handles all types of stress, but in your case the FLEXIBLE (!) slurry should be sufficient.
Oh, and if the technical sheet says: “Substrate must be dry, dust- and dirt-free”—this is not always literal. Mineral substrates for plaster, mortar, or waterproof coatings should always be pre-wetted so they are surface damp. This binds the dust always present in basements; otherwise, nothing will stick!
Thank you very much.
I will address the interior work soon and will get back here with any questions or generally share feedback on how it went.
Outside, a excavator will most likely be working shortly anyway, so it can free the two walls lying in the ground so that I can apply the appropriate waterproofing and insulation.
Thank you for the help and detailed explanation.
I will address the interior work soon and will get back here with any questions or generally share feedback on how it went.
Outside, a excavator will most likely be working shortly anyway, so it can free the two walls lying in the ground so that I can apply the appropriate waterproofing and insulation.
Thank you for the help and detailed explanation.
M
Mottenhausen8 Apr 2019 12:36dertill said everything perfectly. I would just add: the existing horizontal damp-proof course must under no circumstances be damaged during any work (especially when removing the old plaster). Your internal waterproofing (as described above) must then be seamlessly connected at that point.
PS. And don’t let anyone convince you to line the basement with a thin layer of waterproof (WU) concrete. This is still often done in basement renovations, but it doesn’t work because waterproof concrete only becomes watertight at certain thicknesses, and basements usually don’t have enough height for that. A thin layer of waterproof concrete is ineffective.
PS. And don’t let anyone convince you to line the basement with a thin layer of waterproof (WU) concrete. This is still often done in basement renovations, but it doesn’t work because waterproof concrete only becomes watertight at certain thicknesses, and basements usually don’t have enough height for that. A thin layer of waterproof concrete is ineffective.
Similar topics