
ᐅ IKEA PAX Sliding Doors Glass Panel Installation with Frame Not Flush
Created on: 14 May 2014 09:07
Y
Y2K187Hello Ikea fans,
I’m quite new here and pretty frustrated.
I have the following problem. I bought 2 Pax wardrobes and assembled them very easily. At first, I had no issues with the doors either. I was able to assemble and hang 3 of them nicely without any major problems.
Now, with the 4th door, it suddenly doesn’t work anymore. After placing the 4 glass panels onto the frame, in step 11 I have to insert the bottom element at the bottom. But this no longer fits cleanly. This element is not flush with the side panel.
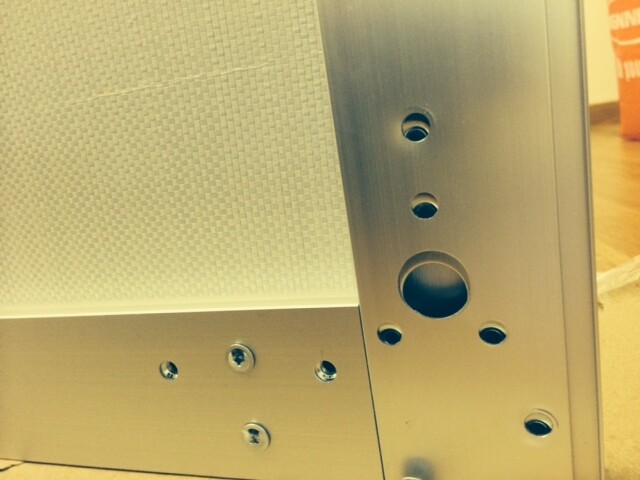
I hope someone knows this problem and can help me. I have already tried rebuilding the frame about 7 times.
Thanks in advance for your help.
Best regards
I’m quite new here and pretty frustrated.
I have the following problem. I bought 2 Pax wardrobes and assembled them very easily. At first, I had no issues with the doors either. I was able to assemble and hang 3 of them nicely without any major problems.
Now, with the 4th door, it suddenly doesn’t work anymore. After placing the 4 glass panels onto the frame, in step 11 I have to insert the bottom element at the bottom. But this no longer fits cleanly. This element is not flush with the side panel.
I hope someone knows this problem and can help me. I have already tried rebuilding the frame about 7 times.
Thanks in advance for your help.
Best regards
I
IKEA-Experte14 May 2014 15:30Hello, the picture is missing...
I
IKEA-Experte14 May 2014 18:07If I understand the problem correctly, the frame is basically assembled correctly, but in one corner the holes do not align, meaning they are either too high in the frame or too low in the connecting bracket.
You have an identical door that was installed without any issues. So, measure whether the holes in the frame or the bracket were drilled incorrectly and whether you might need to exchange the part.
You have an identical door that was installed without any issues. So, measure whether the holes in the frame or the bracket were drilled incorrectly and whether you might need to exchange the part.
I just assembled a 4m (13 ft) Pax wardrobe with sliding doors over the weekend and am familiar with the issue. First, you need to make sure the corner connectors are fully inserted correctly – there are guide rails in the profiles, and if anything is misaligned or wrong, the parts will never fit flush.
For me, the inserted corner didn’t fit perfectly either, as shown in your picture, but as long as the corner connectors are properly installed, a gentle tap with a rubber mallet fixed it.
For me, the inserted corner didn’t fit perfectly either, as shown in your picture, but as long as the corner connectors are properly installed, a gentle tap with a rubber mallet fixed it.
Similar topics