
ᐅ Is it normal to have polyurethane foam between the sealing tape and the window?
Created on: 4 Mar 2018 22:30
A
AltbauSan18A
AltbauSan184 Mar 2018 22:30
From the pictures, I can see the following: A "sealing tape," a self-expanding, one-sided adhesive foam tape that is resistant to driving rain, was applied into the joint between the window frame and the reveal. However, this tape did not fully fill the gap between the window and the reveal around the frame, so PU foam was added as additional backing. The tape now partly hangs loose in the window gap without any contact, partly has foam in between, and only PU foam was used underneath? And that is all the sealing done at the window?
It’s hard to imagine worse workmanship being done to a component in a single step!
This "sealing tape" – which I would rather call compressible sealing tape – is intended for the EXTERNAL sealing of the joint between the window frame and the wall. It should always be fixed with the adhesive side to the frame, and the non-adhesive side should rest against the masonry. For brick veneer façades or those with an internal rebate, where the frame is set from the inside against a protrusion in the masonry, it should be applied from the inside against the brickwork; otherwise, it is installed on the side, preferably as far to the exterior as possible. The tape is resistant to driving rain and vapor-permeable, and according to the manufacturer, also airtight. However, this only applies if it is firmly pressed on both sides. In your case, it’s just loosely hanging and doesn’t seal anything. The pictures also show a rebate. Is there one, or are the reveals continuous without a step? If there is a rebate, the windows should have been sized to fit against it from the inside, and the compressible tape should have been placed there.
The rest of the window gap, which is not filled by the compressible tape, is normally filled with PU foam. At outdoor temperatures below 5°C (41°F), a winter foam should be used here, because standard foam does not expand properly and can become crumbly. By "rest," I mean the remaining depth of the joint, not the width. For example, with an 80mm (3 inches) frame width, the outermost 20 mm (1 inch) between frame and masonry are fully filled and sealed with compressible tape, starting from the outside. The remaining 60 mm (2 ½ inches) in depth is filled with suitable PU foam.
What is completely missing in your installation is the internal sealing of the window joint! According to RAL guidelines, the inner seal must be airtight and vapor-resistant or vapor-tight. This is done professionally by adhering an inner sealing tape (usually pink and marked INSIDE or similar) to the frame on the joint side before foaming, which should not be confused with the compressible tape for external sealing. This tape is glued all around the frame, including the side that will later form the joint edge. The inner sealing tape typically ranges from 7.5 to 15 cm (3 to 6 inches) wide and extends mostly inward. It is then attached to the reveal on the inside, either self-adhesive or with appropriate adhesive if no tape strip is included, and is plastered over there.
According to RAL, it is also allowed, in addition to compressible tape and PU foam in the joint, to use permanently elastic adhesive sealants with high vapor resistance on the inner side of the window. The finish can therefore, if compressible tape and PU foam are correctly used, be done with suitable acrylic spray sealants and the joint can be covered with a trim. This method is often used for renovations since it requires little or no new plastering.
These are the RAL specifications, which don’t necessarily have to be followed exactly but the principle and concept should always be adopted:
External sealing: resistant to driving rain, vapor-permeable, airtight
Filling of the window joint: highly insulating, gap-filling PU foam
Internal sealing: airtight, vapor-resistant or at least more vapor-resistant than outside
The bottom window joint cannot always be executed in full RAL compliance when existing window sills are present, but the principle should be maintained here: seal the joint between the sill and the window on the inside with acrylic sealant; on the outside, connect the lower window edge to the old sill with an additional trim to ensure rain tightness and fill the space as well as possible. Since your inner window sills are being replaced, there’s no reason not to do proper sealing here as at the sides. The only limitation could be that compressible tape on the outside may be tight if the old sills remain. However, this is not critical as long as the connection between the old sill and the new window is watertight, using a trim and suitable external sealing tape.
In your case: not windproof, because there is only PU foam in some places; not rainproof; and also vapor-open on the inside—so condensation in the gap is inevitable.
If you search for "window installation RAL" or similar, you will find diagrams showing the three levels (external sealing, insulation layer, internal sealing). Comparing these to your situation clearly reveals the poor workmanship.
For cleaning: it is important that the frame is dust-free so that the compressible tape adheres well. The reveal is less critical but should be free from coarse dirt. Inside, the inner sealing tape is usually plastered over. Here, the surface should be primed or, for example, moistened slightly to bind dust. Otherwise, since the plaster will not adhere well, there is no alternative.
It’s hard to imagine worse workmanship being done to a component in a single step!
This "sealing tape" – which I would rather call compressible sealing tape – is intended for the EXTERNAL sealing of the joint between the window frame and the wall. It should always be fixed with the adhesive side to the frame, and the non-adhesive side should rest against the masonry. For brick veneer façades or those with an internal rebate, where the frame is set from the inside against a protrusion in the masonry, it should be applied from the inside against the brickwork; otherwise, it is installed on the side, preferably as far to the exterior as possible. The tape is resistant to driving rain and vapor-permeable, and according to the manufacturer, also airtight. However, this only applies if it is firmly pressed on both sides. In your case, it’s just loosely hanging and doesn’t seal anything. The pictures also show a rebate. Is there one, or are the reveals continuous without a step? If there is a rebate, the windows should have been sized to fit against it from the inside, and the compressible tape should have been placed there.
The rest of the window gap, which is not filled by the compressible tape, is normally filled with PU foam. At outdoor temperatures below 5°C (41°F), a winter foam should be used here, because standard foam does not expand properly and can become crumbly. By "rest," I mean the remaining depth of the joint, not the width. For example, with an 80mm (3 inches) frame width, the outermost 20 mm (1 inch) between frame and masonry are fully filled and sealed with compressible tape, starting from the outside. The remaining 60 mm (2 ½ inches) in depth is filled with suitable PU foam.
What is completely missing in your installation is the internal sealing of the window joint! According to RAL guidelines, the inner seal must be airtight and vapor-resistant or vapor-tight. This is done professionally by adhering an inner sealing tape (usually pink and marked INSIDE or similar) to the frame on the joint side before foaming, which should not be confused with the compressible tape for external sealing. This tape is glued all around the frame, including the side that will later form the joint edge. The inner sealing tape typically ranges from 7.5 to 15 cm (3 to 6 inches) wide and extends mostly inward. It is then attached to the reveal on the inside, either self-adhesive or with appropriate adhesive if no tape strip is included, and is plastered over there.
According to RAL, it is also allowed, in addition to compressible tape and PU foam in the joint, to use permanently elastic adhesive sealants with high vapor resistance on the inner side of the window. The finish can therefore, if compressible tape and PU foam are correctly used, be done with suitable acrylic spray sealants and the joint can be covered with a trim. This method is often used for renovations since it requires little or no new plastering.
These are the RAL specifications, which don’t necessarily have to be followed exactly but the principle and concept should always be adopted:
External sealing: resistant to driving rain, vapor-permeable, airtight
Filling of the window joint: highly insulating, gap-filling PU foam
Internal sealing: airtight, vapor-resistant or at least more vapor-resistant than outside
The bottom window joint cannot always be executed in full RAL compliance when existing window sills are present, but the principle should be maintained here: seal the joint between the sill and the window on the inside with acrylic sealant; on the outside, connect the lower window edge to the old sill with an additional trim to ensure rain tightness and fill the space as well as possible. Since your inner window sills are being replaced, there’s no reason not to do proper sealing here as at the sides. The only limitation could be that compressible tape on the outside may be tight if the old sills remain. However, this is not critical as long as the connection between the old sill and the new window is watertight, using a trim and suitable external sealing tape.
In your case: not windproof, because there is only PU foam in some places; not rainproof; and also vapor-open on the inside—so condensation in the gap is inevitable.
If you search for "window installation RAL" or similar, you will find diagrams showing the three levels (external sealing, insulation layer, internal sealing). Comparing these to your situation clearly reveals the poor workmanship.
For cleaning: it is important that the frame is dust-free so that the compressible tape adheres well. The reveal is less critical but should be free from coarse dirt. Inside, the inner sealing tape is usually plastered over. Here, the surface should be primed or, for example, moistened slightly to bind dust. Otherwise, since the plaster will not adhere well, there is no alternative.
A
AltbauSan185 Mar 2018 18:36Wow, that’s quite a detailed response. Thank you very much for that.
In the meantime, the compressible sealing tape has expanded. It now looks as if everything is covered. At least some level of airtightness should be present. However, you mentioned that the tape needs to adhere well to the window frame. In some areas, this is definitely not the case. I can’t judge if the pressure of the tape against the frame is sufficient for a proper seal. I assume it’s probably poor or even inadequate. The full depth is certainly not completely filled in all areas.
Regarding your question, "Is there just one, or are the reveals continuous without offsets?"
Yes, the windows have an offset and were installed up to that point. However, there is no tape between the window’s front edge and the wall projection.
Today, the window installers came back and sealed from the inside again. I have not seen the result yet.
Unfortunately, nothing further can be done to improve rain- and wind-tightness without scraping and removing material first. I don’t know if any repairs have been made since then.
Do you see any chance that the issues mentioned were corrected after all? The foam or tape was certainly not removed and replaced.
Here are a few photos of the condition from this morning:
For me, this is now also about whether the labor costs for the fine plastering and the expense of the compressible tape were even worthwhile with this execution.
My walls are still not plastered, so I still have a chance to have everything corrected. But if the vapor-tight tape is already applied, it’s obviously no longer possible to see if they made any corrections.
I will send more photos later to show the last work step.
Oh, and regarding the exterior windowsills: there were previously concrete windowsills installed, running from inside to outside. The window installer insisted on removing these because of thermal bridging. I think that was really necessary.
In the meantime, the compressible sealing tape has expanded. It now looks as if everything is covered. At least some level of airtightness should be present. However, you mentioned that the tape needs to adhere well to the window frame. In some areas, this is definitely not the case. I can’t judge if the pressure of the tape against the frame is sufficient for a proper seal. I assume it’s probably poor or even inadequate. The full depth is certainly not completely filled in all areas.
Regarding your question, "Is there just one, or are the reveals continuous without offsets?"
Yes, the windows have an offset and were installed up to that point. However, there is no tape between the window’s front edge and the wall projection.
Today, the window installers came back and sealed from the inside again. I have not seen the result yet.
Unfortunately, nothing further can be done to improve rain- and wind-tightness without scraping and removing material first. I don’t know if any repairs have been made since then.
Do you see any chance that the issues mentioned were corrected after all? The foam or tape was certainly not removed and replaced.
Here are a few photos of the condition from this morning:
For me, this is now also about whether the labor costs for the fine plastering and the expense of the compressible tape were even worthwhile with this execution.
My walls are still not plastered, so I still have a chance to have everything corrected. But if the vapor-tight tape is already applied, it’s obviously no longer possible to see if they made any corrections.
I will send more photos later to show the last work step.
Oh, and regarding the exterior windowsills: there were previously concrete windowsills installed, running from inside to outside. The window installer insisted on removing these because of thermal bridging. I think that was really necessary.
AltbauSan18 schrieb:
By now, the compressible sealing tape has expanded. It looks like everything is covered now. At least some level of airtightness should be achieved.If the compressible tape only touches the frame on one side and the foam on the other, it still won’t be airtight. It only works if the tape fully adheres to both the frame and the wall structure all around!
AltbauSan18 schrieb:
However, you said the compressible tape needs to stick well to the window frame. That definitely isn’t the case in some areas.It must be in full contact everywhere. If there are any gaps between the tape and the frame, it’s ineffective. Adhesion helps because the frame expands and contracts with temperature changes; otherwise, the tape can eventually be pushed out of the joint over time.
AltbauSan18 schrieb:
Yes, the windows have a setback and have been installed up to that point. However, there is no tape between the front edge of the window and the wall reveal.This is exactly where the compressible tape should have been installed—unless the overlap is so small that even perfectly fitting windows leave less than 1 cm (0.4 inches) of bearing surface. Then it’s too narrow to apply the tape. Without removing the windows, this can no longer be corrected.
AltbauSan18 schrieb:
Today the window installers came back and sealed again on the inside. I haven’t seen the result yet.Just trying to cover up poor work quickly so no one notices! How were the interior window sealing tapes applied? Were they installed on the inside of the frame? Or was the side still not fully foam-insulated?
AltbauSan18 schrieb:
Do you think there’s a chance they were able to fix those mistakes? The foam and tape were definitely not removed and replaced.IF the inner sealing tape was properly applied and the rest of the window gap fully and seamlessly insulated with foam afterward, this might still be fixable without removing the window. Then all you would still be missing is the outer airtight layer. Are you planning to install an external insulation system? In that case, you will need special plaster stop beads for the reinforcing coat attached to the window frame; these are available as weatherproof and vapor-permeable versions. If there is no external insulation, there are rain-tight renovation sealing strips (e.g., Reno Rechtsanwältin) that can be glued on the outside against the outer frame to seal the external perimeter joint against rain (according to the manufacturer). Whether they also seal tightly against the interior edge where the window meets the reveal, I don’t know. In any case, the windows need to be fully flush on the outside. This approach is always a second-best solution. Correct installation of compressible sealing tape would have been much easier, more cost-effective, and less noticeable. The window installer can’t blame oversized window gaps or low temperatures. If the windows were measured and don’t fit, that is their responsibility.
If the installation was included as RAL-compliant in the contract, you can point out the incorrectly applied sealing tapes and complain that they are ineffective. If the installer resists, ask for the manufacturer and model so you can check the technical data sheets, which surely include instructions for correct installation that have not been followed here.
AltbauSan18 schrieb:
Now I’m wondering whether the labor costs for fine plastering and the cost of the compressible tape even made sense with this execution.As described, you could have saved all installation labor costs and done it yourself. A simple Google search and common sense would show where to properly install a sealing tape. Some plastering is always necessary with window replacements and can’t be avoided entirely. With proper interior sealing, the inner reveal always needs to be replastered. Without this, only acrylic sealant and a cover strip are used, which is possible but the long-term durability is questionable.
AltbauSan18 schrieb:
Before, there were concrete window sills running from inside to outside. The installer insisted they be removed because of the thermal bridge. I think that was really necessary.Yes, that was the right decision.
At minimum, the window installer must completely fill the window gap with PU foam. The sealing tape inside doesn’t interfere since it also insulates, but as installed, it does not seal. Also essential are the inner airtight and vapor-tight connection as well as the outer airtight and rainproof connection.
If you haven’t paid too much in advance yet—e.g., only 50% of the material cost—insist on removing, reopening, and resealing the joint. Unless the installer can provide a technical data sheet or RAL guidelines based on your pictures showing that this method is acceptable.
Edit: Photos were not uploaded with your post.
Good luck.
A
AltbauSan187 Mar 2018 19:50So, by now I have also spoken with Würth customer service. The compressible sealing tape 66/5 - 10, as the name suggests, is approved for joint widths up to 10 mm (0.4 inches). Of course, it can expand further (in my case up to 35 mm (1.4 inches)), but then none of the required RAL standards are met anymore. The nice gentleman on the phone also said he had never heard of using PU foam in combination with the tape, and there will certainly never be any test results for this setup.
I think the foam will be wide enough in some parts of the joint so that the tape will touch the surface in those areas at its stated expansion. But that doesn’t help me, since as you already mentioned, it would need to be fully compressed across the entire joint in that case.
What annoys me the most is that I already complained about this during the installation of the second window, but the window installer told me that the tape presses firmly enough and that everything was fine. I didn’t believe that. That evening, I read the tape’s specification myself and then it was clear to me. The fact that I understood the specification correctly was then confirmed to me over the phone today. It’s not particularly complicated...
He could have simply used a different tape for a 30 mm (1.2 inches) width at that time, or at least had the plasterers apply an extra 2 cm (0.8 inches) of plaster. Probably, the day was just scheduled for our house, and it couldn’t be rearranged… Then it gets botched.
Wrong window contacts were delivered and will be replaced. After that, the sides will be sealed.
He also said that plaster profiles will be installed. But I don’t know if that’s only on the inside or also on the outside.
Unfortunately, I am currently very busy with work, so communicating with the window installer to finally clarify everything is out of the question.
The more work progresses, the more complicated the correction becomes.
He claims that everything is fine as it is. I will probably have to get an expert report…
The contract does not mention RAL installation, but he mentioned it several times. According to information from the internet, you always have the right to installation according to RAL standards, unless you explicitly agree in writing that it will be installed differently.
Therefore, if a non-standard installation was not explicitly agreed upon, you have the right to window installation according to RAL.
So the law should be on my side. The warranty is also the only reason why I did not install it myself. But I really don’t want a legal dispute. I hope he fixes it without a fuss.
We will not insulate the house.
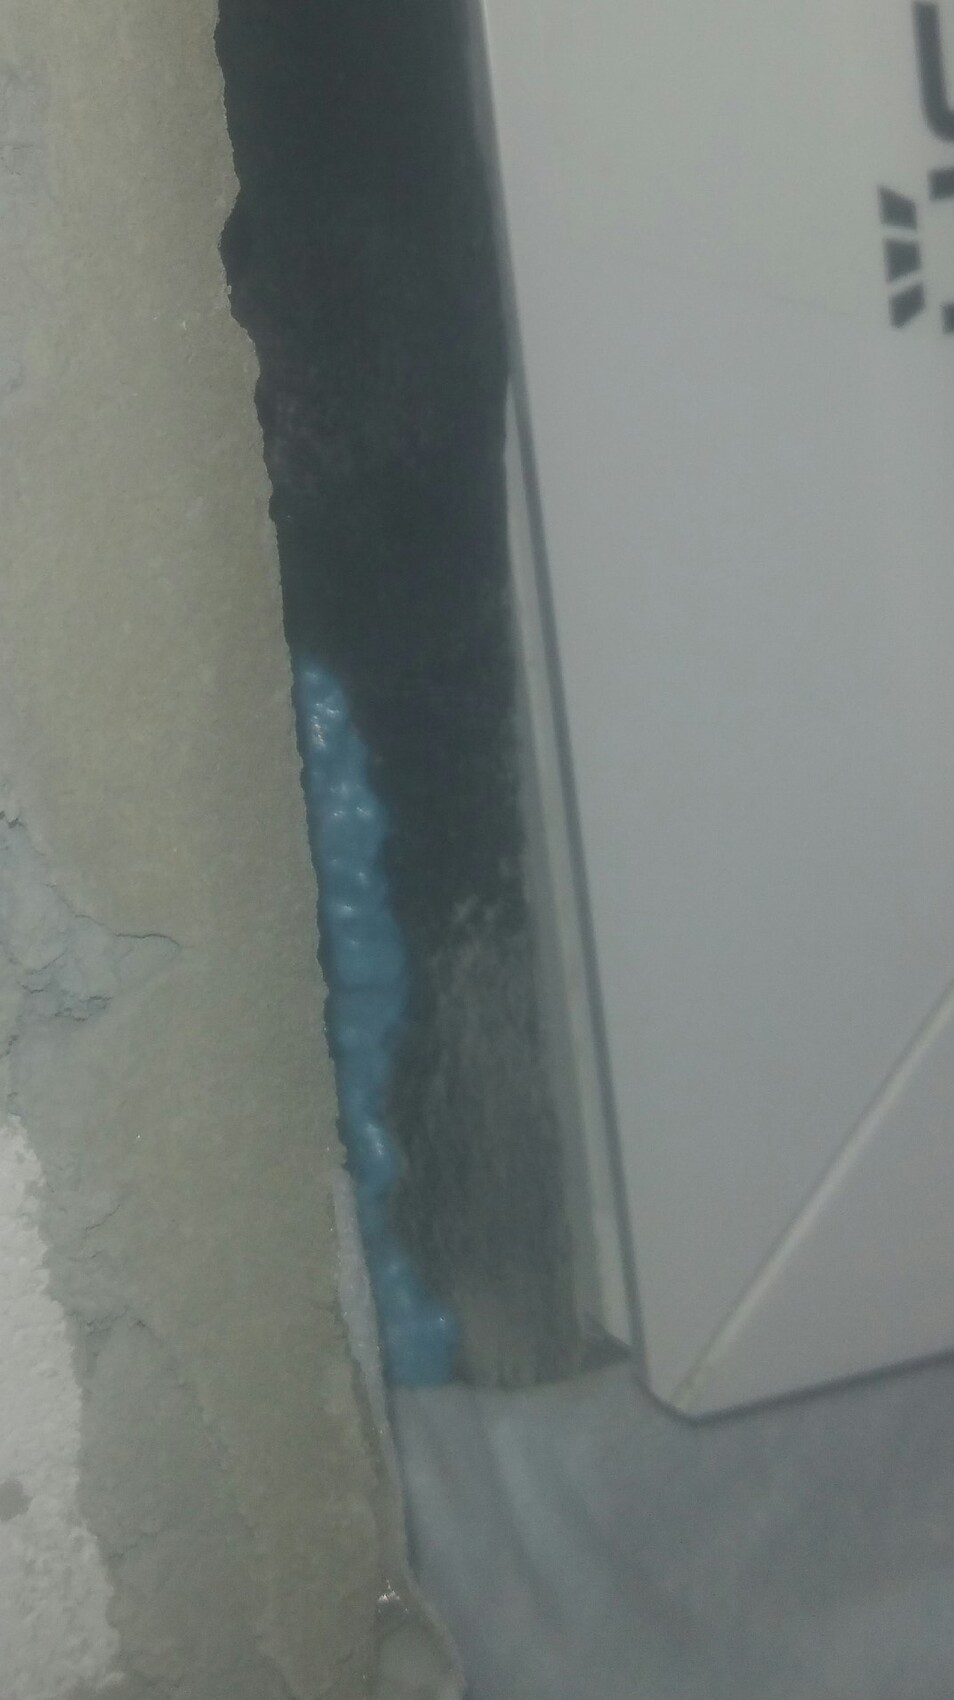
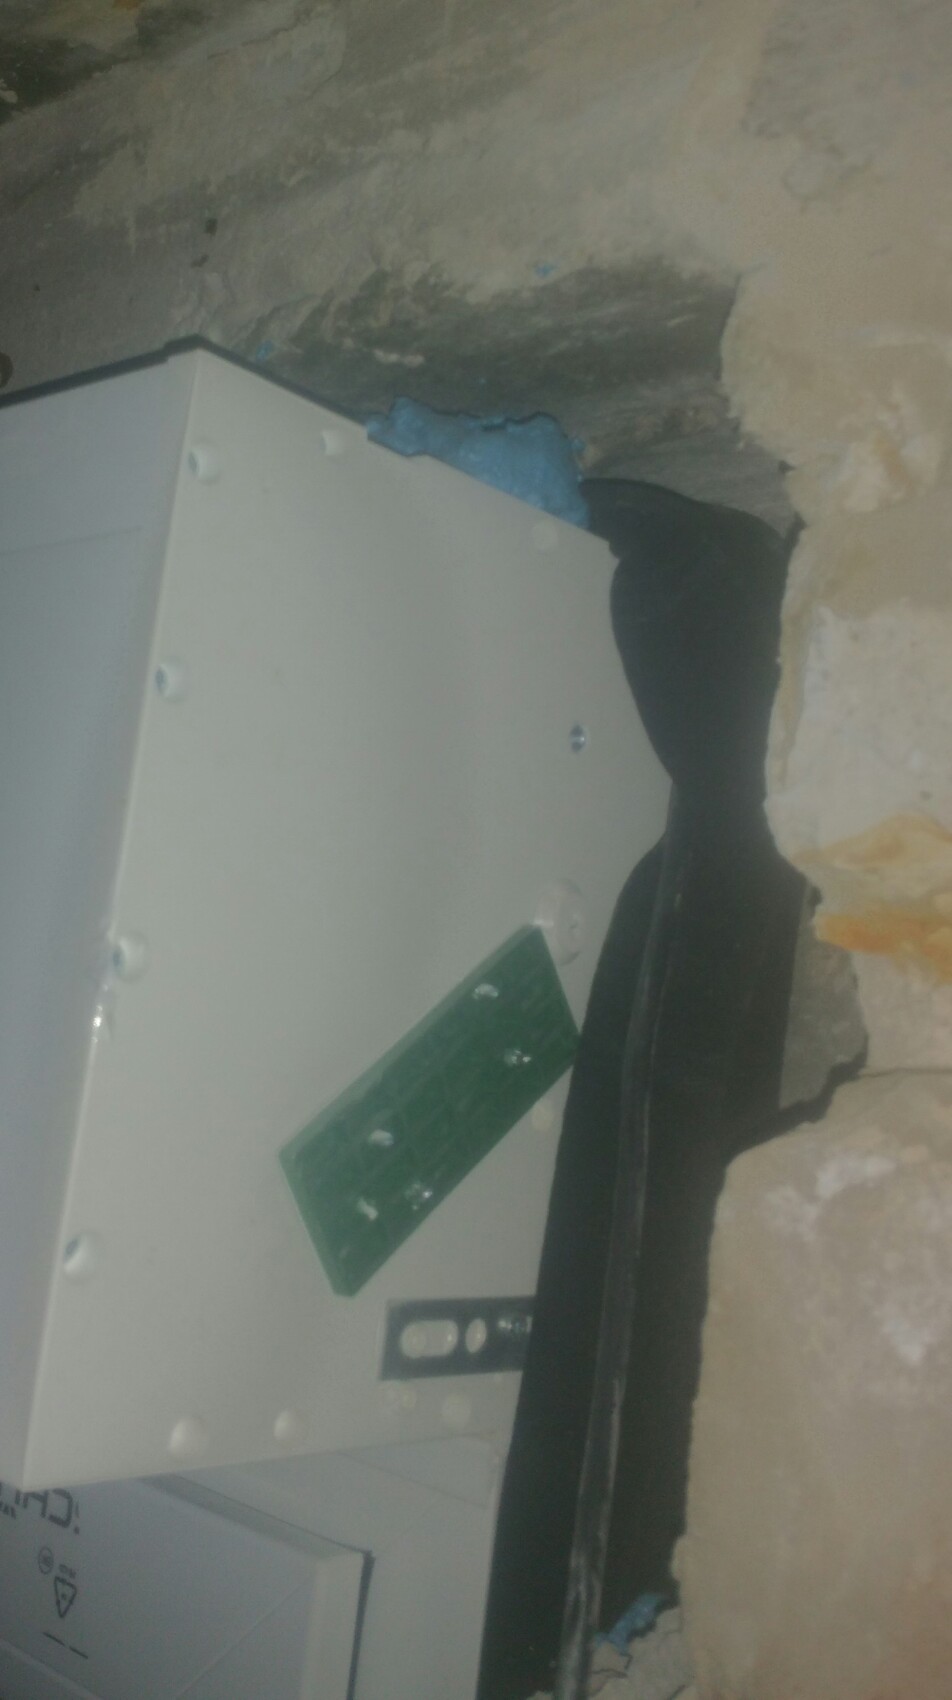
Now here are the promised pictures plus some more of the sealing.
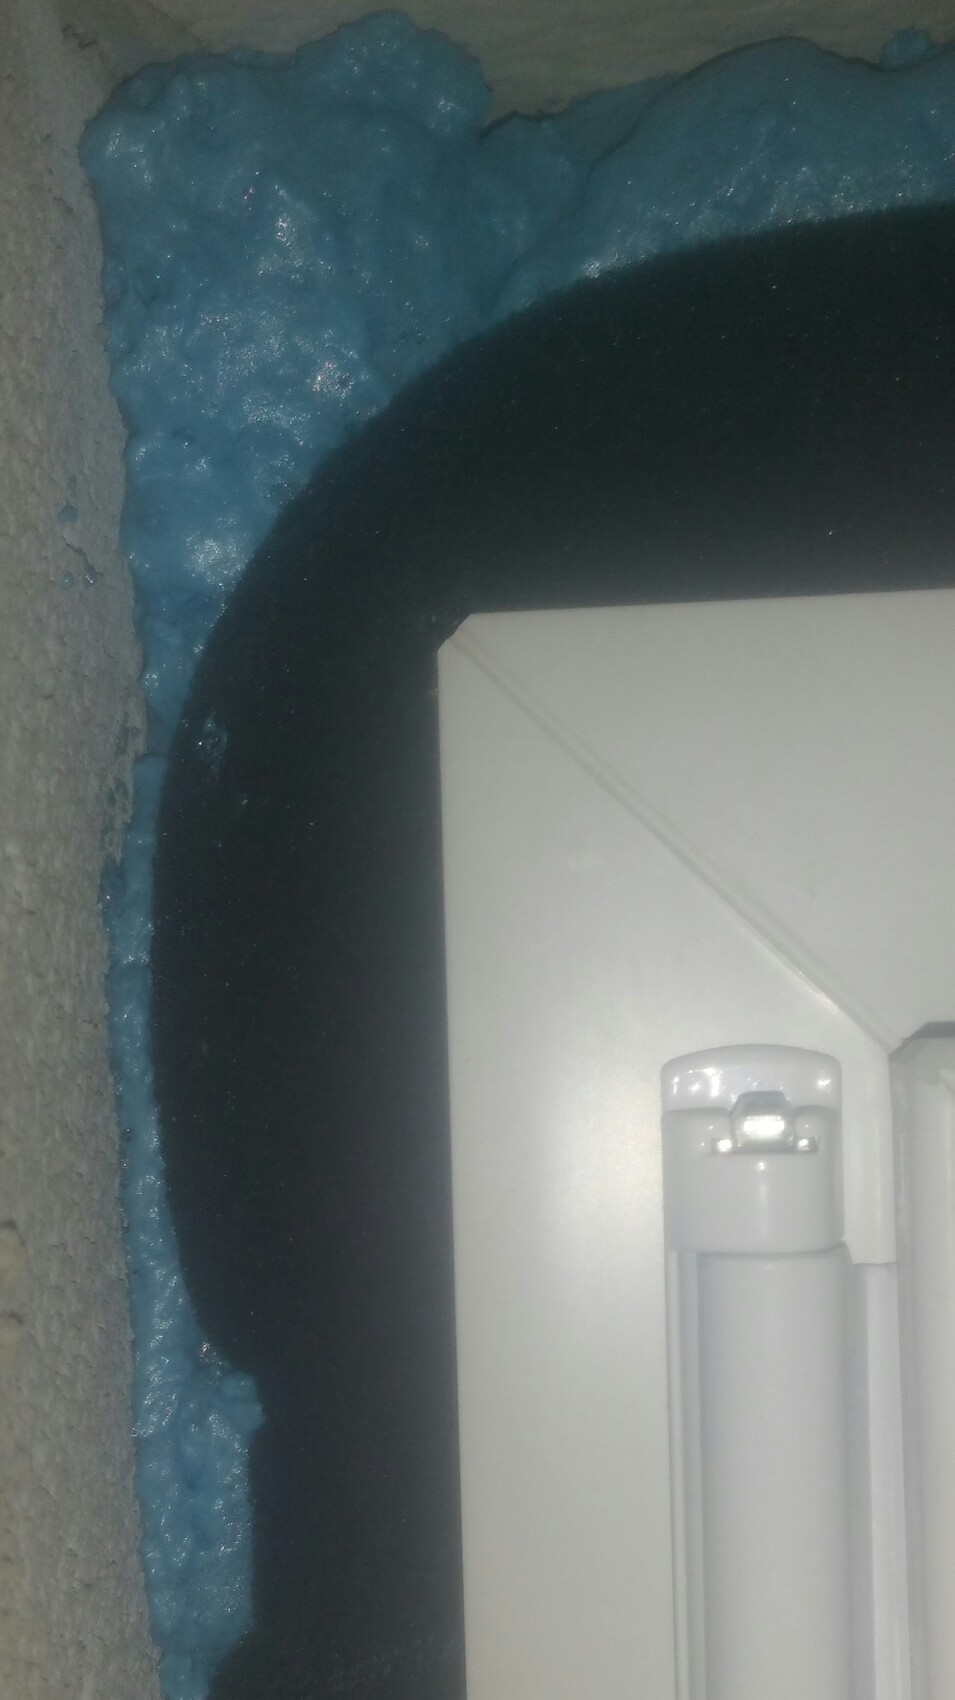
Interior sealing
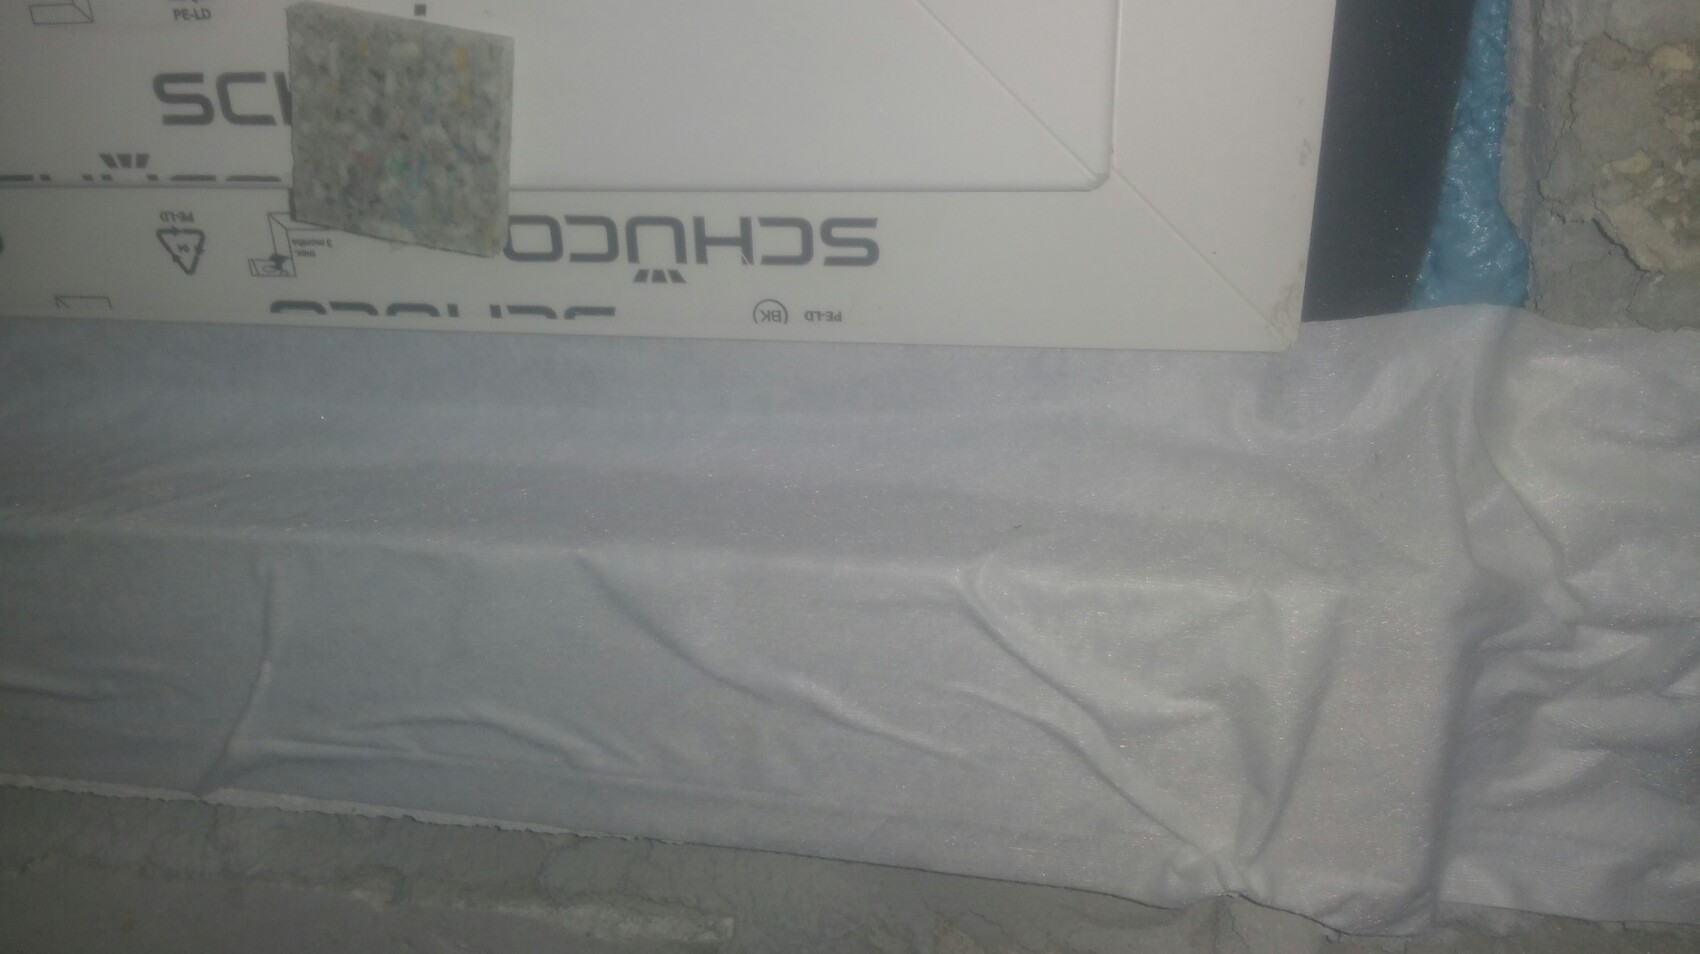
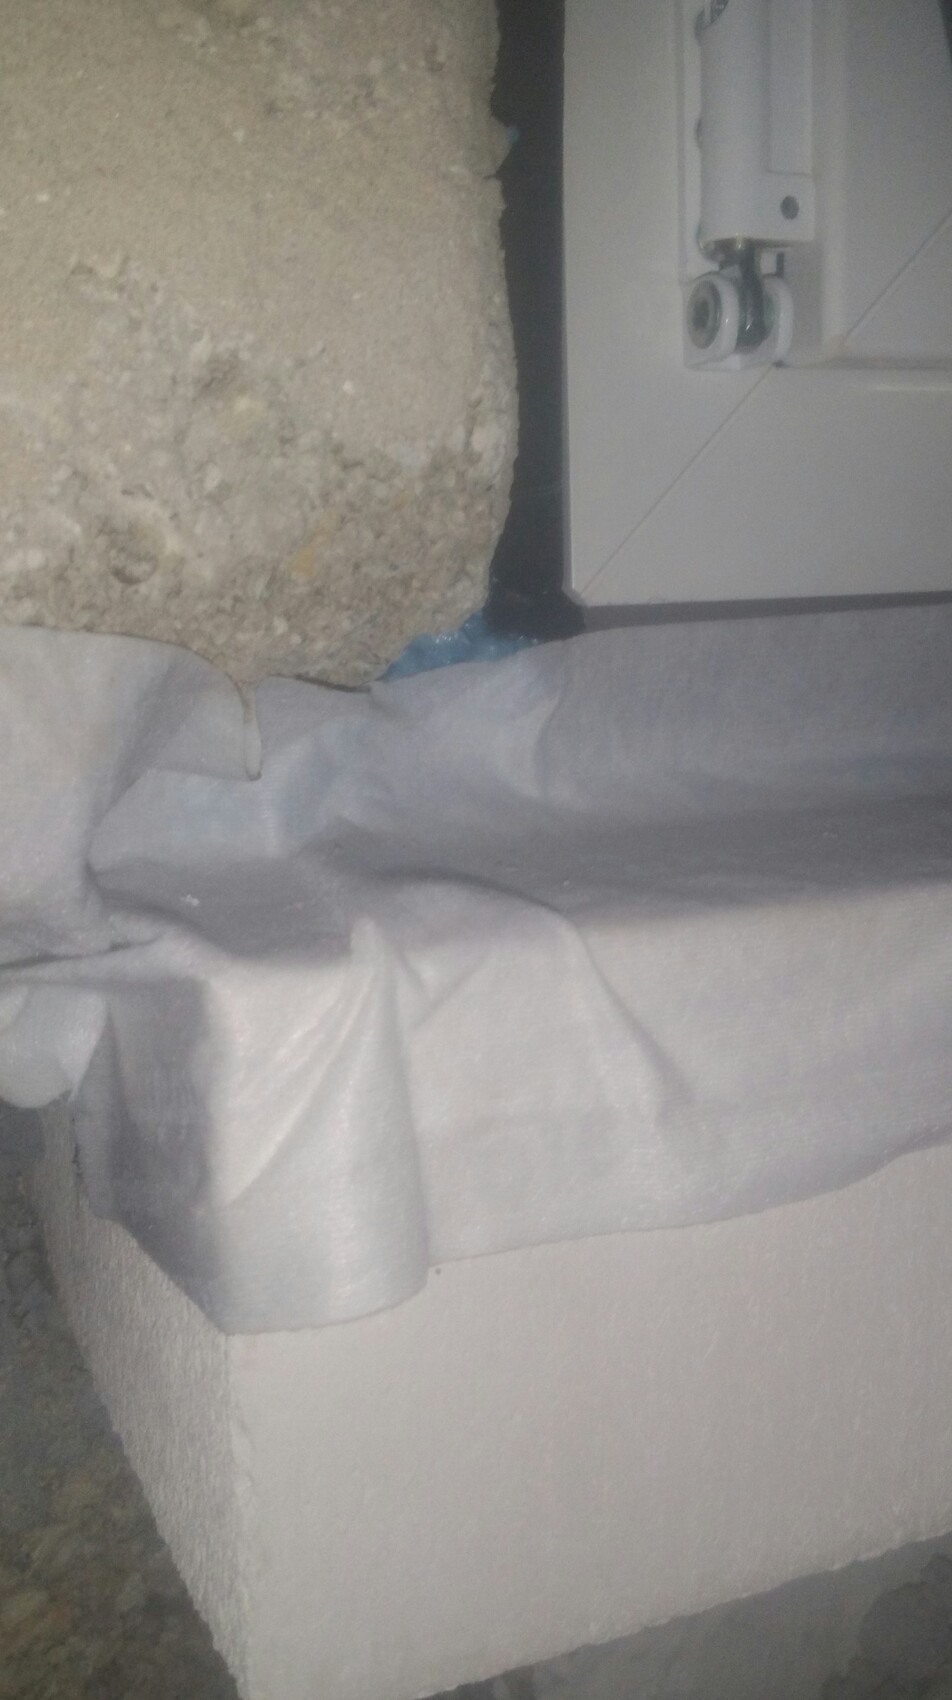
Exterior sealing
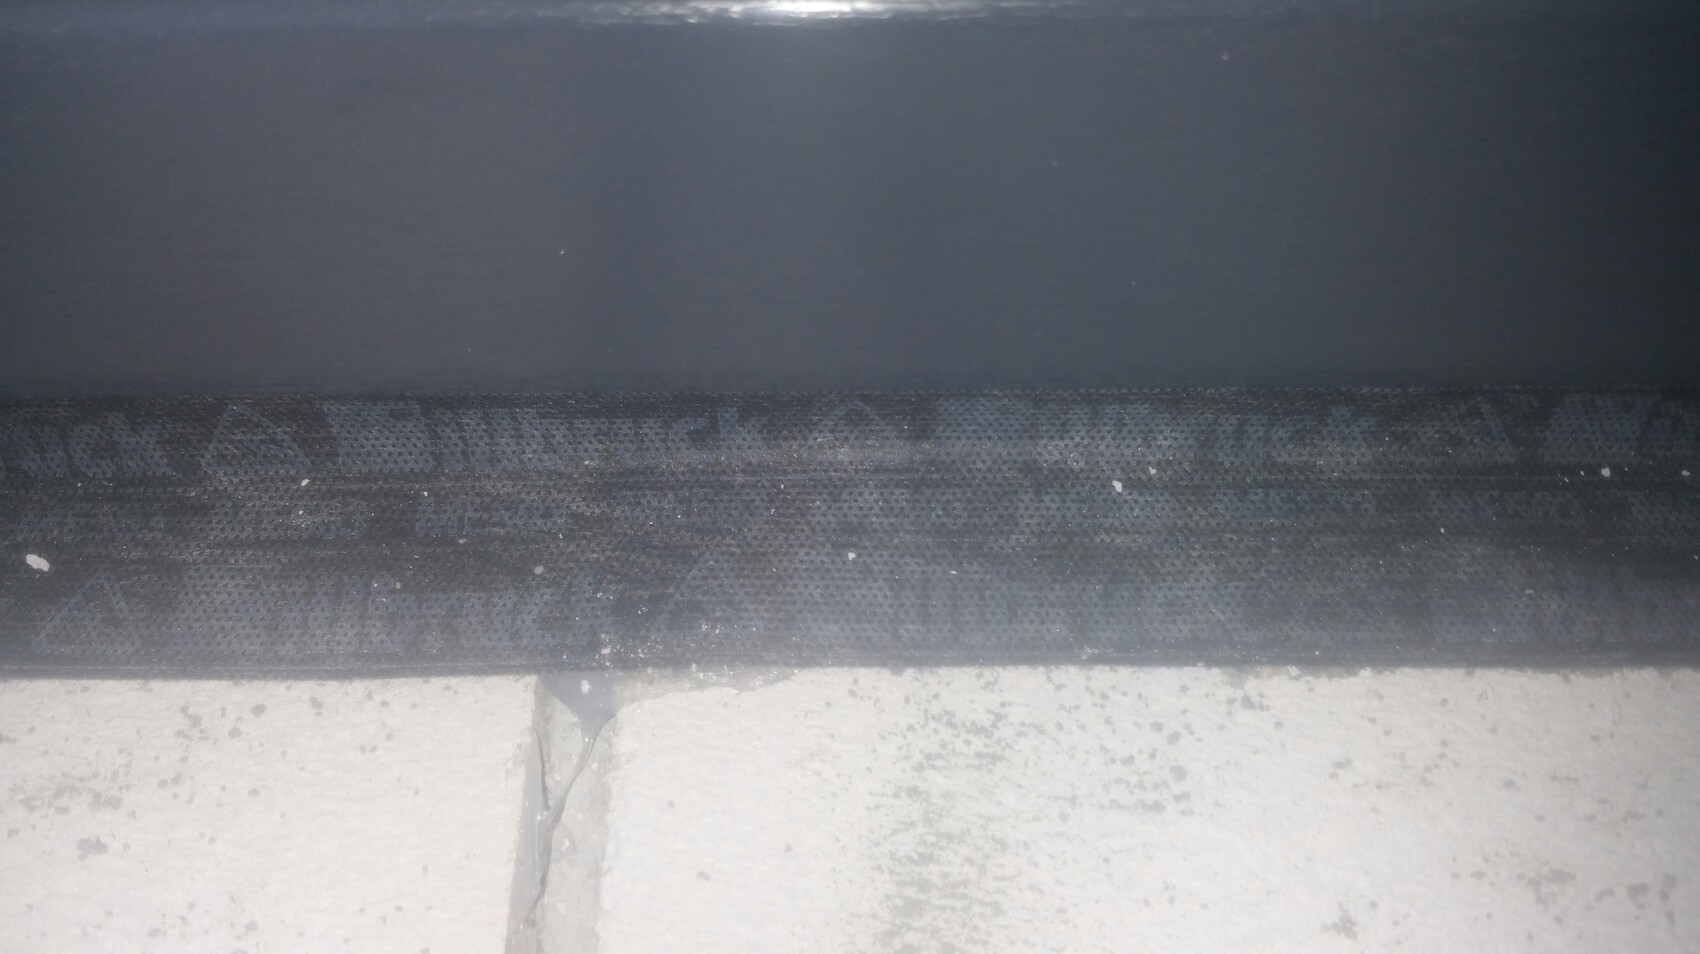
Here on the outside next to the window.

At the roller shutter box


I think the foam will be wide enough in some parts of the joint so that the tape will touch the surface in those areas at its stated expansion. But that doesn’t help me, since as you already mentioned, it would need to be fully compressed across the entire joint in that case.
What annoys me the most is that I already complained about this during the installation of the second window, but the window installer told me that the tape presses firmly enough and that everything was fine. I didn’t believe that. That evening, I read the tape’s specification myself and then it was clear to me. The fact that I understood the specification correctly was then confirmed to me over the phone today. It’s not particularly complicated...
He could have simply used a different tape for a 30 mm (1.2 inches) width at that time, or at least had the plasterers apply an extra 2 cm (0.8 inches) of plaster. Probably, the day was just scheduled for our house, and it couldn’t be rearranged… Then it gets botched.
Wrong window contacts were delivered and will be replaced. After that, the sides will be sealed.
He also said that plaster profiles will be installed. But I don’t know if that’s only on the inside or also on the outside.
Unfortunately, I am currently very busy with work, so communicating with the window installer to finally clarify everything is out of the question.
The more work progresses, the more complicated the correction becomes.
He claims that everything is fine as it is. I will probably have to get an expert report…
The contract does not mention RAL installation, but he mentioned it several times. According to information from the internet, you always have the right to installation according to RAL standards, unless you explicitly agree in writing that it will be installed differently.
Therefore, if a non-standard installation was not explicitly agreed upon, you have the right to window installation according to RAL.
So the law should be on my side. The warranty is also the only reason why I did not install it myself. But I really don’t want a legal dispute. I hope he fixes it without a fuss.
We will not insulate the house.
Now here are the promised pictures plus some more of the sealing.
Interior sealing
Exterior sealing
Here on the outside next to the window.
At the roller shutter box
Similar topics