
ᐅ Existing tiled surfaces with HSK Renodeco decorative elements
Created on: 10 Oct 2018 10:23
N
NordlichtchenN
Nordlichtchen10 Oct 2018 10:23Hello,
Does anyone here have experience with HSK Renodeco and know the prices?
We have the following situation at our home: We built our house in 2013, timber frame construction, interior walls made of KVH studs, both sides covered with 12mm OSB and 12mm drywall, so far so good.
Last year, water leaked through the shower upstairs, causing tiles on the ground floor to come loose and sections of the wall on both floors had to be repaired. The first shower was not installed professionally; the shower tray was installed first and sealed only with a silicone joint (so no waterproofing membrane, like a sealing tape, between the tray and the wall). Thus, the waterproofing layer applied to the drywall ended at the shower tray. Both the silicone joint at the tray’s installation and the silicone joint of the tiles in front of it eventually cracked, probably because the shower tray was mounted on an adjustable pedestal standing on wooden blocks to compensate for a height of 20cm (8 inches). This setup was probably too unstable, especially since it was an acrylic shower tray and when two people or children showered, the movement and weight caused too much stress on it. As a result, water passed through the leaky silicone joints of the tiles and the tray, reached the exposed, uncoated drywall, and soaked into the wall, eventually seeping down to the ground floor guest bathroom where tiles also detached.
After that, we got a new shower installed, the wall structure had to be replaced, insurance covered everything, so that was good, but still frustrating.
Then, after a few months, it started dripping again downstairs, this time from the visible wooden plank ceiling on the ground floor below the shower. It was then found that the grout joint between the newly tiled lower section and the older tiles above had cracked. The grout was removed and replaced with silicone.
Now, after a few months, it is dripping again in the same spot. Someone came yesterday and we noticed that the grout joints of the old tiles show multiple fine cracks, some up to 50cm (20 inches) long.
In their opinion, this will never be fully resolved because the wooden structure behind is too flexible. I found that surprising since they should have realized this problem years ago if it’s known that such constructions tend to have issues. Then maybe the wet room should not have been tiled in the first place. (By the way, I now know that cement-based boards, not moisture-resistant drywall, are actually recommended for wet rooms.)
Their suggestion is to cover the existing tiled surfaces with 3mm (1/8 inch) aluminum composite panels from HSK Renodeco, glued directly onto the tiles, creating a seamless surface with large-format panels. That would be a reliable and aesthetically pleasing solution, which I agree with. However, to maintain a consistent overall look, all tiled surfaces would need to be covered with HSK Renodeco panels, about 15 sqm (160 sq ft), costing 4800 euros *uff*.
So now to ask you all: What do you think? Has anyone worked with aluminum composite panels like these, or had similar problems? Are there alternative solutions you would recommend? Sure, one could remove and redo the grout every year, which might be cheaper over a lifetime but certainly more labor-intensive...
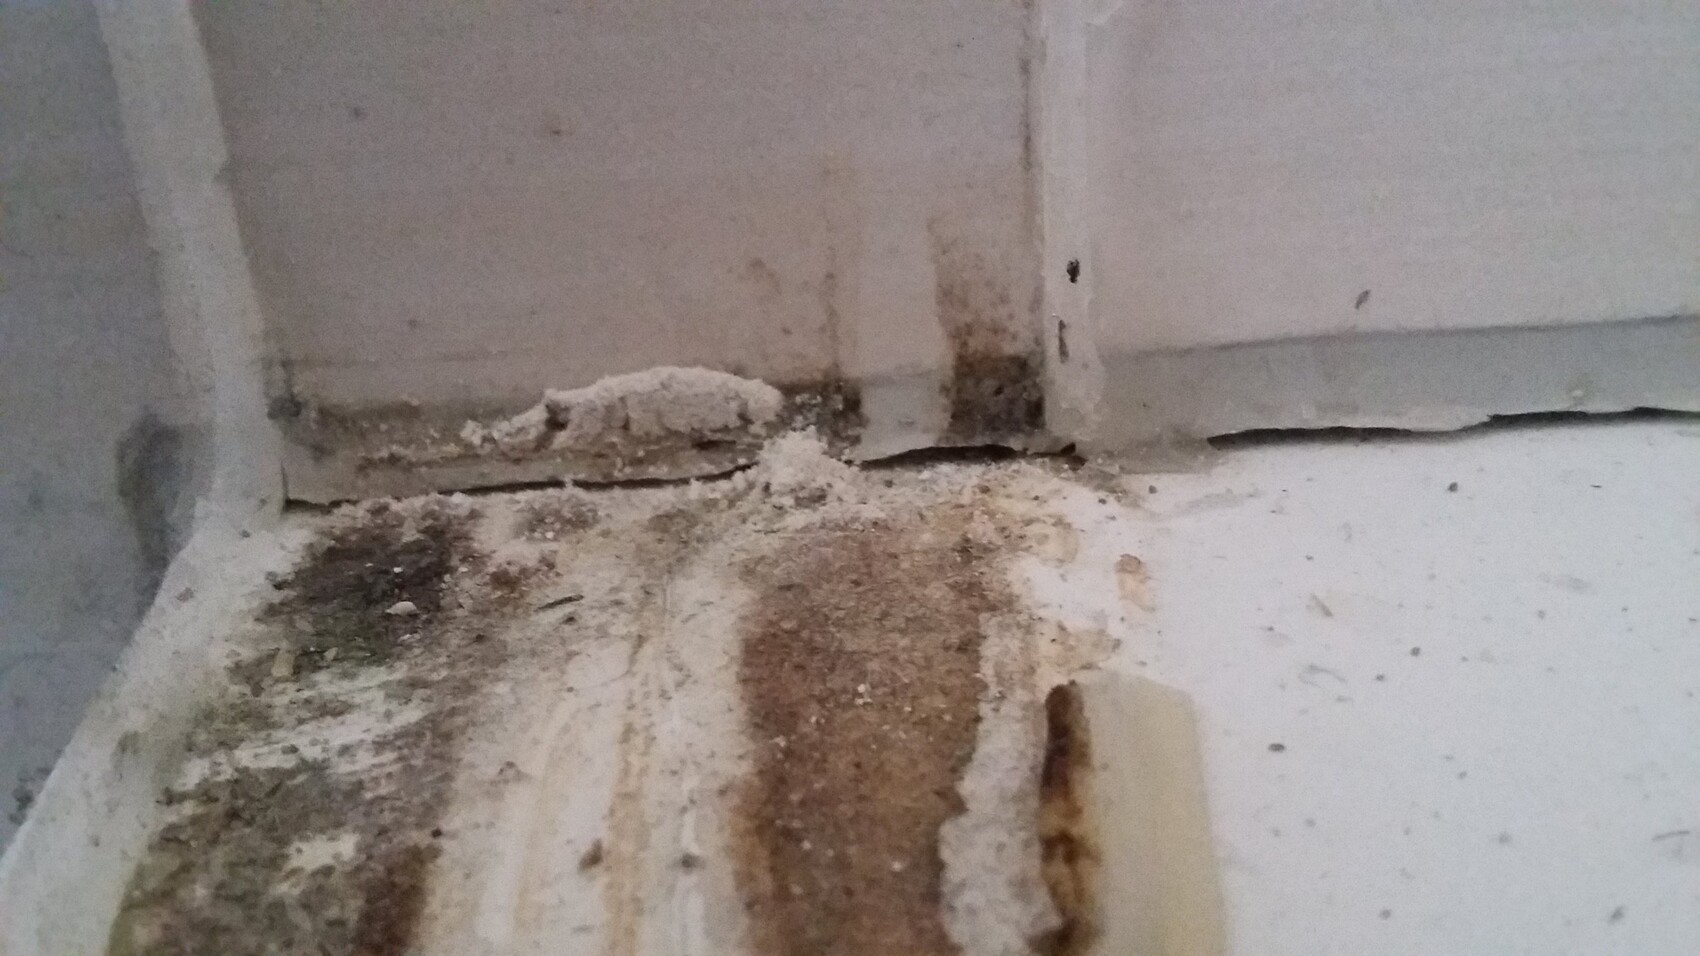
Attached are some photos of the first damage/water leakage, the second leakage, and a photo of a grout crack.
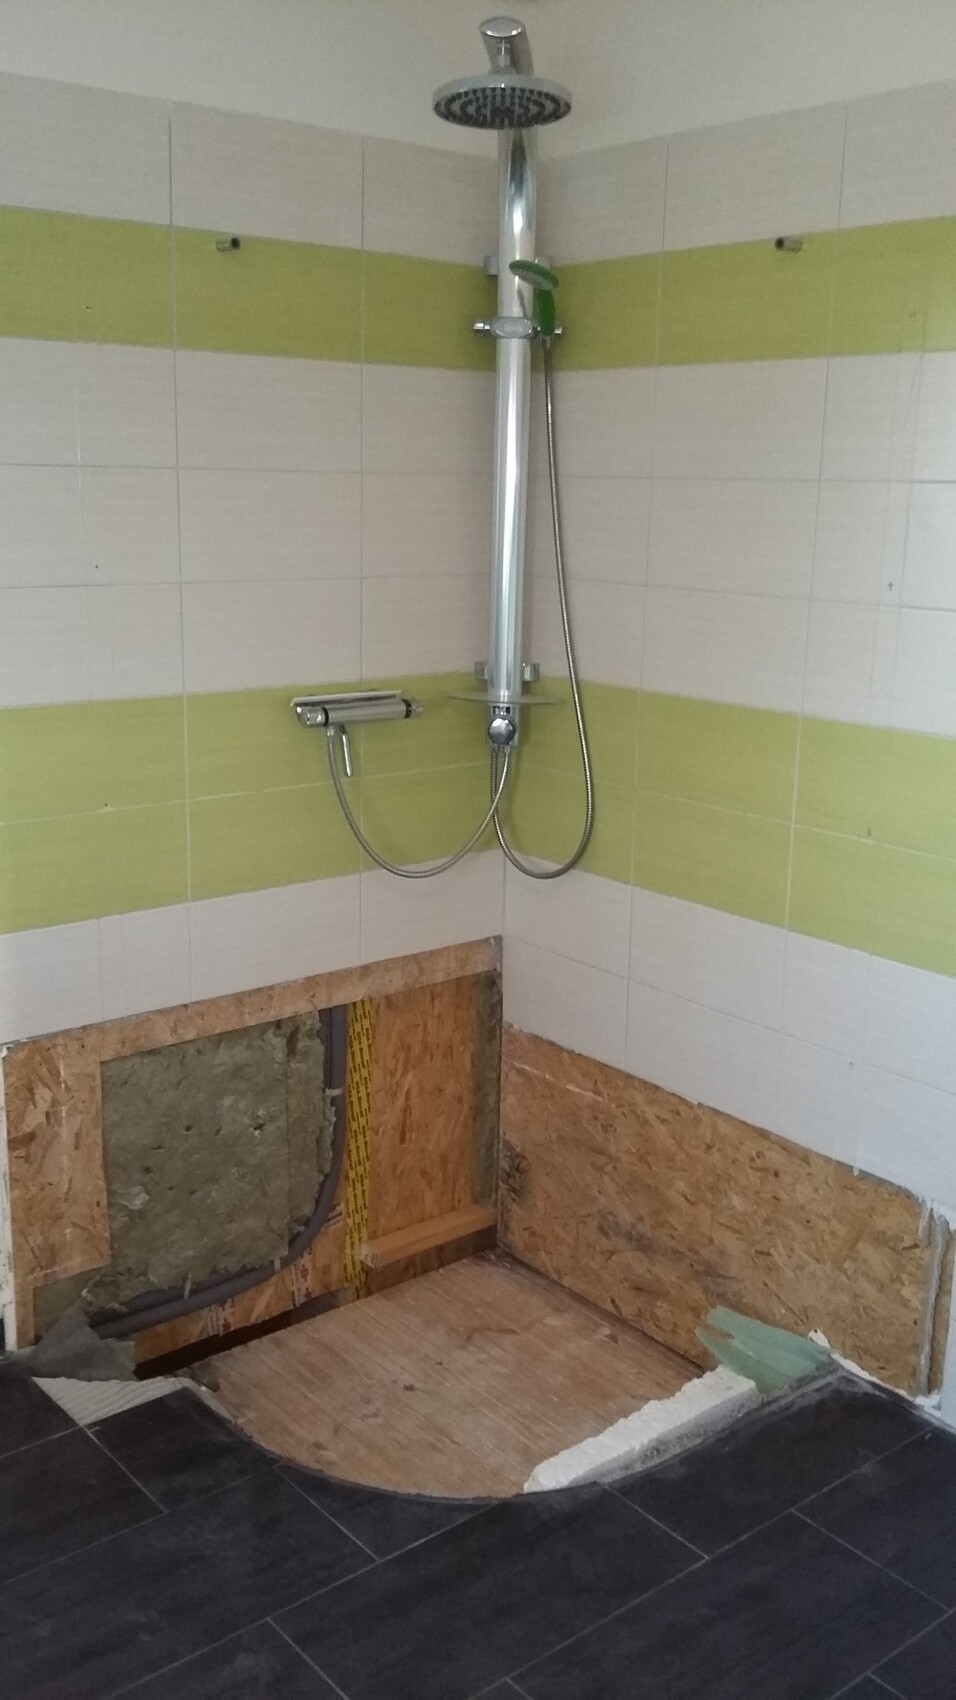
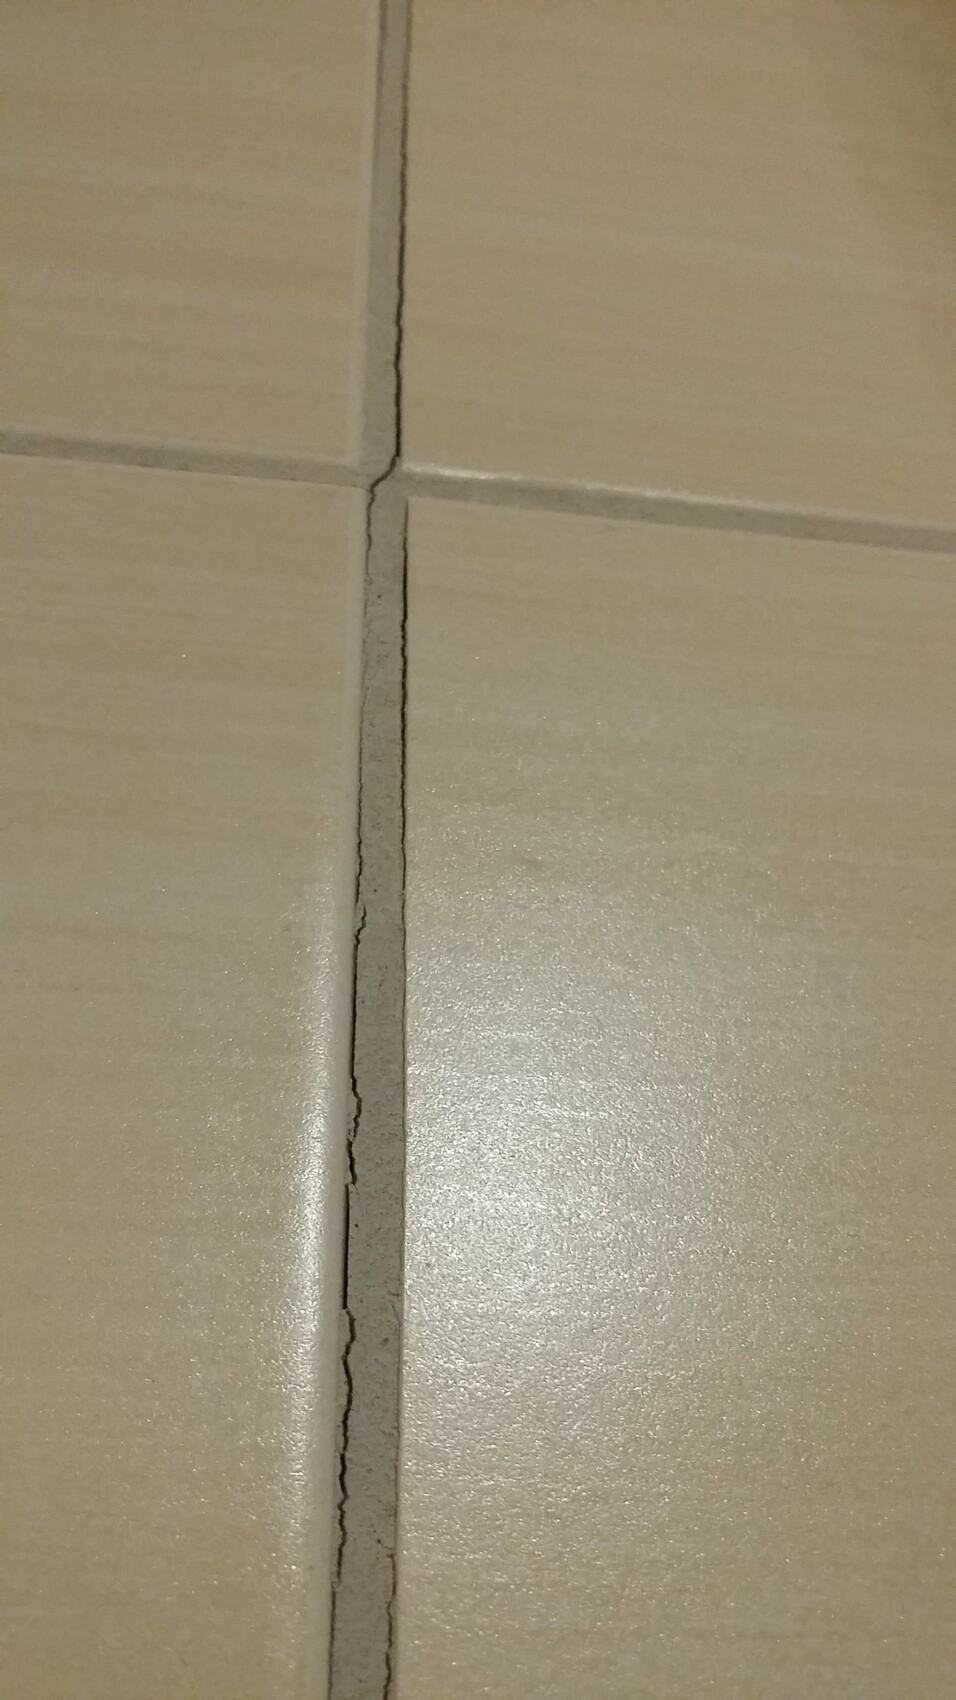
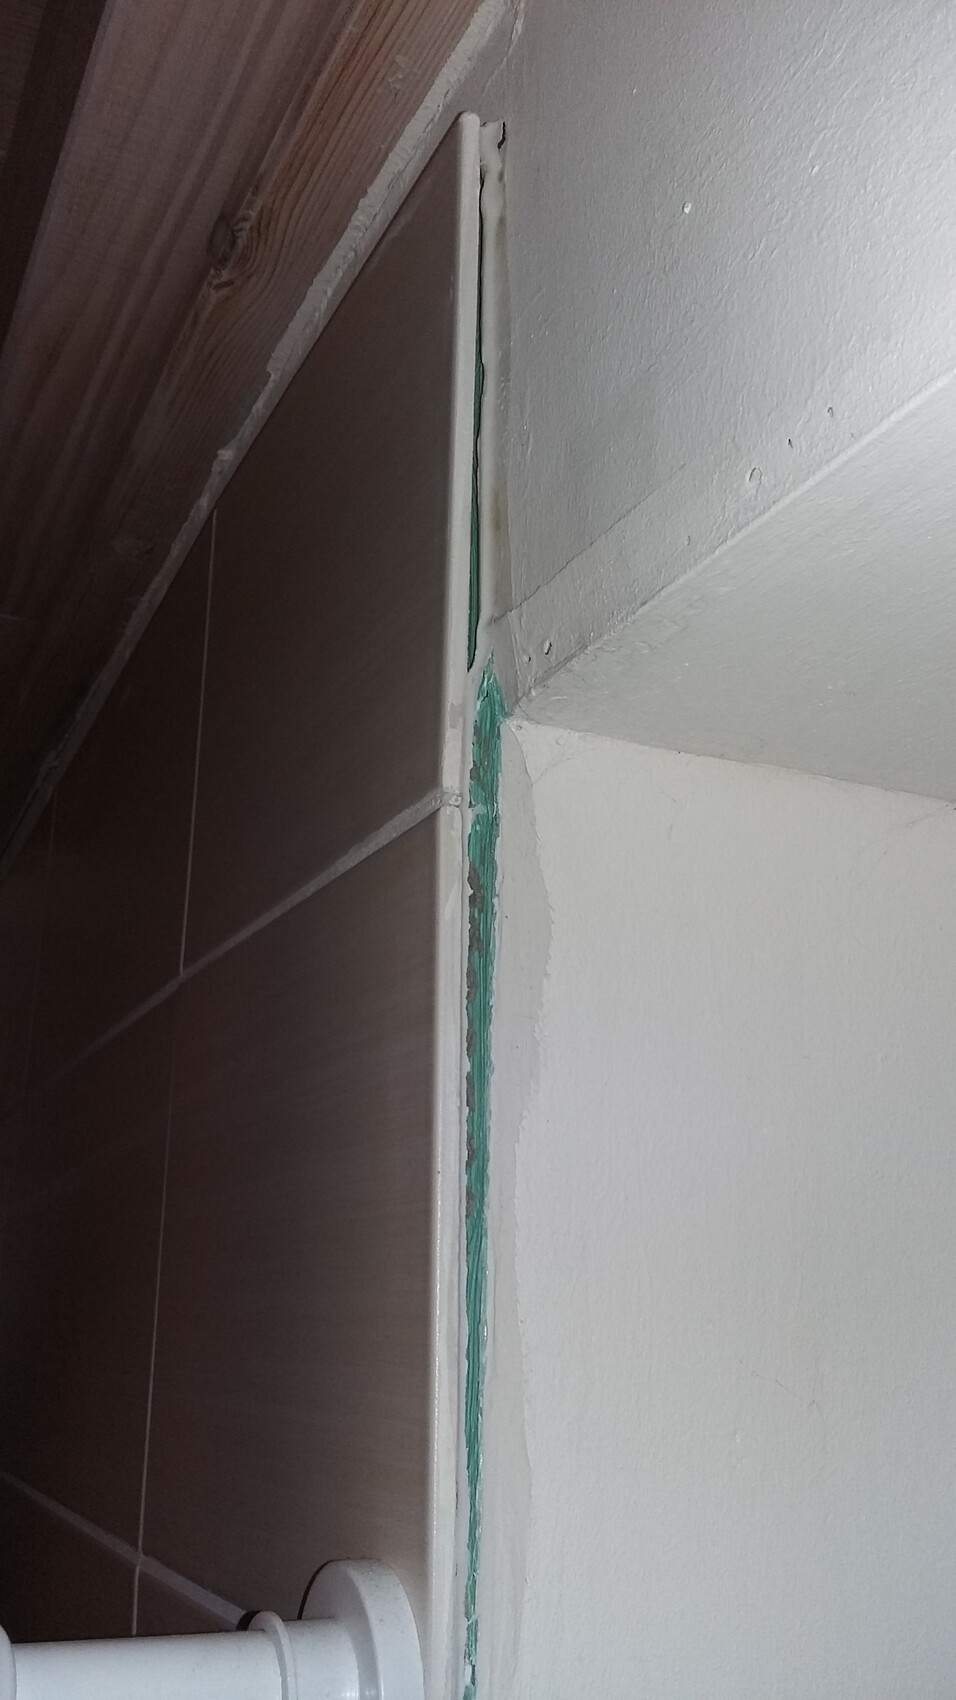
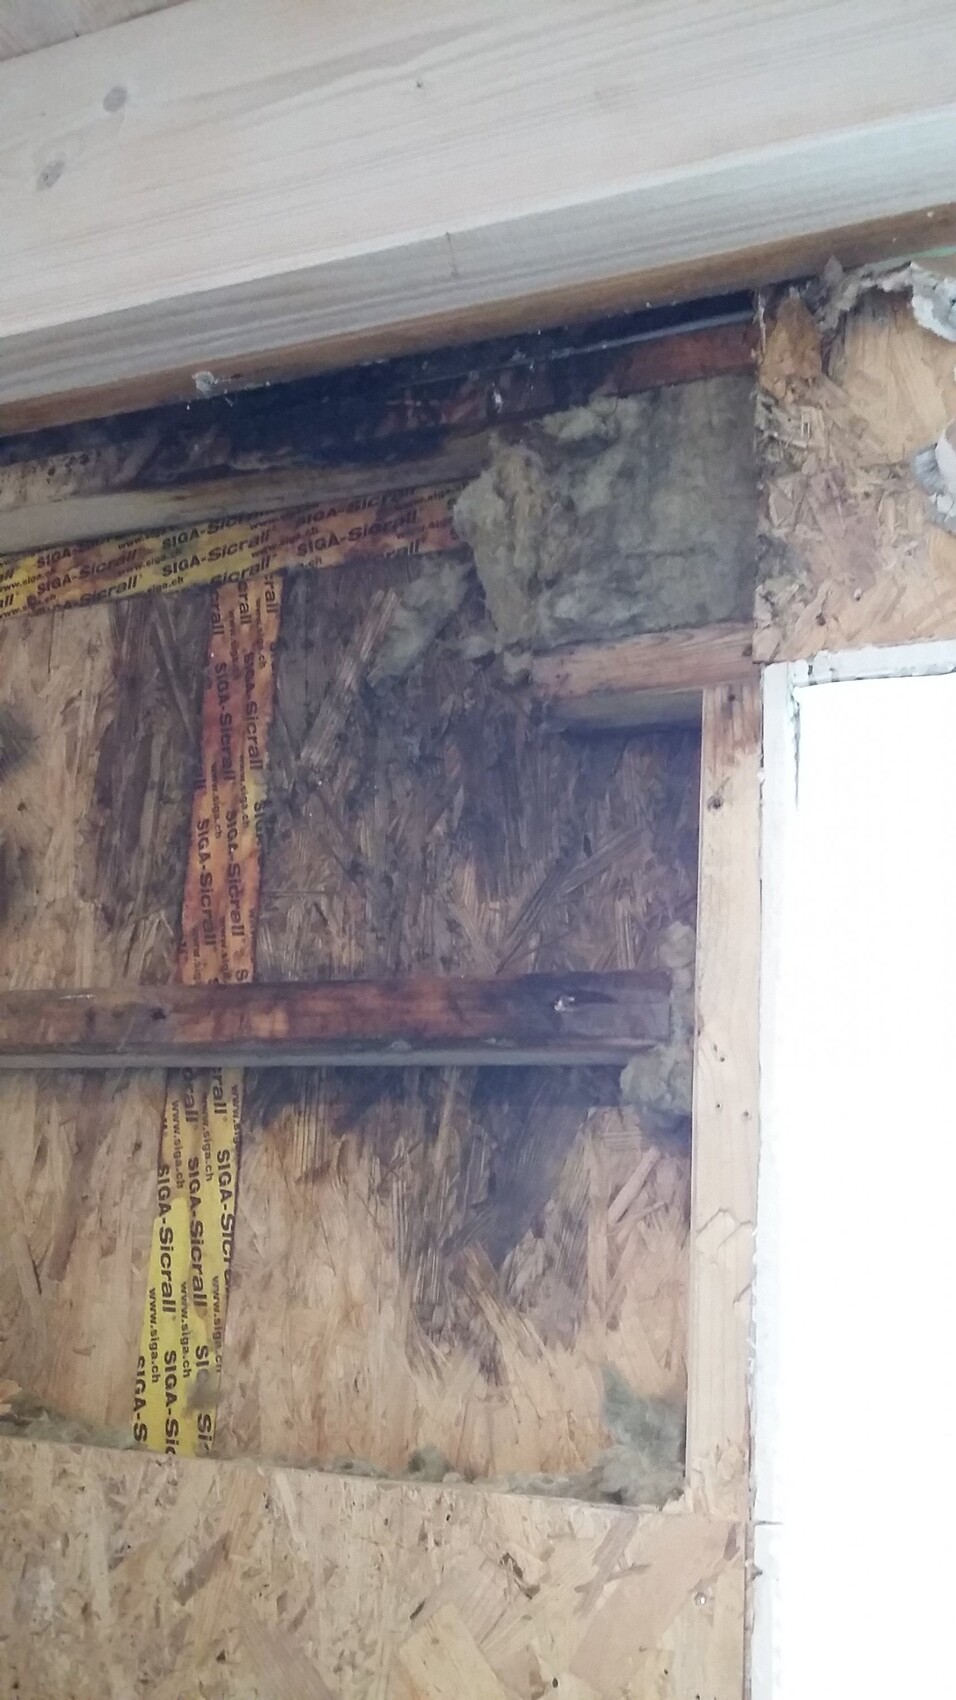
Does anyone here have experience with HSK Renodeco and know the prices?
We have the following situation at our home: We built our house in 2013, timber frame construction, interior walls made of KVH studs, both sides covered with 12mm OSB and 12mm drywall, so far so good.
Last year, water leaked through the shower upstairs, causing tiles on the ground floor to come loose and sections of the wall on both floors had to be repaired. The first shower was not installed professionally; the shower tray was installed first and sealed only with a silicone joint (so no waterproofing membrane, like a sealing tape, between the tray and the wall). Thus, the waterproofing layer applied to the drywall ended at the shower tray. Both the silicone joint at the tray’s installation and the silicone joint of the tiles in front of it eventually cracked, probably because the shower tray was mounted on an adjustable pedestal standing on wooden blocks to compensate for a height of 20cm (8 inches). This setup was probably too unstable, especially since it was an acrylic shower tray and when two people or children showered, the movement and weight caused too much stress on it. As a result, water passed through the leaky silicone joints of the tiles and the tray, reached the exposed, uncoated drywall, and soaked into the wall, eventually seeping down to the ground floor guest bathroom where tiles also detached.
After that, we got a new shower installed, the wall structure had to be replaced, insurance covered everything, so that was good, but still frustrating.
Then, after a few months, it started dripping again downstairs, this time from the visible wooden plank ceiling on the ground floor below the shower. It was then found that the grout joint between the newly tiled lower section and the older tiles above had cracked. The grout was removed and replaced with silicone.
Now, after a few months, it is dripping again in the same spot. Someone came yesterday and we noticed that the grout joints of the old tiles show multiple fine cracks, some up to 50cm (20 inches) long.
In their opinion, this will never be fully resolved because the wooden structure behind is too flexible. I found that surprising since they should have realized this problem years ago if it’s known that such constructions tend to have issues. Then maybe the wet room should not have been tiled in the first place. (By the way, I now know that cement-based boards, not moisture-resistant drywall, are actually recommended for wet rooms.)
Their suggestion is to cover the existing tiled surfaces with 3mm (1/8 inch) aluminum composite panels from HSK Renodeco, glued directly onto the tiles, creating a seamless surface with large-format panels. That would be a reliable and aesthetically pleasing solution, which I agree with. However, to maintain a consistent overall look, all tiled surfaces would need to be covered with HSK Renodeco panels, about 15 sqm (160 sq ft), costing 4800 euros *uff*.
So now to ask you all: What do you think? Has anyone worked with aluminum composite panels like these, or had similar problems? Are there alternative solutions you would recommend? Sure, one could remove and redo the grout every year, which might be cheaper over a lifetime but certainly more labor-intensive...
Attached are some photos of the first damage/water leakage, the second leakage, and a photo of a grout crack.
N
nordanney10 Oct 2018 11:36How is it possible that the walls are moving so much? Your entire house would then have to look like this, with cracks in the walls...
Perhaps the moisture-resistant boards were not installed offset on the OSB panels?
Could it be that you have a fundamental issue with the shower installation or the wall preparation? You can easily use drywall in the bathroom if it is done properly. It is just as effective as plaster or other types of boards.
For example, why weren’t the walls treated with a waterproof membrane? That would already make the walls completely secure.
For the shower tray, there are installation frames with integrated drains that can collect water in case of leakage and direct it safely to the drain.
Perhaps the moisture-resistant boards were not installed offset on the OSB panels?
Could it be that you have a fundamental issue with the shower installation or the wall preparation? You can easily use drywall in the bathroom if it is done properly. It is just as effective as plaster or other types of boards.
For example, why weren’t the walls treated with a waterproof membrane? That would already make the walls completely secure.
For the shower tray, there are installation frames with integrated drains that can collect water in case of leakage and direct it safely to the drain.
N
Nordlichtchen10 Oct 2018 12:01I have no idea. I only know that the walls were initially coated with a green latex membrane applied in two layers. The already renovated area was treated with a different coating, including sealing tapes in the edges and corners, as well as a wide sealing tape between the shower tray and the wall.
I'm actually surprised that water manages to reach the floorboards, since despite cracked joints, it should hit the sealed drywall, run down there, and meet the sealed shower tray, where it should be stopped. Somehow, though, it finds a way around it. At first, I suspected the shower drain wasn't installed correctly, but that's not the case (because the droplets visible from the ground floor are mostly in the center and not along the wall side).
If I had known we'd have so many problems, I would have installed a fully enclosed shower cubicle (basically a one-piece shower like a phone booth) that has only water supply connections and one connection for the drain.
I'm actually surprised that water manages to reach the floorboards, since despite cracked joints, it should hit the sealed drywall, run down there, and meet the sealed shower tray, where it should be stopped. Somehow, though, it finds a way around it. At first, I suspected the shower drain wasn't installed correctly, but that's not the case (because the droplets visible from the ground floor are mostly in the center and not along the wall side).
If I had known we'd have so many problems, I would have installed a fully enclosed shower cubicle (basically a one-piece shower like a phone booth) that has only water supply connections and one connection for the drain.
Similar topics