
Hello everyone,
Unfortunately, I had a leak in the welded joint of the PPR pipe supplying water in my bathroom, which caused water damage. This meant having to painstakingly remove and sand the old tiles and adhesive, reseal with PCI Lastogum, install a drainage channel, and now I’m currently cutting and laying tiles, which brings me to the problem area. To be clear, I’m not a professional tiler and would have really preferred to leave this to an expert, but the quotes for the 4 wall tiles plus 2 floor tiles were outrageous (despite having the materials: porcelain stoneware + PCI Nanolight) — around 2,000 euros. So I have to do it myself, since unfortunately I don’t have a money tree yet.
So far, the project has gone okay: I have cut and deburred the tiles and roughly laid them out.
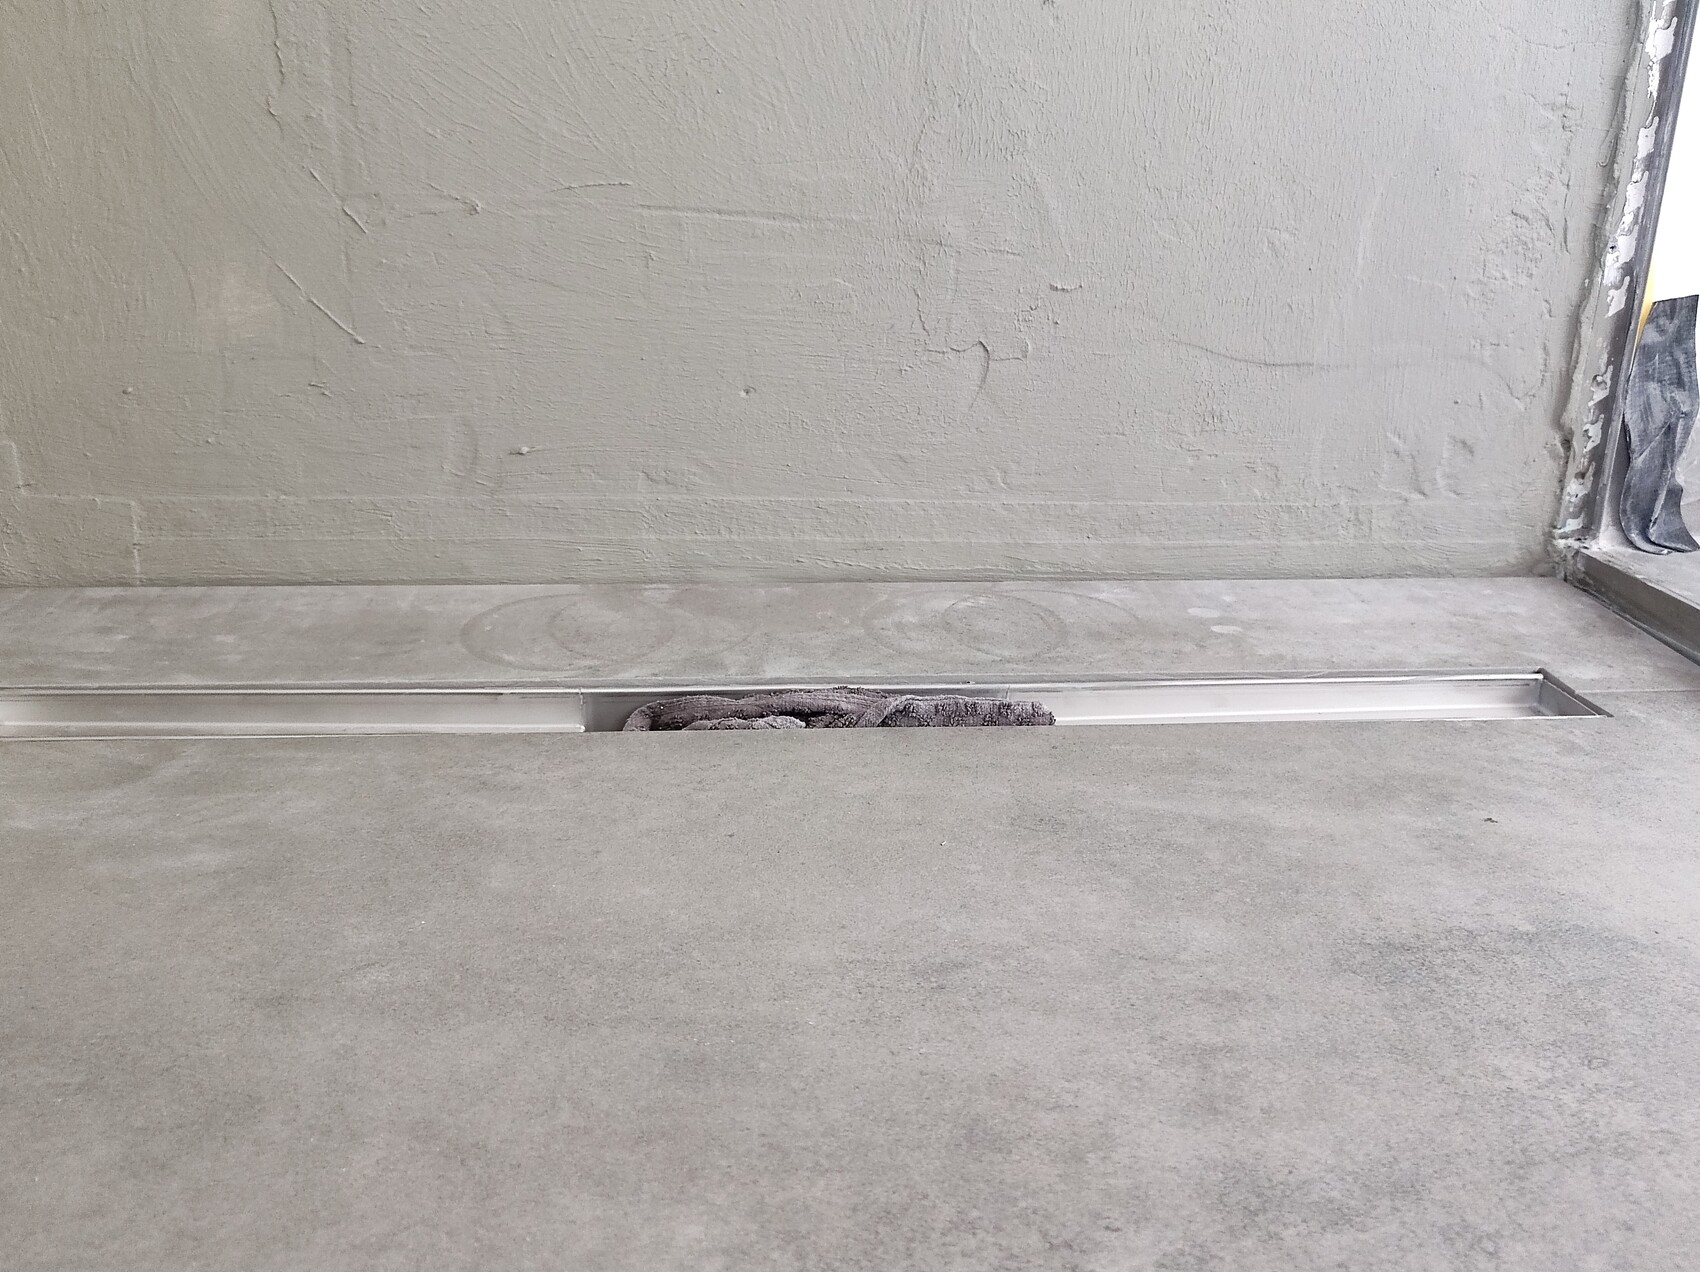
Unfortunately, I then noticed that the porcelain stoneware, despite being first quality and calibrated, has a slight crown in the middle of about 4mm (0.16 inches) upwards.
I’ve tried to illustrate this for you.
My question now is: is there a way to compensate for this warp in the tile? When I press down on the tile in the middle, it moves down… Does this work in practice — if I push the tile down while the adhesive dries, will it permanently stay flat, or is it only a matter of time before it warps upwards again due to internal stresses?
I would really appreciate any tips... I bought 6 tiles from different batches and all have this warping. Unfortunately, these tiles are the remaining ones from the rest of the apartment, so I can’t just swap them out, and using different tiles would look bad.
Best regards.
For your information, the tiles are only roughly laid out, and the Lastogum you see is the new layer, with another layer of Lastogum underneath that continues beneath the angle profiles.
Unfortunately, I had a leak in the welded joint of the PPR pipe supplying water in my bathroom, which caused water damage. This meant having to painstakingly remove and sand the old tiles and adhesive, reseal with PCI Lastogum, install a drainage channel, and now I’m currently cutting and laying tiles, which brings me to the problem area. To be clear, I’m not a professional tiler and would have really preferred to leave this to an expert, but the quotes for the 4 wall tiles plus 2 floor tiles were outrageous (despite having the materials: porcelain stoneware + PCI Nanolight) — around 2,000 euros. So I have to do it myself, since unfortunately I don’t have a money tree yet.
So far, the project has gone okay: I have cut and deburred the tiles and roughly laid them out.
Unfortunately, I then noticed that the porcelain stoneware, despite being first quality and calibrated, has a slight crown in the middle of about 4mm (0.16 inches) upwards.
I’ve tried to illustrate this for you.
My question now is: is there a way to compensate for this warp in the tile? When I press down on the tile in the middle, it moves down… Does this work in practice — if I push the tile down while the adhesive dries, will it permanently stay flat, or is it only a matter of time before it warps upwards again due to internal stresses?
I would really appreciate any tips... I bought 6 tiles from different batches and all have this warping. Unfortunately, these tiles are the remaining ones from the rest of the apartment, so I can’t just swap them out, and using different tiles would look bad.
Best regards.
For your information, the tiles are only roughly laid out, and the Lastogum you see is the new layer, with another layer of Lastogum underneath that continues beneath the angle profiles.

Hello questioner.
By warping, we mean an uplift or a convex deformation. This occurs either in the middle of the material or along the edges.
In the case of ceramic tiles, this deformation would already be inherent in the tile itself, thus a material property incorporated during manufacturing.
Such a convex deformation cannot be corrected if it is caused solely by the tile itself.
Applying surface pressure during the uncured state of the tile adhesive will only cause the tile with a central (convex) deformation to sit deeper, but the edges will then lower to the extent that water would remain standing there.
I suspect the problem has been described incorrectly.
Generally speaking:
In practice, it may be necessary to hold a freshly set tile in the desired position with a weight until the adhesive cures. However, this is not the usual case.
This only applies if the elastic substrate (waterproofing) was applied with a noticeably compressible thickness.
This can be ruled out with Lastogum (recommended minimum dry film thickness of 2 x 0.5mm = 1.0mm (0.02 inches)).
------------------
Regards, KlaRa
By warping, we mean an uplift or a convex deformation. This occurs either in the middle of the material or along the edges.
In the case of ceramic tiles, this deformation would already be inherent in the tile itself, thus a material property incorporated during manufacturing.
Such a convex deformation cannot be corrected if it is caused solely by the tile itself.
Applying surface pressure during the uncured state of the tile adhesive will only cause the tile with a central (convex) deformation to sit deeper, but the edges will then lower to the extent that water would remain standing there.
I suspect the problem has been described incorrectly.
Generally speaking:
In practice, it may be necessary to hold a freshly set tile in the desired position with a weight until the adhesive cures. However, this is not the usual case.
This only applies if the elastic substrate (waterproofing) was applied with a noticeably compressible thickness.
This can be ruled out with Lastogum (recommended minimum dry film thickness of 2 x 0.5mm = 1.0mm (0.02 inches)).
------------------
Regards, KlaRa
Thank you for the quick response.
If I understand correctly, I have to accept the tile deformation? It really looks quite bad, I would have really liked to achieve a straight/clean edge at the (expensive) drainage channel… once again you can see how much advertising samples and reality differ from each other.
If I understand correctly, I have to accept the tile deformation? It really looks quite bad, I would have really liked to achieve a straight/clean edge at the (expensive) drainage channel… once again you can see how much advertising samples and reality differ from each other.
You also have to consider the following: the photograph is actually meaningless (sorry).
Simply place a tile on the finished side, put a flat but straight metal bar over it, and then position a ruler in the middle to identify any possible warping of the surface (and its extent).
Then do the same, but with the back side facing down and the metal bar on the finished side.
This way, it becomes clear what is actually wrong with the tile.
The accompanying texts, in any case, do not allow any conclusions about the actual condition.
Regards, KlaRa
Simply place a tile on the finished side, put a flat but straight metal bar over it, and then position a ruler in the middle to identify any possible warping of the surface (and its extent).
Then do the same, but with the back side facing down and the metal bar on the finished side.
This way, it becomes clear what is actually wrong with the tile.
The accompanying texts, in any case, do not allow any conclusions about the actual condition.
Regards, KlaRa
Tommi27 schrieb:
Is the channel installed completely level? There’s really quite a large overhang. Try pulling it down with the installation system. 😉Yes, it is fully supported with mortar; I was very careful with that since it cost 400 Euros -.- (ESS Drain Compact). The leveling system doesn’t work this way because there is no point on the channel where the leveling eyes could grip. I already considered that, but it’s basically the same as placing something heavy on top of the channel and letting the adhesive cure (solid iron or similar…).
But I want to know if this is acceptable, or if I should expect the tile to eventually bend upward again and detach from the adhesive.
KlaRa schrieb:
You also have to consider this: the photograph itself doesn’t really show much (sorry). Just put a tile on the usable side, place a flat but straight metal piece on top, and then position a ruler in the middle to check for any overall deformation (and how big it is). Then do the same with the back side down and the metal piece on the usable side. This way, you can see what is actually going on with the tile. The related texts don’t allow any conclusions about the actual condition.
Regards, KlaRaI’ve tried to capture that visually, but it’s not possible… when I put a 60cm (24 inch) spirit level in the middle of the tile and then tap the level on the right or left side, it rocks back and forth… that’s the mentioned warping. At the highest point in the middle, it’s about 3–4mm (0.1–0.15 inches) of elevation.
It just looks as bad as you can see in the picture, since I can’t get a straight edge across the full width of the channel.
Similar topics