
ᐅ Preserving the vapor retarder without an installation cavity
Created on: 20 Apr 2020 15:35
W
WurstsalatW
Wurstsalat20 Apr 2020 15:35Hello everyone,
We are currently building, and “tear down and start over” is not really an option. The problem is as follows:
- Electrical installation within the exterior wall
- Preservation of the vapor barrier
- Wall structure is vapor permeable
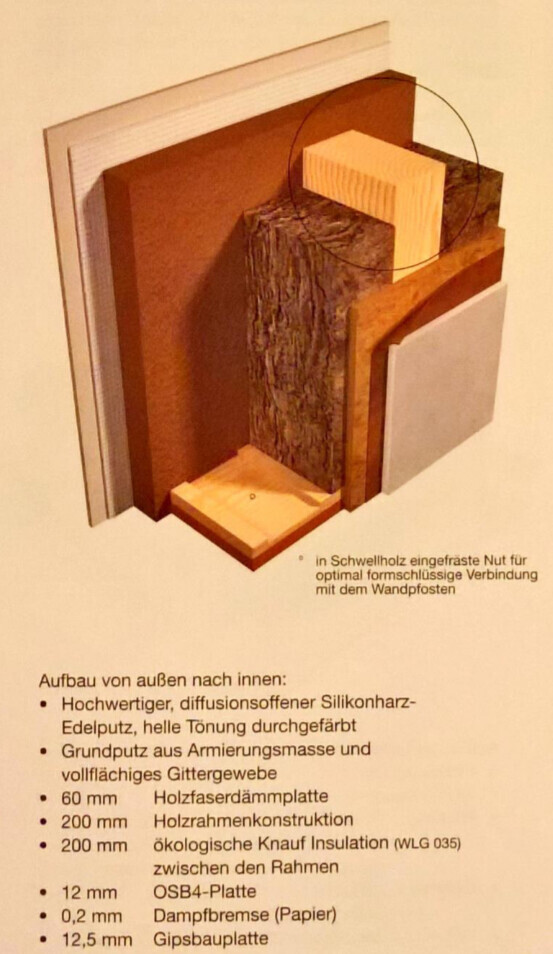
As you can see, there is no dedicated installation cavity, but there are prefabricated cable channels within the exterior walls.
- After consulting with the site manager, it is allowed to “break out” some parts of the channels (more pictures coming)
- Only airtight electrical boxes will be used
- I will be doing the electrical wiring myself
- The cable channels in the exterior walls are closed at the back and sides by wooden beams or OSB panels
In reality, it looks like this:
- Wall entry point
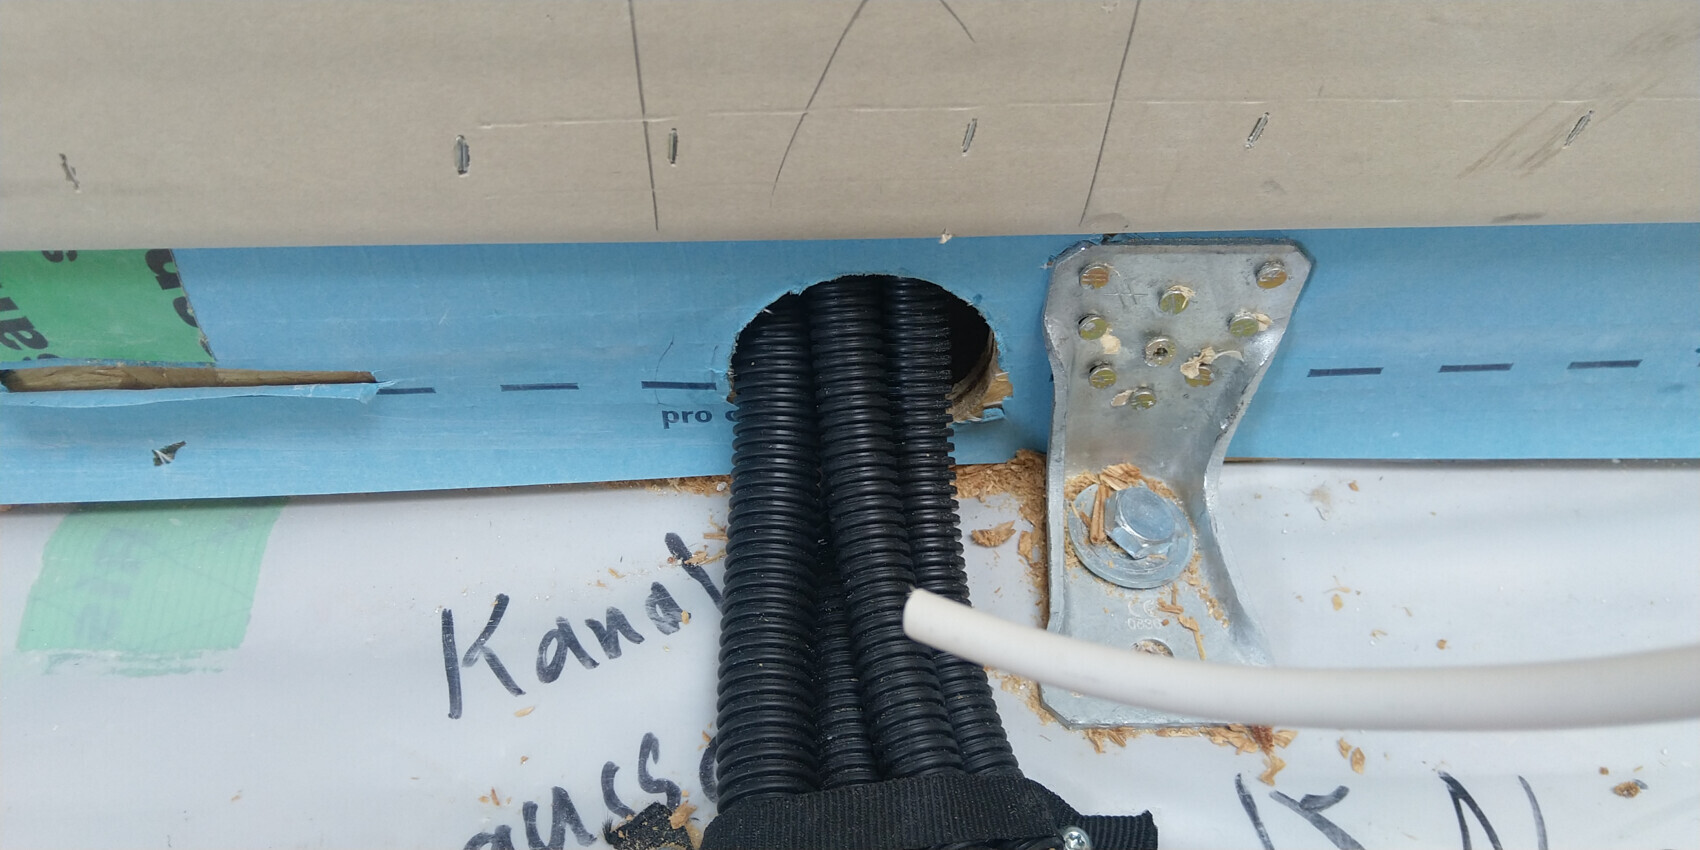
- “Breakout” from the cable channel due to the number of boxes
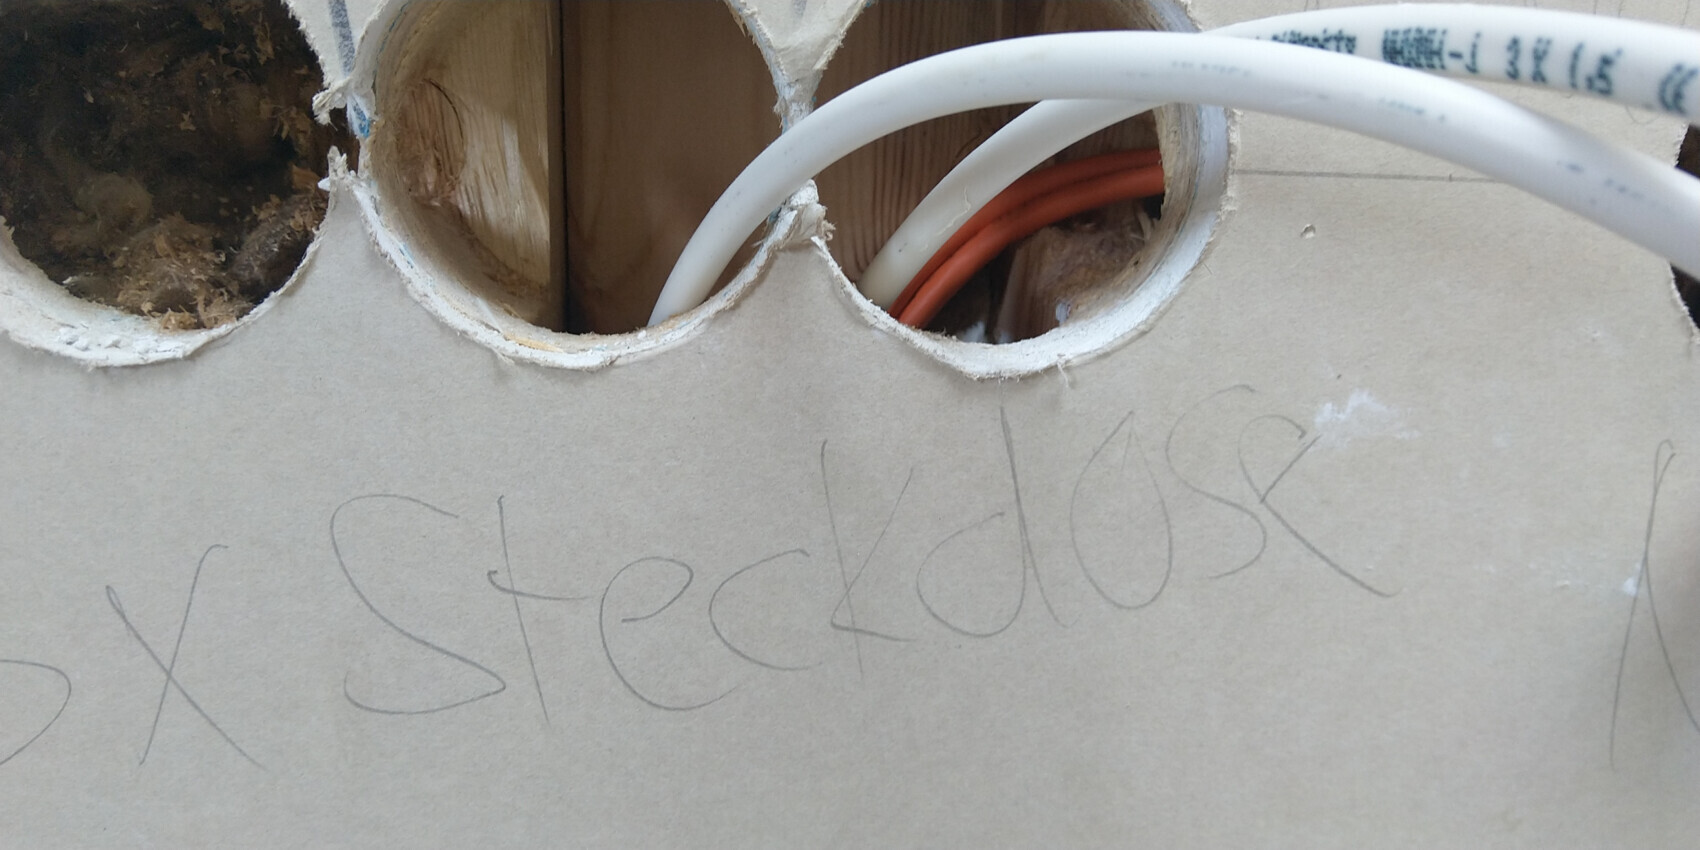
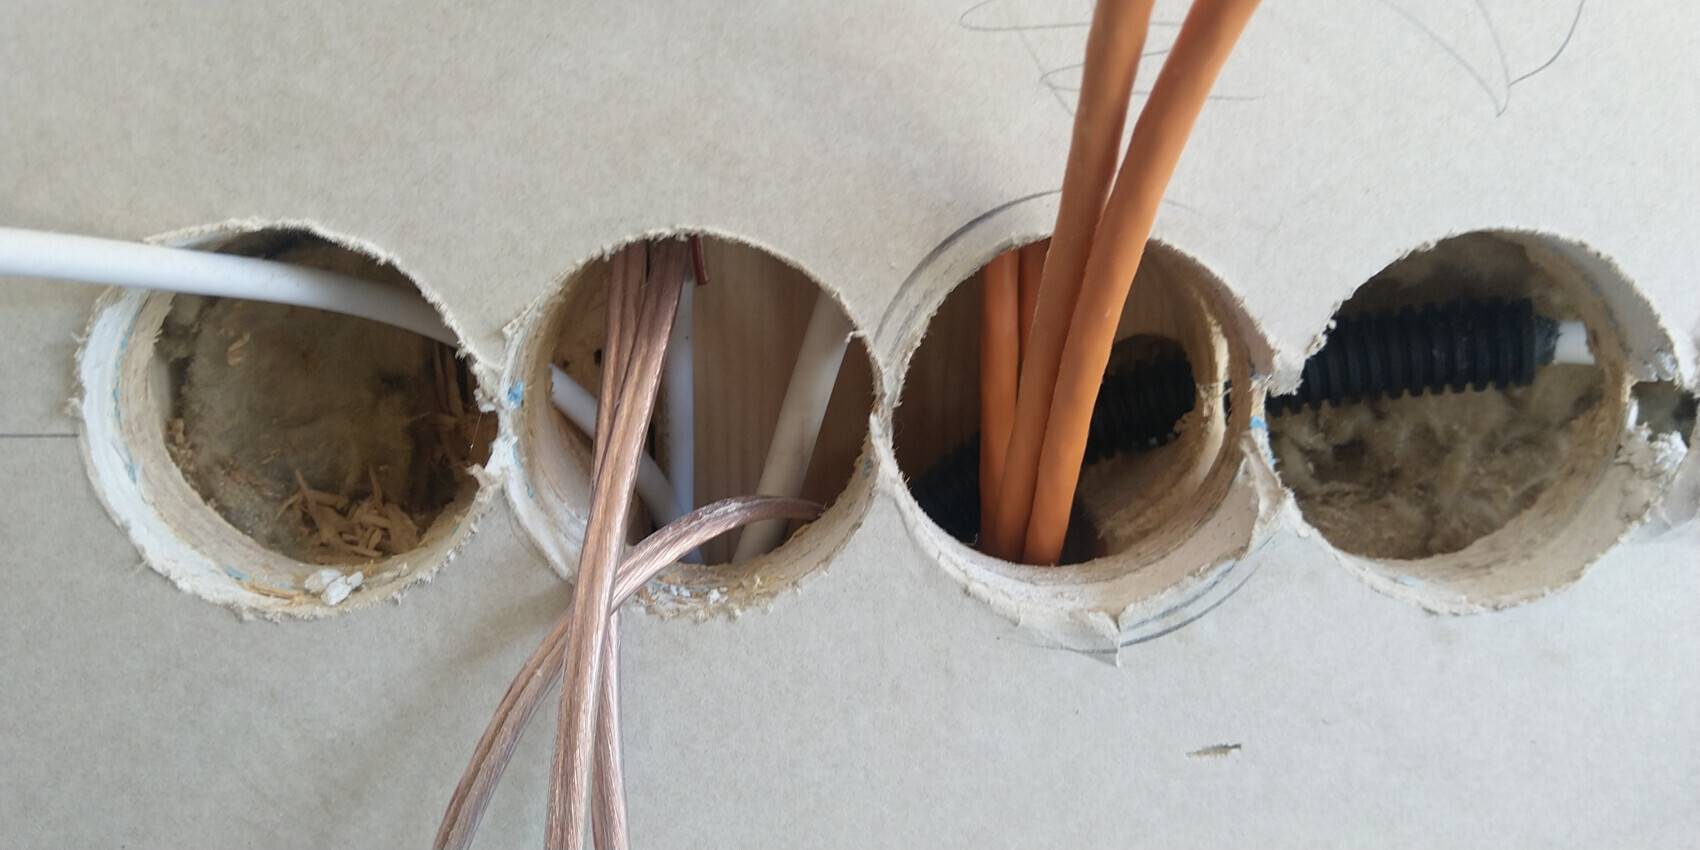
This "breakout" from the cable channel does not occur frequently, but it does happen. Additionally, there are cases where two boxes are next to each other, and they fit inside the cable channel without me having to break out of the channel (i.e., I only cut into the “guide beam”).
Now, the cable channel itself is not necessarily part of the vapor barrier for me, because there are some spots where the “guide beams” (that’s what I call the vertical battens which are not load-bearing) do not directly touch the OSB panel inside… since everything was stapled, nothing was pulled tight against the wall.
So my question is: how do I properly seal the necessarily interrupted vapor barrier? According to the site manager, the wall penetrations should simply be foamed shut with expanding foam and otherwise just airtight boxes used, and everything will be fine. However, that does not seem correct to me. Honestly, so much has gone wrong in our build that I have some doubts about that advice.
On the other hand, I can't really fill all the channel entries completely with something like Isover DoubleFit, because I would easily need a whole cartridge of foam for each penetration to seal it around.
My plan was to seal the box openings additionally around the edges with DoubleFit (or similar foam) and then push in the airtight boxes (yes, they will stay put where they are).
For drilled holes or wall fixings, I intend to also fill the drilled hole with DoubleFit (or similar) and then insert a wall plug or, where possible, attach the fixture to a vertical batten.
Does anyone have other recommendations? Is there a specific foam or something similar that you would recommend for this? Are there any especially suitable products?
Thanks in advance!
Best regards
We are currently building, and “tear down and start over” is not really an option. The problem is as follows:
- Electrical installation within the exterior wall
- Preservation of the vapor barrier
- Wall structure is vapor permeable
As you can see, there is no dedicated installation cavity, but there are prefabricated cable channels within the exterior walls.
- After consulting with the site manager, it is allowed to “break out” some parts of the channels (more pictures coming)
- Only airtight electrical boxes will be used
- I will be doing the electrical wiring myself
- The cable channels in the exterior walls are closed at the back and sides by wooden beams or OSB panels
In reality, it looks like this:
- Wall entry point
- “Breakout” from the cable channel due to the number of boxes
This "breakout" from the cable channel does not occur frequently, but it does happen. Additionally, there are cases where two boxes are next to each other, and they fit inside the cable channel without me having to break out of the channel (i.e., I only cut into the “guide beam”).
Now, the cable channel itself is not necessarily part of the vapor barrier for me, because there are some spots where the “guide beams” (that’s what I call the vertical battens which are not load-bearing) do not directly touch the OSB panel inside… since everything was stapled, nothing was pulled tight against the wall.
So my question is: how do I properly seal the necessarily interrupted vapor barrier? According to the site manager, the wall penetrations should simply be foamed shut with expanding foam and otherwise just airtight boxes used, and everything will be fine. However, that does not seem correct to me. Honestly, so much has gone wrong in our build that I have some doubts about that advice.
On the other hand, I can't really fill all the channel entries completely with something like Isover DoubleFit, because I would easily need a whole cartridge of foam for each penetration to seal it around.
My plan was to seal the box openings additionally around the edges with DoubleFit (or similar foam) and then push in the airtight boxes (yes, they will stay put where they are).
For drilled holes or wall fixings, I intend to also fill the drilled hole with DoubleFit (or similar) and then insert a wall plug or, where possible, attach the fixture to a vertical batten.
Does anyone have other recommendations? Is there a specific foam or something similar that you would recommend for this? Are there any especially suitable products?
Thanks in advance!
Best regards
W
Wurstsalat20 Apr 2020 15:49Additional note
In reality, it looks like this:
- Wall penetration
-> As you can see, the paper is often damaged at the lower part, which the builder wouldn’t do. However, I will extend the fiberglass-reinforced plastic (FRP) further down towards the floor and stick the blue paper to the membrane underneath (the interior finishing is largely DIY anyway). In the right picture, you can see on the left the approach I’m taking—does this make sense? According to the builder, the actual vapor barrier is the OSB board, and the paper is only an additional layer, but somehow I need to make the penetration airtight.

In reality, it looks like this:
- Wall penetration
-> As you can see, the paper is often damaged at the lower part, which the builder wouldn’t do. However, I will extend the fiberglass-reinforced plastic (FRP) further down towards the floor and stick the blue paper to the membrane underneath (the interior finishing is largely DIY anyway). In the right picture, you can see on the left the approach I’m taking—does this make sense? According to the builder, the actual vapor barrier is the OSB board, and the paper is only an additional layer, but somehow I need to make the penetration airtight.
Similar topics