
ᐅ Vertical strip parquet – Are the joints properly filled? Is the sanding done correctly?
Created on: 13 May 2021 19:53
M
moscatoDear everyone,
I hope you can help me. We recently had a new vertical lamella parquet floor installed. It has already been filled, primed, and received one coat of varnish. Tomorrow, the next varnish layer is scheduled.
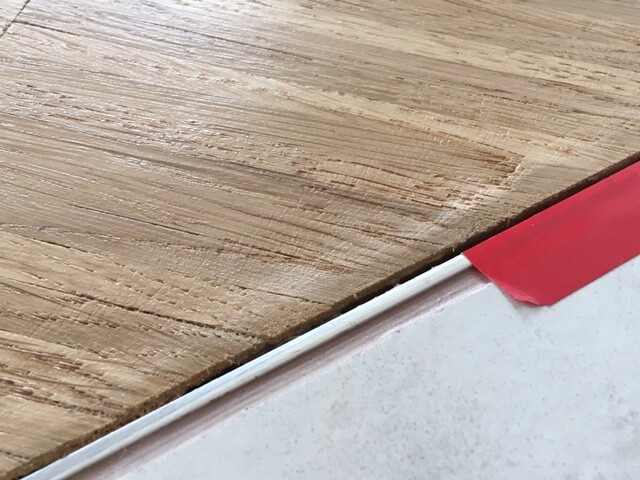
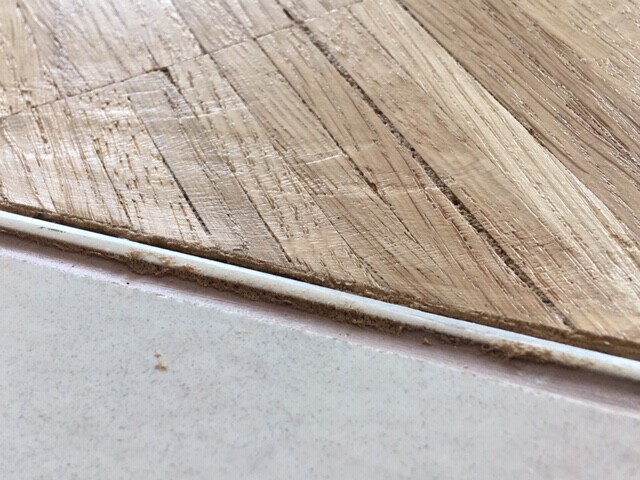
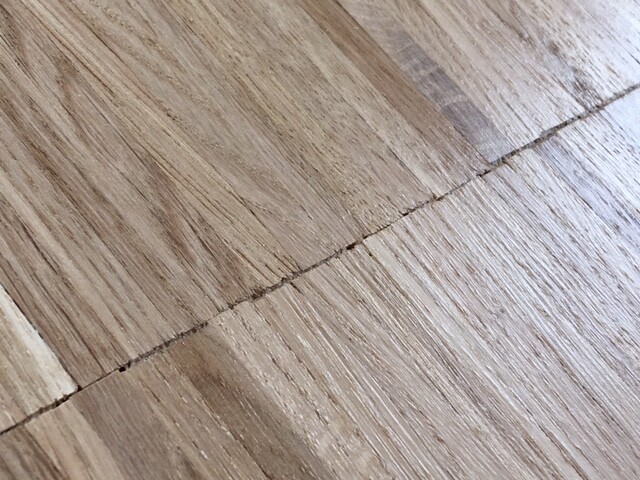
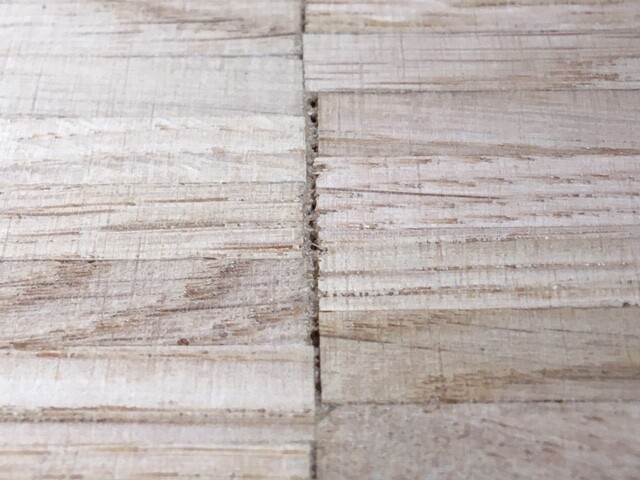
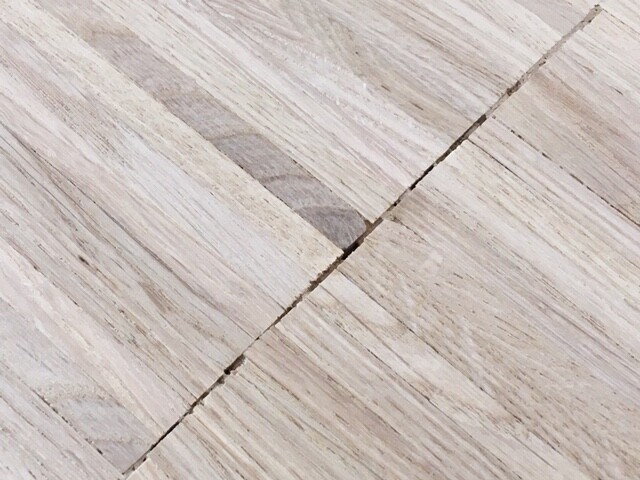
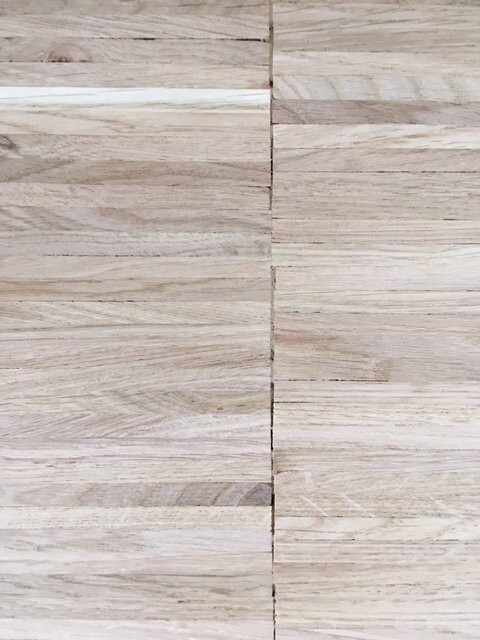
Unfortunately, I have to say that the joints don’t seem properly filled to me. The filler is somewhat “sunken” in the joints and not flush with the top surface of the lamellae. It has created many small canyon-like grooves, and some joints don’t appear to be completely filled. Additionally, the transition to the tiled floor isn’t sanded very well; it looks like a wave pattern of peaks and valleys.
Was it correctly filled this way? Shouldn’t a better result be possible? The same question applies to the sanding. Surely it can be done better, right?
Thanks in advance for your tips and experiences!
Tom




I hope you can help me. We recently had a new vertical lamella parquet floor installed. It has already been filled, primed, and received one coat of varnish. Tomorrow, the next varnish layer is scheduled.
Unfortunately, I have to say that the joints don’t seem properly filled to me. The filler is somewhat “sunken” in the joints and not flush with the top surface of the lamellae. It has created many small canyon-like grooves, and some joints don’t appear to be completely filled. Additionally, the transition to the tiled floor isn’t sanded very well; it looks like a wave pattern of peaks and valleys.
Was it correctly filled this way? Shouldn’t a better result be possible? The same question applies to the sanding. Surely it can be done better, right?
Thanks in advance for your tips and experiences!
Tom

Please upload images that show the overall situation. Always these "meaningless" close-up shots :-(
The third picture looks to me as if the apprentice got a bit carried away with the sander; I can’t explain the sanding marks any other way.
If I were doing it myself, I would follow my carpenter’s recommendation and fill the joints with a paste made from the sanding dust of the floor mixed with the finish to be applied. Alternatively, a certified filler could be used. Here, it looks like the filler has shrunk and therefore settled into the joint. Seeing the entire floor (please with good image quality) would certainly help to make a better assessment. Maybe @KlaRa, as a flooring specialist, could take a look as well?
The third picture looks to me as if the apprentice got a bit carried away with the sander; I can’t explain the sanding marks any other way.
If I were doing it myself, I would follow my carpenter’s recommendation and fill the joints with a paste made from the sanding dust of the floor mixed with the finish to be applied. Alternatively, a certified filler could be used. Here, it looks like the filler has shrunk and therefore settled into the joint. Seeing the entire floor (please with good image quality) would certainly help to make a better assessment. Maybe @KlaRa, as a flooring specialist, could take a look as well?
Similar topics