

Hello everyone,
I have a topic again where I’m stuck and hope to benefit from your collective knowledge. Of course, I’ve already done some research online, but I’m still not sure about the right approach.
Our landscaper is unfortunately taking a long time to prepare the quote. So, I thought I might try to install the splatter protection myself.
Our house has a basement. Recently, an external thermal insulation composite system (ETICS) was installed, ending roughly at the top edge of the basement windows. The lowest insulation panels are wedge-shaped, getting narrower toward the bottom. The landscaper said he would use a drainage membrane (dimpled membrane) there.
Question 1: What is the purpose of the drainage membrane? My understanding is that it protects the ETICS from damage by stones?
Question 2: Is the drainage membrane attached to the house somehow? My idea was to extend it slightly lower than the ETICS so that it stays in place due to soil pressure. Does that work? Will a few centimeters be enough?
I only need splatter protection on two sides of the house. On one side, there is already a concrete edge. After installing the drainage membrane, I would fill it with soil, then lay landscaping fabric on top, followed by gravel. On the other side, a new edge needs to be built. For this, I’d like to use existing paving stones.
Question 3: How do I build an edge with paving stones for the splatter protection? Probably best with concrete. How do I do that?
The garages also need splatter protection. There is no ETICS here, and so far, there has been little to no splatter protection. For about 50-60 years, soil has been directly against the garage foundations (or in one garage, there is some very thin insulation attached).
Question 4: Should a drainage membrane be installed at the garages? I don’t see a reason, since there hasn’t been one before.
Well, this turned out to be quite a long message. Oh yes, I’ve also attached photos.
1. Garage
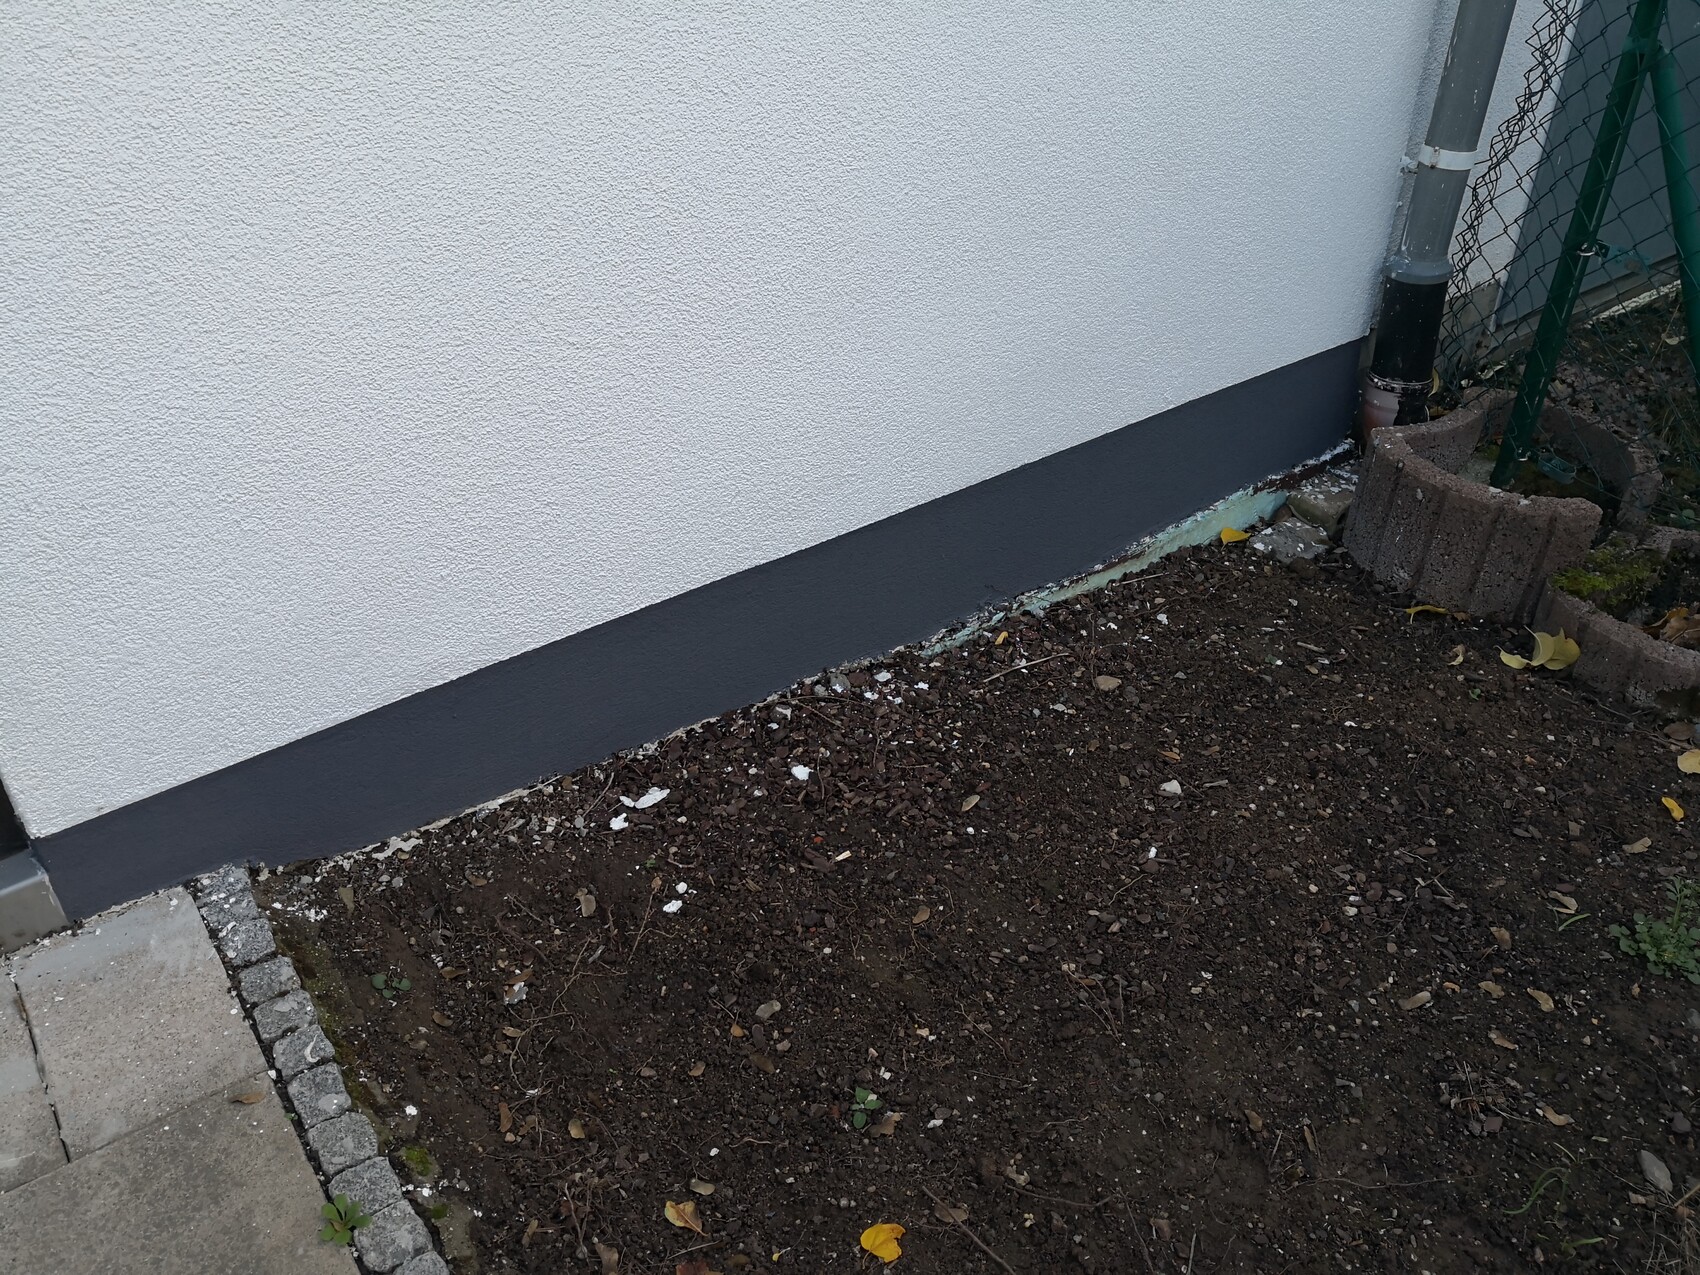
2. House side with existing edge
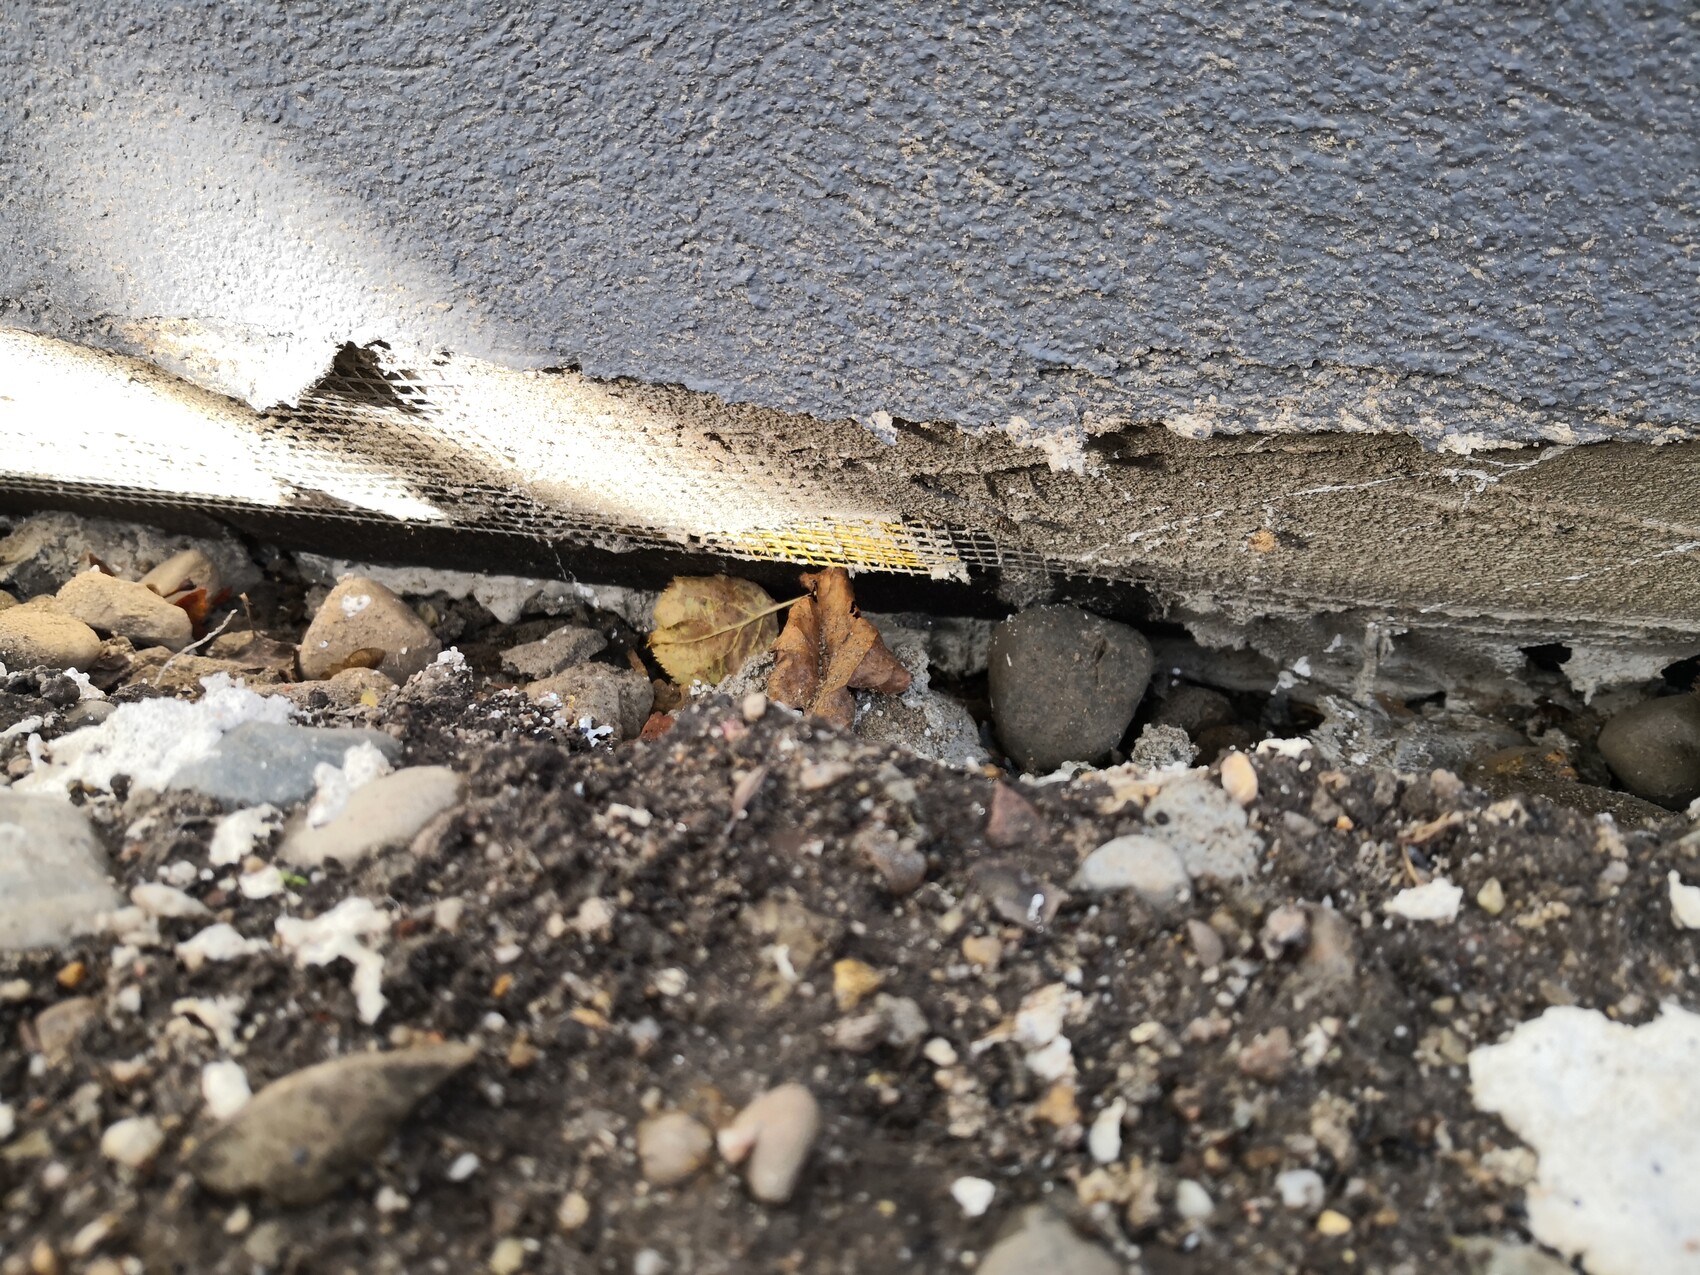
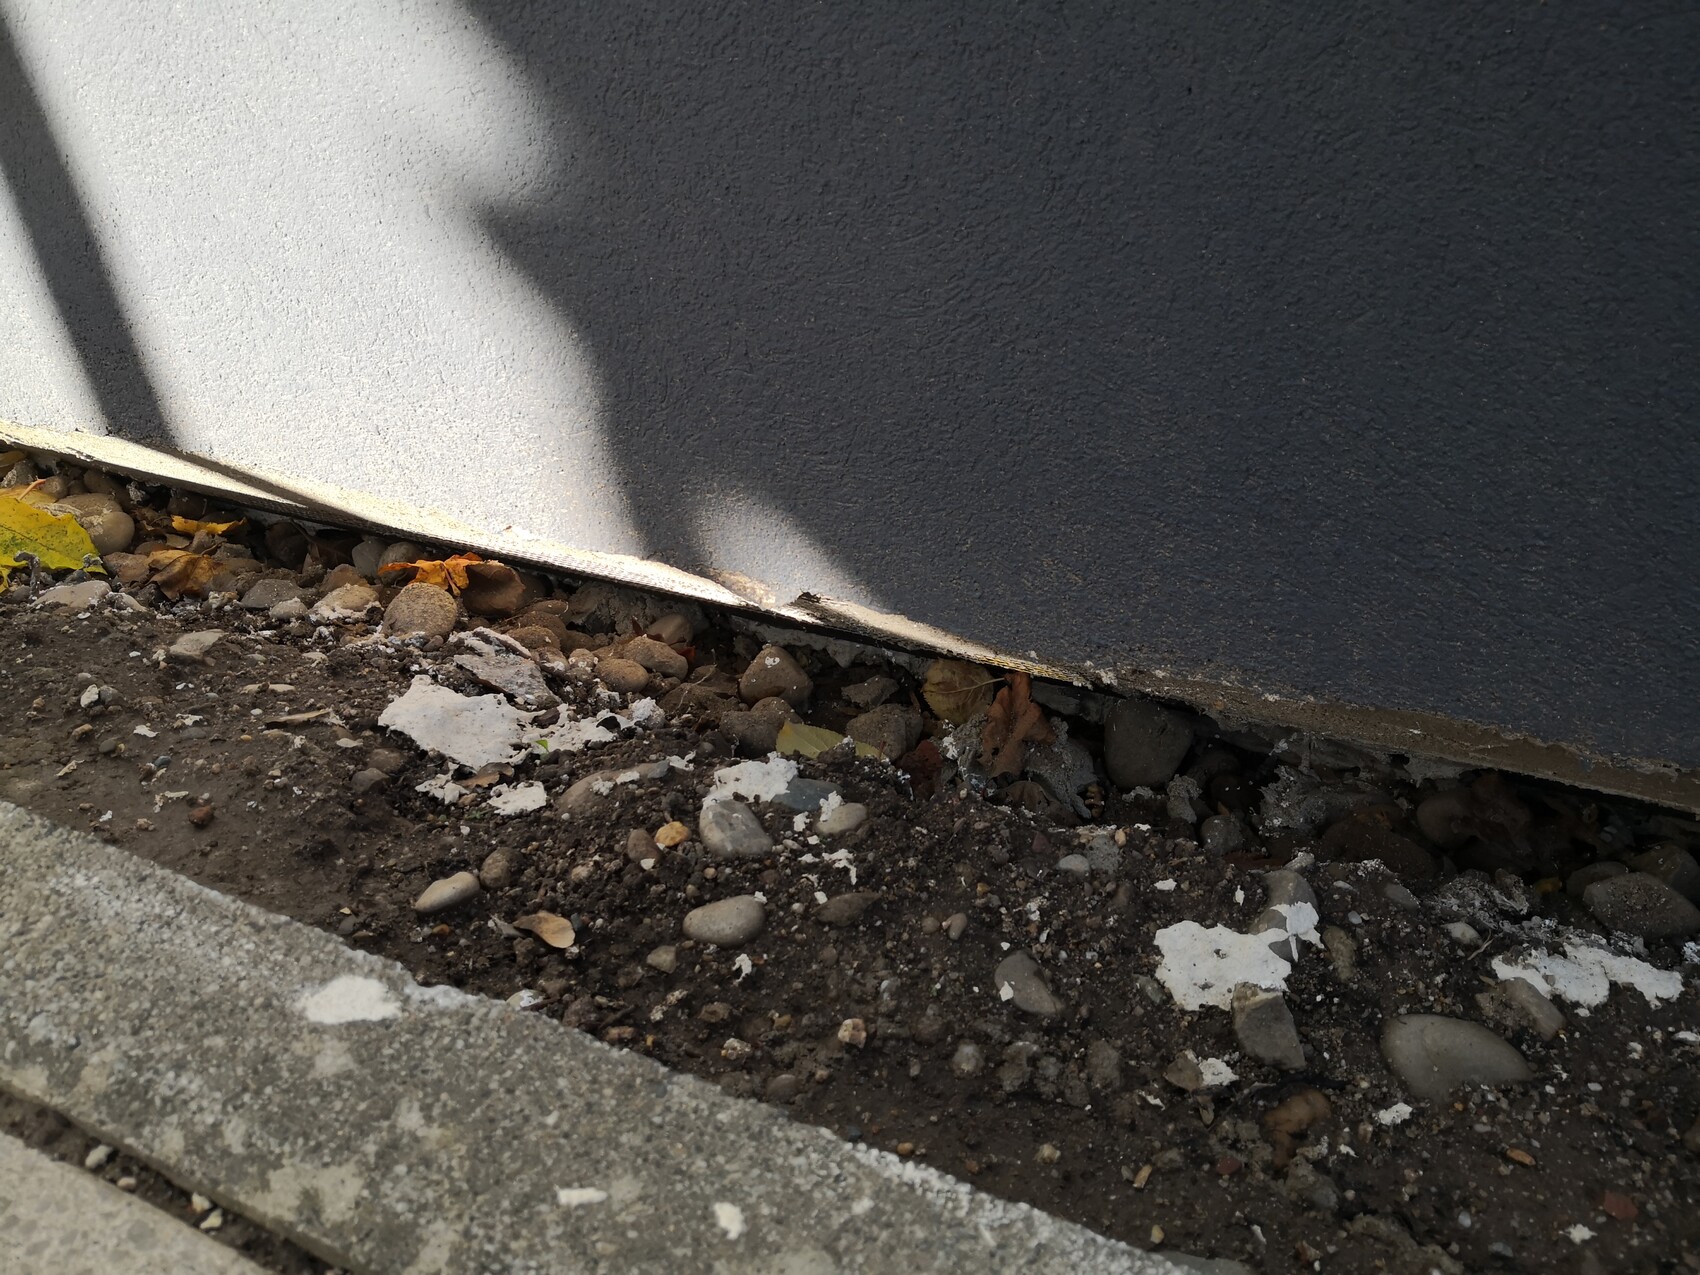
3.+4. With a bit of imagination, you might see the wedge-shaped insulation here.
Thanks in advance to everyone who has read this far!

I have a topic again where I’m stuck and hope to benefit from your collective knowledge. Of course, I’ve already done some research online, but I’m still not sure about the right approach.
Our landscaper is unfortunately taking a long time to prepare the quote. So, I thought I might try to install the splatter protection myself.
Our house has a basement. Recently, an external thermal insulation composite system (ETICS) was installed, ending roughly at the top edge of the basement windows. The lowest insulation panels are wedge-shaped, getting narrower toward the bottom. The landscaper said he would use a drainage membrane (dimpled membrane) there.
Question 1: What is the purpose of the drainage membrane? My understanding is that it protects the ETICS from damage by stones?
Question 2: Is the drainage membrane attached to the house somehow? My idea was to extend it slightly lower than the ETICS so that it stays in place due to soil pressure. Does that work? Will a few centimeters be enough?
I only need splatter protection on two sides of the house. On one side, there is already a concrete edge. After installing the drainage membrane, I would fill it with soil, then lay landscaping fabric on top, followed by gravel. On the other side, a new edge needs to be built. For this, I’d like to use existing paving stones.
Question 3: How do I build an edge with paving stones for the splatter protection? Probably best with concrete. How do I do that?
The garages also need splatter protection. There is no ETICS here, and so far, there has been little to no splatter protection. For about 50-60 years, soil has been directly against the garage foundations (or in one garage, there is some very thin insulation attached).
Question 4: Should a drainage membrane be installed at the garages? I don’t see a reason, since there hasn’t been one before.
Well, this turned out to be quite a long message. Oh yes, I’ve also attached photos.
1. Garage
2. House side with existing edge
3.+4. With a bit of imagination, you might see the wedge-shaped insulation here.
Thanks in advance to everyone who has read this far!
What I noticed when looking at the pictures: in some areas, the external thermal insulation composite system (ETICS) is not fully plastered at the very bottom—the part that will later be underground. Is this a problem?
I also found a picture from Sto showing how it was installed in our case.
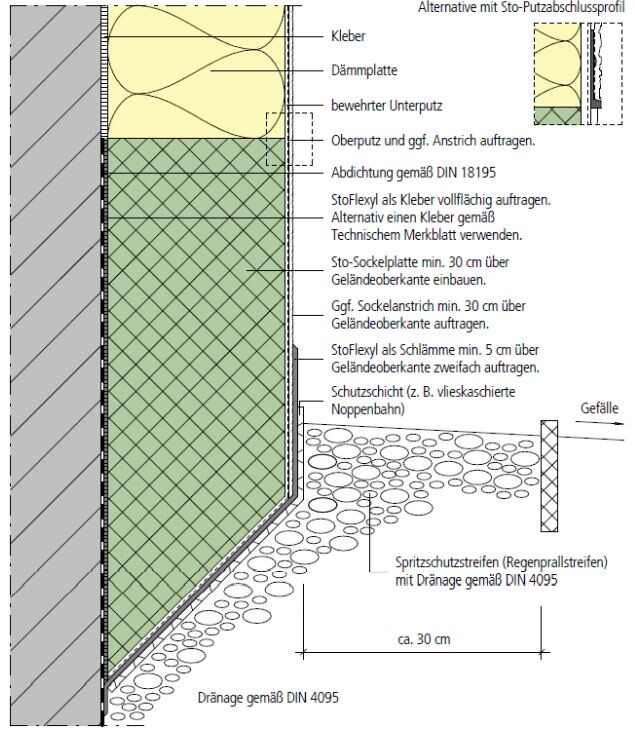
I also found a picture from Sto showing how it was installed in our case.
Pinky0301 schrieb:
What is the purpose of the dimpled membrane? I understand it protects the external thermal insulation composite system (ETICS) from damage caused by stones? Yes, exactly.
Pinky0301 schrieb:
Is the dimpled membrane fixed to the house in any way? My idea was to install it slightly deeper than the ETICS so that it stays in place due to soil pressure. Does that work? Are a few centimeters enough? No, it stays in place by counterpressure.
Pinky0301 schrieb:
Should a dimpled membrane be installed at the garage? You can do without it.
How to do it: Take stones of your choice and place them into lean concrete (magerbeton) or throw lean concrete at an angle onto the stones and tamp it down firmly. It doesn’t require much. You can do this on both sides or just one side.
A rough guideline: 20cm (8 inches) deep, 10cm (4 inches) wide. Create a slope for water drainage.
I wouldn’t be overly cautious here... if the guys around here explain how to do it, they tend to make a huge fuss out of it 😉
Then fill the gaps with gravel, ideally the same material used to make the lean concrete. Finally, cover it with a water-permeable membrane—geotextile fabric is not necessarily required.
It doesn’t matter which way the dimpled membrane is installed; everyone has their own preference.
Tip: If you prefer doing detailed work, stay kneeling near the edges, and your partner can hand you the gravel or lean concrete.
P.S.: Use more material if there is a parking space or similar nearby.
Don’t make the splash guard too narrow if you have the room. A narrow strip looks cheap.

Pinky0301 schrieb:
What I notice when looking at the pictures: Part of the ETICS at the very bottom is not fully plastered. I mean the section that will later be below ground level. Is that a problem?Yes, moisture can penetrate there. You should fill it in (as also shown in the STO image) and apply a waterproofing slurry.
Similar topics