ᐅ Which type of flooring is recommended for a utility room with a screed base – DIY options or tiles?
Created on: 24 Feb 2023 10:32
J
Jurassic135
Hello everyone,
In our house, built in 2007, the utility room only has the bare screed floor. The original builders probably cut costs and just left it like that.
The room is just under 7 square meters (about 75 square feet) and, as usual, besides the technical installations, it also houses the washing machine, dryer, and freezer.
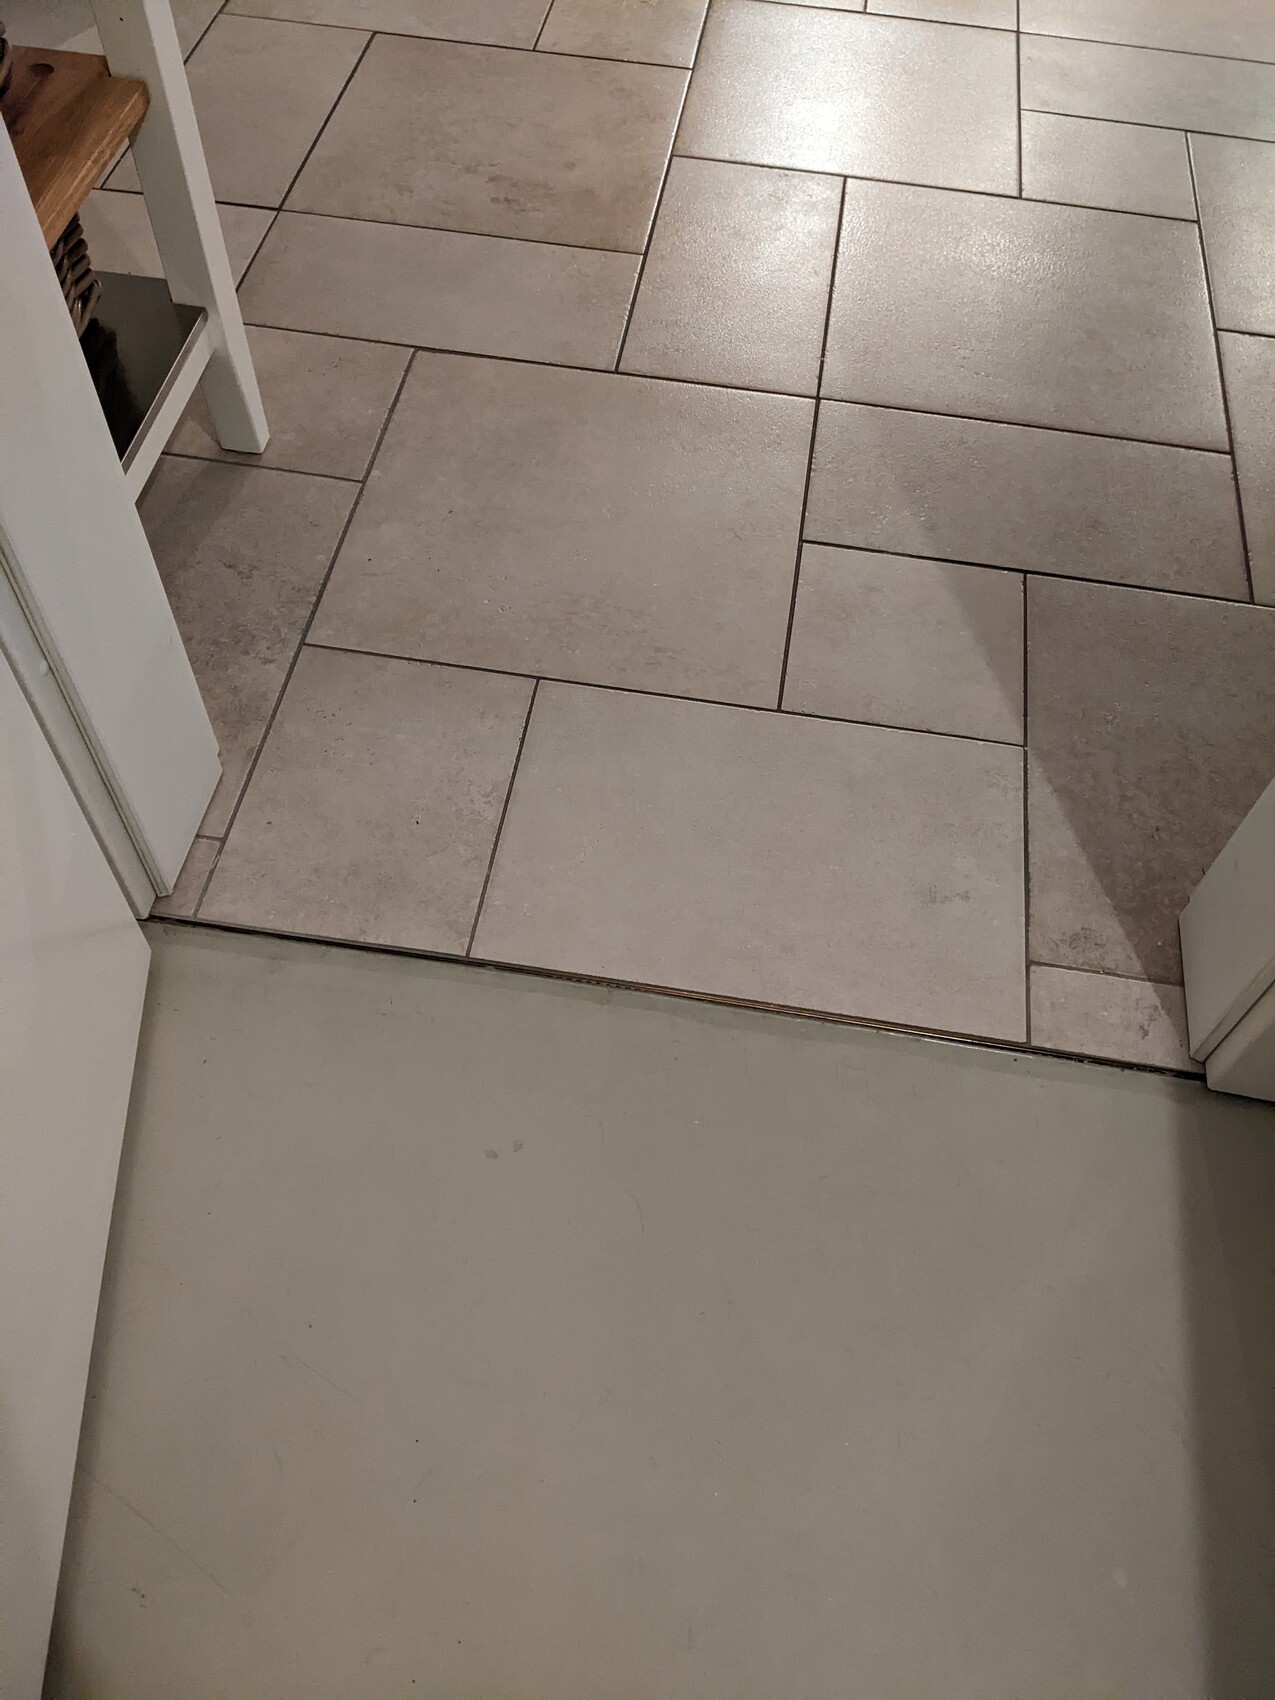
Directly adjacent is the kitchen, where tiles have been laid and end with a metal strip at the utility room. From there, the floor drops down a few millimeters (inches) to the screed.
Bare screed is neither visually appealing nor comfortable to walk on, so we would like to install some kind of floor covering.
Option 1: Have tiles installed – but then we would first need to find a tiler willing to take on a 7 square meter (75 square feet) job with many awkward cutouts (pipes, etc.). I’m not sure if we’ll find someone.
Option 2: DIY – install something ourselves.
Can you recommend a floor covering suitable for a utility room that can be installed by beginners? We are absolute novices when it comes to flooring; so far, we haven’t even laid laminate or carpet. We also don’t have any large tools. I’m unclear how to manage the floor around all the pipes. You can use pipe collars for the cutouts, but I imagine that will still be difficult.
The flooring should be suitable for damp environments since there is always a chance of water from the washing machine etc. Our washing machine has leaked before, and the heating system’s expansion vessel has sprayed water, so the floor must be able to handle that.
Is this even a reasonable project for beginners, or should we look for a professional tiler? Maybe you have experience or ideas on how we could do this cost-effectively but properly.
In our house, built in 2007, the utility room only has the bare screed floor. The original builders probably cut costs and just left it like that.
The room is just under 7 square meters (about 75 square feet) and, as usual, besides the technical installations, it also houses the washing machine, dryer, and freezer.
Directly adjacent is the kitchen, where tiles have been laid and end with a metal strip at the utility room. From there, the floor drops down a few millimeters (inches) to the screed.
Bare screed is neither visually appealing nor comfortable to walk on, so we would like to install some kind of floor covering.
Option 1: Have tiles installed – but then we would first need to find a tiler willing to take on a 7 square meter (75 square feet) job with many awkward cutouts (pipes, etc.). I’m not sure if we’ll find someone.
Option 2: DIY – install something ourselves.
Can you recommend a floor covering suitable for a utility room that can be installed by beginners? We are absolute novices when it comes to flooring; so far, we haven’t even laid laminate or carpet. We also don’t have any large tools. I’m unclear how to manage the floor around all the pipes. You can use pipe collars for the cutouts, but I imagine that will still be difficult.
The flooring should be suitable for damp environments since there is always a chance of water from the washing machine etc. Our washing machine has leaked before, and the heating system’s expansion vessel has sprayed water, so the floor must be able to handle that.
Is this even a reasonable project for beginners, or should we look for a professional tiler? Maybe you have experience or ideas on how we could do this cost-effectively but properly.


Jurassic135 schrieb:
Oh, that sounds like something for us. 😎 Do you remember the manufacturer? And do you perhaps have a photo of the "shoddy" result – maybe that's almost good enough for us... The edges aren’t visible anyway, you mainly see the floor in the center and near the door because everything is so cluttered.
A wood look would also fit well here, that would be a good contrast to the beige-gray kitchen tiles. This is how it looks here. I can also attach a photo of the previous appearance.
I can send you a private message with where I got it from, but linking isn’t allowed here.
I noticed that you need to cut precisely. I rushed and cut inaccurately. And I have spots near the door, for example, where there is no finishing trim, and the panels have pulled apart by a few millimeters (a few millimeters (about 0.1 inches)). If you’re not lazy (like me), you can fix it with a heat gun by reheating the adhesive. But I think if you measure and cut carefully and use finishing strips, this problem shouldn’t occur.
J
Jurassic13524 Feb 2023 19:18kati1337 schrieb:
This is what it looks like here. I can attach a photo below showing how it looked before.
I can send you a private message with the source, as linking is not allowed here.
I noticed that you have to cut very precisely. I rushed and cut inaccurately. Near the door, for example, where there is no edge trim, the floorboards have pulled apart by a few millimeters. If you’re not lazy (unlike me), you can fix this with a heat gun by reheating the adhesive. But I think if you measure and cut properly and use finishing strips, this problem shouldn’t occur at all.
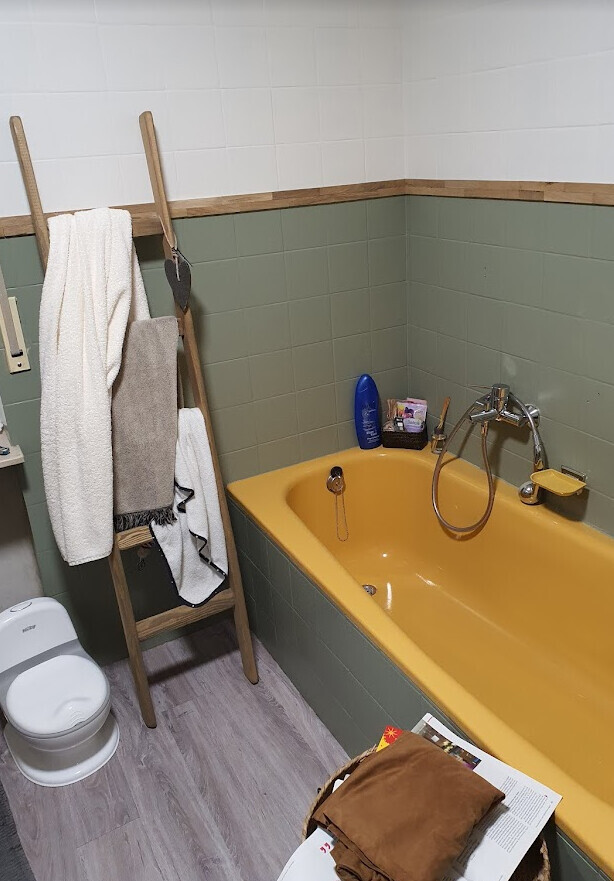

That turned out really nice! Especially for a transitional bathroom—it really has a wow factor. I’m also more of a “rough and ready” type; it doesn’t all have to be perfect. I don’t stand right in front of it scrutinizing every detail. The overall impression is what really matters to me.
I’m already considering the white-wood-green combination for the utility room as well (after the floor, the walls and furniture will come next). I’m still debating between trendy sage green and dove blue for an understructure with a worktop on it, but first the floor needs to turn out well somehow…
Feel free to send more details about the floor via private message.
J
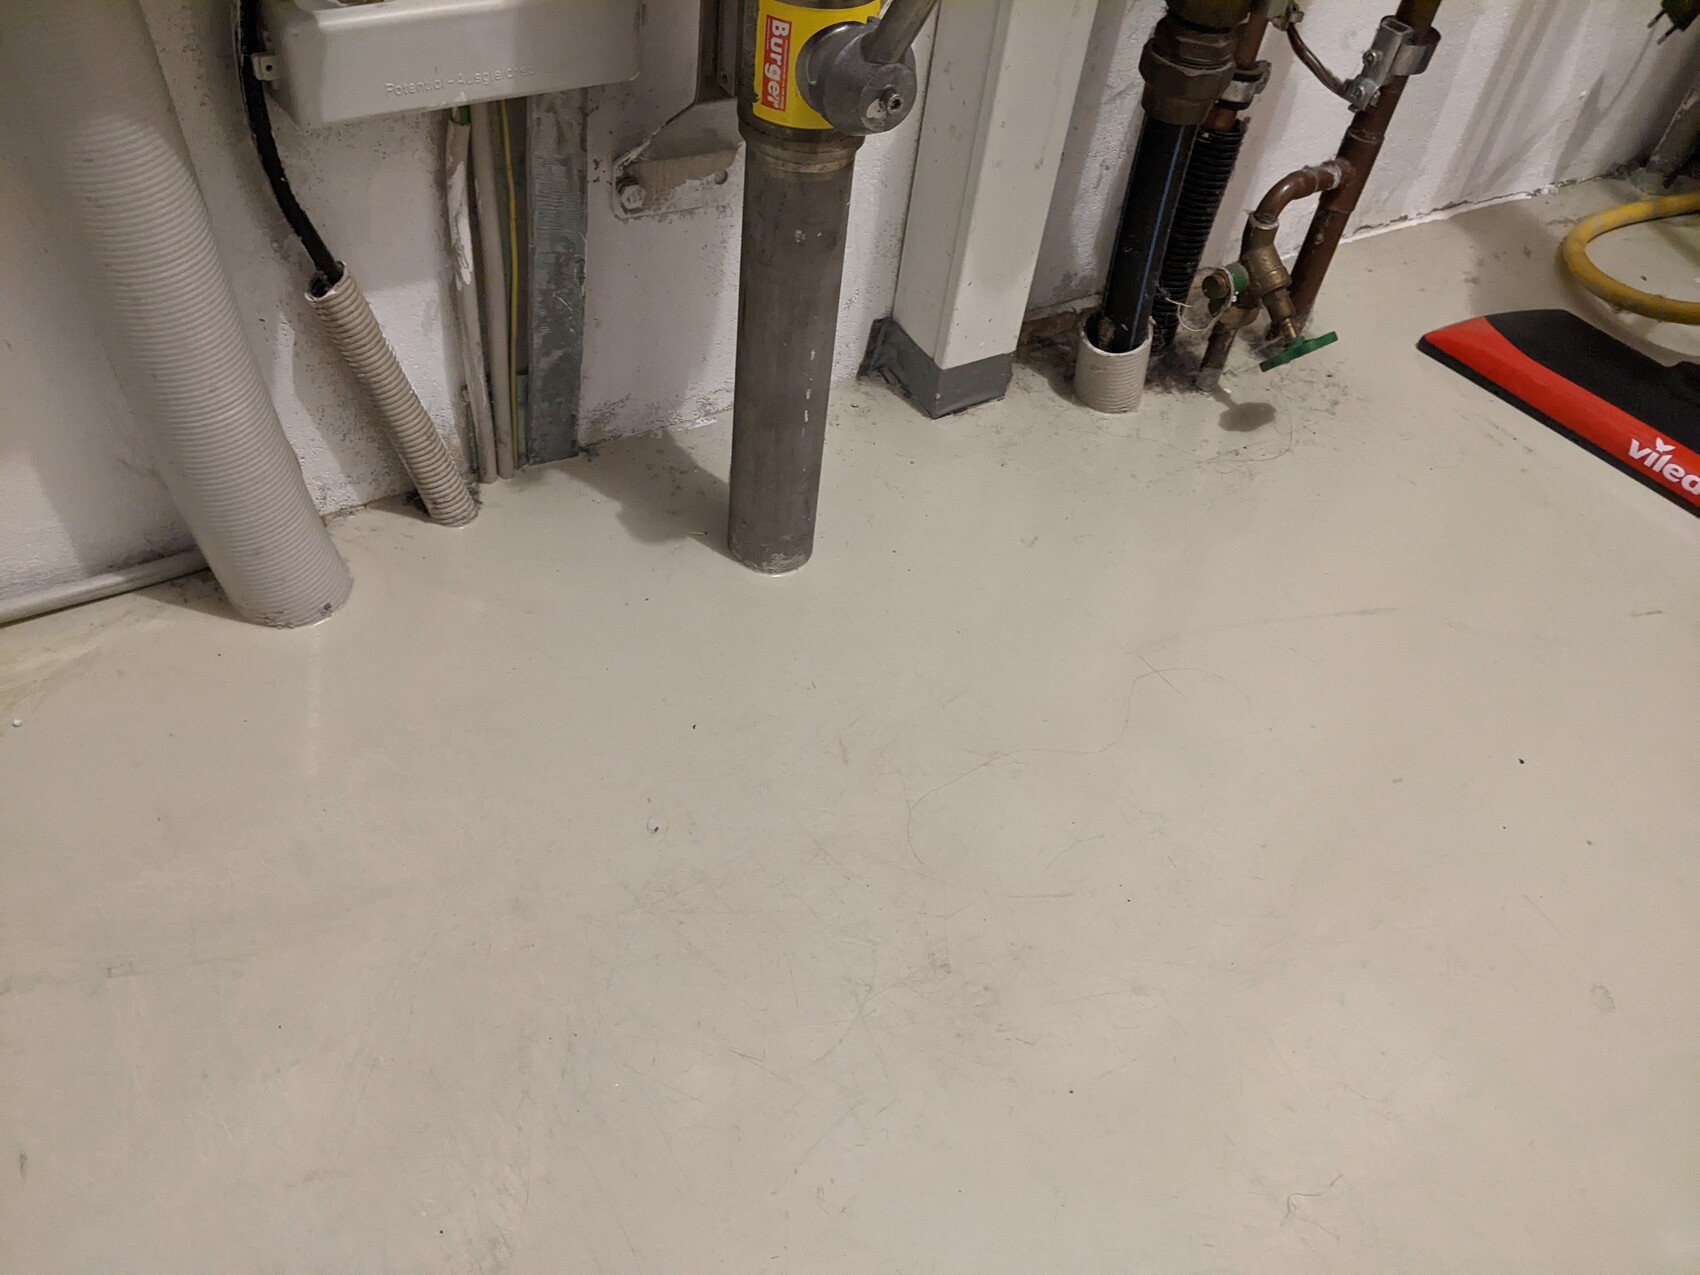
Jurassic13524 Feb 2023 19:29Here are some pictures of the current situation and the many pipes that you have to somehow work around. For the numerous ones at the back, I would say I’ll just cut a square notch around them... I can’t really imagine any other way right now.
In the last picture, you can see that the flooring was probably poured onto the screed after the heating system was installed. Under the heater, the rough screed is visible, and the layer is clearly defined there. I would lay the flooring up to that point and save some; maybe the remaining part can be used to cover the floor properly when the heating system is replaced.
And sorry, the floor has dust on it in addition to scratches, we were all sick recently and haven’t cleaned for a while...
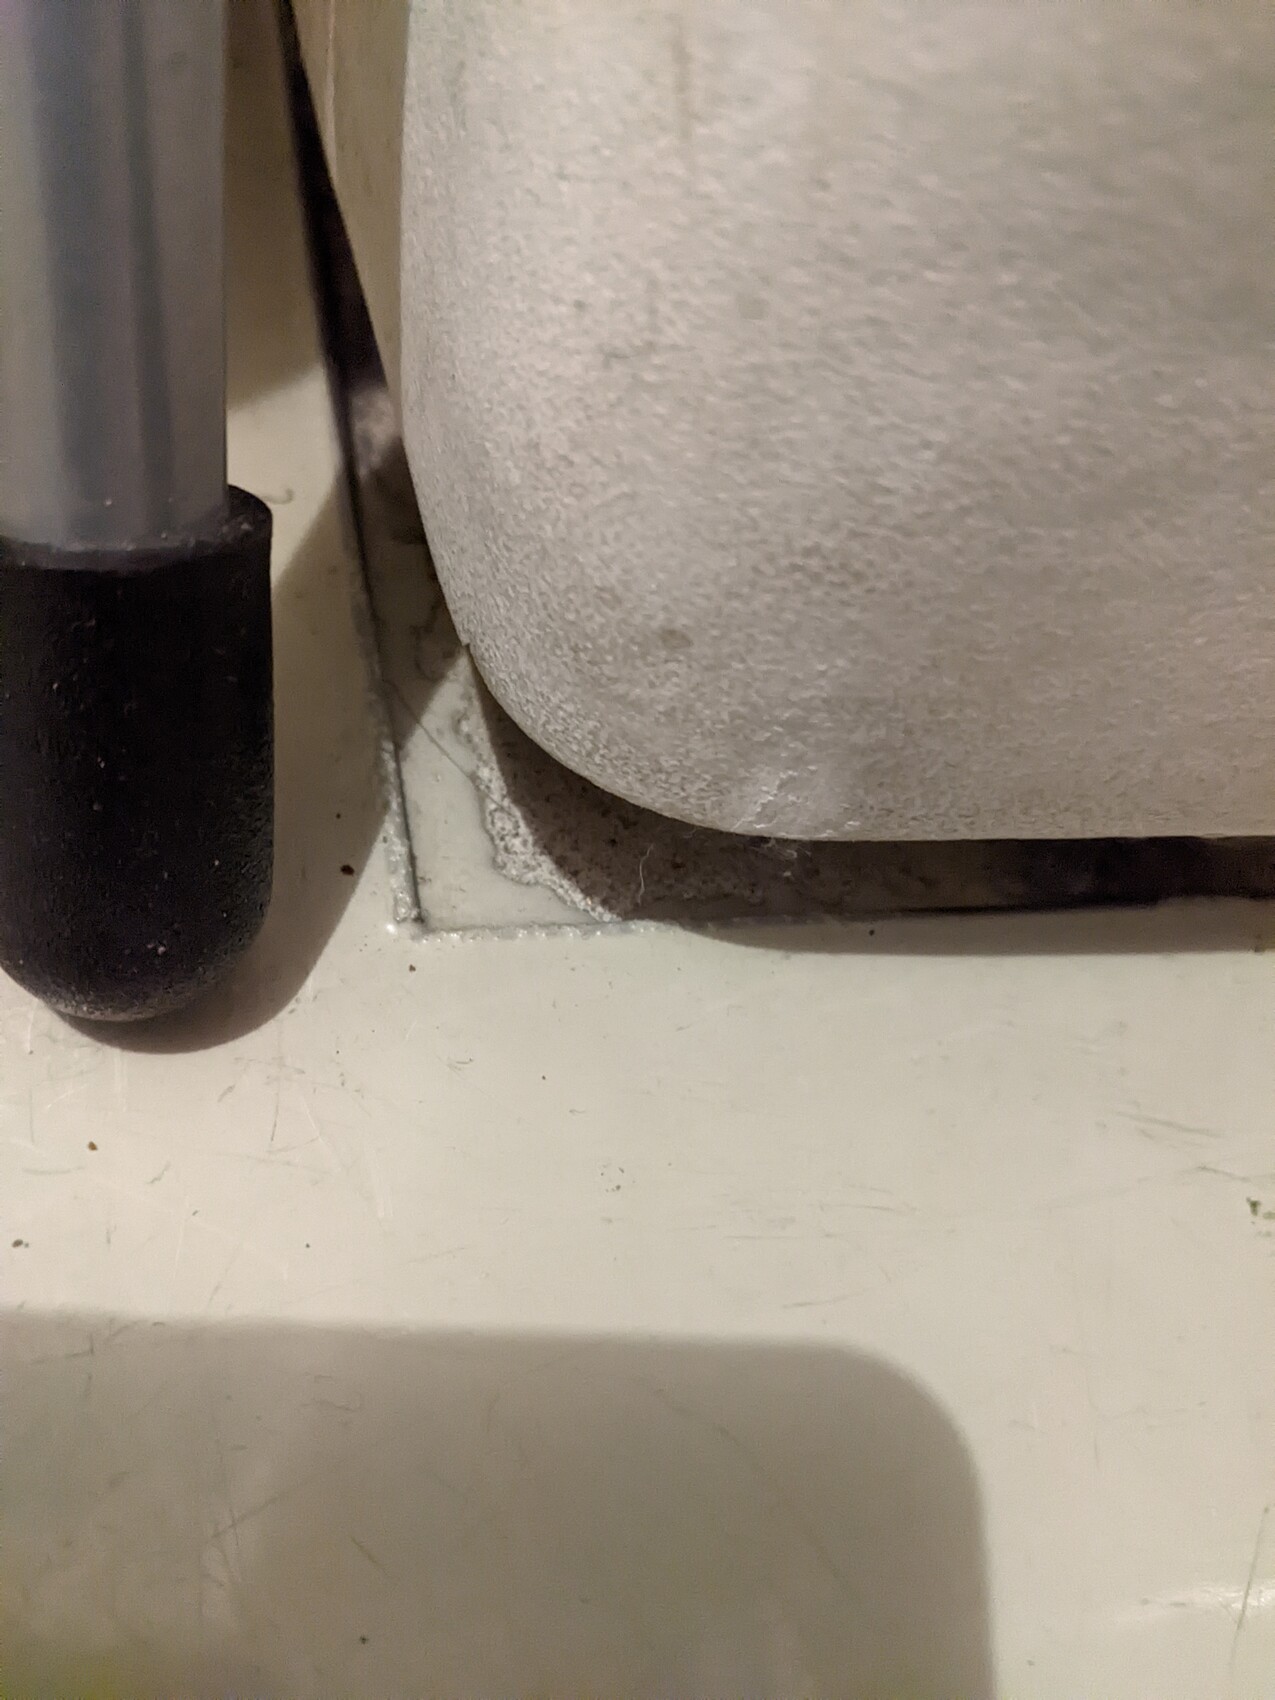
Jurassic135 schrieb:
Here are some pictures of the current situation and the many pipes that you somehow have to work around. For the many pipes at the very back, I would say I’d cut a square opening around them... I can’t really imagine another way right now.
In the last picture, you can see that the flooring was probably poured onto the screed after the heating system was installed. Under the heating unit, you can see the rough screed clearly separated from the flooring material. I would install the flooring up to that point and save some material; maybe when the heating is replaced in the future, the rest can be finished accordingly.
And sorry, the floor has dust on it besides some scratches—we were all sick recently and hadn’t cleaned for a while... Oh yes, that looks like fiddly work with all those pipes. I just checked how it was done in our utility room. But we had fewer individual pipes. There was a multi-service unit that was tiled around, and otherwise only a few single pipes. I’m attaching a picture for you.
I’ll send you a private message about the vinyl flooring.
Similar topics