Hello everyone,
I would like to gather your opinions, experiences, and tips regarding wells for garden irrigation.
We are planning to sow lawn in spring, about 450 m² (4900 sq ft). I would like to set up automatic irrigation using Hunter or Rainbird systems.
The existing water connection from the house is too weak (18 l/min, 1100 l/h [4.75 gpm, 290 gph]).
There is no cistern since we have always wanted a well.
In the neighborhood (about 50 meters (55 yards) away), there are already wells, with water at approximately 7 meters (23 feet) depth.
Now the question about the type of well: driven well or drilled well?
Driven well:
- What are your experiences: how much flow (volume per hour) can be taken from a driven well without overloading it? Is such a well suitable for automatic irrigation?
- Which pumps would you recommend for that?
- What did it cost you? Either price per meter or all-in cost?
Drilled well:
- I have not received any quotes yet, but according to my research, it is significantly more expensive than a driven well. However, capacity should not be a problem, right?
- I recently read a tip from Rick in the well topic about pump types. Are these suitable for automatic irrigation?
- What did it cost you? Either price per meter or all-in cost?
What are your general experiences with wells?
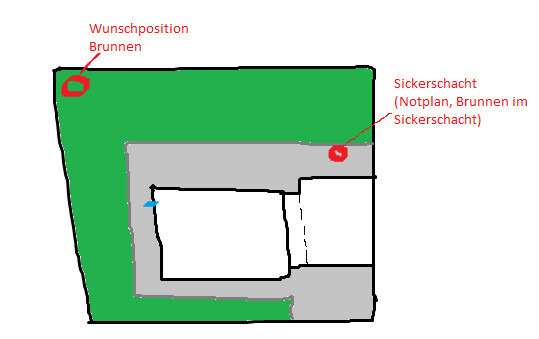
I was thinking to place the well as far away from the house as possible to avoid any ground settlement over the years caused by water or sand extraction.
If that is not an issue, I could theoretically use the existing soakaway pit (already 4 meters (13 feet) deep and lined with concrete rings) and drive a well there. The advantage would be gaining 4 meters (13 feet) of depth security, as the pump would be located at about -4 meters (-13 feet). The disadvantage is that it is close to the garage and located on a paved area — potential risk of settlement?
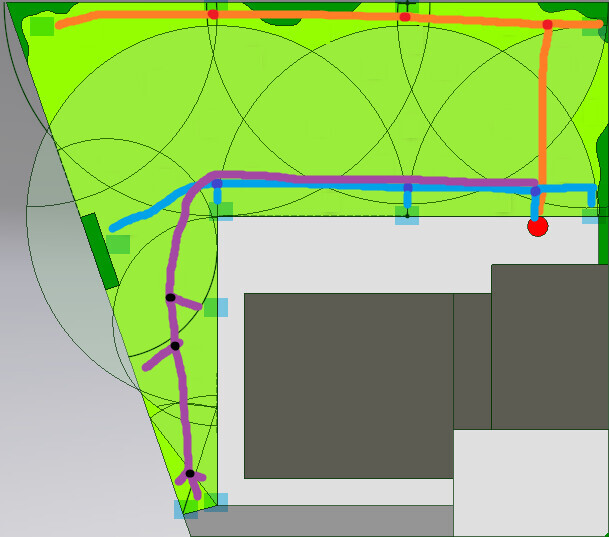
I am attaching a sketch of the property.
Thank you in advance!
I would like to gather your opinions, experiences, and tips regarding wells for garden irrigation.
We are planning to sow lawn in spring, about 450 m² (4900 sq ft). I would like to set up automatic irrigation using Hunter or Rainbird systems.
The existing water connection from the house is too weak (18 l/min, 1100 l/h [4.75 gpm, 290 gph]).
There is no cistern since we have always wanted a well.
In the neighborhood (about 50 meters (55 yards) away), there are already wells, with water at approximately 7 meters (23 feet) depth.
Now the question about the type of well: driven well or drilled well?
Driven well:
- What are your experiences: how much flow (volume per hour) can be taken from a driven well without overloading it? Is such a well suitable for automatic irrigation?
- Which pumps would you recommend for that?
- What did it cost you? Either price per meter or all-in cost?
Drilled well:
- I have not received any quotes yet, but according to my research, it is significantly more expensive than a driven well. However, capacity should not be a problem, right?
- I recently read a tip from Rick in the well topic about pump types. Are these suitable for automatic irrigation?
- What did it cost you? Either price per meter or all-in cost?
What are your general experiences with wells?
I was thinking to place the well as far away from the house as possible to avoid any ground settlement over the years caused by water or sand extraction.
If that is not an issue, I could theoretically use the existing soakaway pit (already 4 meters (13 feet) deep and lined with concrete rings) and drive a well there. The advantage would be gaining 4 meters (13 feet) of depth security, as the pump would be located at about -4 meters (-13 feet). The disadvantage is that it is close to the garage and located on a paved area — potential risk of settlement?
I am attaching a sketch of the property.
Thank you in advance!

So, the "pimp my soakaway shaft" project is almost finished.
To complete the topic, I wanted to share feedback on how I solved my questions regarding the well and irrigation.
Starting point:
The desire for a well to automatically water the garden.
The final location for the well was the existing soakaway shaft behind the garage.
The soakaway shaft is 4 m (13 feet) deep. The pipe was driven an additional 4.5 m (15 feet) and in spring stands about 1.8 m (6 feet) in water. So I have this 1.8 m (6 feet) reserve in case the water level drops in August. I don’t really expect that, since about 200 m² (2,150 sq ft) of roof surface drains exactly here.
This is what it looked like after drilling the well. We left the pipe sticking out about 1.5 m (5 feet).
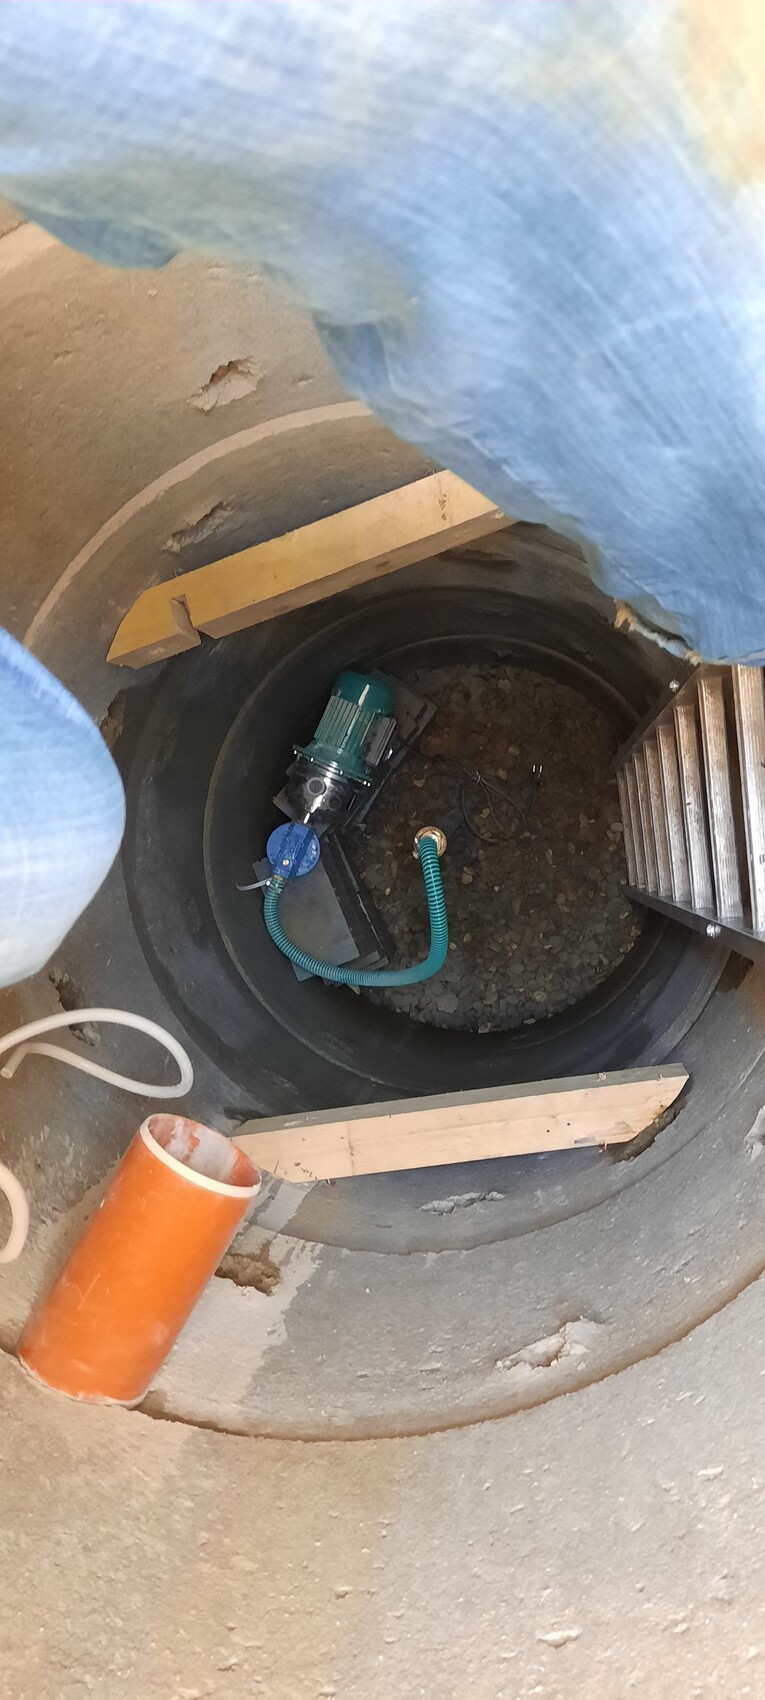
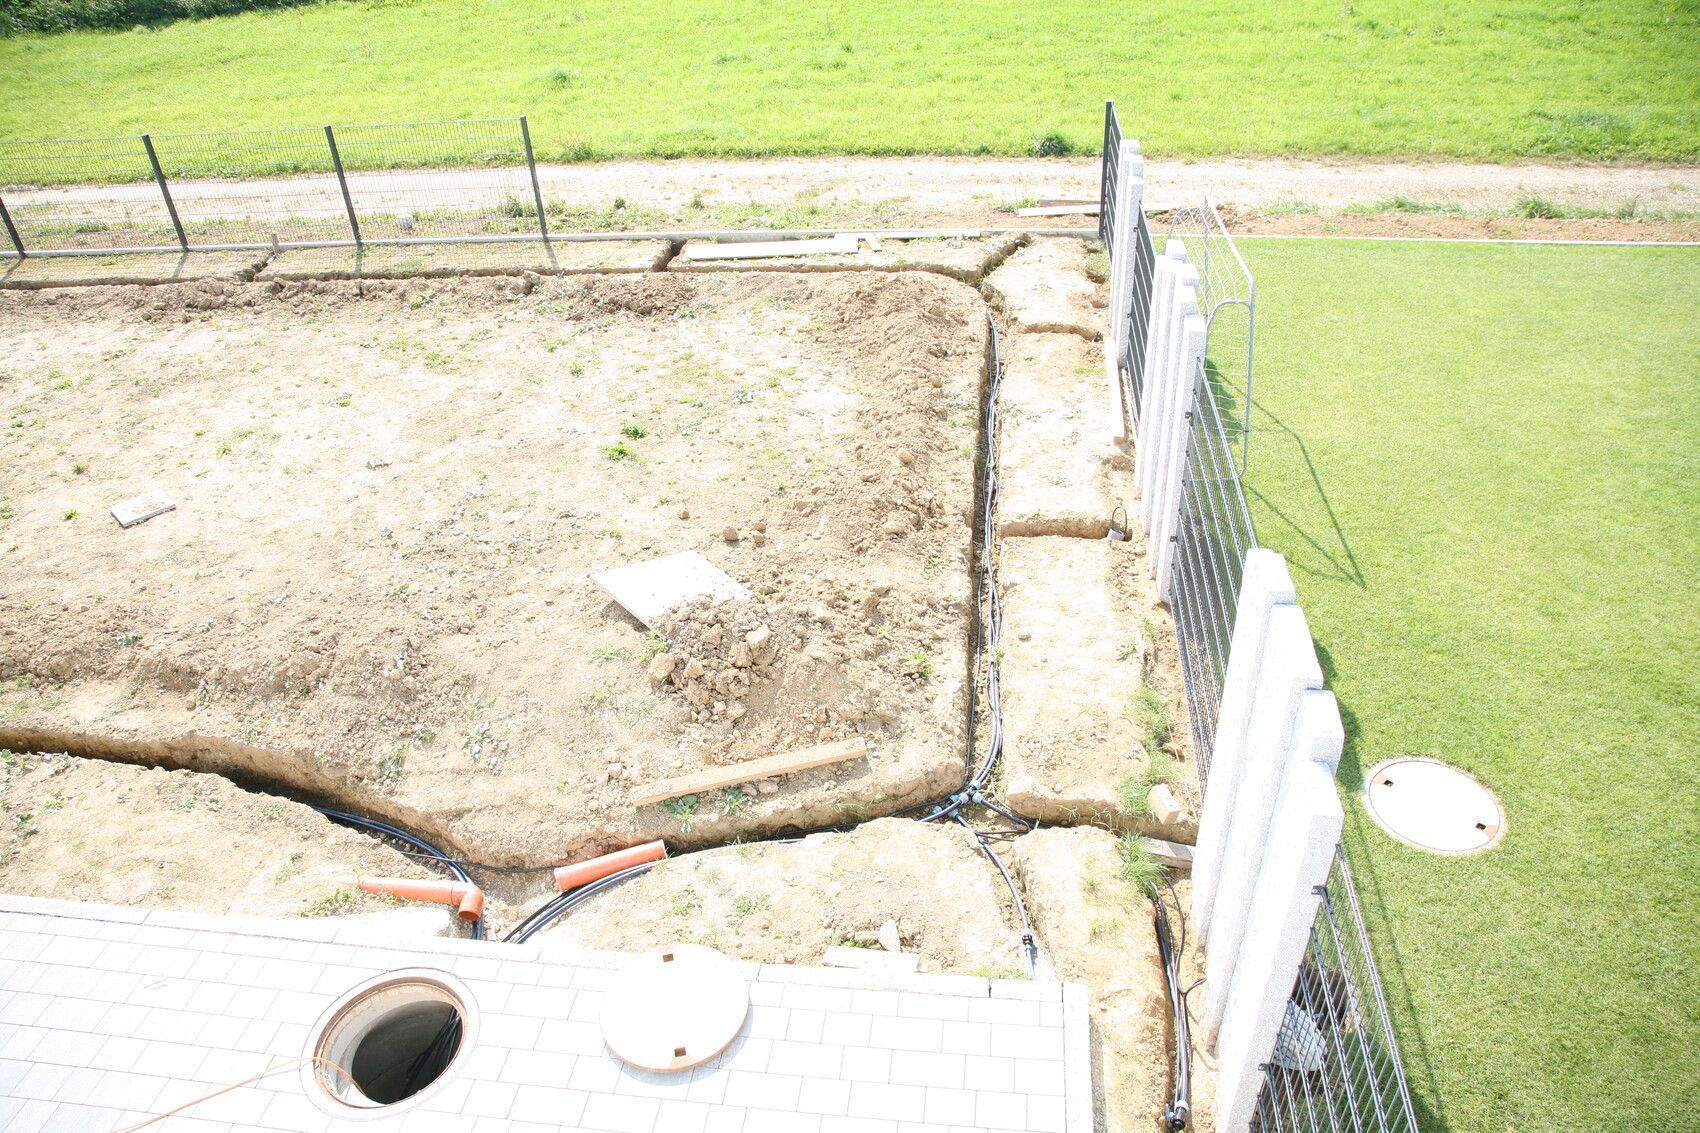
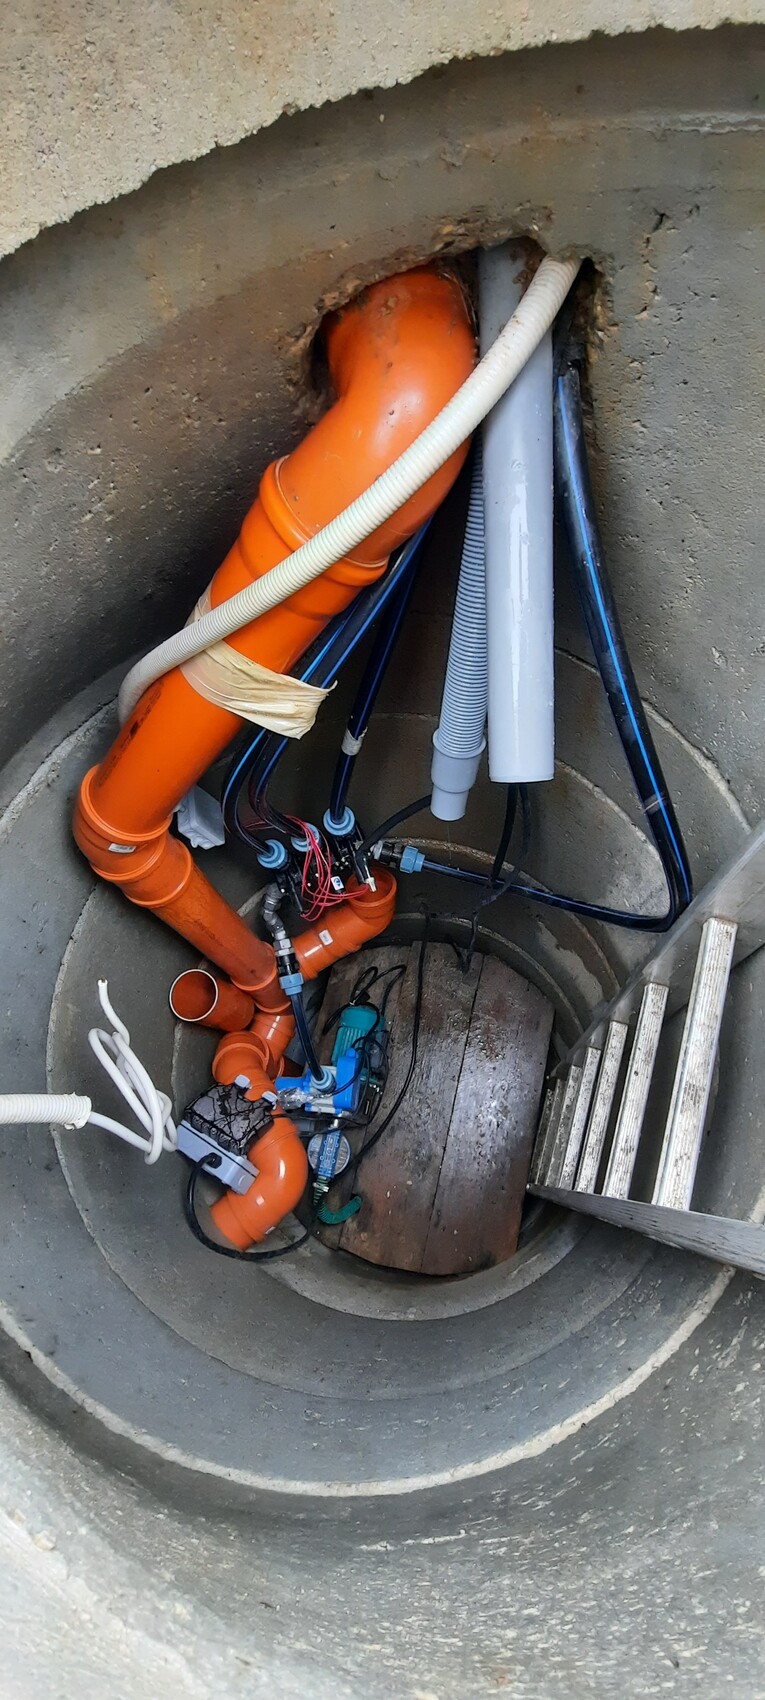
Next, I built a platform halfway down, where the pump is placed. All the valve technology was also installed there. At the same time, I laid a 110 mm (4.3 inches) pipe for drainage of the future patio roof.
It’s not neatly arranged yet.
Through the solid PVC pipe, the future lawn mower will get power; it will be positioned directly above it.
Through the flexible PVC pipe, an extraction system is planned; I have extended this up to the fence. The soakaway shaft is quite damp. Therefore, I plan to install a fan in the PVC pipe to blow air out of the shaft once or twice a day for 5 minutes. Dry air will flow in through the shaft cover due to underpressure. Controlled ventilation for the soakaway shaft 🙂
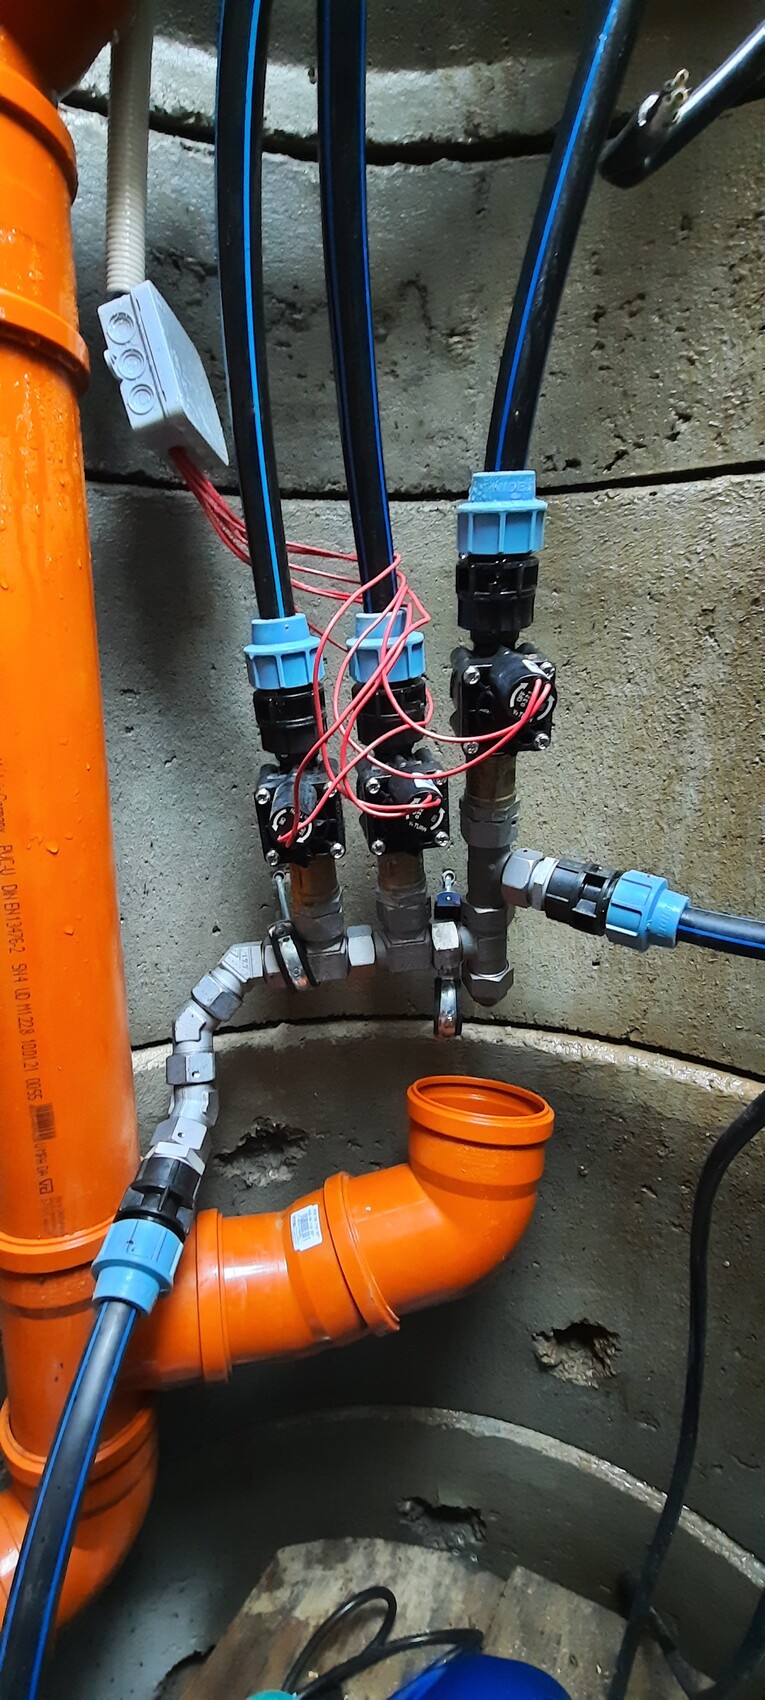
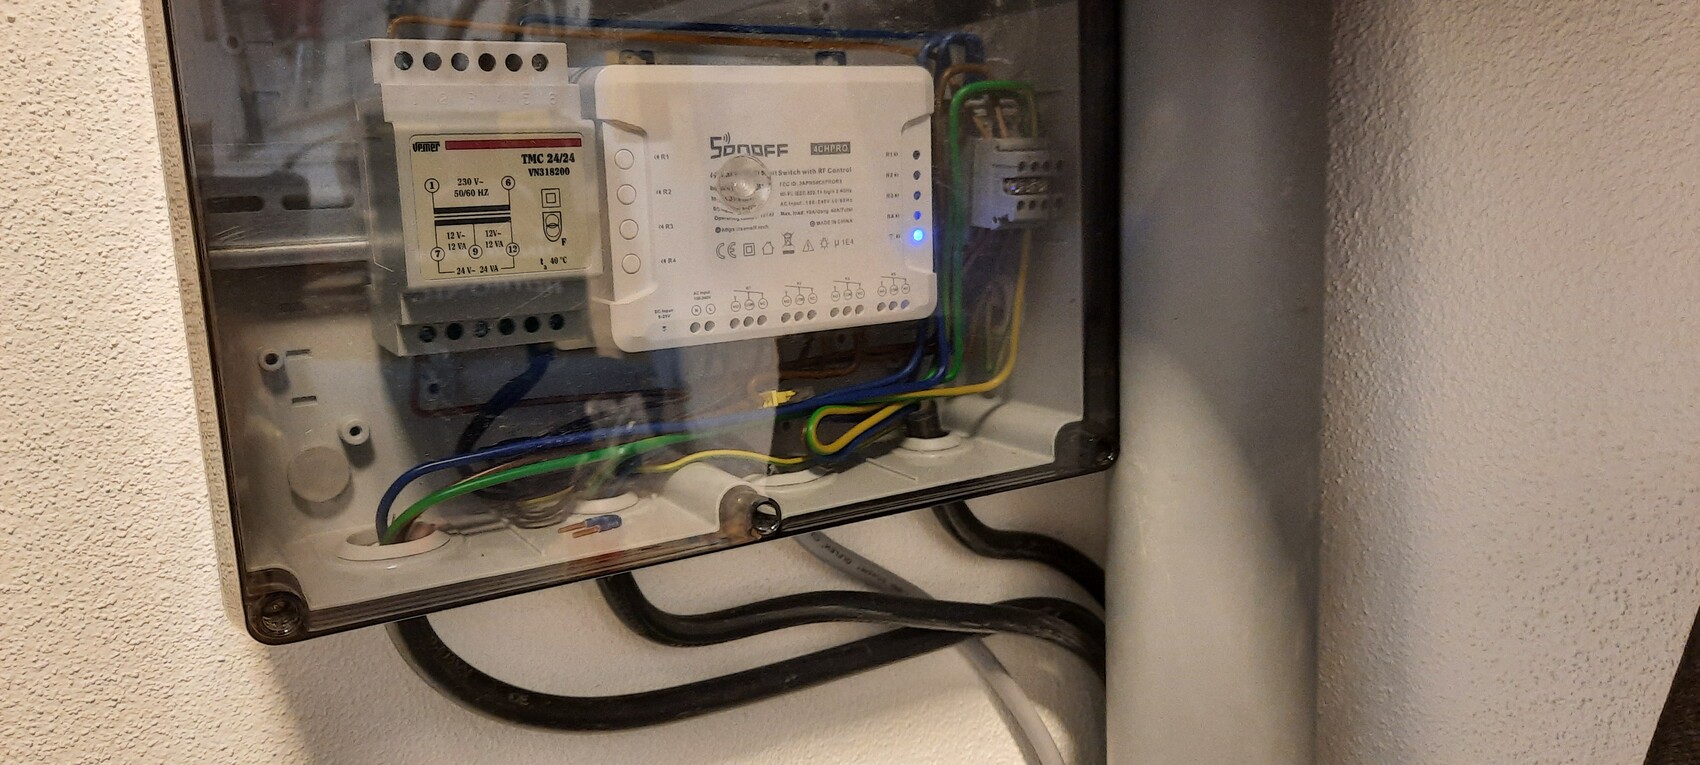
Because of the moisture in the soakaway shaft, I moved the valve control into the garage.
The control runs via a Sonoff smart Wi-Fi switch (55 USD).
Additionally, there is a transformer for 24 V alternating current for the Hunter valves.
Everything mounted on a DIN rail.
All for under 100 USD. The ready-made solutions from Hunter were significantly more expensive.
I also control the garden lighting with it, which is a plus for me. I must say, I’m very satisfied with how reliably it works.
Irrigation was implemented with 4 zones: 3 for sprinkler watering and the 4th for 4 water outlets in the garden.
Hunter MP rotators. Supply line is 25 mm (1 inch) pipe.
Then seeded the lawn, sat on the patio, a beer in one hand, phone in the other, and water on! 🙂
One week after sowing, first blades:
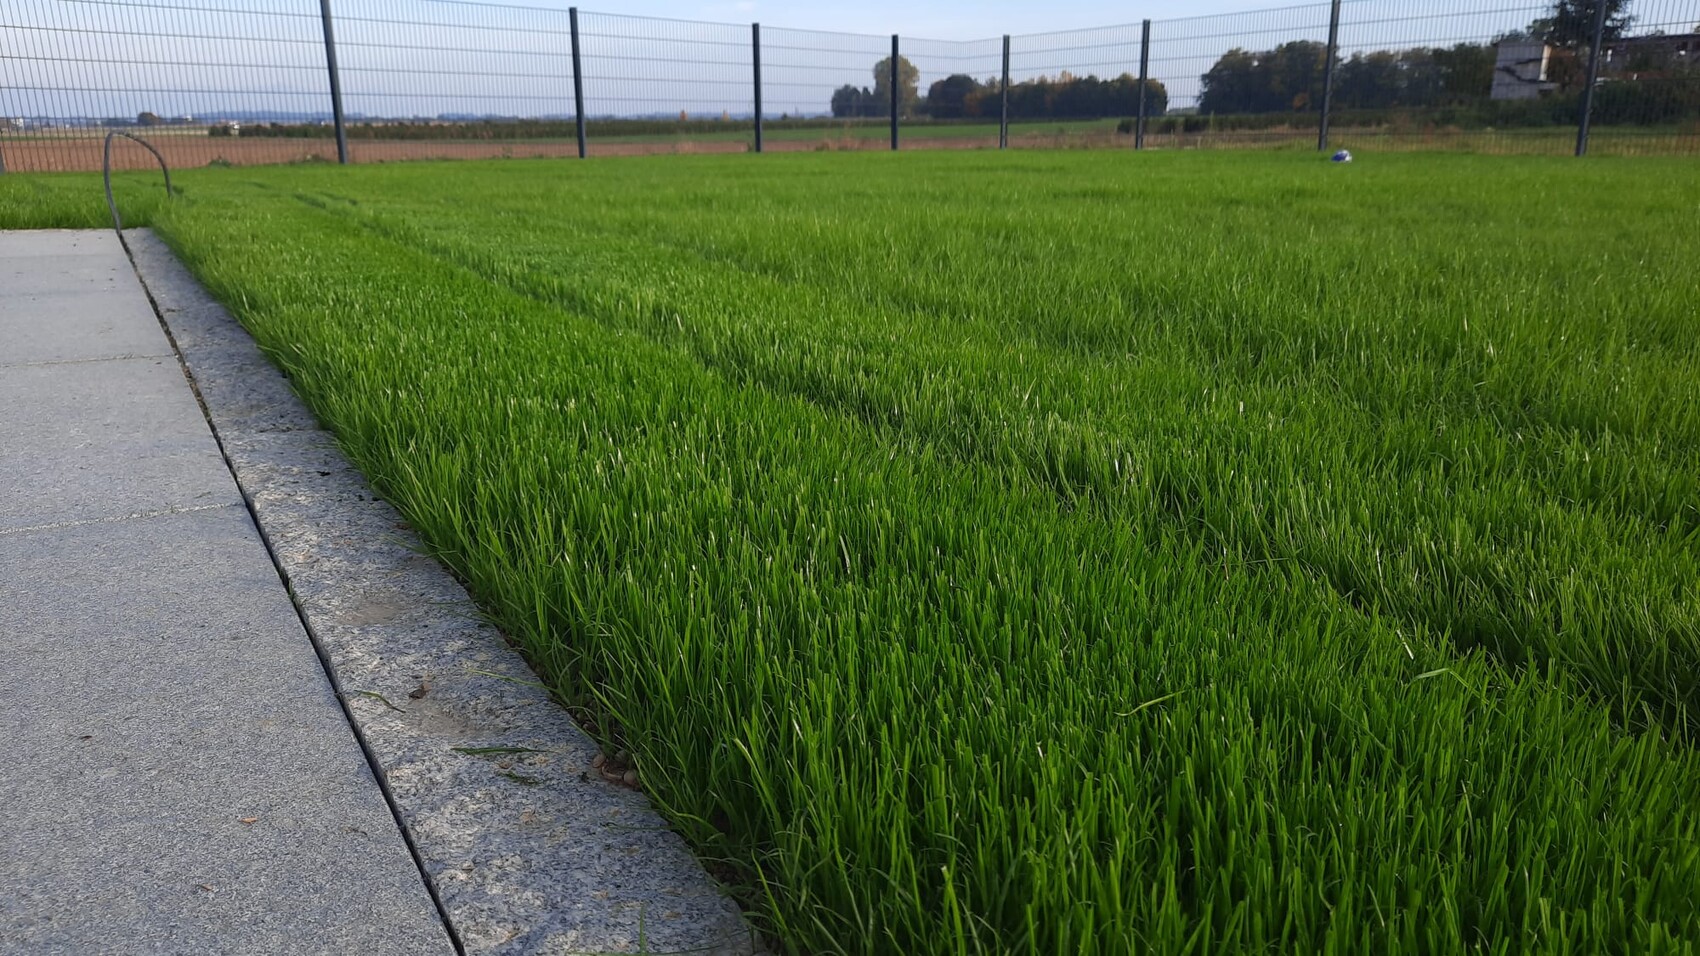
After 3 weeks, everything is green. 🙂
Thanks again to everyone.
Especially you, rick2018
To complete the topic, I wanted to share feedback on how I solved my questions regarding the well and irrigation.
Starting point:
The desire for a well to automatically water the garden.
The final location for the well was the existing soakaway shaft behind the garage.
The soakaway shaft is 4 m (13 feet) deep. The pipe was driven an additional 4.5 m (15 feet) and in spring stands about 1.8 m (6 feet) in water. So I have this 1.8 m (6 feet) reserve in case the water level drops in August. I don’t really expect that, since about 200 m² (2,150 sq ft) of roof surface drains exactly here.
This is what it looked like after drilling the well. We left the pipe sticking out about 1.5 m (5 feet).
Next, I built a platform halfway down, where the pump is placed. All the valve technology was also installed there. At the same time, I laid a 110 mm (4.3 inches) pipe for drainage of the future patio roof.
It’s not neatly arranged yet.
Through the solid PVC pipe, the future lawn mower will get power; it will be positioned directly above it.
Through the flexible PVC pipe, an extraction system is planned; I have extended this up to the fence. The soakaway shaft is quite damp. Therefore, I plan to install a fan in the PVC pipe to blow air out of the shaft once or twice a day for 5 minutes. Dry air will flow in through the shaft cover due to underpressure. Controlled ventilation for the soakaway shaft 🙂
Because of the moisture in the soakaway shaft, I moved the valve control into the garage.
The control runs via a Sonoff smart Wi-Fi switch (55 USD).
Additionally, there is a transformer for 24 V alternating current for the Hunter valves.
Everything mounted on a DIN rail.
All for under 100 USD. The ready-made solutions from Hunter were significantly more expensive.
I also control the garden lighting with it, which is a plus for me. I must say, I’m very satisfied with how reliably it works.
Irrigation was implemented with 4 zones: 3 for sprinkler watering and the 4th for 4 water outlets in the garden.
Hunter MP rotators. Supply line is 25 mm (1 inch) pipe.
Then seeded the lawn, sat on the patio, a beer in one hand, phone in the other, and water on! 🙂
One week after sowing, first blades:
After 3 weeks, everything is green. 🙂
Thanks again to everyone.
Especially you, rick2018
rick2018 schrieb:
Please seal the junction box once the functionality is confirmed. It’s already done 🙂 with silicone.
The five-word rule is so annoying…
rick2018 schrieb:
With silicone? That's not really the right choice. Resin or better yet Aquasit would be preferable. They remain flexible.My electrician friend recommended that to me. But I’m not too worried since it’s only 24V and located in the soakaway pit.
Similar topics