ᐅ Transition profile tiles to vinyl flooring in an attractive way
Created on: 30 Jul 2020 07:22
M
Markuss85
Good morning everyone,
At the transition from the kitchen (fully tiled by the main contractor) to the living room (flooring installed as a DIY project, Parador Modular One vinyl laid as a floating floor), we are unsure how to achieve a professional and visually appealing finish.
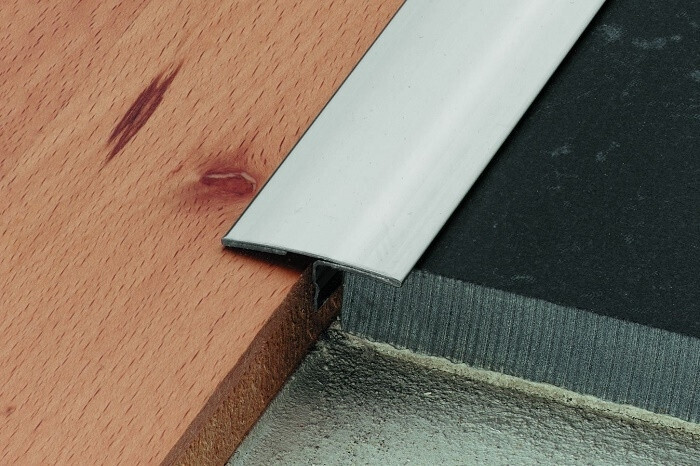
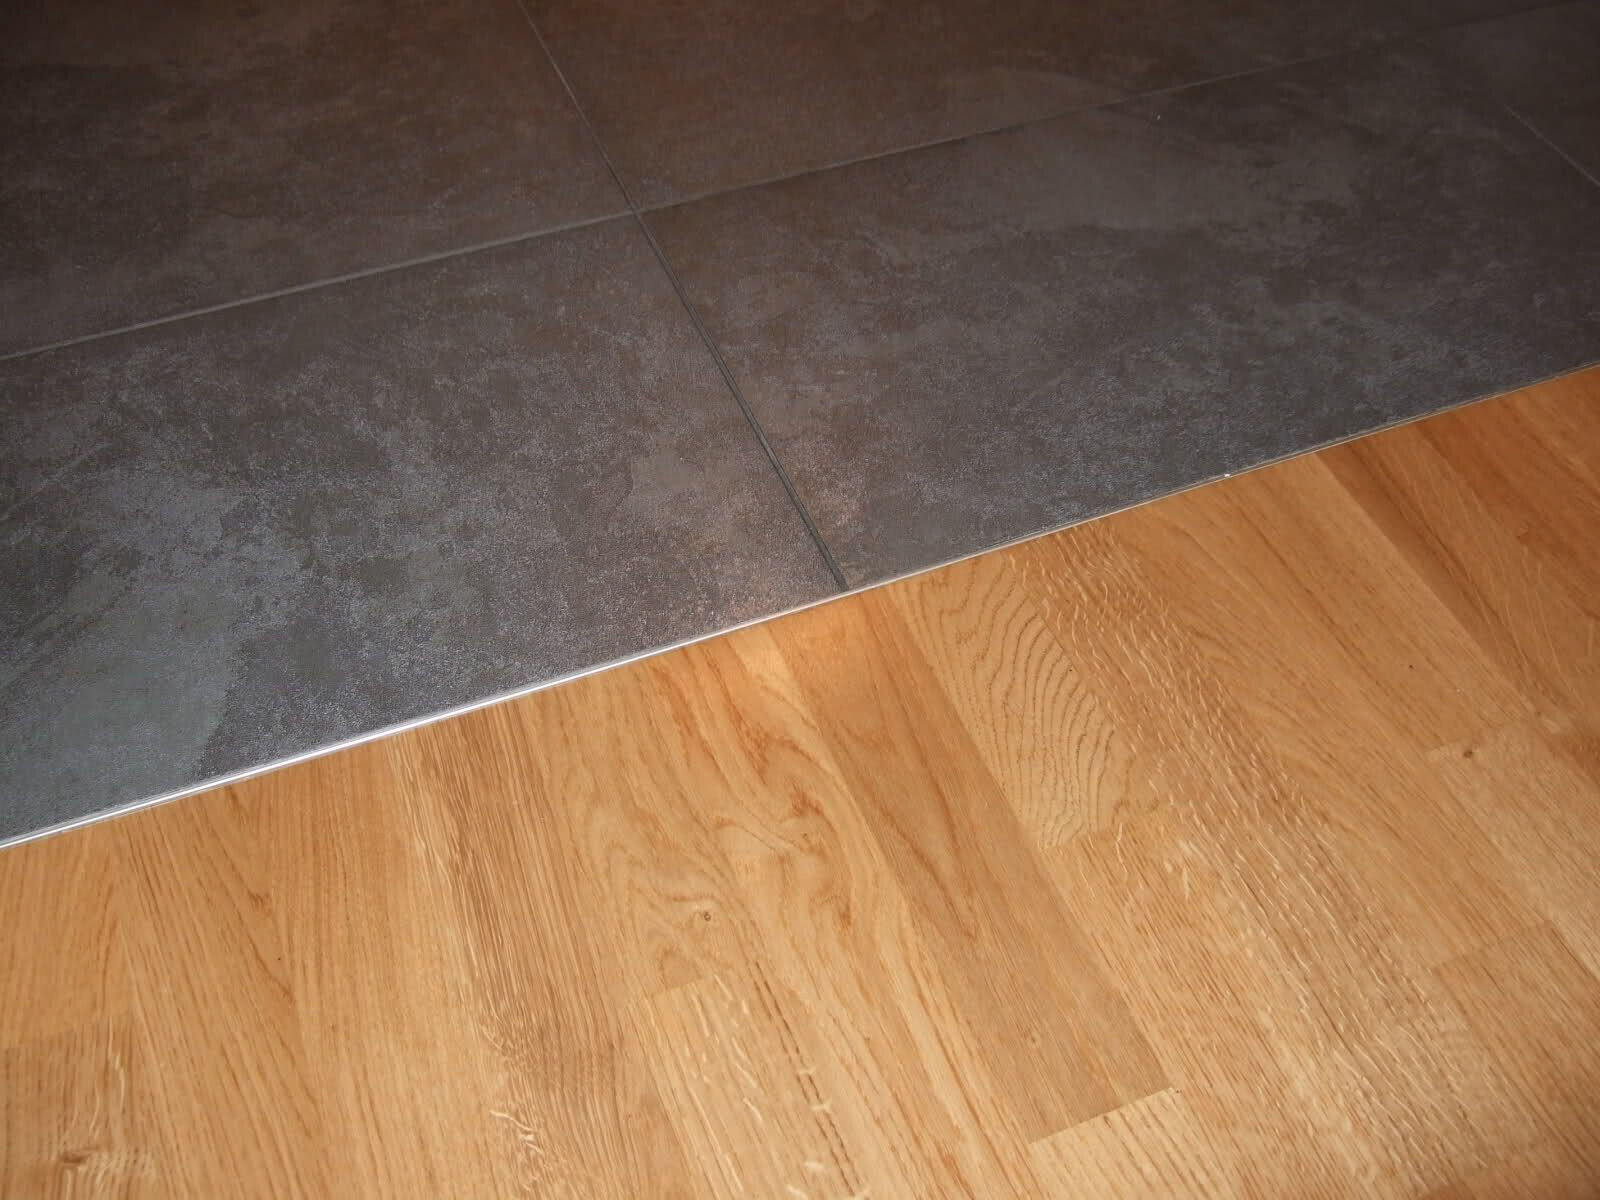
The simplest solution would, of course, be a standard transition strip, but honestly, we don’t find those very attractive (first photo). A more visually appealing option would be to have the vinyl meet directly against the existing stainless steel edge profile (second photo). However, we have some concerns about this because the flooring is supposed to have about a 1cm (0.4 inch) expansion gap to allow for movement.
How would you approach this? Would a small silicone joint between the tiles and the vinyl be a viable alternative?
Thank you very much in advance!
Not so nice:
Nice:
At the transition from the kitchen (fully tiled by the main contractor) to the living room (flooring installed as a DIY project, Parador Modular One vinyl laid as a floating floor), we are unsure how to achieve a professional and visually appealing finish.
The simplest solution would, of course, be a standard transition strip, but honestly, we don’t find those very attractive (first photo). A more visually appealing option would be to have the vinyl meet directly against the existing stainless steel edge profile (second photo). However, we have some concerns about this because the flooring is supposed to have about a 1cm (0.4 inch) expansion gap to allow for movement.
How would you approach this? Would a small silicone joint between the tiles and the vinyl be a viable alternative?
Thank you very much in advance!
Not so nice:
Nice:
M
Markuss851 Aug 2020 06:59Many thanks for all the answers, especially to @KlaRa, always very helpful.
Markuss85 schrieb:
Nice:
Sorry for bringing up this old thread again, but we are currently facing the same issue. We would like to install our click vinyl flooring in the neat way shown here, as we really don’t find transition strips appealing.
Now the question for me is how big the risk is. Of course, we would maintain the expansion gap of 5-10mm (0.2-0.4 inches) all around the room. Only at the door area would we lay the vinyl directly up to the tile edge trim. How likely is it that this will cause problems? We’re talking about an area of “only” one meter (about 3 feet) where we wouldn’t follow the recommended gap.
Has anyone had experience with this? How did you solve it back then, @Markuss85?

I had already bought transition strips for all the doors but wasn’t willing to accept the visual disaster ;-)
My photo shows the transition from click-lock engineered wood flooring (open-plan kitchen and living area) to tiles (bathroom). The open-plan kitchen and living area is about 5m (16 feet) deep, the bathroom 3m (10 feet). It has been like this for 2 years now with no issues. I tried to make the gap perfectly straight ;-) by carefully trimming and fitting the last narrow strip of wood flooring by hand. Then I had the painter fill the gap with a permanently elastic joint sealant.
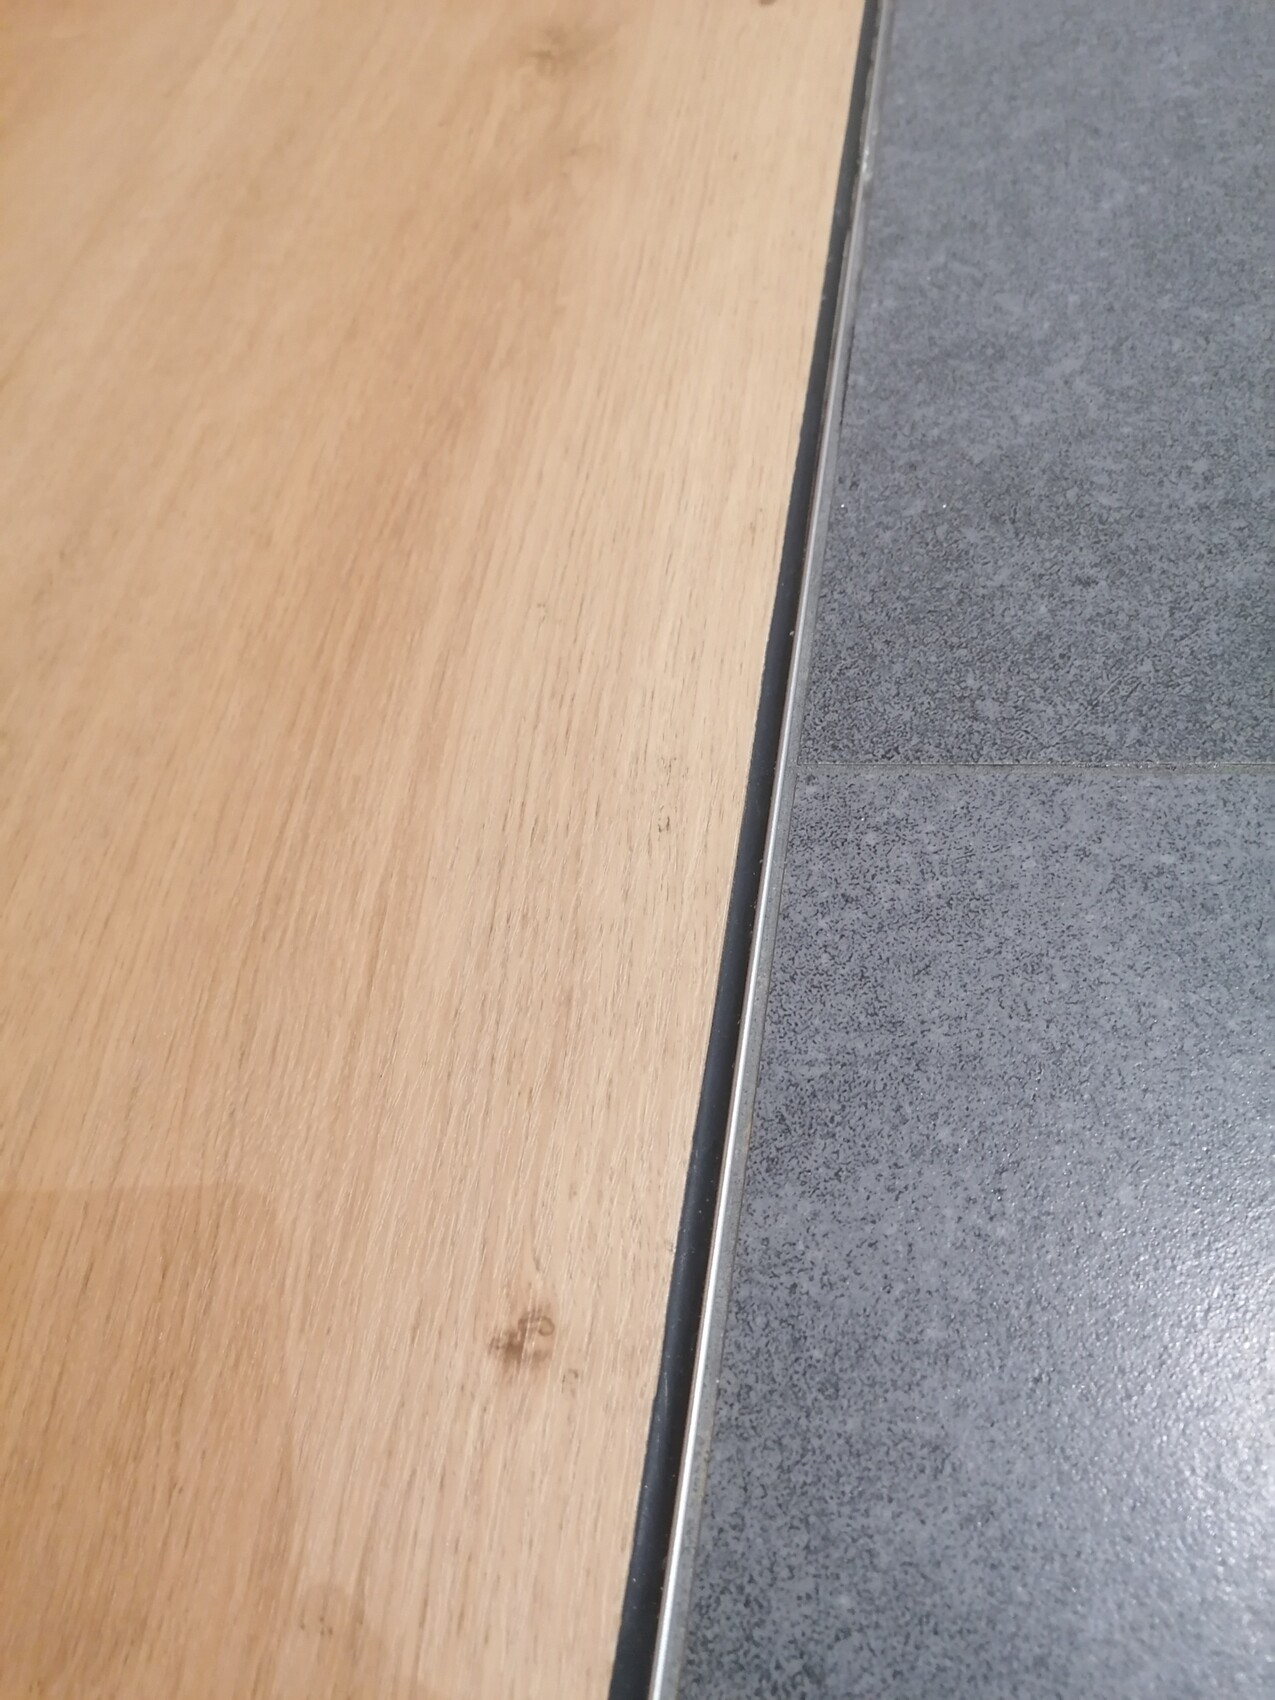
In the flat above mine, I arranged the transition from click-lock vinyl flooring (open-plan kitchen and living area) to tiles (bathroom) in the same way. Here too, I manually adjusted the last vinyl piece until the edge matched the tiles almost perfectly. So far, there have been no problems with this transition either. Soon, I will have a cabinet installed under the stairs upstairs. I can provide a photo then if desired.
My solution might drive a professional flooring installer crazy ;-) but it has held up perfectly and was the most comfortable option for me (though not the easiest—the small wooden strip took me several hours).
P.S. The visible screw hole (in the knot’s center) could be almost invisibly filled, but I want the screw to remind me of the craftsmanship I accomplished every time I see it… The screw itself is technically necessary and indispensable.
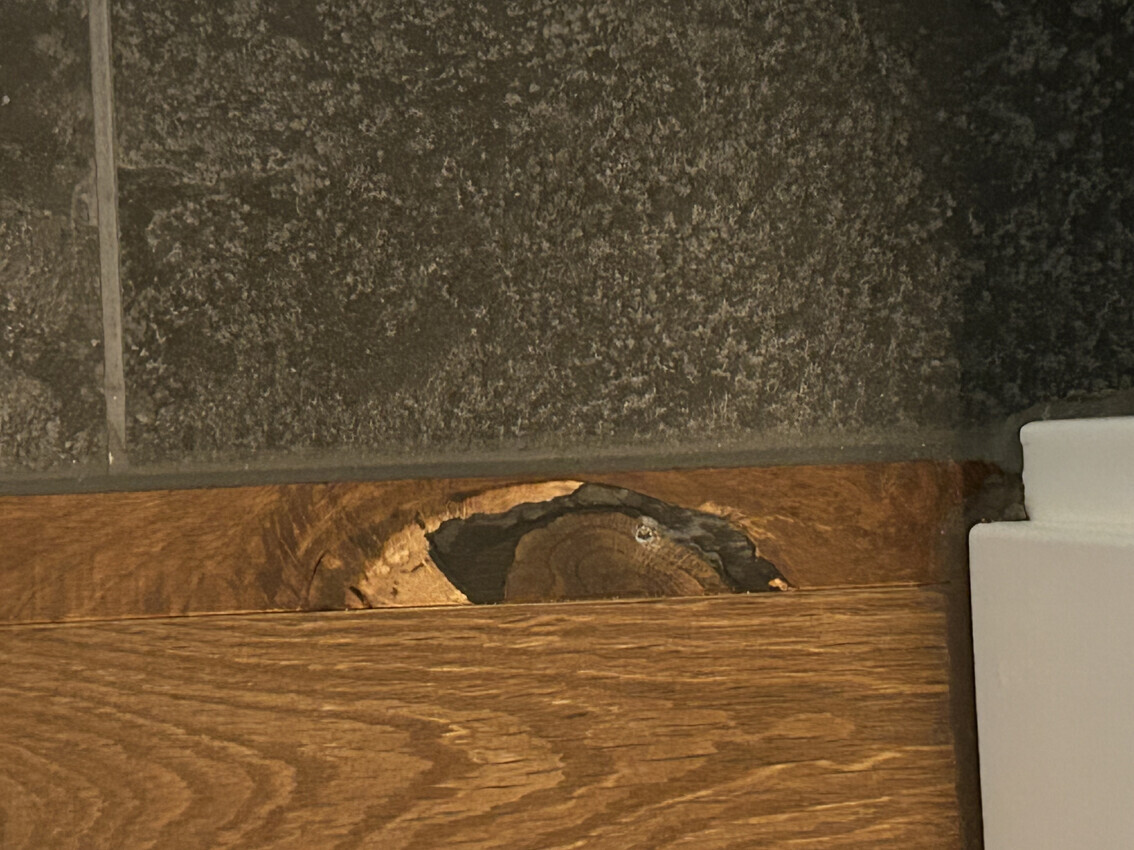
My photo shows the transition from click-lock engineered wood flooring (open-plan kitchen and living area) to tiles (bathroom). The open-plan kitchen and living area is about 5m (16 feet) deep, the bathroom 3m (10 feet). It has been like this for 2 years now with no issues. I tried to make the gap perfectly straight ;-) by carefully trimming and fitting the last narrow strip of wood flooring by hand. Then I had the painter fill the gap with a permanently elastic joint sealant.
In the flat above mine, I arranged the transition from click-lock vinyl flooring (open-plan kitchen and living area) to tiles (bathroom) in the same way. Here too, I manually adjusted the last vinyl piece until the edge matched the tiles almost perfectly. So far, there have been no problems with this transition either. Soon, I will have a cabinet installed under the stairs upstairs. I can provide a photo then if desired.
My solution might drive a professional flooring installer crazy ;-) but it has held up perfectly and was the most comfortable option for me (though not the easiest—the small wooden strip took me several hours).
P.S. The visible screw hole (in the knot’s center) could be almost invisibly filled, but I want the screw to remind me of the craftsmanship I accomplished every time I see it… The screw itself is technically necessary and indispensable.
Thanks for the update. We will probably implement it the same way. The only difference is that our installation direction will not be parallel to the joint but perpendicular. However, I don’t see any major issues with achieving a clean finish. I have deliberately allowed plenty of time for the installation.
Why the screw? Did you use it to secure the flooring? Did the click vinyl of your tenant work without screws as well?
Why the screw? Did you use it to secure the flooring? Did the click vinyl of your tenant work without screws as well?
jrth2151 schrieb:
Thanks for the update. We will probably implement it the same way. The only difference is that our installation direction won’t be parallel to the joint, but perpendicular. However, I don’t see any major issues achieving a clean finish here. I have deliberately set aside enough time for the installation.
Why the screw? Did you use it to fix the parquet? Did the click vinyl at your tenant’s place work without screws as well? The click vinyl at my tenant’s place works without screws 😎. I made the narrow strip of parquet myself, and since there is no perpendicular joint in the door area (the planks lock tightly there), I had to somehow secure the strip at the bottom to avoid stressing the joint too much. So I screwed the strip to the subfloor. I have suitable wooden dowels to cover the screws here, but....
M
Markuss8530 Sep 2023 17:04Hello @jrth2151, nice to see this thread bumped again 🙂
So, back then we actually created the transition “butt joint” style with a very narrow silicone joint and only glued down the first vinyl plank on the floor. It’s probably not 100% correct from a technical standpoint, but it has held up without any issues for over 3 years and looks way better than any kind of trim. I’m happy with it and would do the same again 😀
So, back then we actually created the transition “butt joint” style with a very narrow silicone joint and only glued down the first vinyl plank on the floor. It’s probably not 100% correct from a technical standpoint, but it has held up without any issues for over 3 years and looks way better than any kind of trim. I’m happy with it and would do the same again 😀
Similar topics