
With our new house, I finally became the proud owner of a wood-fired oven in the garden. I had been dreaming of this for such a long time! Baking your own bread, and doing it properly in an oven that was heated with wood beforehand.
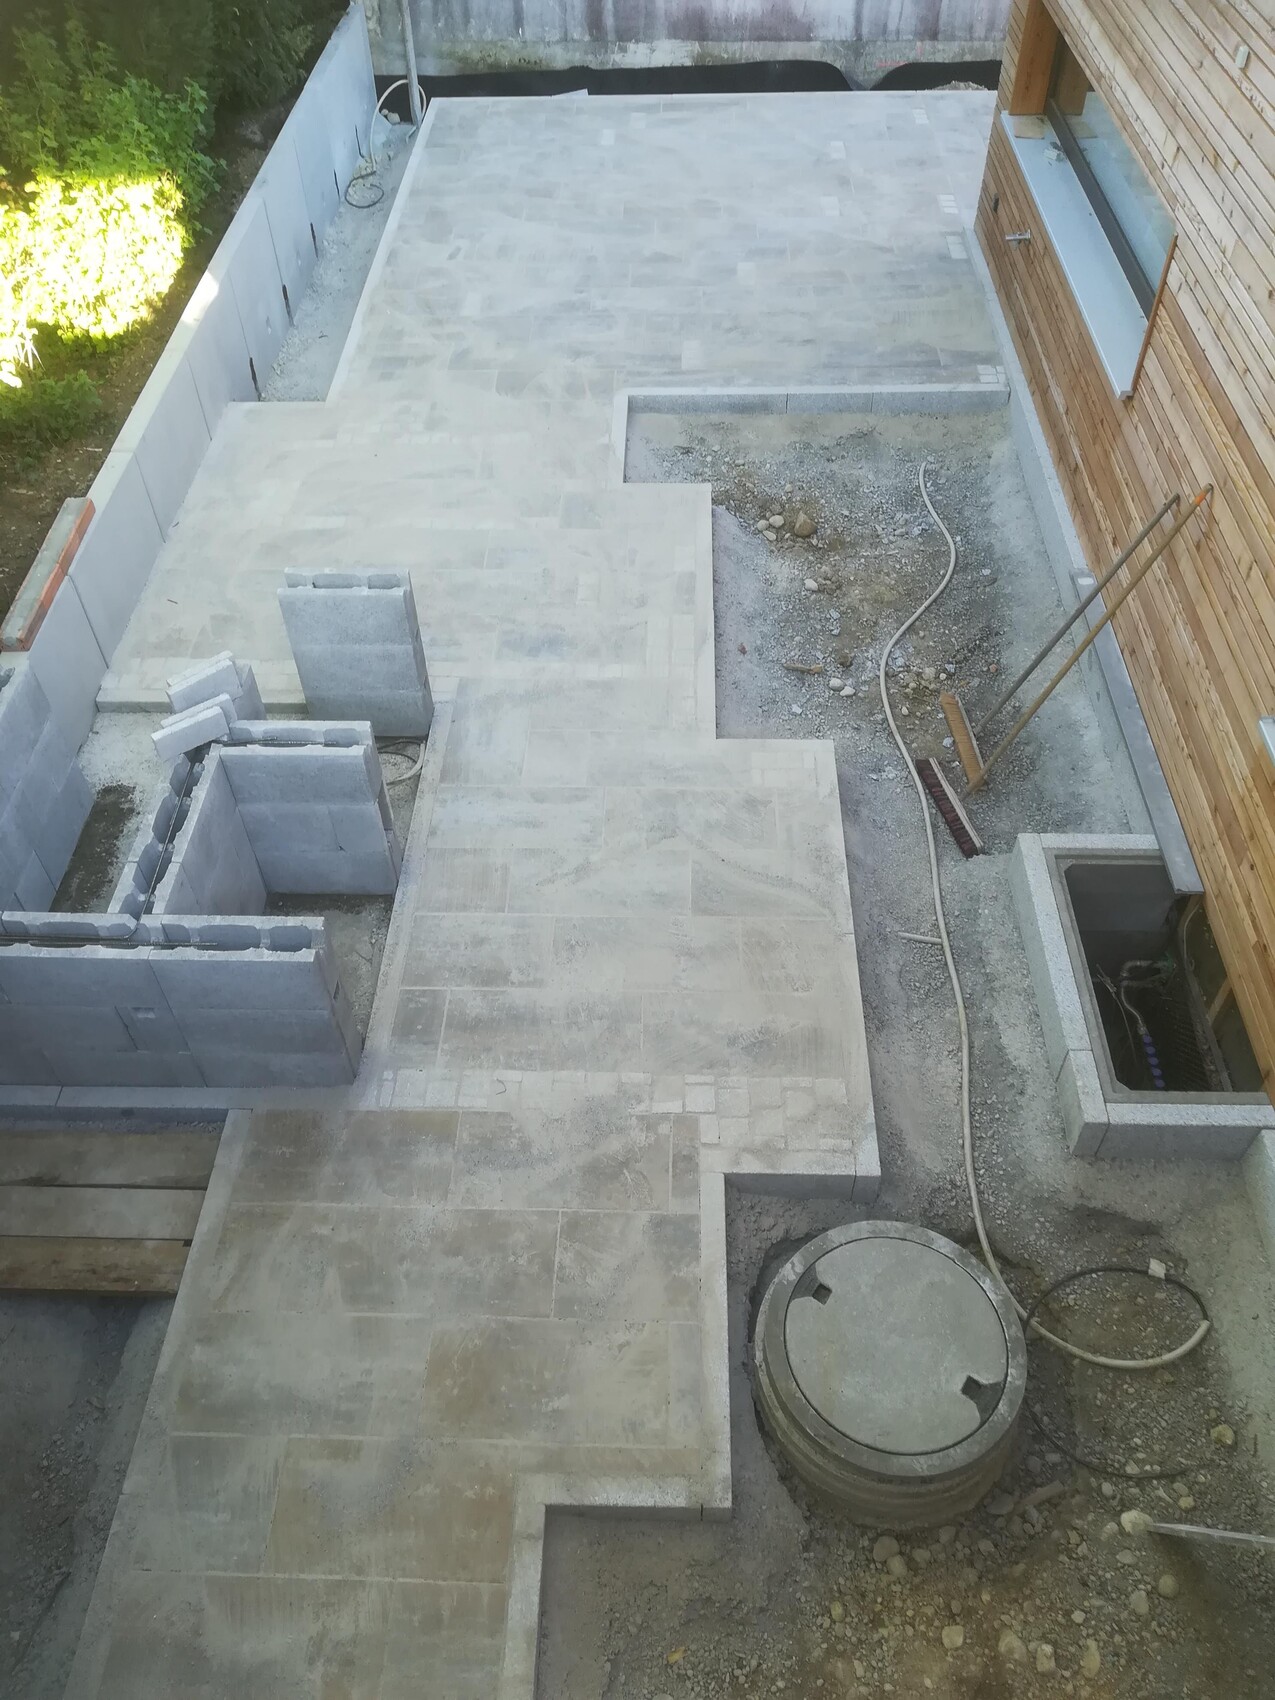
The installation took place as part of the garden landscaping, although the garden landscaper didn’t do the work. My husband built the foundation, and then a stove setter installed the oven.
The masonry foundation:
Now plastered:
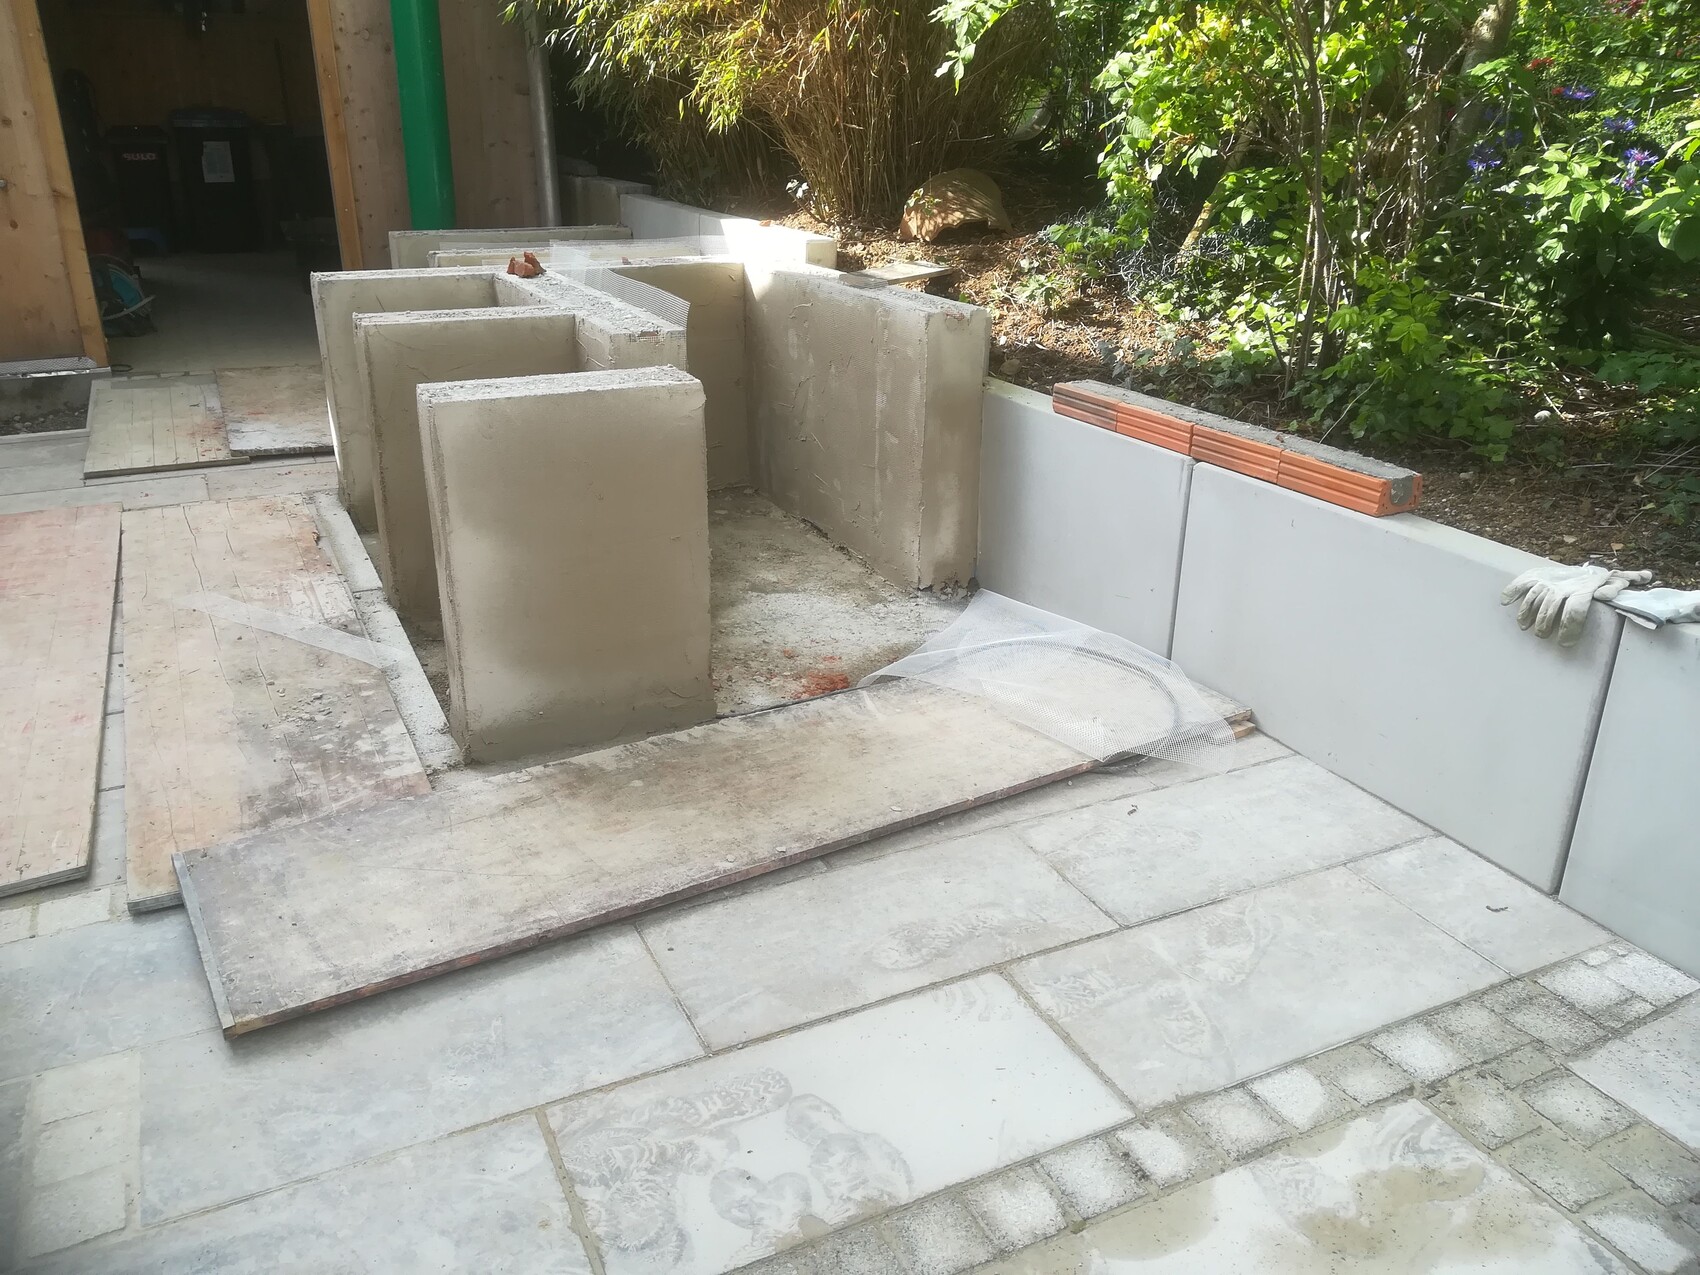
Then brick lintels were placed on top:

And finally, the oven was installed (it was a kit from Kandern Feuerfest):
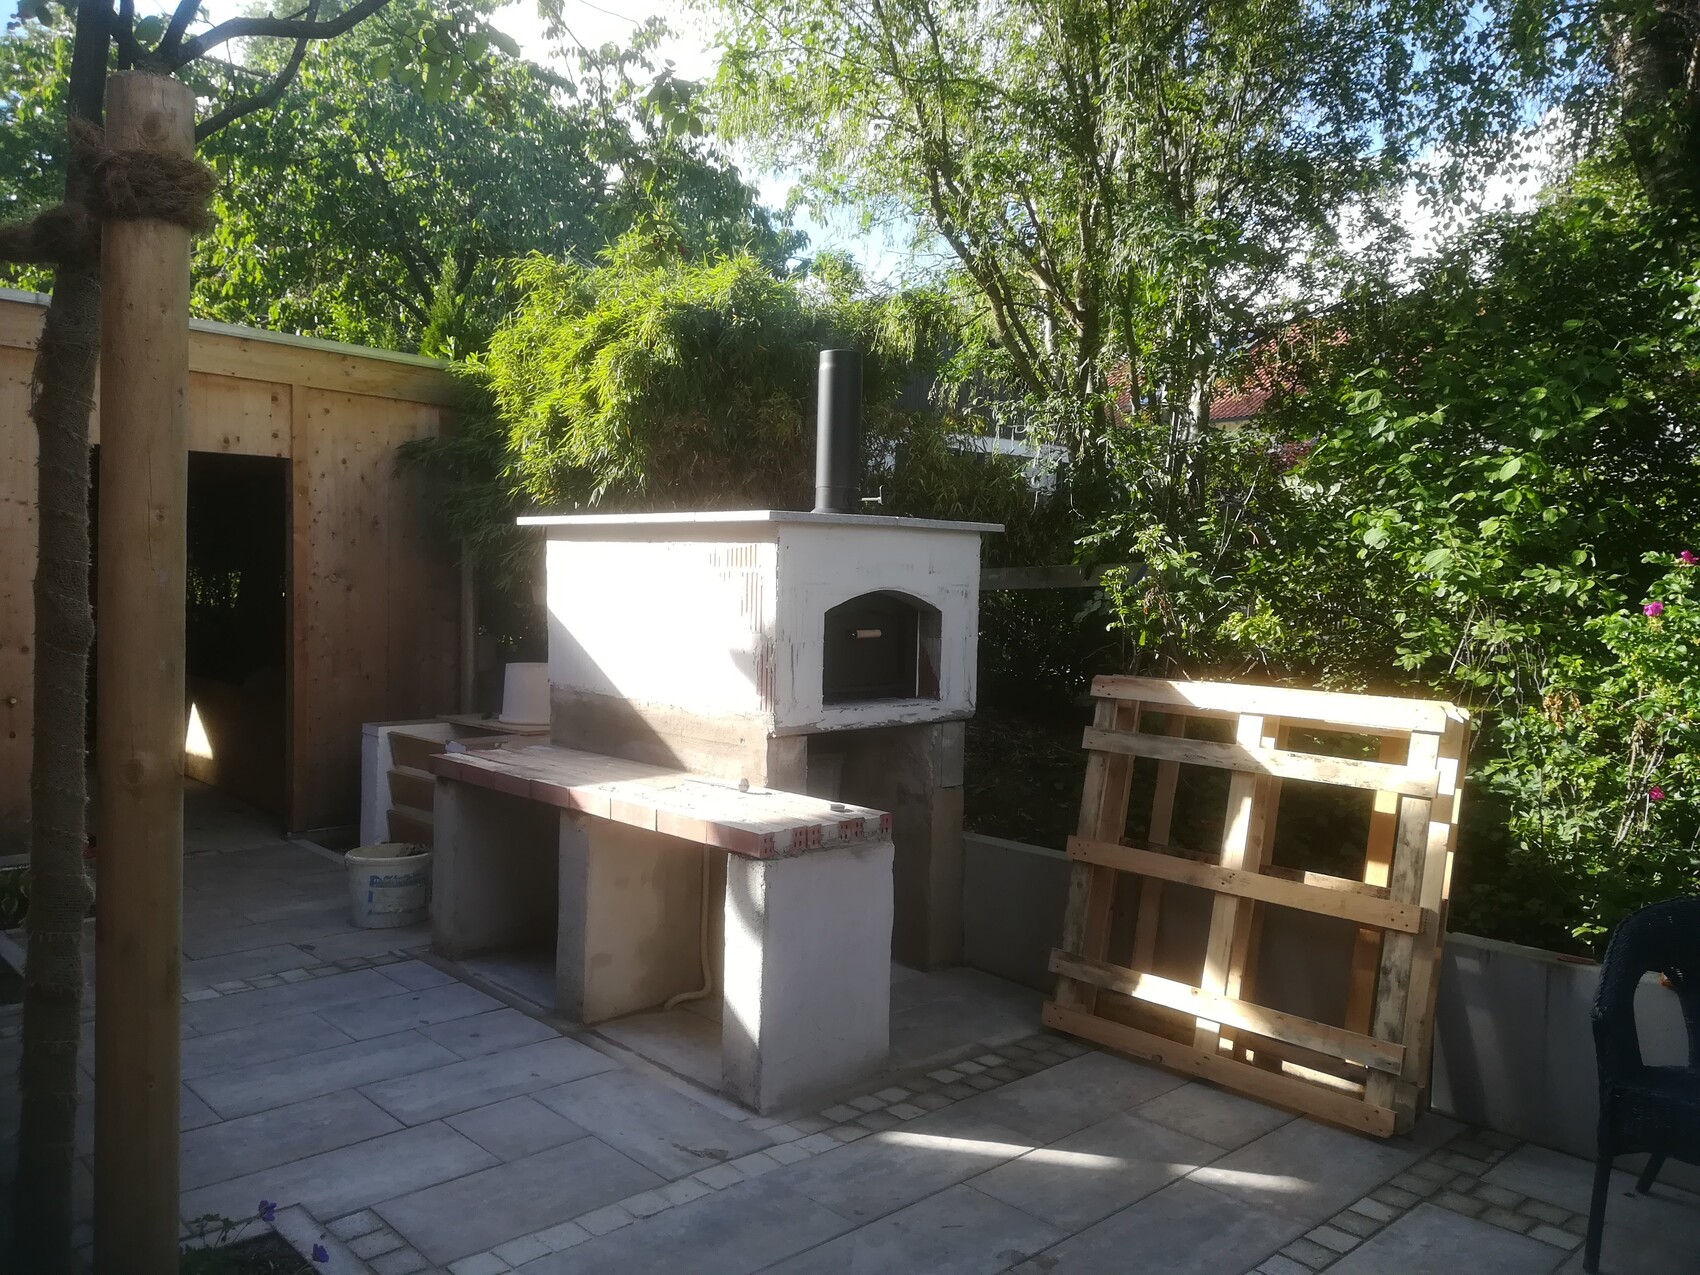
On top, granite slabs were added, and the work surface next to the oven now also has a granite slab that we had cut to size.
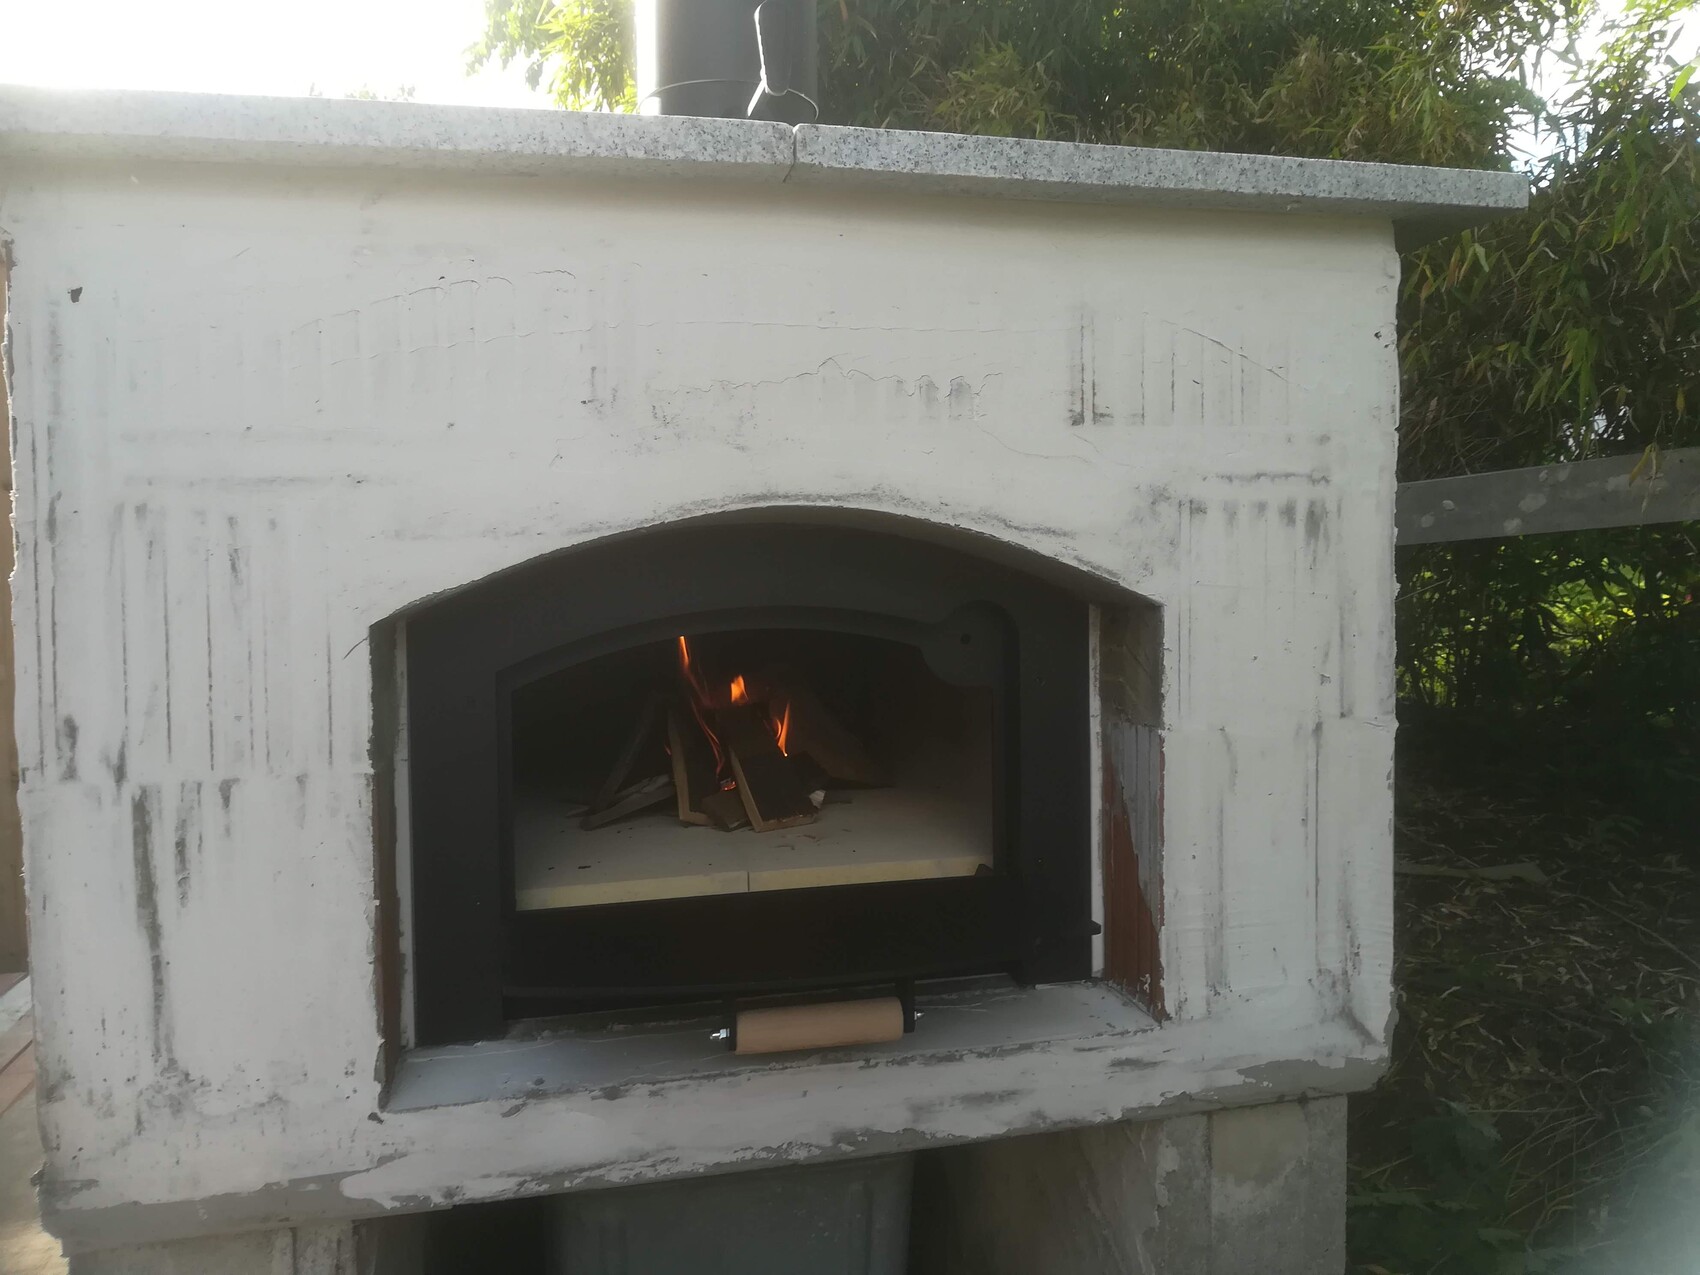
After a few days, the oven was cured. This meant starting slowly with small loads of wood until it was possible to use the full amount, making the oven fully operational. This is a process that takes several days:
Finally, we were able to use the oven for the first time! Since I didn’t have any sourdough starter yet, we baked a bread using ready-made sourdough (which can no longer be used as a leavening agent, but only adds flavor) and a ciabatta:
We were already very impressed. You can always use the residual heat for all kinds of slow-cooked dishes:
By now, we have become pros. Whether venison leg, layered meat, rabbit, or goulash — there is always something we put into the oven after baking bread, and without any extra effort, we have wonderfully tender meat dishes after a few hours or overnight.
Of course, you need to upgrade your equipment:
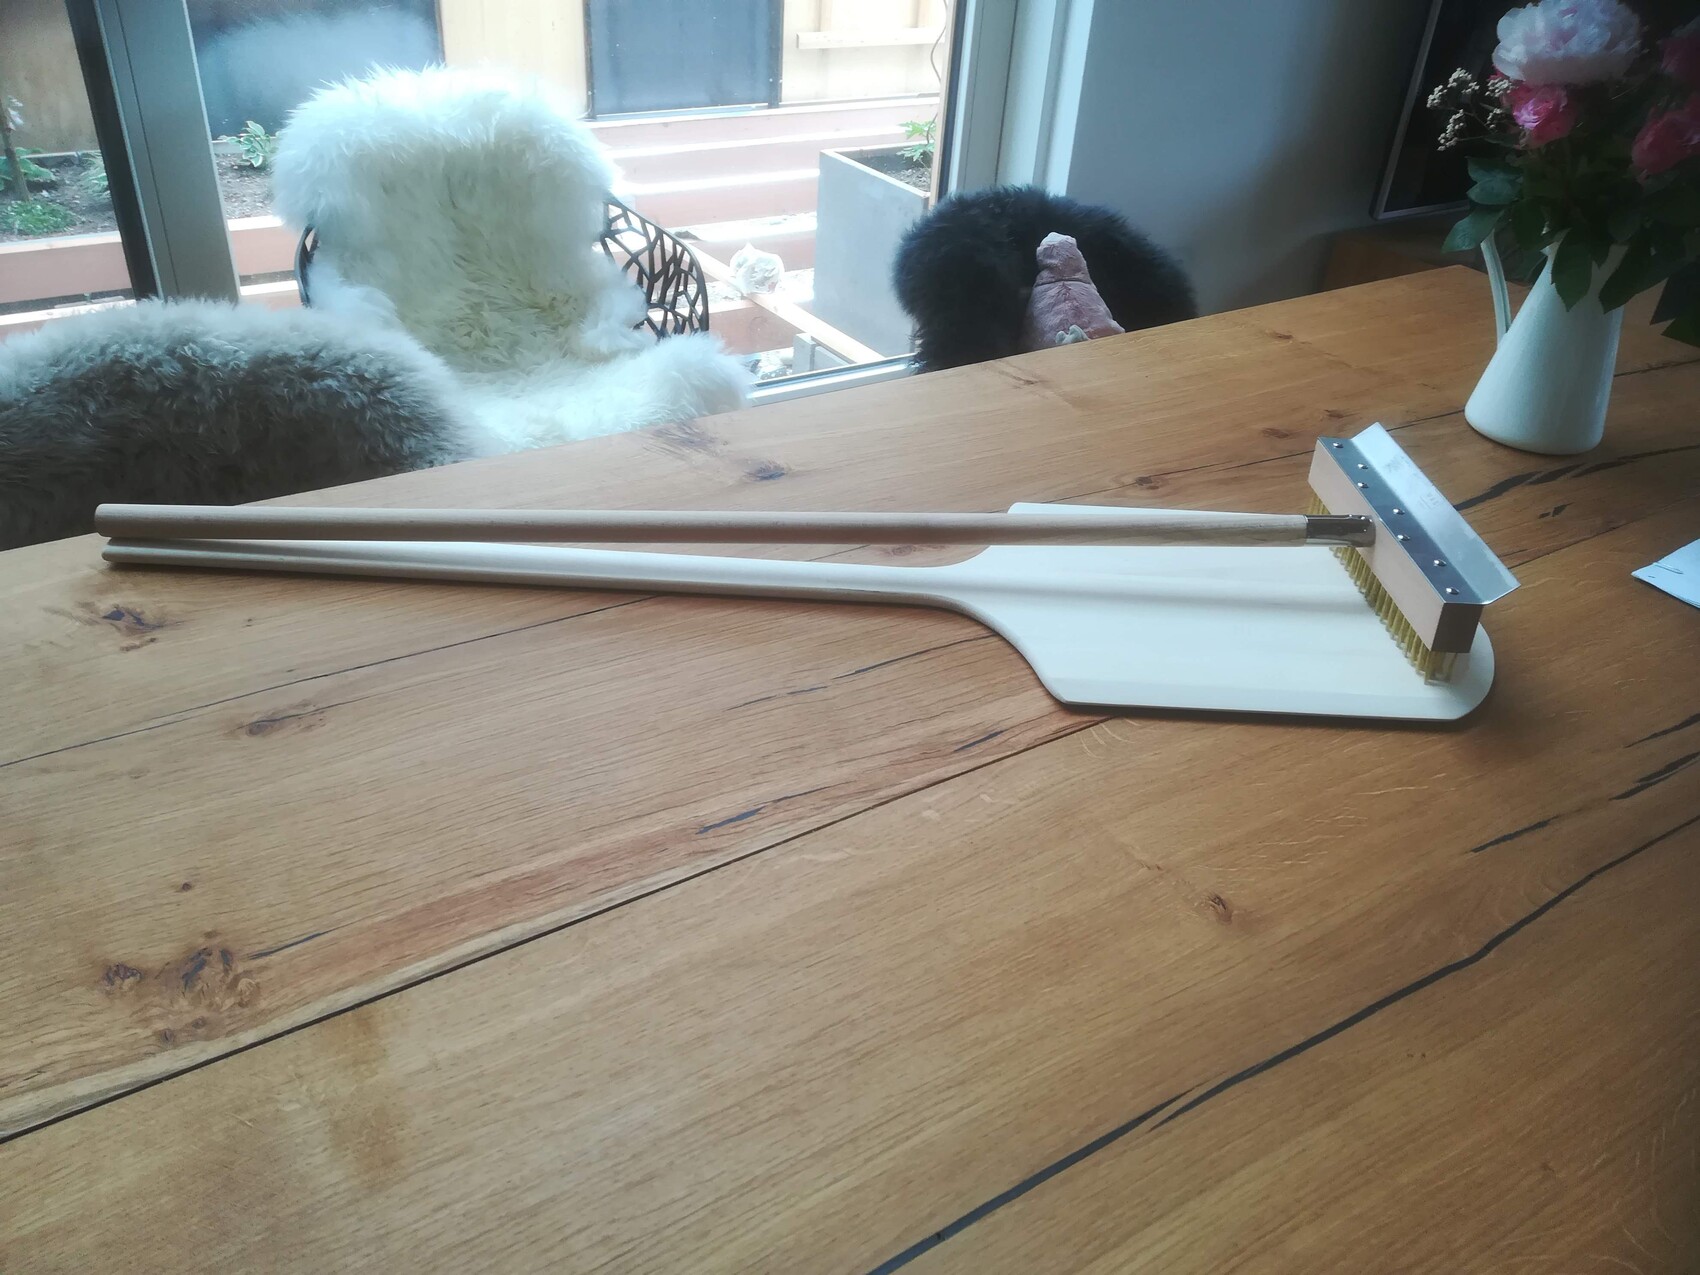
A bread peel and a fire rake with a brush to clean the baking chamber after heating. We knew that we would need these.
The installation took place as part of the garden landscaping, although the garden landscaper didn’t do the work. My husband built the foundation, and then a stove setter installed the oven.
The masonry foundation:
Now plastered:
Then brick lintels were placed on top:
And finally, the oven was installed (it was a kit from Kandern Feuerfest):
On top, granite slabs were added, and the work surface next to the oven now also has a granite slab that we had cut to size.
After a few days, the oven was cured. This meant starting slowly with small loads of wood until it was possible to use the full amount, making the oven fully operational. This is a process that takes several days:
Finally, we were able to use the oven for the first time! Since I didn’t have any sourdough starter yet, we baked a bread using ready-made sourdough (which can no longer be used as a leavening agent, but only adds flavor) and a ciabatta:
We were already very impressed. You can always use the residual heat for all kinds of slow-cooked dishes:
By now, we have become pros. Whether venison leg, layered meat, rabbit, or goulash — there is always something we put into the oven after baking bread, and without any extra effort, we have wonderfully tender meat dishes after a few hours or overnight.
Of course, you need to upgrade your equipment:
A bread peel and a fire rake with a brush to clean the baking chamber after heating. We knew that we would need these.

What caught us off guard was that our Kitchen Aid didn’t really get us anywhere with bread baking. It’s actually quite a sturdy stand mixer, but its maximum dough capacity is 1kg (2.2 lbs) — just enough for a single loaf. But you don’t heat up an entire oven for just one loaf; it needs to be worth the effort, and both the Kitchen Aid and the baker were reaching their limits.
The Kitchen Aid can only run for a maximum of 10 minutes at a time — which is already necessary just for one loaf. When you want to bake 5 or more loaves, the little machine really struggles. So does the baker. That means the dough for each loaf has to be made separately.
That’s quite a lot of work and barely acceptable timewise.
So, we started looking for a dough kneading machine (DKM). At first, I was very optimistic. Given the many pizzerias closing during the pandemic, surely a used DKM could be found! Well, yes — but not necessarily what you want. Eventually, we decided: the dough bowl had to be removable so we could work with two, enabling us to make two different types of bread without much hassle.
That rules out most pizzeria machines right away, since their bowls are fixed.
The bowl also needed to be large enough to allow the dough to rise inside it. For 5 - 6kg (11 - 13 lbs) of dough, the machine must be sized for at least 10 - 12kg (22 - 26 lbs) of dough capacity.
In the end, only the Häussler DKM fit the bill — either the 14kg (31 lbs) or the 18kg (40 lbs) version. The price difference wasn’t significant, so naturally we went for the larger one! With two bowls and the matching cover hood, baking could finally begin!
We were very lucky to find a used machine that met our needs perfectly. These machines hold their value extremely well, so my new treasure is already of age — 18 years old. But it still looks almost new:
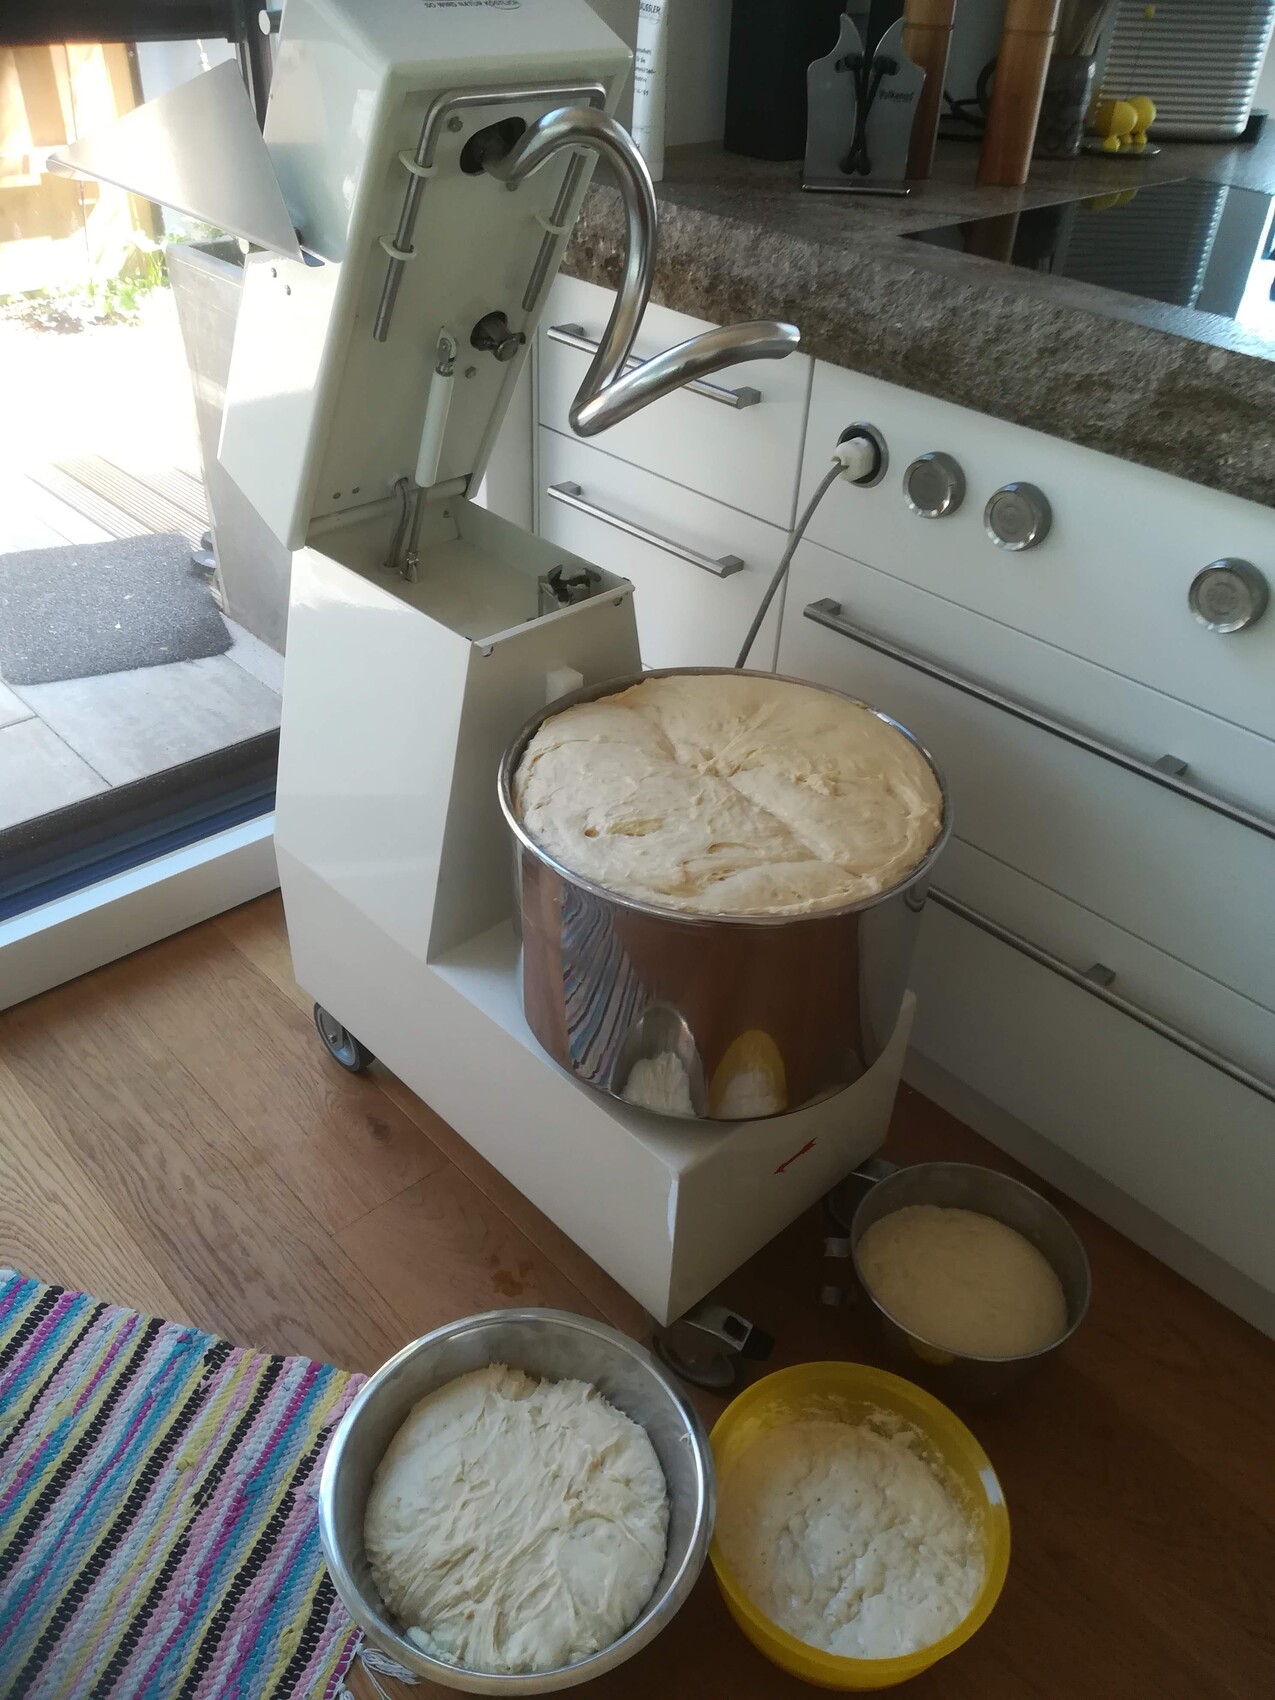
The picture above is from the machine’s first run last weekend. To test it, we brought 10kg (22 lbs) of flour — the stated maximum amount — and mixed it with water.
The machine ran smoothly, and we came home with a full dough bowl holding about 9kg (20 lbs) of flour mixed with water — still quite a lot!
Somehow, I couldn’t just throw away the lump of flour, so I made yeast dough out of it. I set aside a bit for fresh Sunday rolls, made Bohemian dumplings for dinner, and the rest became sweet yeast dough. You can see the result above. Altogether, that ended up being around 15kg (33 lbs) of yeast dough, and I baked like crazy (in the regular oven; there was no time to heat up the wood oven).
One tray of crumble cake and about 150 cinnamon rolls later, I gave up and froze the rest in portions. We probably have enough yeast dough stocked up for the whole extended family for the next two years…
And then, of course, it was finally time to bake bread with it. A bread baking day requires at least a day of preparation. By now, I’m also a proud owner of several home-cultivated sourdough starters (my husband is always teasing me: “So, how are your pets doing?”), and sourdough bread takes some planning. So, I prepped on Monday and yesterday was the big baking day!
This time it was pumpkin crust bread and a rye bread with a three-stage fermentation (which makes it especially digestible).
Finally, the new machine got its proper use!
It really makes a difference whether you have to make dough for each loaf separately or can just mix 5kg (11 lbs) of dough in one go! It’s so much faster, and the machine barely breaks a sweat. My poor little Kitchen Aid would have groaned and given up.
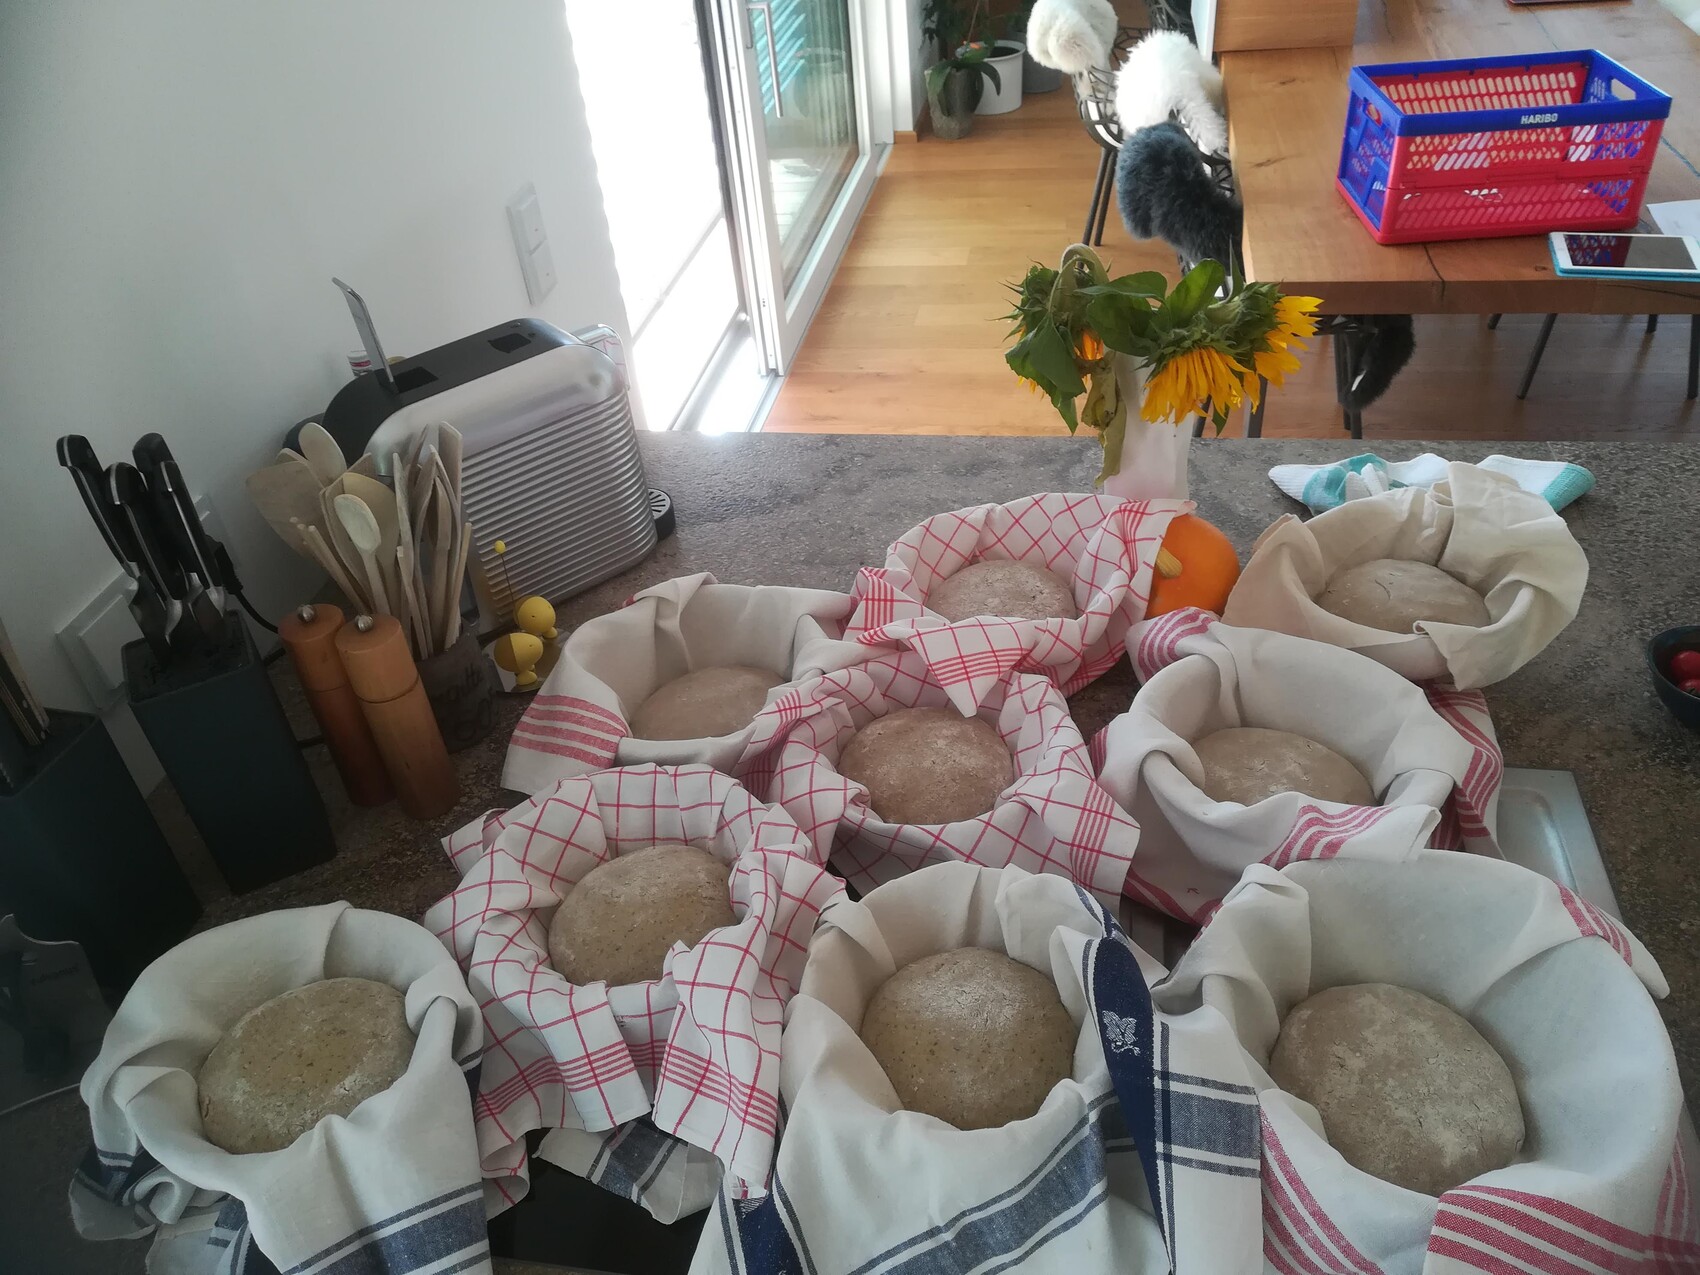
Here’s some pictures of the final proofing in proofing baskets (or, lacking proofing baskets, various bowls):
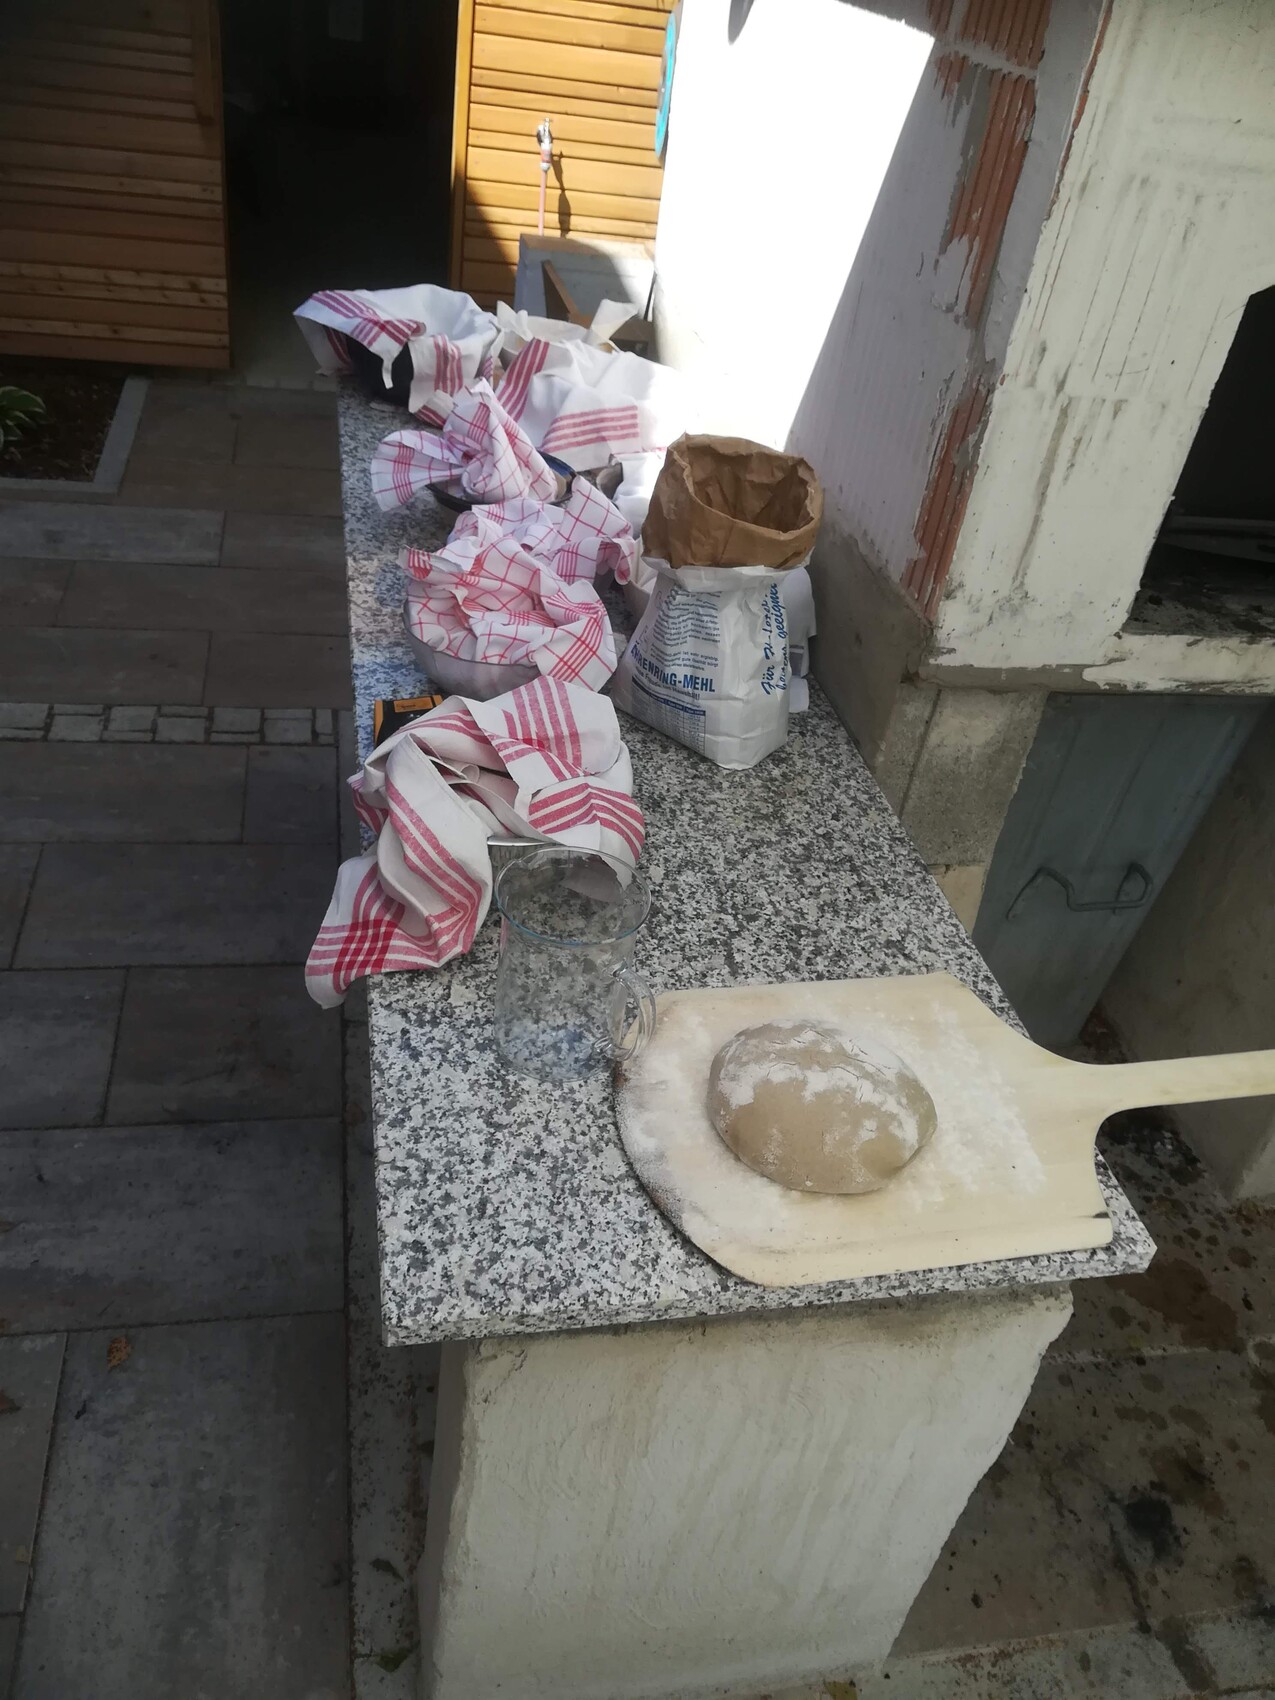
Just before loading into the oven:
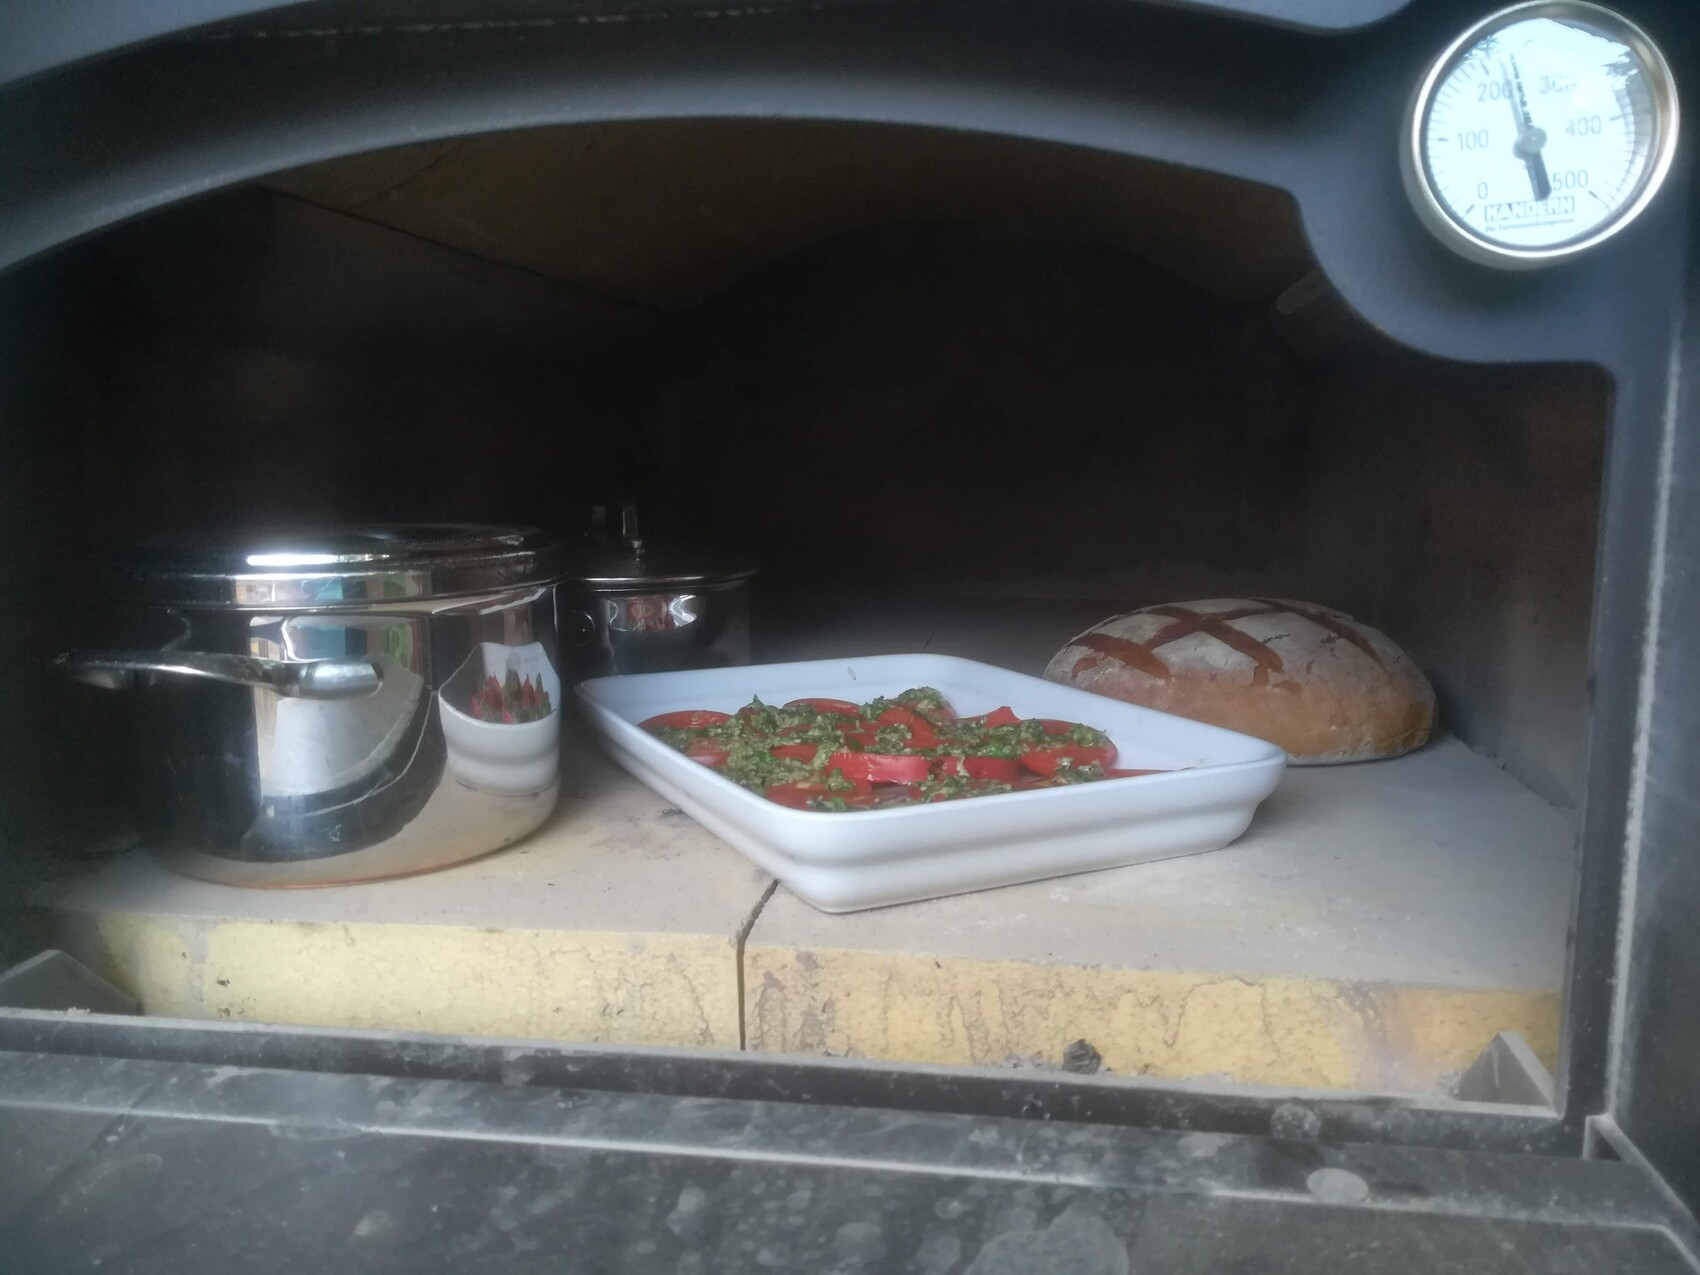
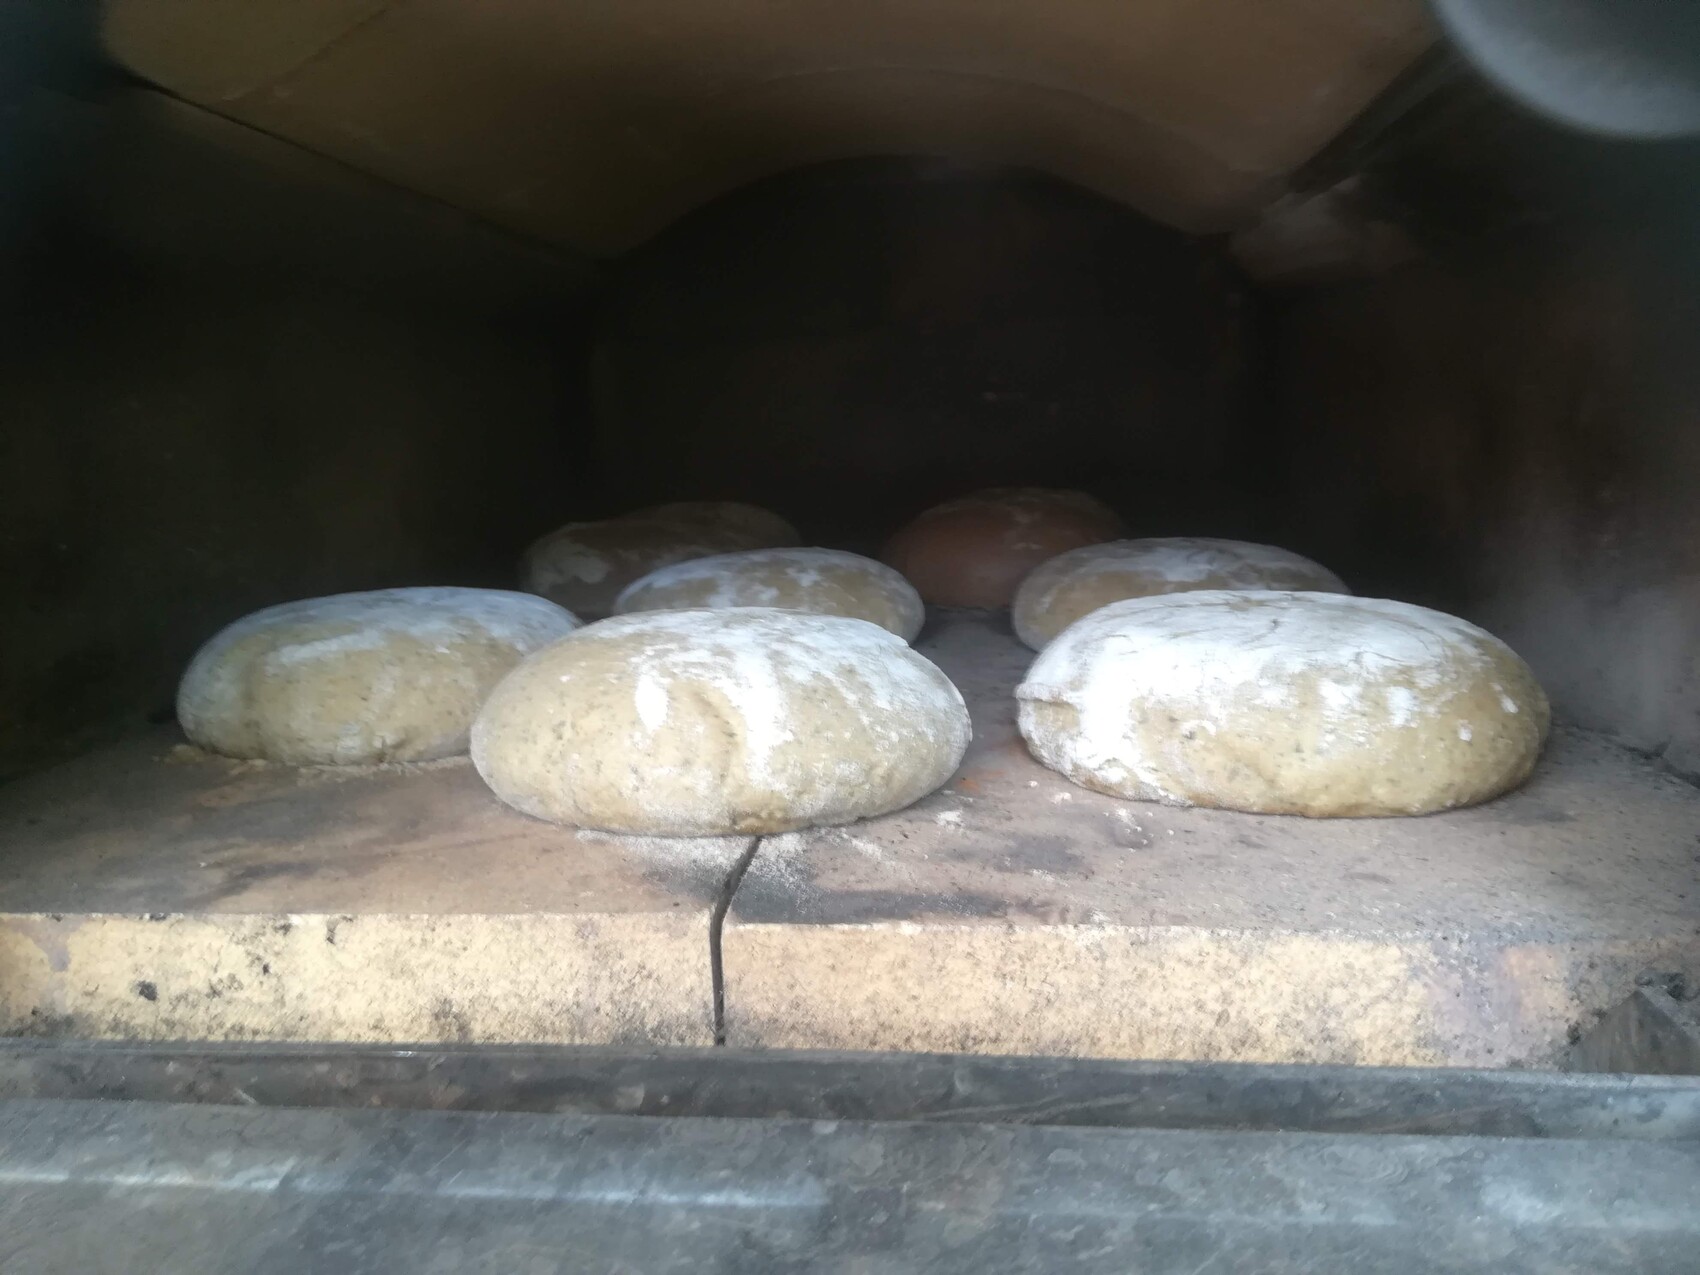
Finally, the oven is full!
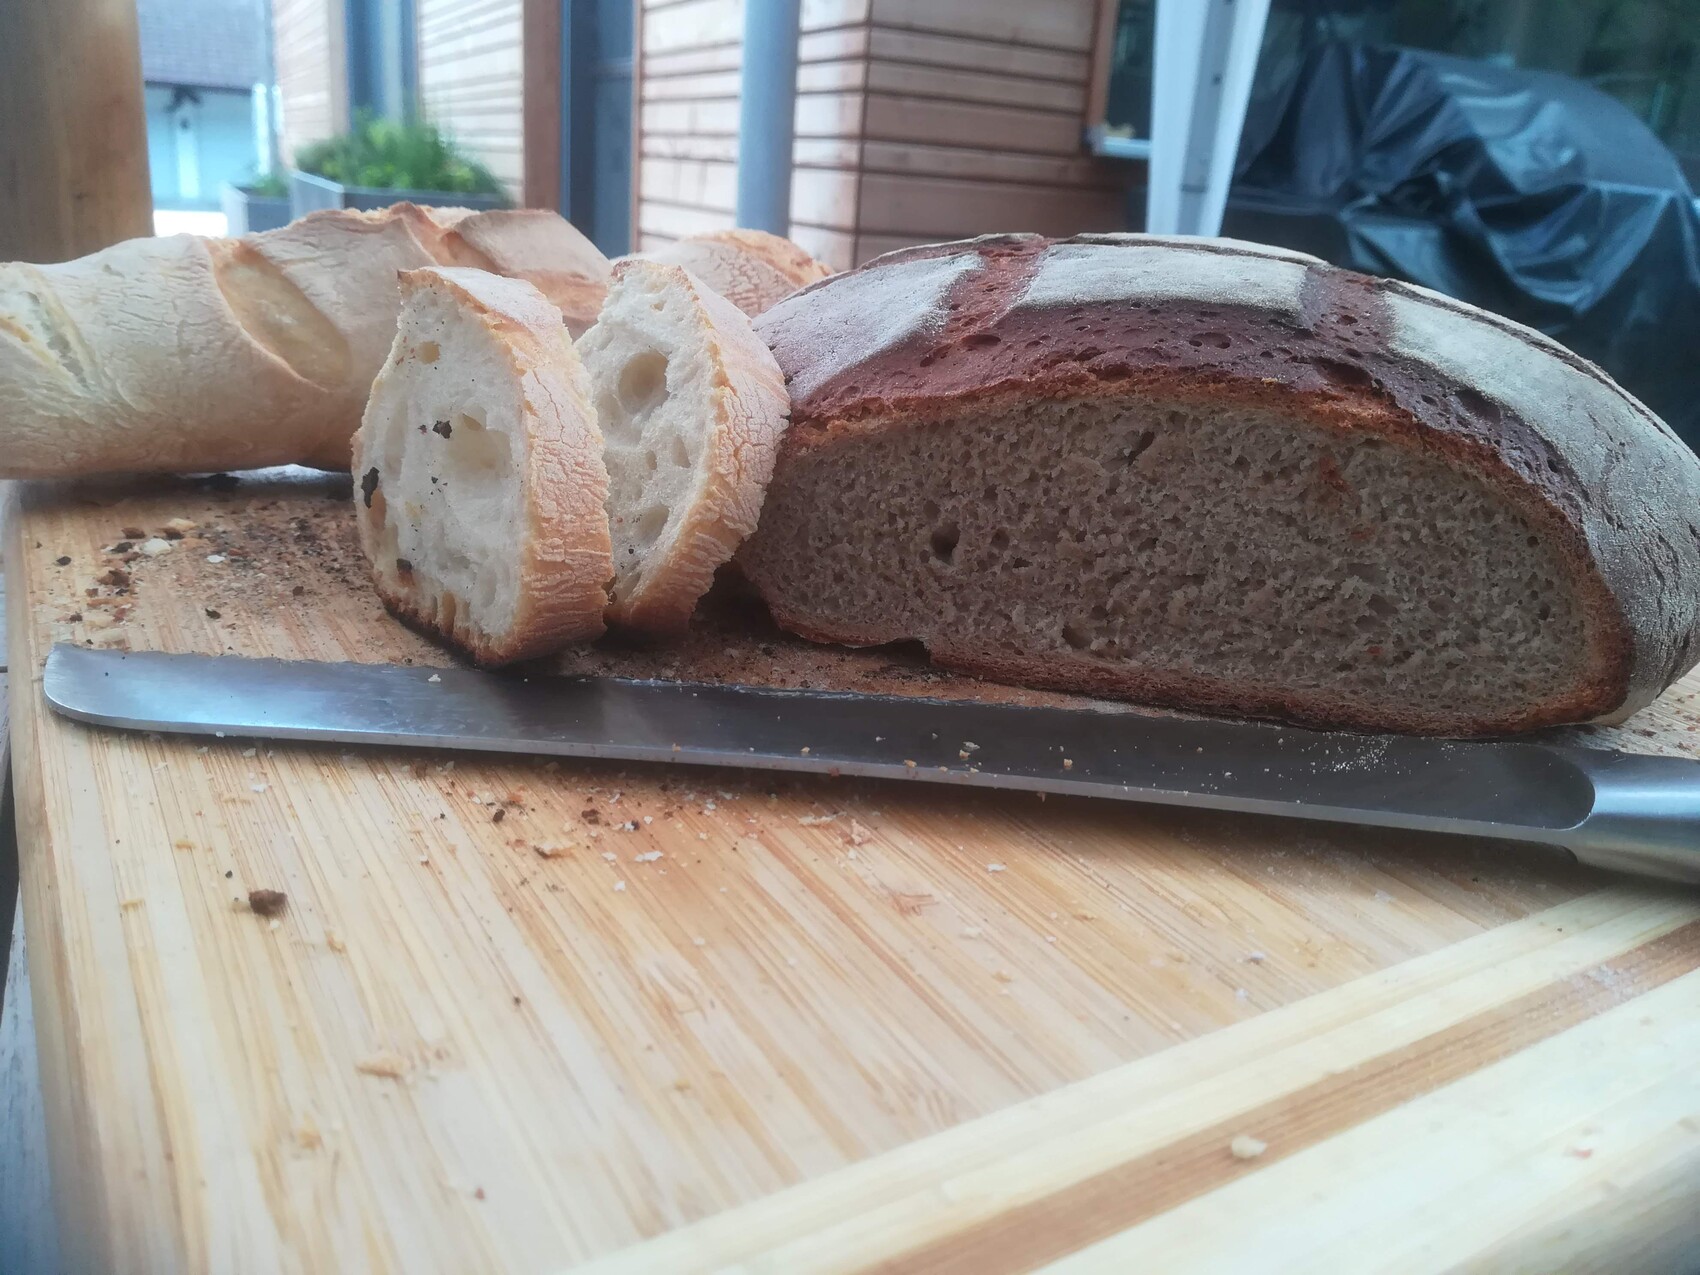
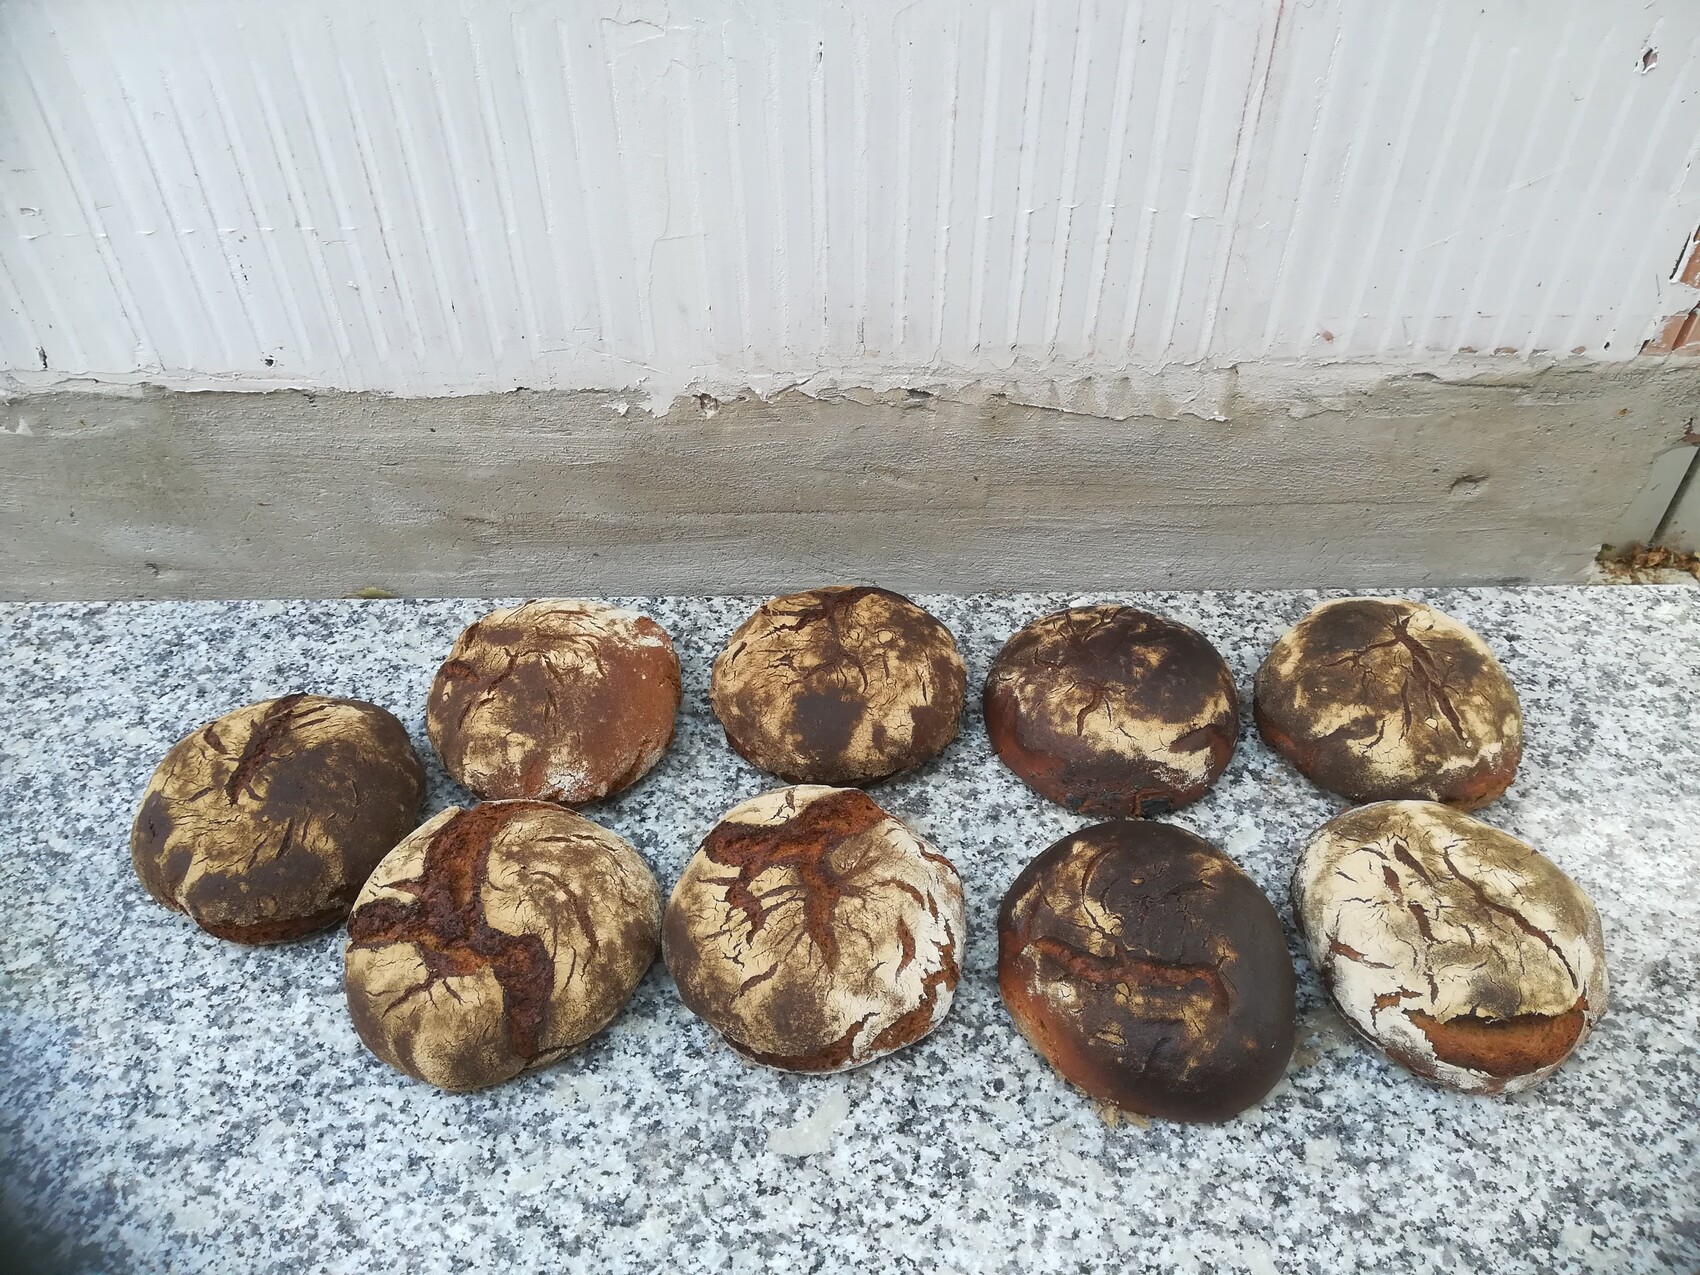
And after an hour, the bread is done:

The oven still needs to be plastered at some point, then it will be finished.
Of course, pizza works too, but that requires higher temperatures than bread baking and the fire stays in the oven chamber. My brother is our pizza expert, and I’ll share pictures from our next family pizza session!
The Kitchen Aid can only run for a maximum of 10 minutes at a time — which is already necessary just for one loaf. When you want to bake 5 or more loaves, the little machine really struggles. So does the baker. That means the dough for each loaf has to be made separately.
That’s quite a lot of work and barely acceptable timewise.
So, we started looking for a dough kneading machine (DKM). At first, I was very optimistic. Given the many pizzerias closing during the pandemic, surely a used DKM could be found! Well, yes — but not necessarily what you want. Eventually, we decided: the dough bowl had to be removable so we could work with two, enabling us to make two different types of bread without much hassle.
That rules out most pizzeria machines right away, since their bowls are fixed.
The bowl also needed to be large enough to allow the dough to rise inside it. For 5 - 6kg (11 - 13 lbs) of dough, the machine must be sized for at least 10 - 12kg (22 - 26 lbs) of dough capacity.
In the end, only the Häussler DKM fit the bill — either the 14kg (31 lbs) or the 18kg (40 lbs) version. The price difference wasn’t significant, so naturally we went for the larger one! With two bowls and the matching cover hood, baking could finally begin!
We were very lucky to find a used machine that met our needs perfectly. These machines hold their value extremely well, so my new treasure is already of age — 18 years old. But it still looks almost new:
The picture above is from the machine’s first run last weekend. To test it, we brought 10kg (22 lbs) of flour — the stated maximum amount — and mixed it with water.
The machine ran smoothly, and we came home with a full dough bowl holding about 9kg (20 lbs) of flour mixed with water — still quite a lot!
Somehow, I couldn’t just throw away the lump of flour, so I made yeast dough out of it. I set aside a bit for fresh Sunday rolls, made Bohemian dumplings for dinner, and the rest became sweet yeast dough. You can see the result above. Altogether, that ended up being around 15kg (33 lbs) of yeast dough, and I baked like crazy (in the regular oven; there was no time to heat up the wood oven).
One tray of crumble cake and about 150 cinnamon rolls later, I gave up and froze the rest in portions. We probably have enough yeast dough stocked up for the whole extended family for the next two years…
And then, of course, it was finally time to bake bread with it. A bread baking day requires at least a day of preparation. By now, I’m also a proud owner of several home-cultivated sourdough starters (my husband is always teasing me: “So, how are your pets doing?”), and sourdough bread takes some planning. So, I prepped on Monday and yesterday was the big baking day!
This time it was pumpkin crust bread and a rye bread with a three-stage fermentation (which makes it especially digestible).
Finally, the new machine got its proper use!
It really makes a difference whether you have to make dough for each loaf separately or can just mix 5kg (11 lbs) of dough in one go! It’s so much faster, and the machine barely breaks a sweat. My poor little Kitchen Aid would have groaned and given up.
Here’s some pictures of the final proofing in proofing baskets (or, lacking proofing baskets, various bowls):
Just before loading into the oven:
Finally, the oven is full!
And after an hour, the bread is done:
The oven still needs to be plastered at some point, then it will be finished.
Of course, pizza works too, but that requires higher temperatures than bread baking and the fire stays in the oven chamber. My brother is our pizza expert, and I’ll share pictures from our next family pizza session!
Similar topics