ᐅ Mold Problem in a New Kitchen – How to Prevent It in the Future?
Created on: 14 Feb 2021 21:54
N
Nanopixel
In our kitchen, which was completely renovated in mid-2020, we have a problem with mold:
It became noticeable when water suddenly started leaking from under the refrigerator. At first, I thought it was a device malfunction, but that does not seem to be the case. We have a built-in refrigerator, and after removing the cabinet where it was installed, we discovered the problem: mold in the lower corner of the room and on the wall next to the refrigerator (see picture). There was even mold between the refrigerator and the built-in cabinet (picture 2). The entire right side wall of the appliance was covered with water droplets (picture 3).
Trusted tradespeople (tiler and plasterer) examined the situation and said it is condensed water caused by humidity. The air cannot circulate properly around this cabinet, which leads to this problem. In addition, the refrigerator is placed directly in the corner of the room against two exterior walls (northeast).
How should this problem be addressed? Removing the mold and thoroughly drying everything first seems obvious.
The tiler suggested installing ventilation openings in the wall above the refrigerator to help regulate humidity. I find that reasonable, but I am concerned that, since the cabinet is placed right next to the wall on the right side with only about 0.5 to 1 cm (0.2 to 0.4 inches) of space, condensation might still form there despite ventilation.
Are there any additional measures that could be taken here—perhaps filling the small cavity somehow?
Thanks in advance for any advice.
N
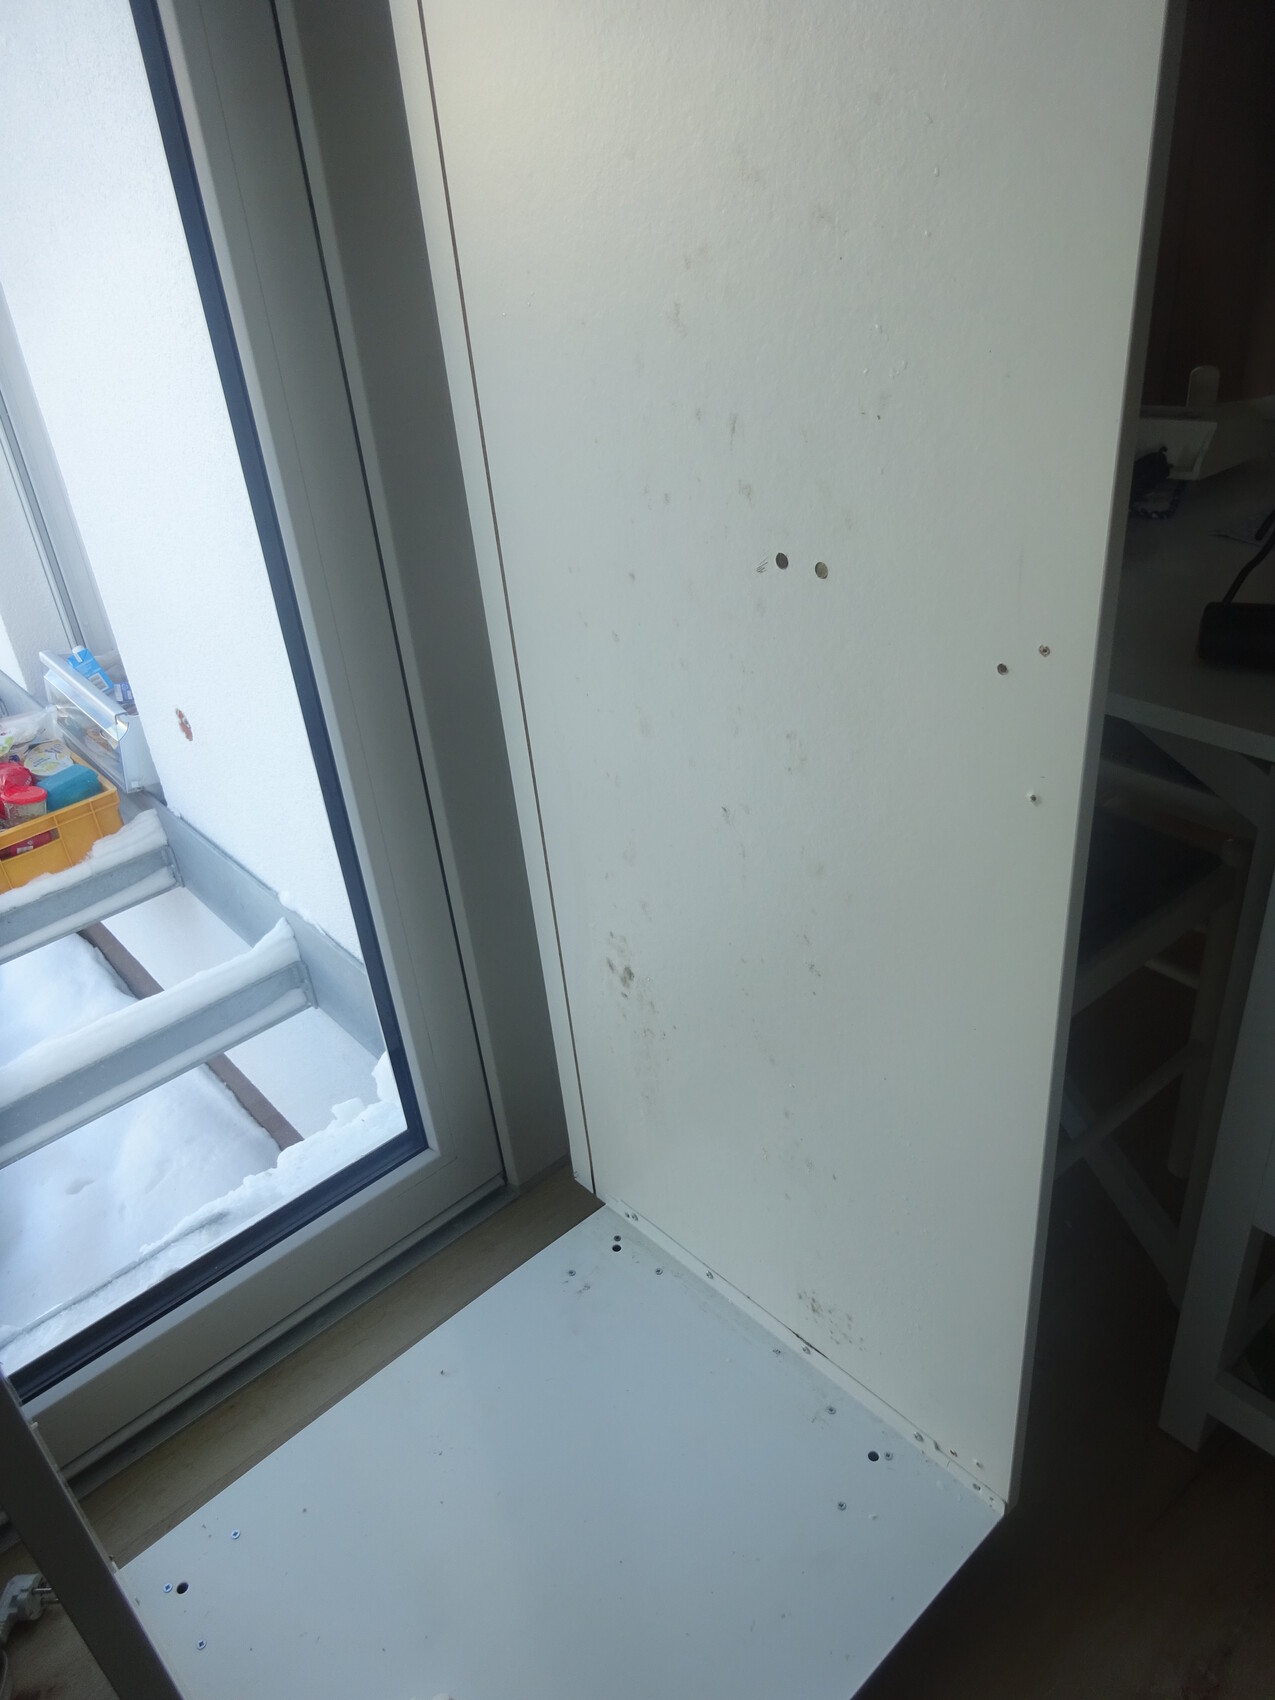
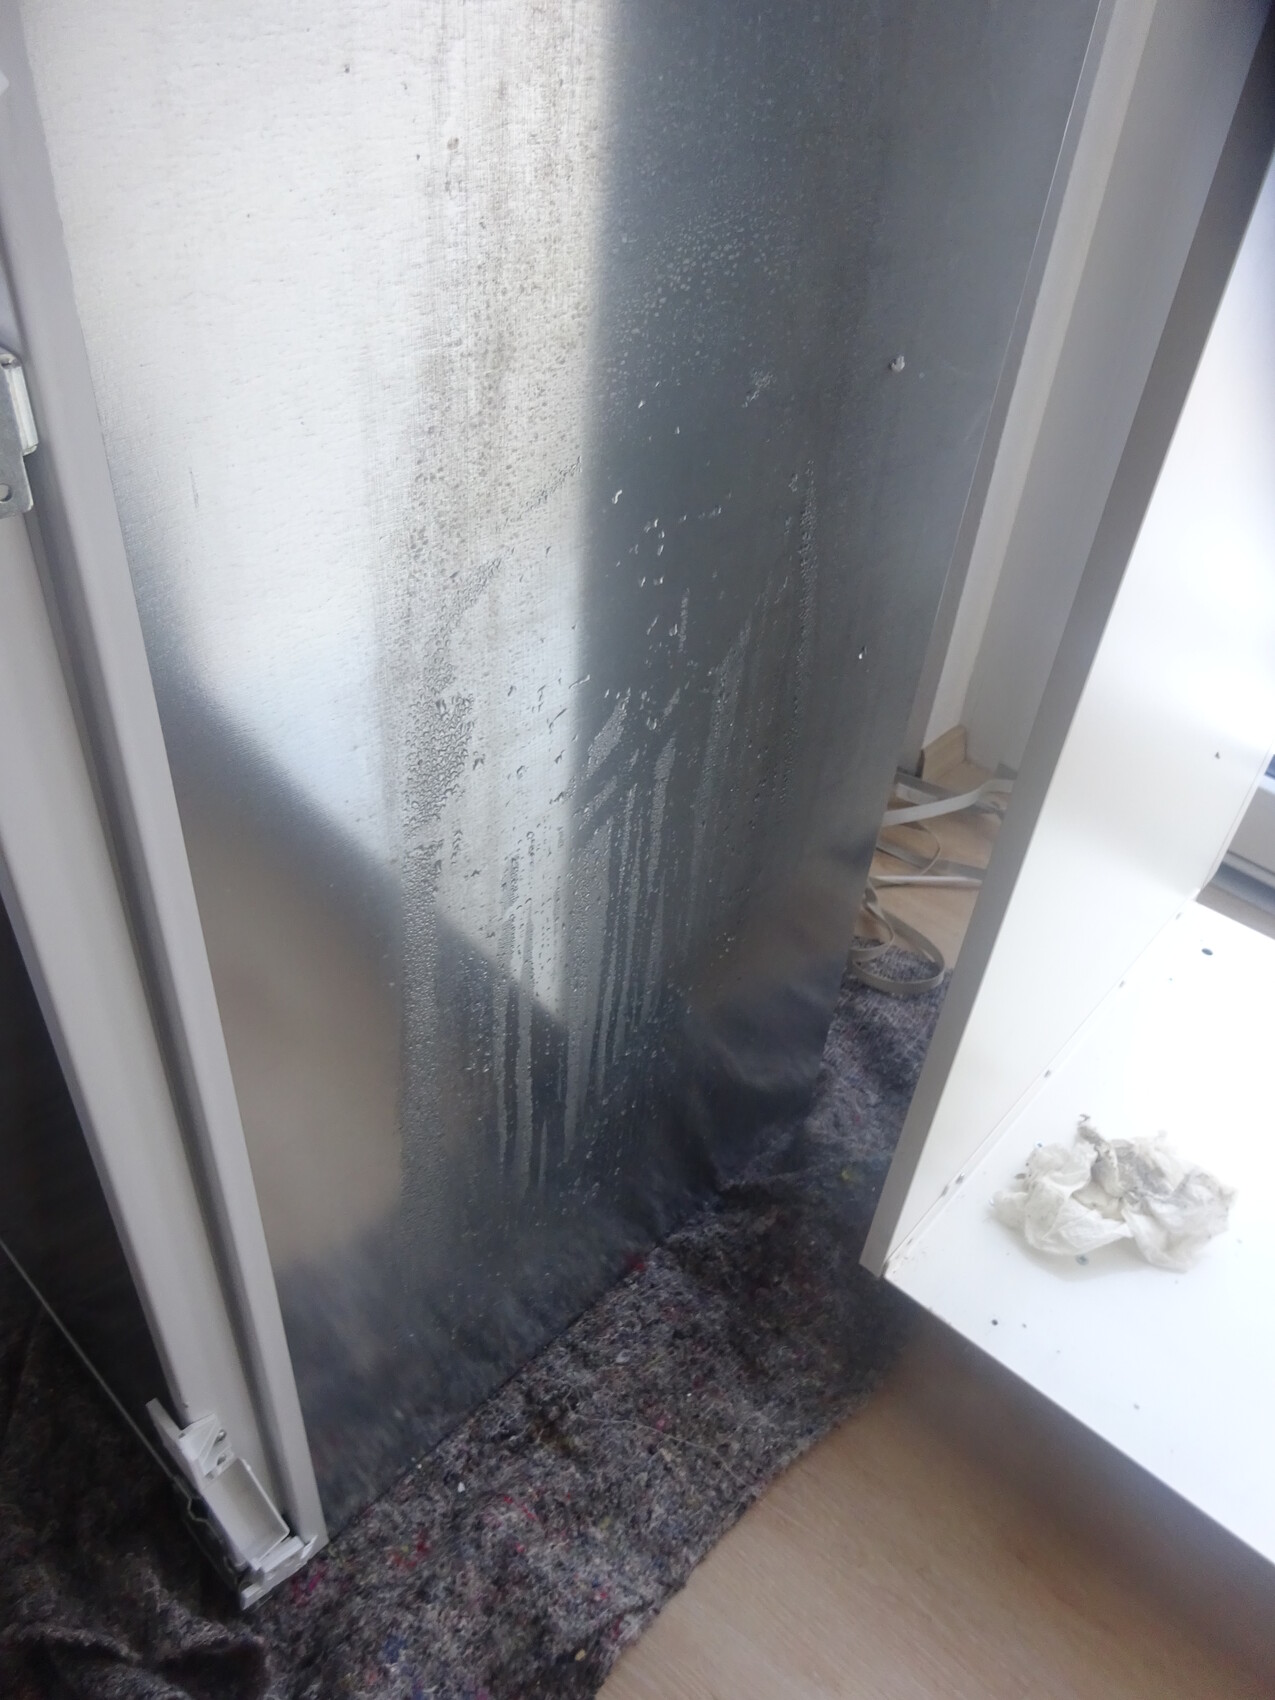
S
Stefan00120 Feb 2021 22:15There are cabinet fans available.
Try searching for AC Infinity on Google.
Try searching for AC Infinity on Google.
N
Nanopixel22 Feb 2021 23:58Cabinet fan is nice and all, but none of the available sizes seem to fit.
So I need to make something myself and currently have the following idea:
If all this fails and makes no difference, the cabinet will be removed, the wall will be insulated on the inside, and a 55cm (22 inches) freestanding fridge will be installed there.

So I need to make something myself and currently have the following idea:
- Since the ventilation grille under the fridge is 40cm (16 inches) wide, five 80mm (3.15 inches) fans can fit side by side. Ideally, these would be wired to run whenever the fridge compressor is on. Tapping into the compressor’s control phase and neutral wires should be straightforward, then connect a 12V power supply to run the fans.
- As strange as the idea initially seemed, I can imagine it would help to remove the right side panel of the cabinet (at least mostly). This would increase the air gap to the wall from 1cm (0.4 inches) to 2.5cm (1 inch), more than doubling it. Along with the fans mentioned above, this should significantly improve air circulation. I’m attaching a picture showing the cabinet as it was during assembly, with the right side panel practically pressed against the wall. I also find it a bit odd that there is hardly any space at the top for warm air from the heat exchanger to properly escape...
- Above the fridge, create a wall opening with an intelligent ventilation system that controls airflow based on room humidity. This point is especially important because ventilating this kitchen is really difficult: the window in the recess cannot be opened, and the patio door only opens outward—there is no tilt function. There are no other windows.
If all this fails and makes no difference, the cabinet will be removed, the wall will be insulated on the inside, and a 55cm (22 inches) freestanding fridge will be installed there.
N
Nanopixel5 Mar 2021 15:18Tassimat schrieb:
The base of the main frame usually rests on supports.
The remaining side panel should be screwed halfway up to the adjacent side panel, which makes it stable—actually more stable than before.
To prevent the top board from falling, attach an angle bracket to the outer wall where the top board rests or is screwed onto.
For the doors, you need to install a suitable strip (240 cm x 5 cm x 1.6 cm or similar [94 inches x 2 inches x 0.6 inches]), which is probably the most involved part of the job.
Alternatively, you can remove about 95% of the side panel using a jigsaw, leaving only the front section for the hinges. Of course, the remaining part must be screwed to the wall to prevent it from breaking off. @Tassimat As much as I initially found your suggestion a bit unusual, I now want to implement it alongside other measures. 🙂
I believe the most practical approach is to remove most of the side panel and leave a narrow strip along the full height at the front (I think this is what you meant in your last paragraph). There’s no need to keep anything for the hinges since they won’t be attached to the main frame.
The question now is where and how much of the side panel to remove with the jigsaw so that sufficient residual stability remains to 1. move the entire structure back into its intended position without it collapsing, and 2. ensure the refrigerator inside the frame does not shift around.
Maybe you have some good advice based on the picture I uploaded recently.
Best regards
N
Hard to say, I would generously cut out a section by hand and then screw the rest to the wall using brackets. If the refrigerator shifts, I would use one or two wooden blocks as spacers between the wall and the refrigerator.
You can start by cutting out just a little and see how that affects the stability.
A plan like this is easy to talk about. The first cut into the nice cabinet takes some courage.
Addendum: Is a part of that tile backsplash or whatever it is going to be removed as well?
You can start by cutting out just a little and see how that affects the stability.
A plan like this is easy to talk about. The first cut into the nice cabinet takes some courage.
Addendum: Is a part of that tile backsplash or whatever it is going to be removed as well?
N
Nanopixel6 Mar 2021 16:51I’m not really hesitant to cut into the unit because the alternative would be buying a new freestanding refrigerator, and then the old cabinet wouldn’t be needed anyway.
The section of the tile backsplash there doesn’t serve a purpose, but I preferred not to remove it. After all, the issues were not behind the refrigerator but next to it.
The section of the tile backsplash there doesn’t serve a purpose, but I preferred not to remove it. After all, the issues were not behind the refrigerator but next to it.
Similar topics