Hello everyone,
We moved into our new house in 2020, and now I have discovered some mold spots in the attic space. These spots are all located around the opening of the loft ladder. We have an unheated roof space.
This can only be related to warm air rising upwards (due to missing or insufficient insulation) and then condensing when it meets the cold air, right? At first glance, I could not see any damaged vapor barrier. The mold or damp areas are only visible in some isolated spots at the opening. Other areas are intact and dry.
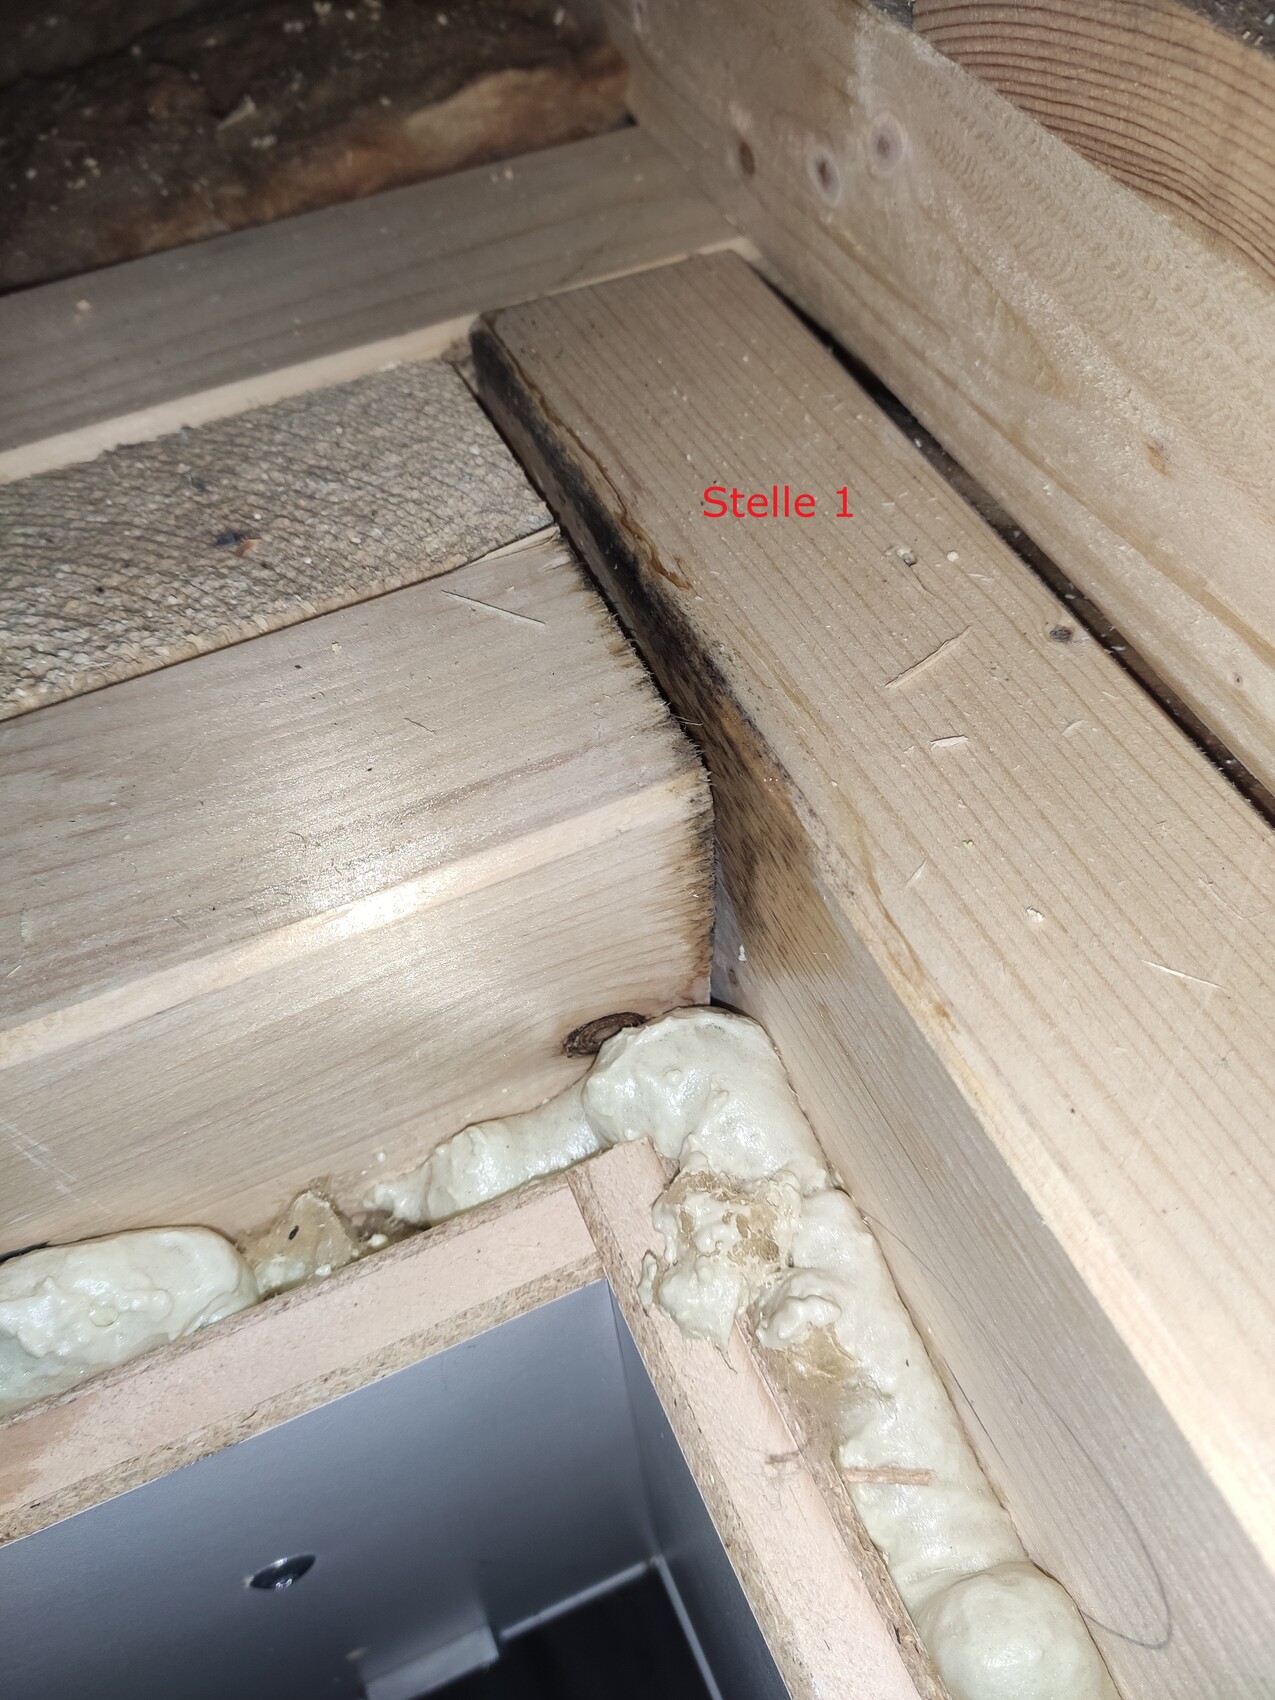
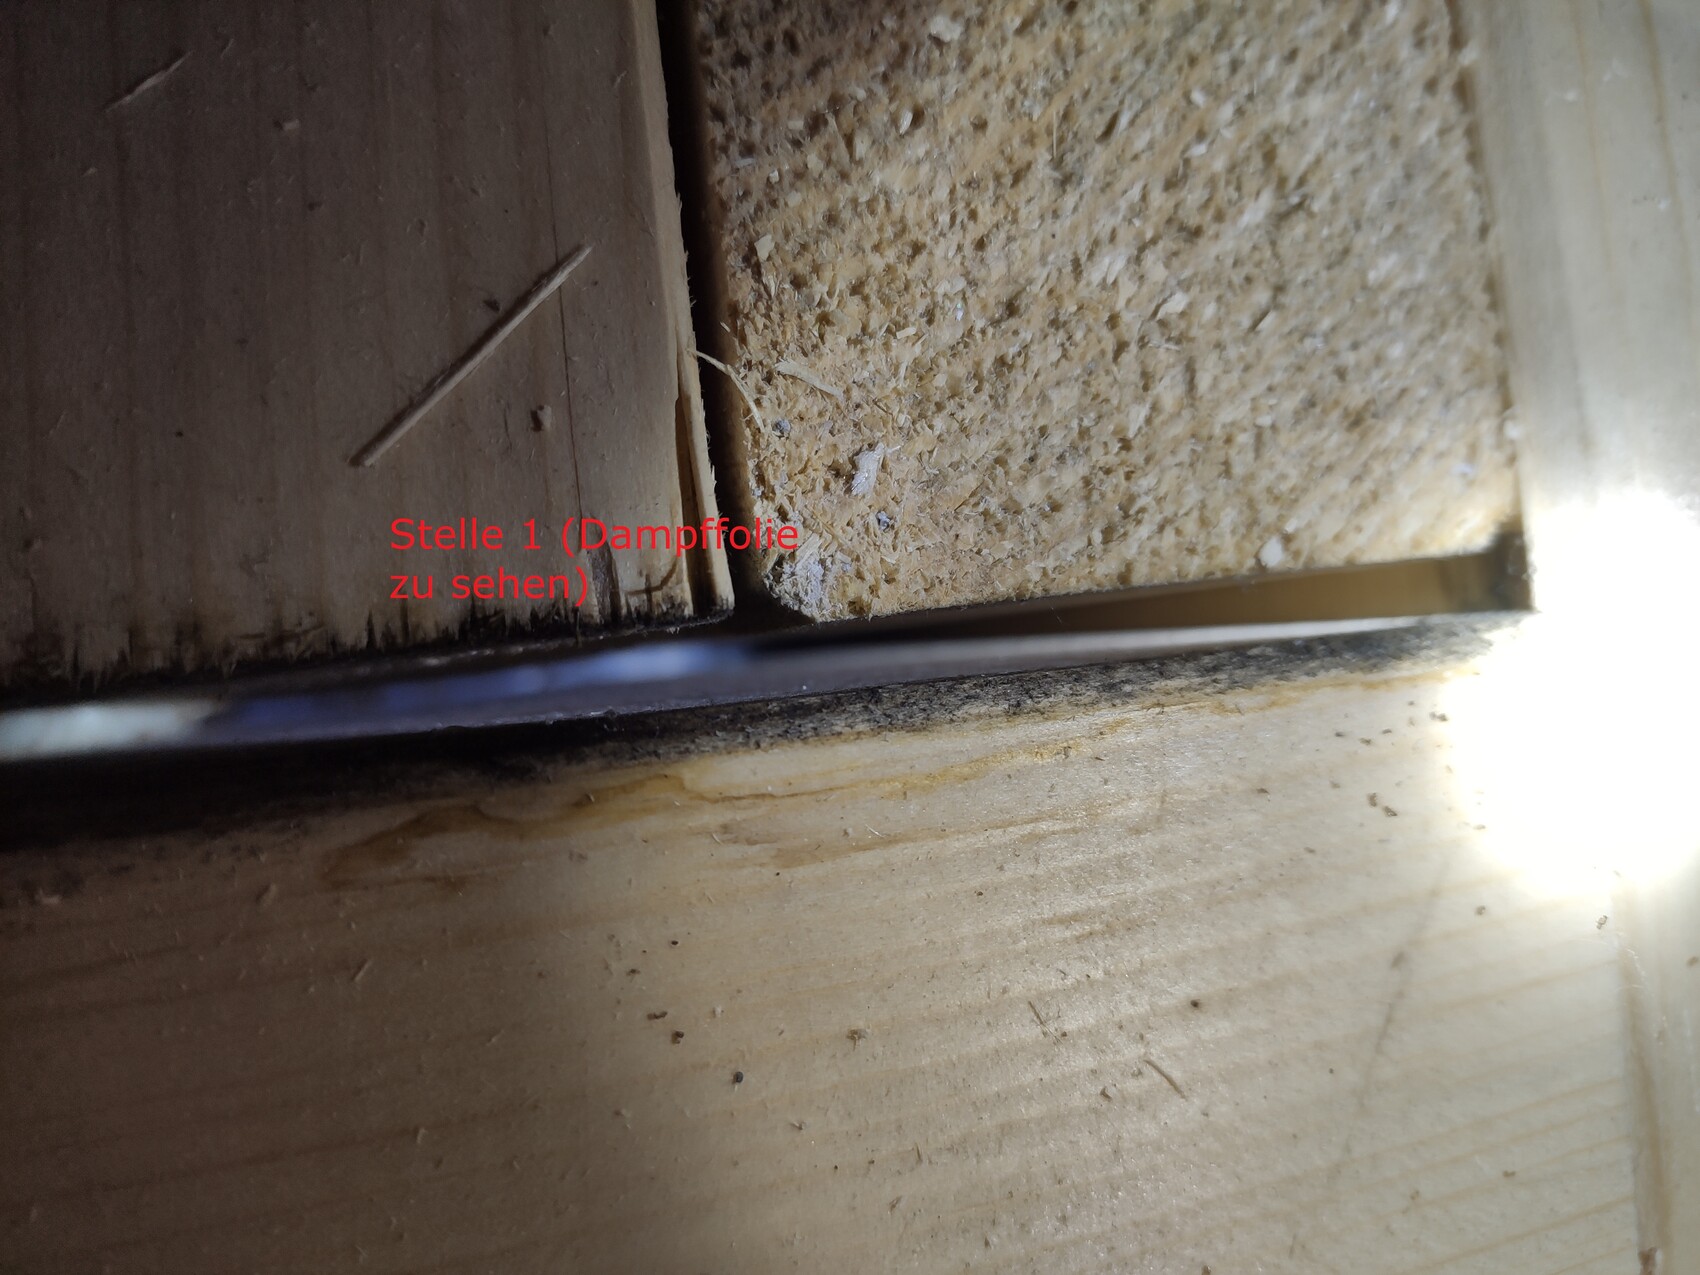
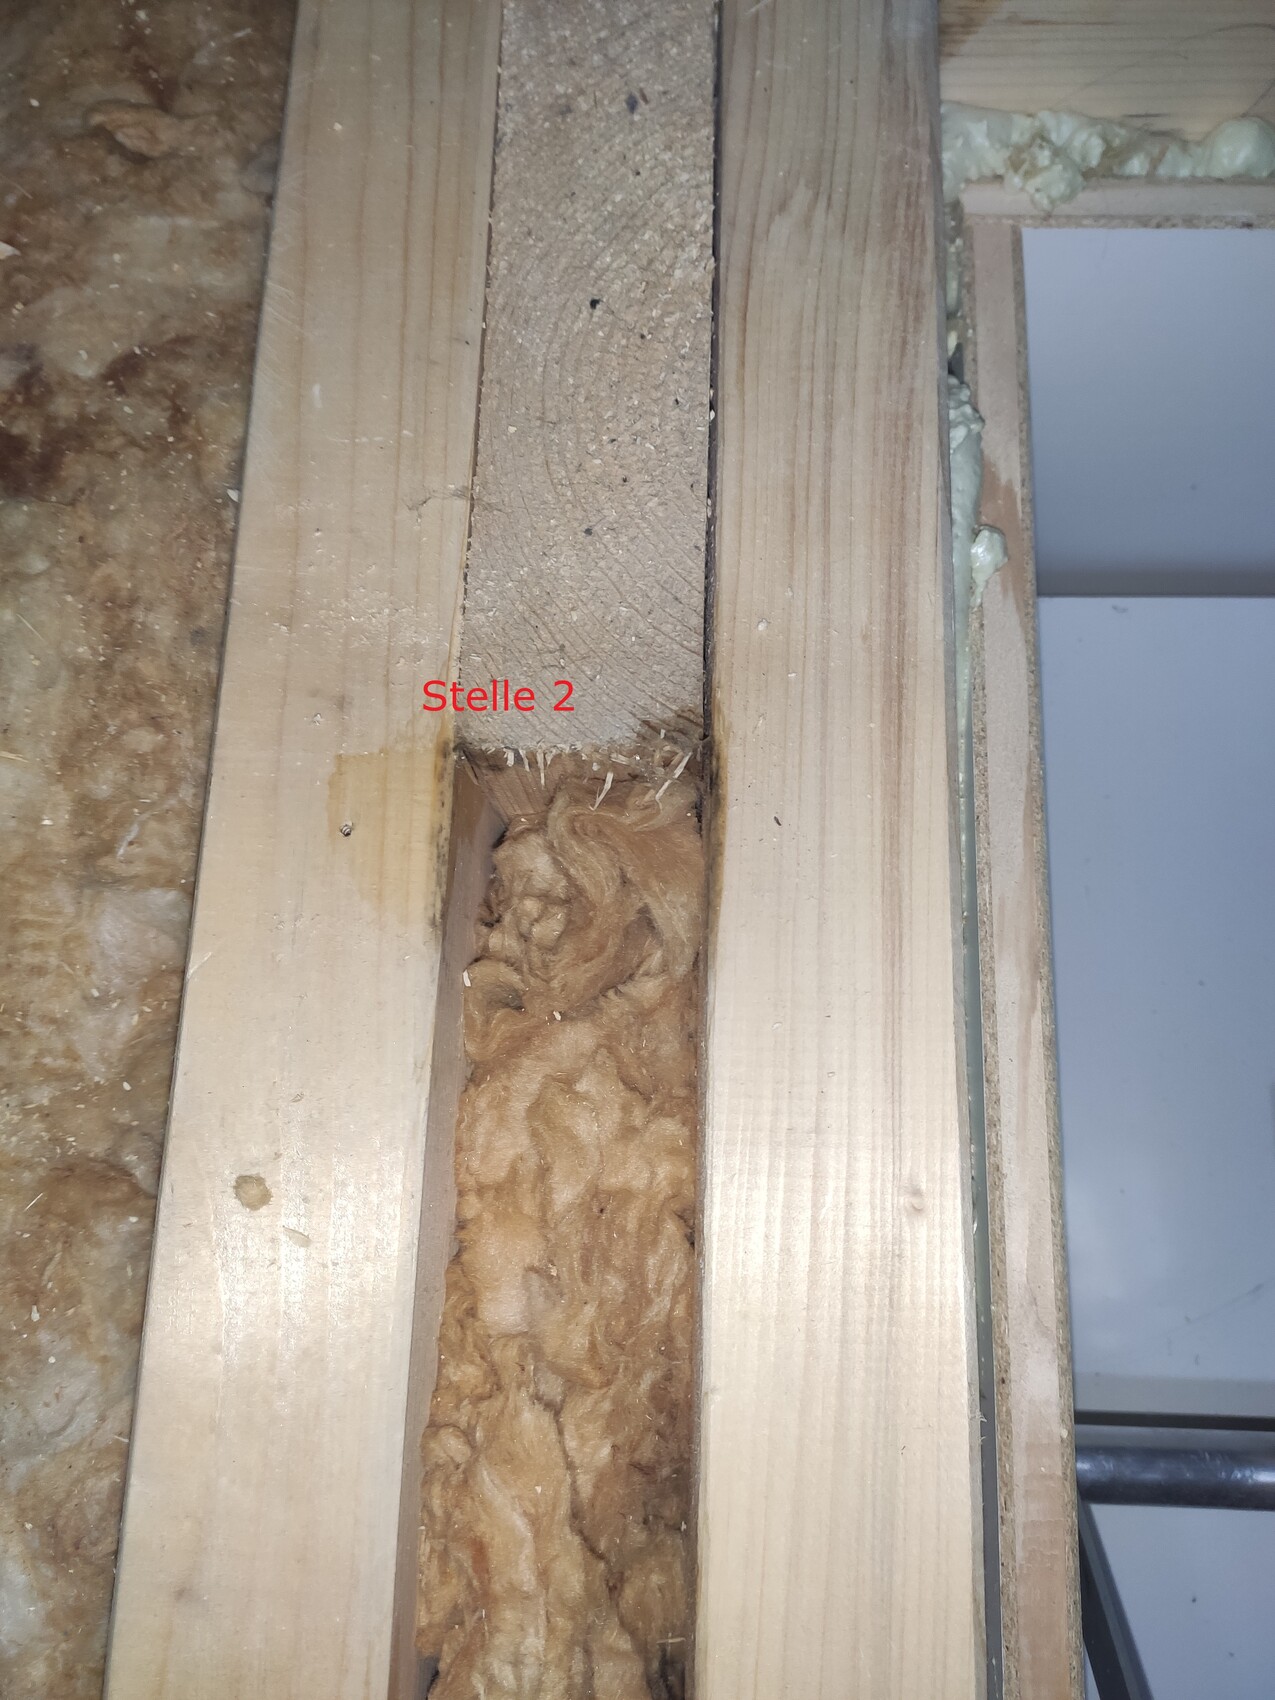
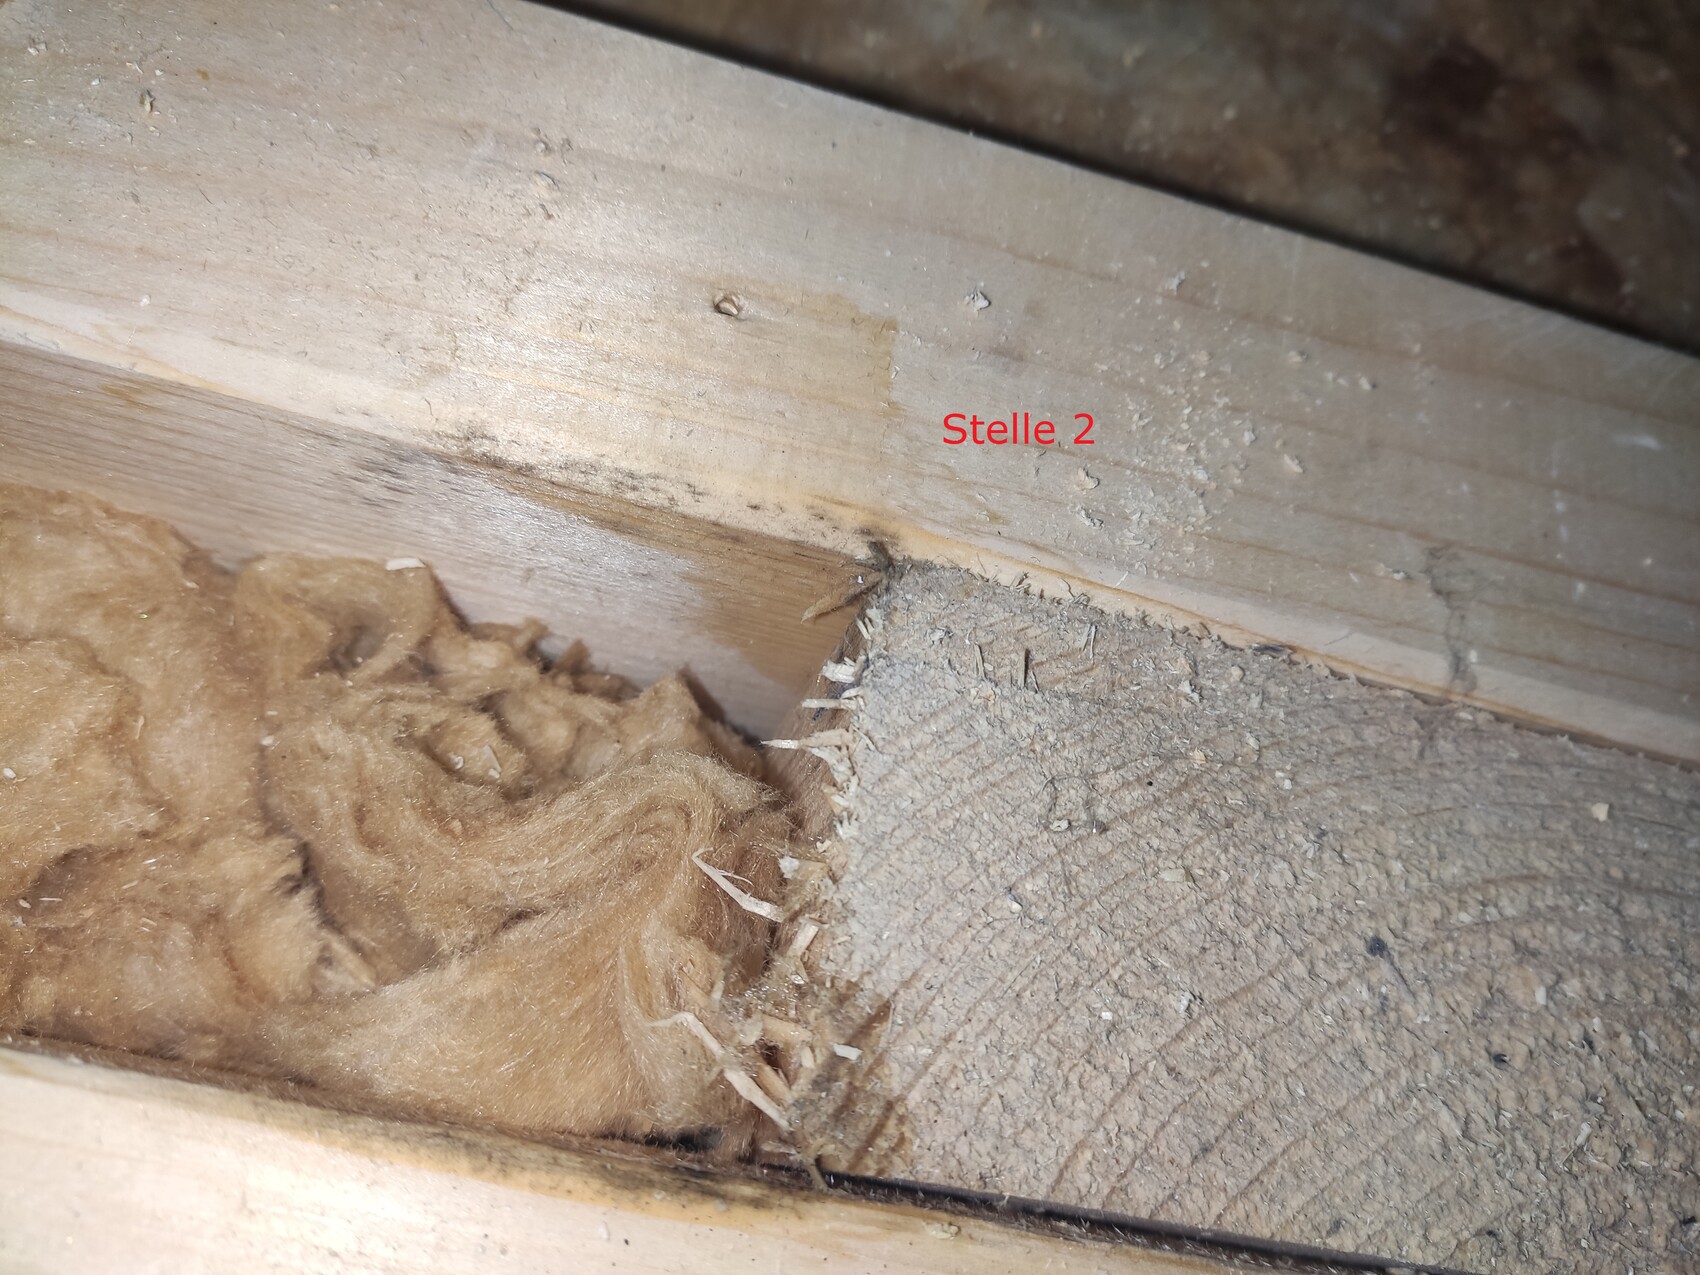
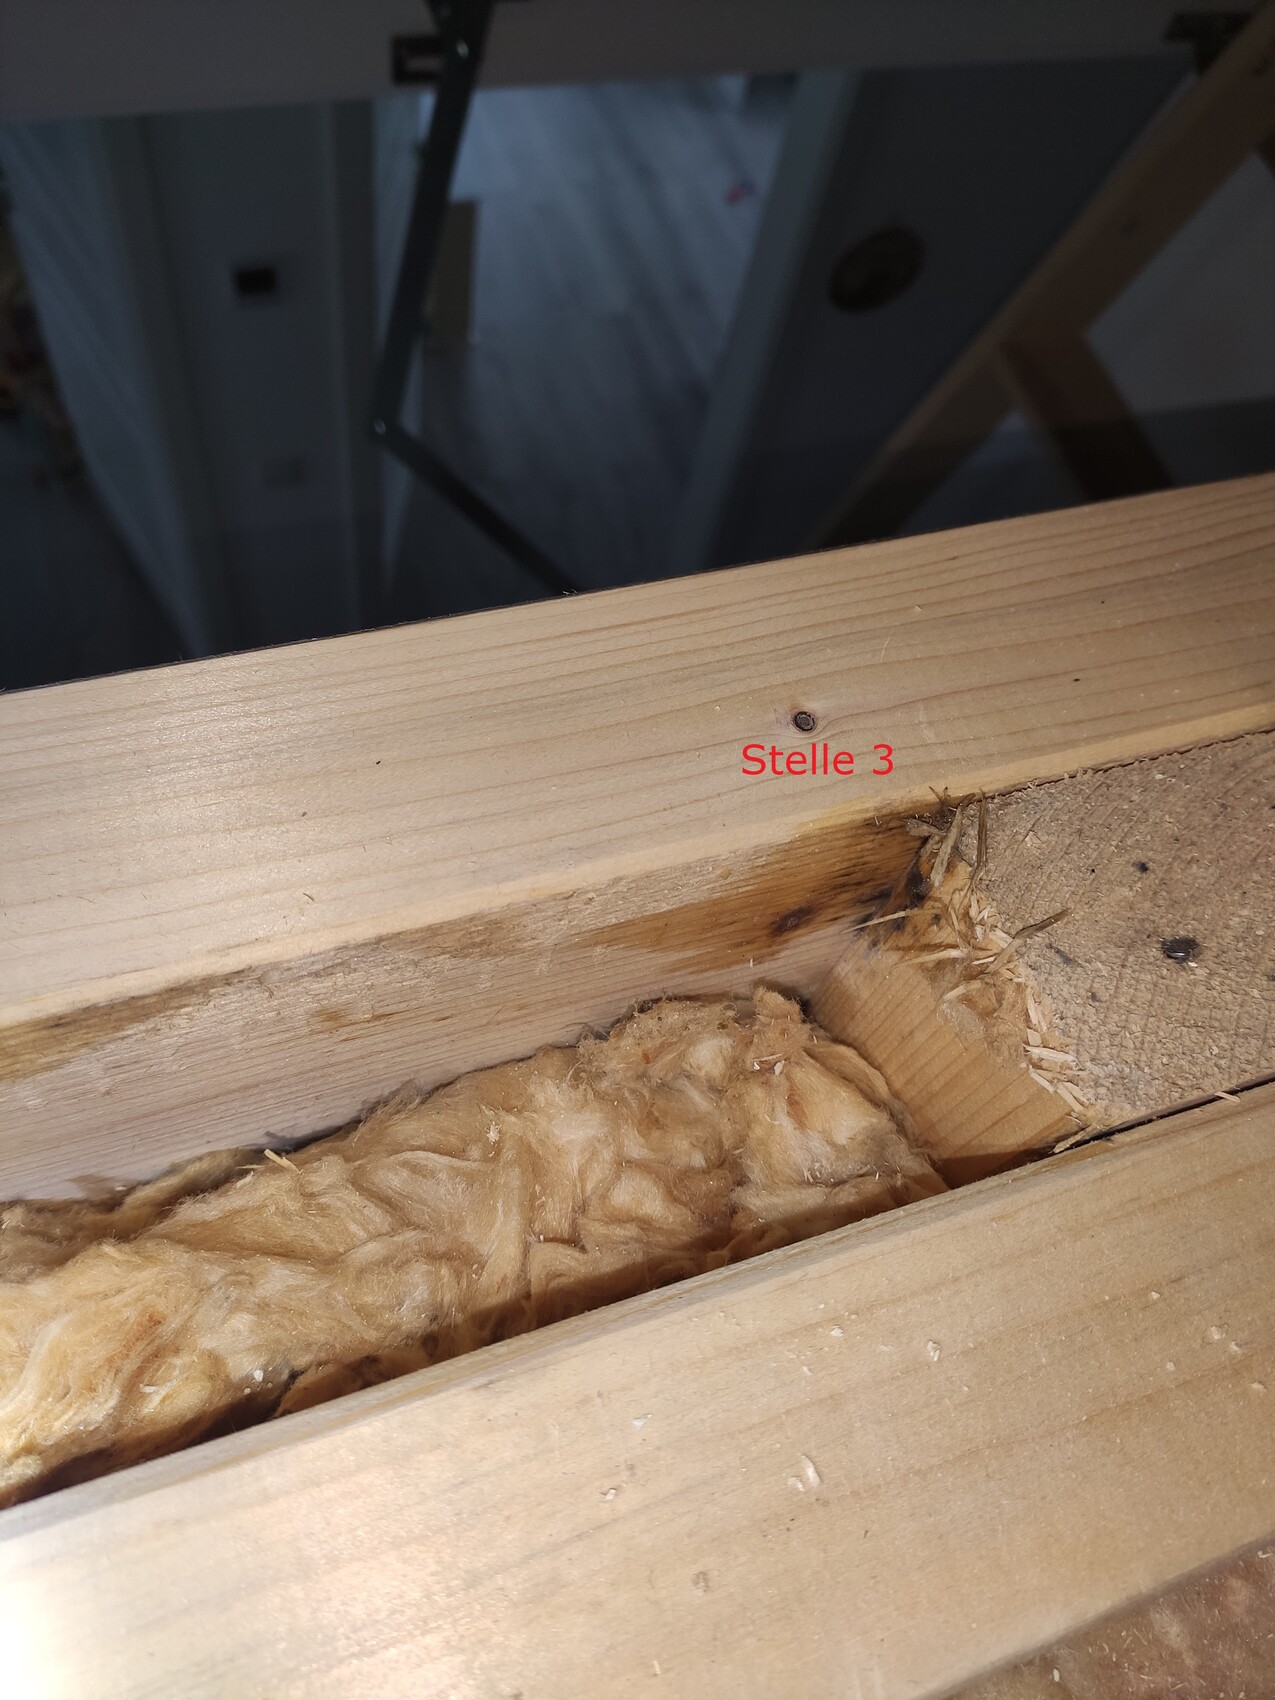
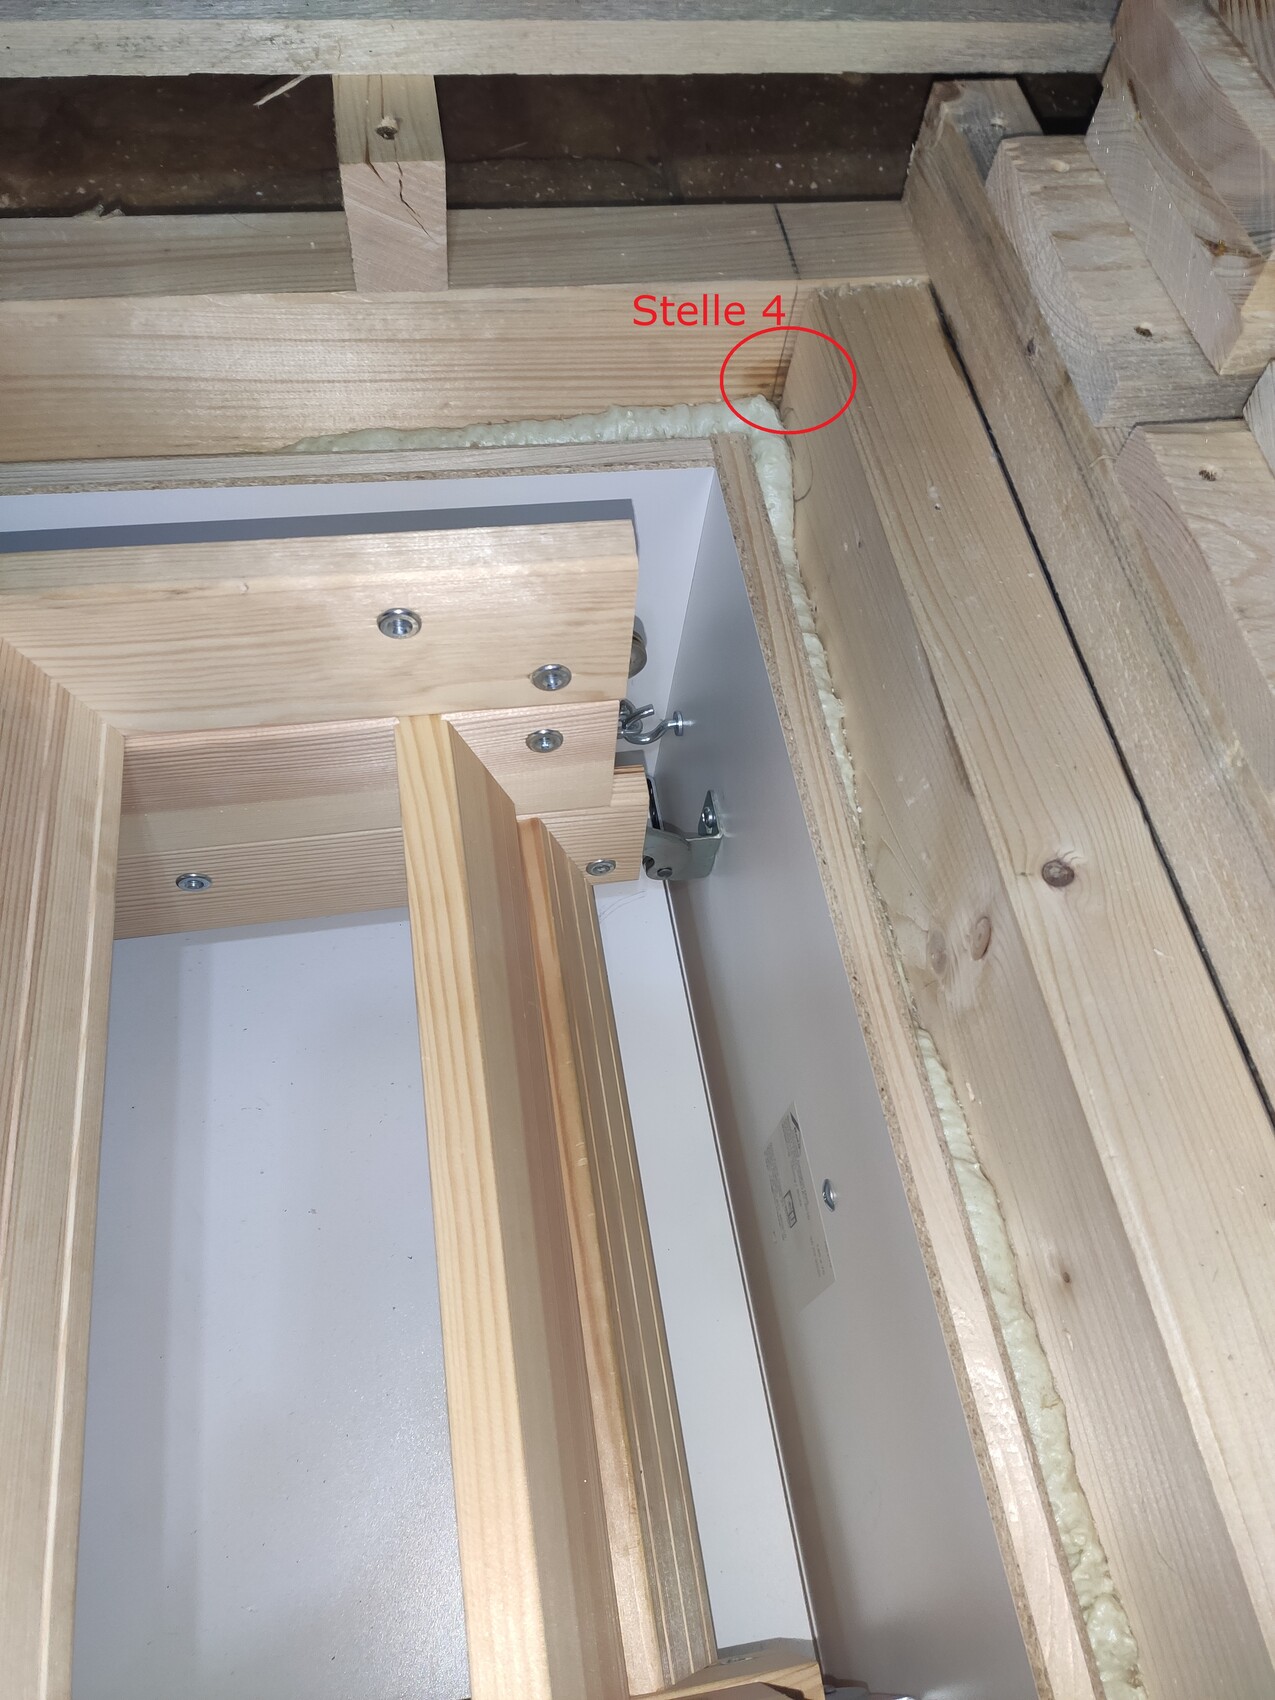
I have attached a few photos of the affected spots (spots 1 to 4). In the narrow gap at spot 1, I can see the vapor barrier at the bottom. So there is no insulation or foam sealant in this gap. Warm air could therefore rise freely there and cause condensation on the wood, correct?
I have labeled the photos accordingly: one overall view with the markings of the four spots as well as detailed photos.
Originally, I wanted to use a thermal imaging camera on cold days to check if warm air is really rising at the affected spots and then contact the construction company. But actually, I might save myself the effort (I would have to borrow such a camera from a tool shop) and just contact the company directly and ask for repairs.
What do you think?


We moved into our new house in 2020, and now I have discovered some mold spots in the attic space. These spots are all located around the opening of the loft ladder. We have an unheated roof space.
This can only be related to warm air rising upwards (due to missing or insufficient insulation) and then condensing when it meets the cold air, right? At first glance, I could not see any damaged vapor barrier. The mold or damp areas are only visible in some isolated spots at the opening. Other areas are intact and dry.
I have attached a few photos of the affected spots (spots 1 to 4). In the narrow gap at spot 1, I can see the vapor barrier at the bottom. So there is no insulation or foam sealant in this gap. Warm air could therefore rise freely there and cause condensation on the wood, correct?
I have labeled the photos accordingly: one overall view with the markings of the four spots as well as detailed photos.
Originally, I wanted to use a thermal imaging camera on cold days to check if warm air is really rising at the affected spots and then contact the construction company. But actually, I might save myself the effort (I would have to borrow such a camera from a tool shop) and just contact the company directly and ask for repairs.
What do you think?

Hello,
Am I understanding correctly that at point 1 you can basically see down from the attic into the upper floor? It looks like light is coming through the gap?
Rising heat itself is not the problem (only for your heating bill), but rising warm air is. It carries a lot of moisture from the warm living area into the cold attic, and the humidity condenses on the first building component it hits.
In short, the attic hatch and its frame must be airtight. Otherwise, you won’t be able to control this issue.
Best regards,
Andreas

andimann schrieb:
Hello,
Am I understanding correctly that at point 1 you can basically look down from the attic into the upper floor? It looks like light is passing through the gap?
Rising heat itself is not the problem (only for your heating bill), but the rising warm air is. It carries a lot of moisture from the warm living area into the cold attic, where the humidity condenses on the first building component it hits.
In short, the attic hatch and frame need to be airtight. Otherwise, you won’t be able to fix this issue.
Best regards,
AndreasThat’s exactly what I thought right away.
Unfortunately, I never took a photo of how it looked in our house, but around the entire attic hatch, there were two layers of these extremely sealing tapes. No air could get through.
I’m surprised how this passed the blower door test in your house, built in 2020, with a cold roof and a whole gap left open?
andimann schrieb:
Hello,
Am I correct in understanding that at point 1 you can basically look down from the attic into the upper floor? There seems to be light coming through the gap?
Rising heat is not the issue (only for your heating bill), but the rising warm air. It carries a lot of moisture from the warm living area into the cold attic, where the moisture condenses on the first building component it encounters.
In short, the attic hatch and its frame must be airtight. Otherwise, you won’t get this under control.
Best regards,
AndreasAt point 1, I see the membrane below. Under the membrane are the ceiling boards (OSB) of the upper floor. So I cannot look through the gap into the upper floor. Still, somehow warm air seems to be coming through at that spot. That’s the only way I can explain the dark spots on the wood, exactly where it meets the cold air.
If missing insulation above the vapor barrier cannot be the cause, the vapor barrier must be damaged or not installed properly somewhere. Although I still don’t fully understand this statement. Water forms at the cold/warm interface, which in this case should be the vapor barrier.
W
WilderSueden22 Nov 2022 13:57The cold-warm boundary is not a line but rather a zone. Let’s assume you have 10cm (4 inches) of insulation, with 20°C (68°F) warm air at 50% humidity below and 0°C (32°F) cold air above. Somewhere within the insulation, the point is reached where water condenses. That is why the vapor barrier is installed on the warm, moist side—so that no moist air enters the insulation and nothing condenses.
Now you have two problems:
1. You have several uninsulated areas. In these places, the boundary is a very narrow zone.
2. You have somewhere a spot where warm, moist air passes through.
This causes condensation—and quite a bit of it. One of the beams is actually very wet.
File a complaint and have it fixed.

Our site manager always emphasized how crucial it is to seal the vapor retarder (intelligent membrane?) or vapor barrier with absolute precision.
He mentioned that, in the worst case, one liter of water can pass through a hole the size of a pinhead in just one day (in the form of water vapor bound in warm air).
For sensitive building components such as wood, drywall, or mineral insulation, one liter is disastrous—especially in areas that cannot be inspected later. He was very insistent that we (doing the work ourselves, initially under his guidance and support) carry out the sealing carefully enough so he could sleep well at night. 😉
Similar topics