Hello everyone,
After building the terrace last year, we are now about to start with the lawn and some shrubs.
We are now considering whether to plan for garden irrigation.
Our old garden was much larger and we rarely watered it at all.
But now we have a southwest-facing garden, so it probably makes sense to water it to prevent damage.
We have an outdoor tap, and next to it there is a cistern water tap.
From there, a conduit runs to the lawn.
But what next?
Should we install pop-up lawn sprinklers, or just a water outlet where the existing sprinkler can be connected as needed?
Do you use drip irrigation for the shrubs?
What systems do you have? And are you satisfied with them?
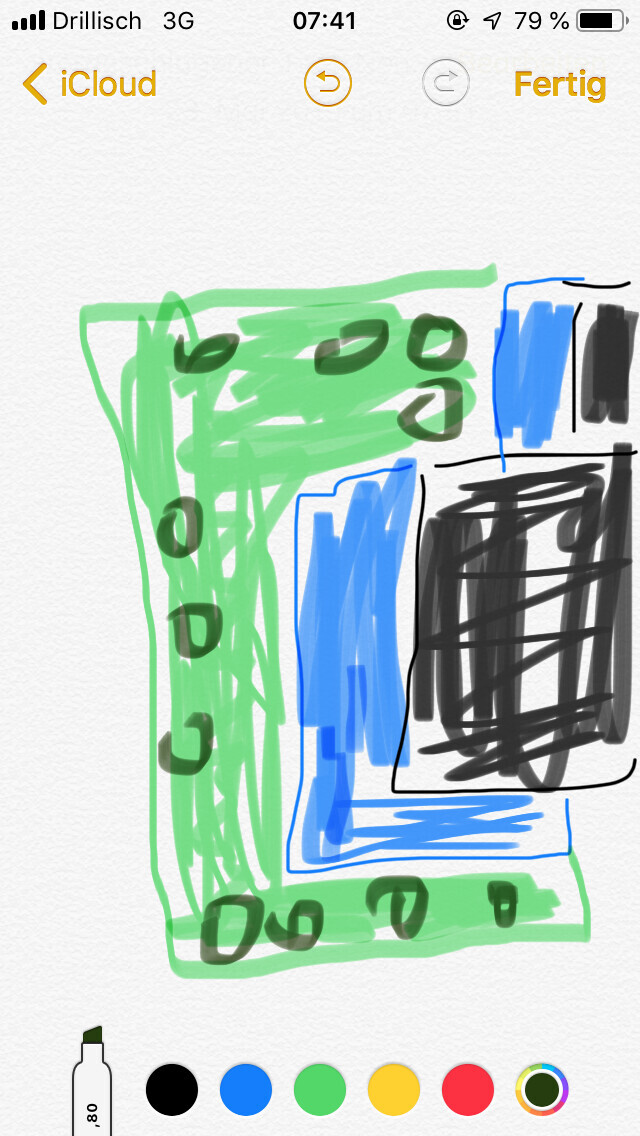
I made a rough sketch, unfortunately not very good since I’m on the go. But it should give you an idea of the situation.
Black is house and garage, blue is terrace, green will be the lawn, and the dark shading is the rough plan for the shrubs.
Our lawn is about 20 meters (65.6 feet) wide and 5–7 meters (16.4–23 feet) deep.
Best regards,
Birgit
After building the terrace last year, we are now about to start with the lawn and some shrubs.
We are now considering whether to plan for garden irrigation.
Our old garden was much larger and we rarely watered it at all.
But now we have a southwest-facing garden, so it probably makes sense to water it to prevent damage.
We have an outdoor tap, and next to it there is a cistern water tap.
From there, a conduit runs to the lawn.
But what next?
Should we install pop-up lawn sprinklers, or just a water outlet where the existing sprinkler can be connected as needed?
Do you use drip irrigation for the shrubs?
What systems do you have? And are you satisfied with them?
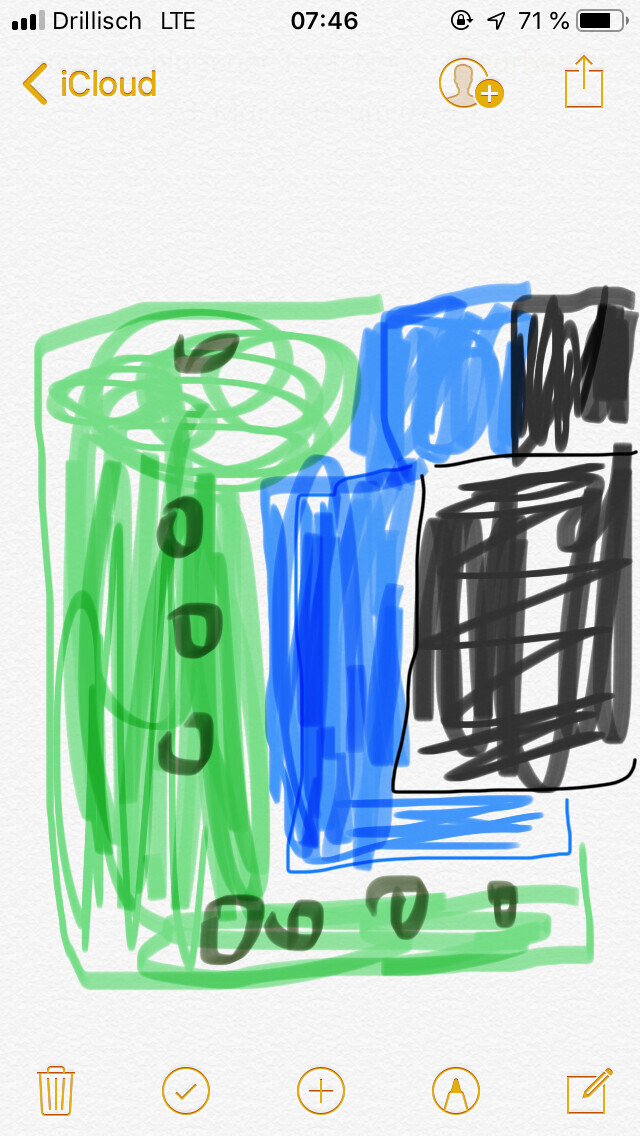
I made a rough sketch, unfortunately not very good since I’m on the go. But it should give you an idea of the situation.
Black is house and garage, blue is terrace, green will be the lawn, and the dark shading is the rough plan for the shrubs.
Our lawn is about 20 meters (65.6 feet) wide and 5–7 meters (16.4–23 feet) deep.
Best regards,
Birgit
projekthausbau schrieb:
Good morning... I think Gardena offers really great value for money. We installed it ourselves and are completely satisfied.Which components are you using?
I’m also considering Gardena right now because it’s the easiest to understand.
Here
Thanks for the link, I’ll check it out right away.
rick2018 schrieb:
From the sketch, it looks like a straightforward task.
I would recommend considering Hunter and Rainbird. Gardena is overpriced for what they offer and also not very durable.
Take a look at this thread. Feel free to ask if you have any questions.
https://www.hausbau-forum.de/threads/Leerrohre-auf-Grundstück-Ideen-noch-ist-es-nicht-zu-spät.30853/page-3
Thanks for the link, I’ll check it out right away.
hampshire schrieb:
Lechuza seems like an interesting system. Unfortunately, I find it less visually appealing than a simple terracotta pot or something nicely glazed. Maybe there are inserts available for standard pots. Although terracotta or clay tends to absorb water.
There are also other brands offering similar systems.

And what if something breaks?
Then I have to dig everything up again.
How do I handle the drainage? I read in another thread about using compressed air, but how exactly do I do that?
How deep do the pipes need to be to avoid freezing? And how do I then drain the water outlets and the sprinklers? The supply line will come up a bit from the frost-free zone.
Sorry for the silly questions.
Hello Bibi80,
there are no silly questions.
Starting from the beginning:
You have a faucet or you connect to your cistern. This main/distribution line runs to the distribution/valve boxes. In your case, one box will be sufficient.
In addition to the main/distribution line, you need a control cable. The number of wires equals the number of valves plus one.
Solenoid valves are installed in these boxes. Each solenoid valve controls one irrigation zone.
The size of the zones depends on your maximum flow rate per hour, pipe length and diameter, and sprinklers/drip lines. Sprinklers usually consist of a body and a head.
From these valves in the box, the zone runs to the sprinklers, drip irrigation, or root zone irrigation. Each zone is then operated sequentially via the irrigation controller.
In the distribution box, you install (or buy pre-assembled) an air pressure connection. In autumn, you connect a compressor there and shut off the faucet. Then you run the irrigation program or manually activate the zones. This causes the sprinklers to pop up due to the compressed air and be blown dry. For watering cans, you simply attach your open garden hose.
Just take your site plan and, for example, the datasheet of the Hunter rotors.
Start in one corner. The MP2000 heads are probably suitable for you. Subtract a little from the maximum specified radius—assume about 5 meters (16 feet). The sprinklers should overlap to ensure full coverage — so one sprinkler every 5 meters (16 feet). I usually use the Hunter PRS40 as the body (with pressure regulator). I have already explained the advantages in another thread.
Then enter everything into a list. The datasheet shows the corresponding flow rates per hour. Now you can form zones, keeping about 90% of your maximum flow rate per zone. Zones should be practical as well—for example, areas in shade, sun, different plant types, etc. Use dripline for hedges and shrubs.
For the piping, PE pipes with an inner diameter of 25mm (1 inch) are suitable for underground installation. If something breaks, it’s usually the sprinkler heads or bodies. These can be replaced without major excavation. The pipes themselves only get damaged during heavy machinery work or trencher use. Normally, even a shovel won’t cause damage.
Regarding installation inside conduit: PE pipes are not like garden hoses. It is best to warm them up with a heat gun or by laying them in the sun to make them flexible. They are quite stiff and sturdy. If you want to pull them through a conduit, you will need a very large conduit; otherwise, it won’t work.
Also, you need to be able to reach every sprinkler anyway…
Forget about frost-free installation. For that, you would need to dig very deep, prepare a proper base, slope, self-watering valve boxes with base…
Similar topics