ᐅ Flush Baseboards – Where to Use, How to Install, Costs, and Experiences
Created on: 7 Feb 2026 17:35
T
tobiwim
Hello everyone,
My partner and I are about to build a new single-family house and we're currently stuck on the topic of baseboards. Of course, flush-mounted baseboards would look much better everywhere, but in the end, it’s also a matter of cost. Does anyone have experience with this? In which rooms did you choose which type of baseboards? How expensive was it? As homeowners, do we need to consider or organize more ourselves, or do the trades usually handle it?
Thanks for sharing your experiences!

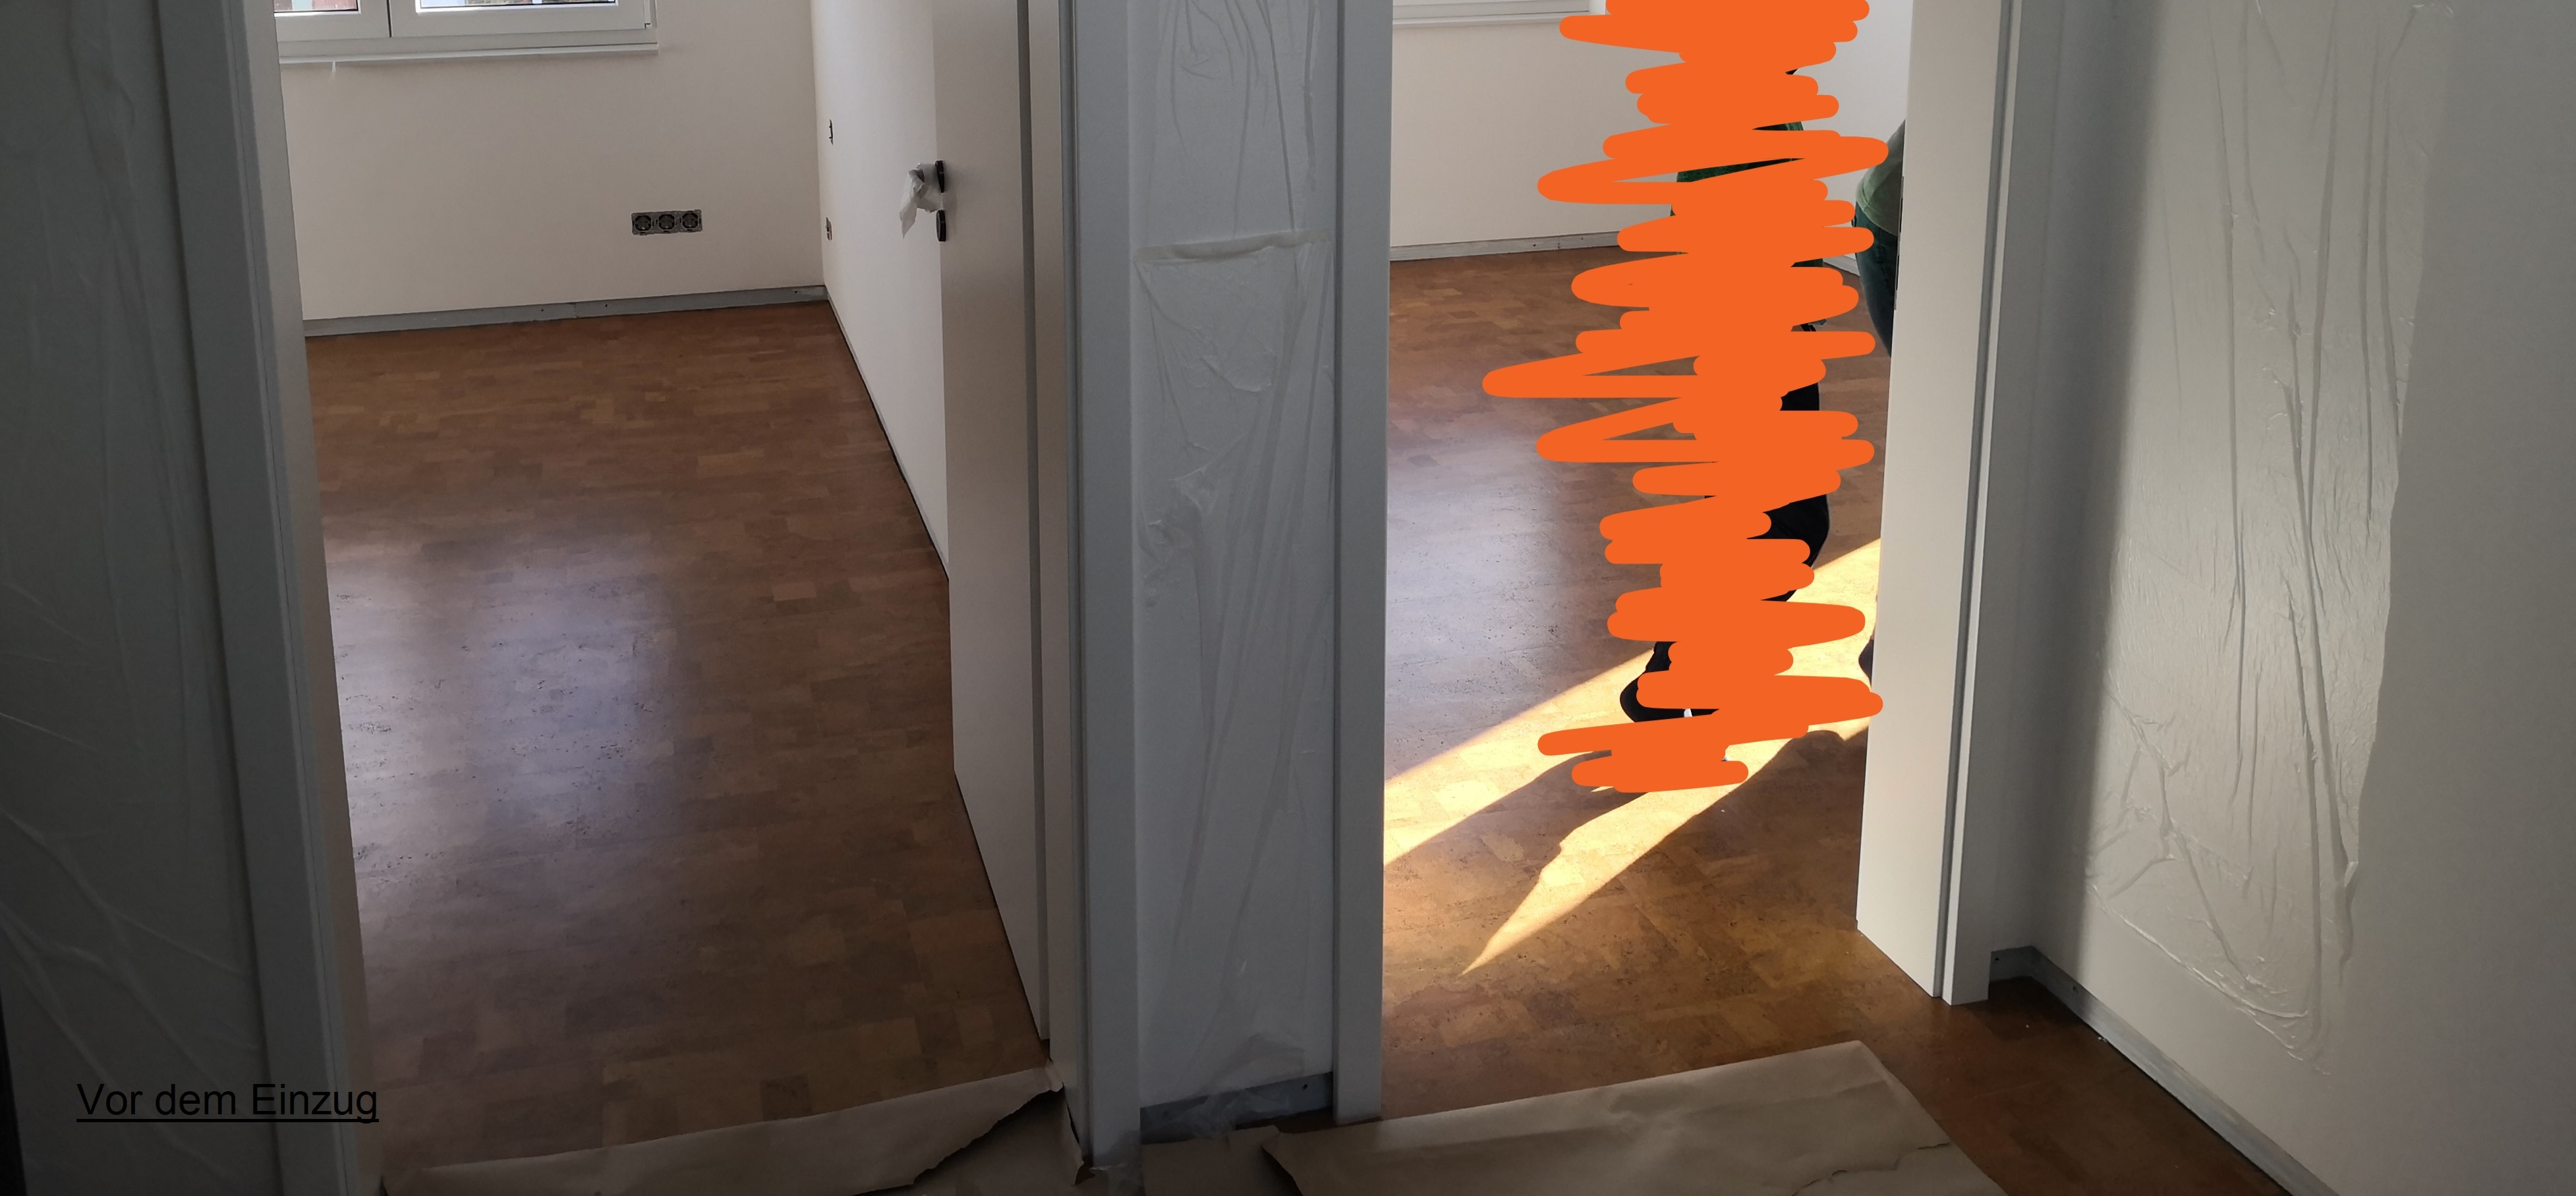
Our solid construction will also have flush baseboards, at least in the rooms with (stone) tiles.
We attached wooden strips to the walls at the height of the baseboards plus 0.5cm (0.2 inches). The plasterers applied plaster up to these strips, and later, when the flooring and baseboards are installed, we will fill the gap with plaster.
We attached wooden strips to the walls at the height of the baseboards plus 0.5cm (0.2 inches). The plasterers applied plaster up to these strips, and later, when the flooring and baseboards are installed, we will fill the gap with plaster.
D
derdietmar9 Feb 2026 05:56Hello,
Flush, floor-to-ceiling solid wood doors cost at least 2000 euros each. Flush skirting boards cost about 75 euros per linear meter (3.3 feet). It’s cheaper with tiles, since you can later have the tiled skirting cleaned.
Door frames (the inner, non-visible part) and skirting profiles are installed before plastering.
If you have to worry about the price for such “small details,” it’s better to skip them. Minimalism then also has to be applied consistently to many other elements (built-in furniture, lighting, fixtures).
This is roughly how it looks.
House Pictures Thread
Best regards
S
Schlauerfuchs9 Feb 2026 20:18Hello everyone,
we usually just read along in this forum, but I would like to share our experience with flush baseboards here, hoping to encourage some of you or perhaps warn others. Individual pictures will follow, unfortunately from different places in the house since we didn’t take photos of the baseboards themselves…
Framework
My husband and I carried out the “flush baseboards” project ourselves as part of a new build in Hesse. We are not inexperienced and have some experience with construction and renovation – but we are not professional tradespeople. The house was built with an architect and through individual contracting, so as the client we had control over the process and scheduling.
Process
At the latest after completion of the shell and installation of the windows, the planned floor buildup including +/- 1 cm (0.4 inches) tolerance must be finalized. First, the area for the floor buildup plus the height of the baseboard plus about 5 cm (2 inches) are plastered thinly and evenly, especially to achieve airtight walls.
Then you take a lot, lots, lots of time to level the final height of the baseboards with a laser and either install suitable aluminum profiles (see below) at this height or simply use aluminum corner trims. This requires a lot of patience and measurement accuracy, especially in large rooms and open-plan areas. Walls for built-in kitchens or other fitted cupboards can of course be excluded. After that, construction proceeds and walls are plastered up to the profiles. Afterwards (or later) the plaster remnants, plaster drips, or simply lumps from the profiles must be removed. The profiles we used were protected with film, so after removing the film we had clean aluminum baseboards.
Next comes the floor construction. The insulation should be installed as cleanly and “play-free” as possible. We also did this ourselves. Then the underfloor heating and screed are installed – unfortunately, you have little influence here. Our screed was lightly sanded, leveled with a parquet leveling compound, and the leveling compound was also lightly sanded. After moving in, we waited 2 years for the floor to "settle." Since we installed aluminum profiles, it didn’t look too bad at all.
Although our floor did not visibly “settle,” there were tolerances in the screed which caused baseboard height variations, up to +/- 0.5 cm (0.2 inches) in one room and more between ground and upper floors. Visually, however, this is not noticeable.
Then came the most difficult part: finding a woodworking company that could manufacture the baseboards in the required height and quality, as precisely as possible to the millimeter. On site, if there is a small “hump” in the floor, the baseboards can be planed or routed accordingly and drilled for screws (using a drill press). The corners must be cut to precise miters.
Finally, the baseboards are oiled and installed. In the bathroom, floor tiles were cut to fit at the appropriate points.
Material costs
Year of construction 2021: about €2,000 (approx. $2,200) total for the 140 m² (1,507 ft²) house
Plastering intermediate step, aluminum profiles from LINEA (Austria), adhesive/screws, oak baseboards, wood oil
Conclusion
Flush baseboards were my must-have and I am really glad we installed them. They look stylish, regardless of whether you have flush doors or not (but taste is subjective). They are also maintenance-free and don’t need cleaning. I can no longer specify the exact time spent – estimated: 3 weekends for two people: 10 hours x 2 people x 3 = about 60 hours.
We did not tender this trade or ask for quotes.
S
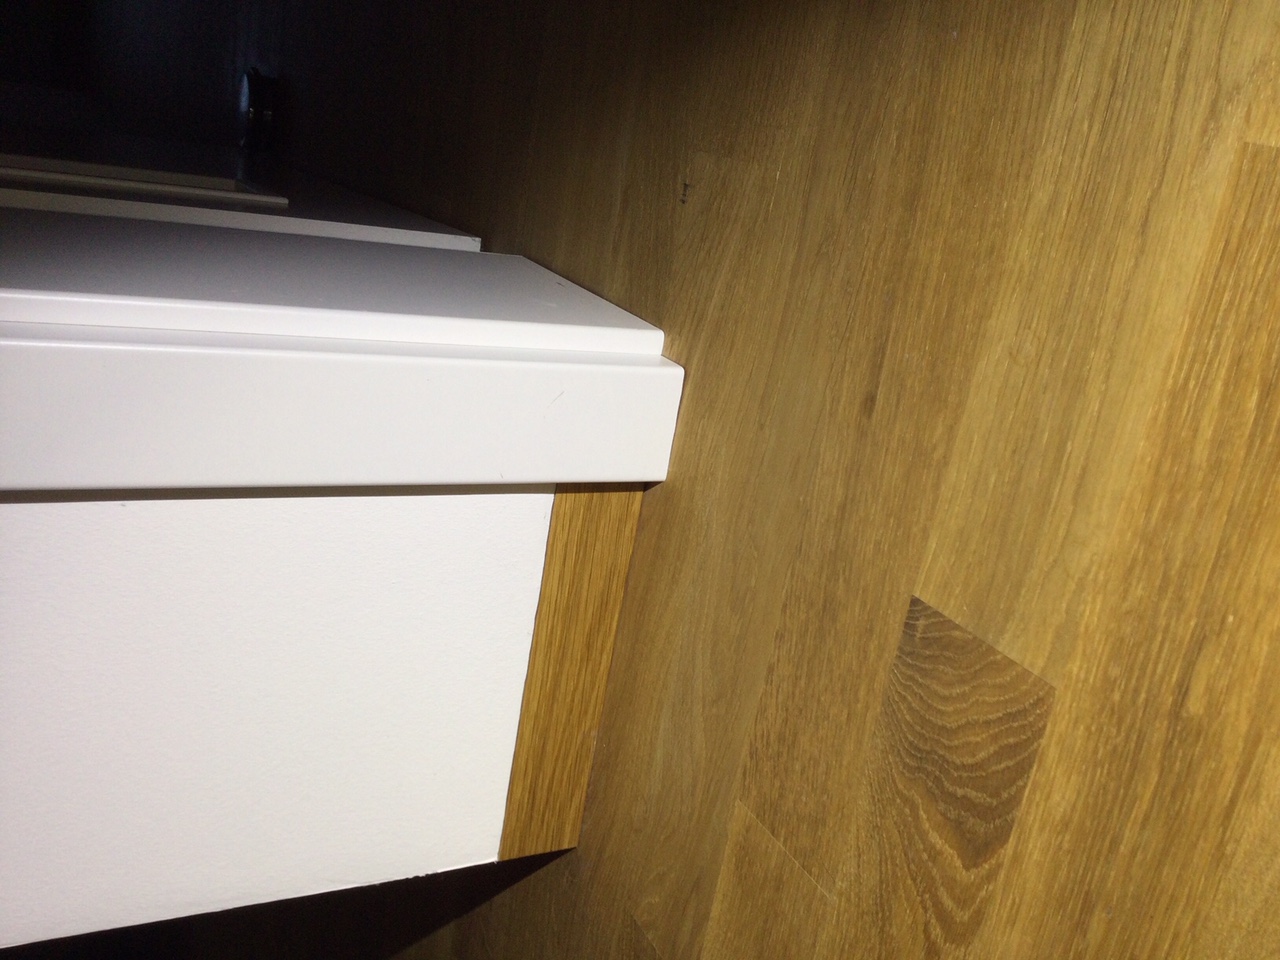
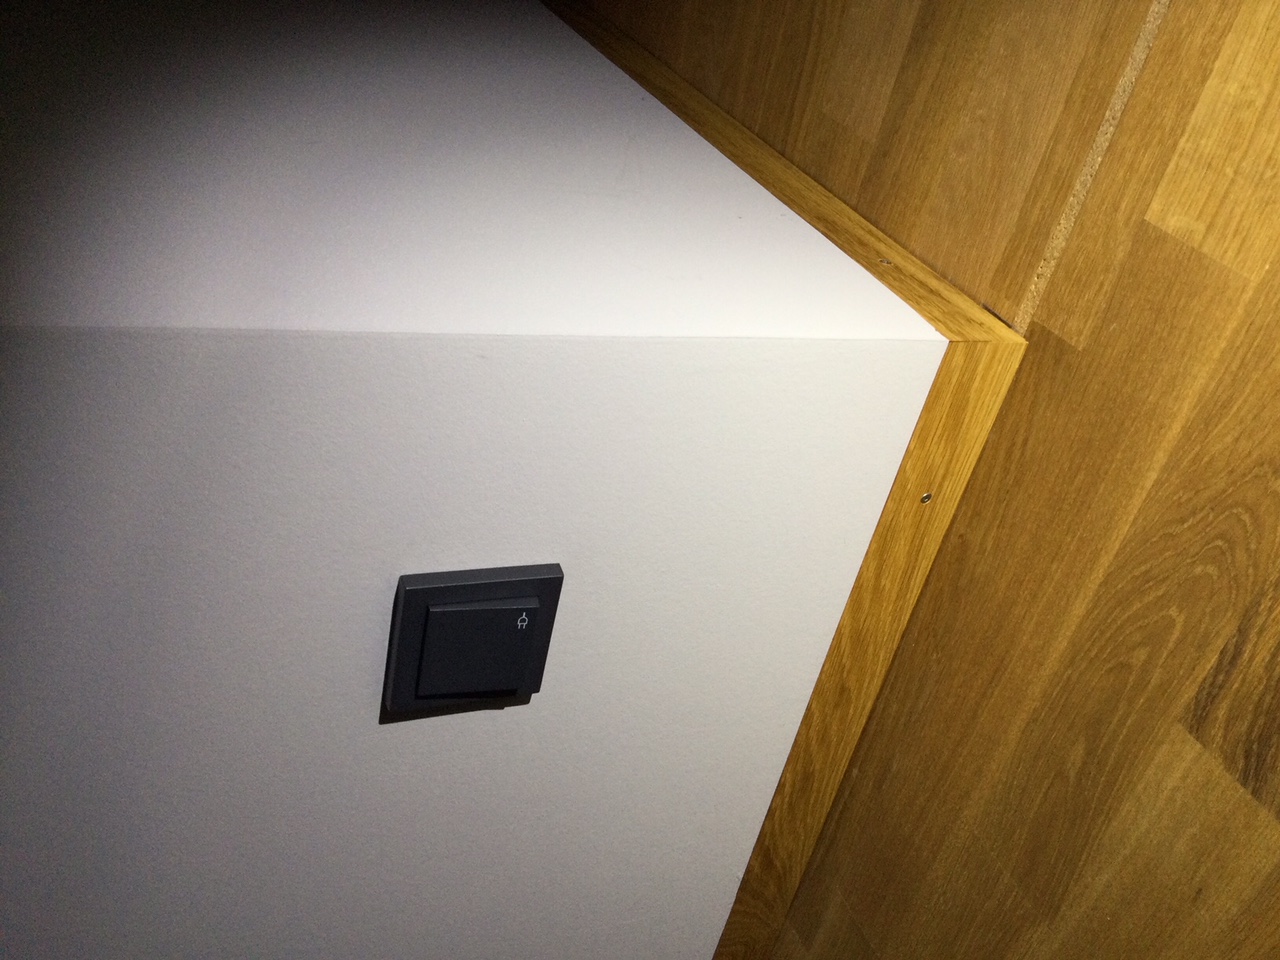
Schlauerfuchs9 Feb 2026 20:37After installation, photographed without natural light, please excuse the quality:
M
MachsSelbst9 Feb 2026 20:56The screws would bother me; I would have glued them instead. But otherwise, it looks pretty good.
The miter joints at the corners don’t need to be that precise since you can’t see them from above.
The miter joints at the corners don’t need to be that precise since you can’t see them from above.
S
Schlauerfuchs9 Feb 2026 21:50Yes, we also initially considered the screws. However, at eye level, they are hardly visible because they are countersunk into the wood. We wanted to avoid gluing so that the moldings can be removed later, for example, when painting.
Similar topics