Hello everyone,
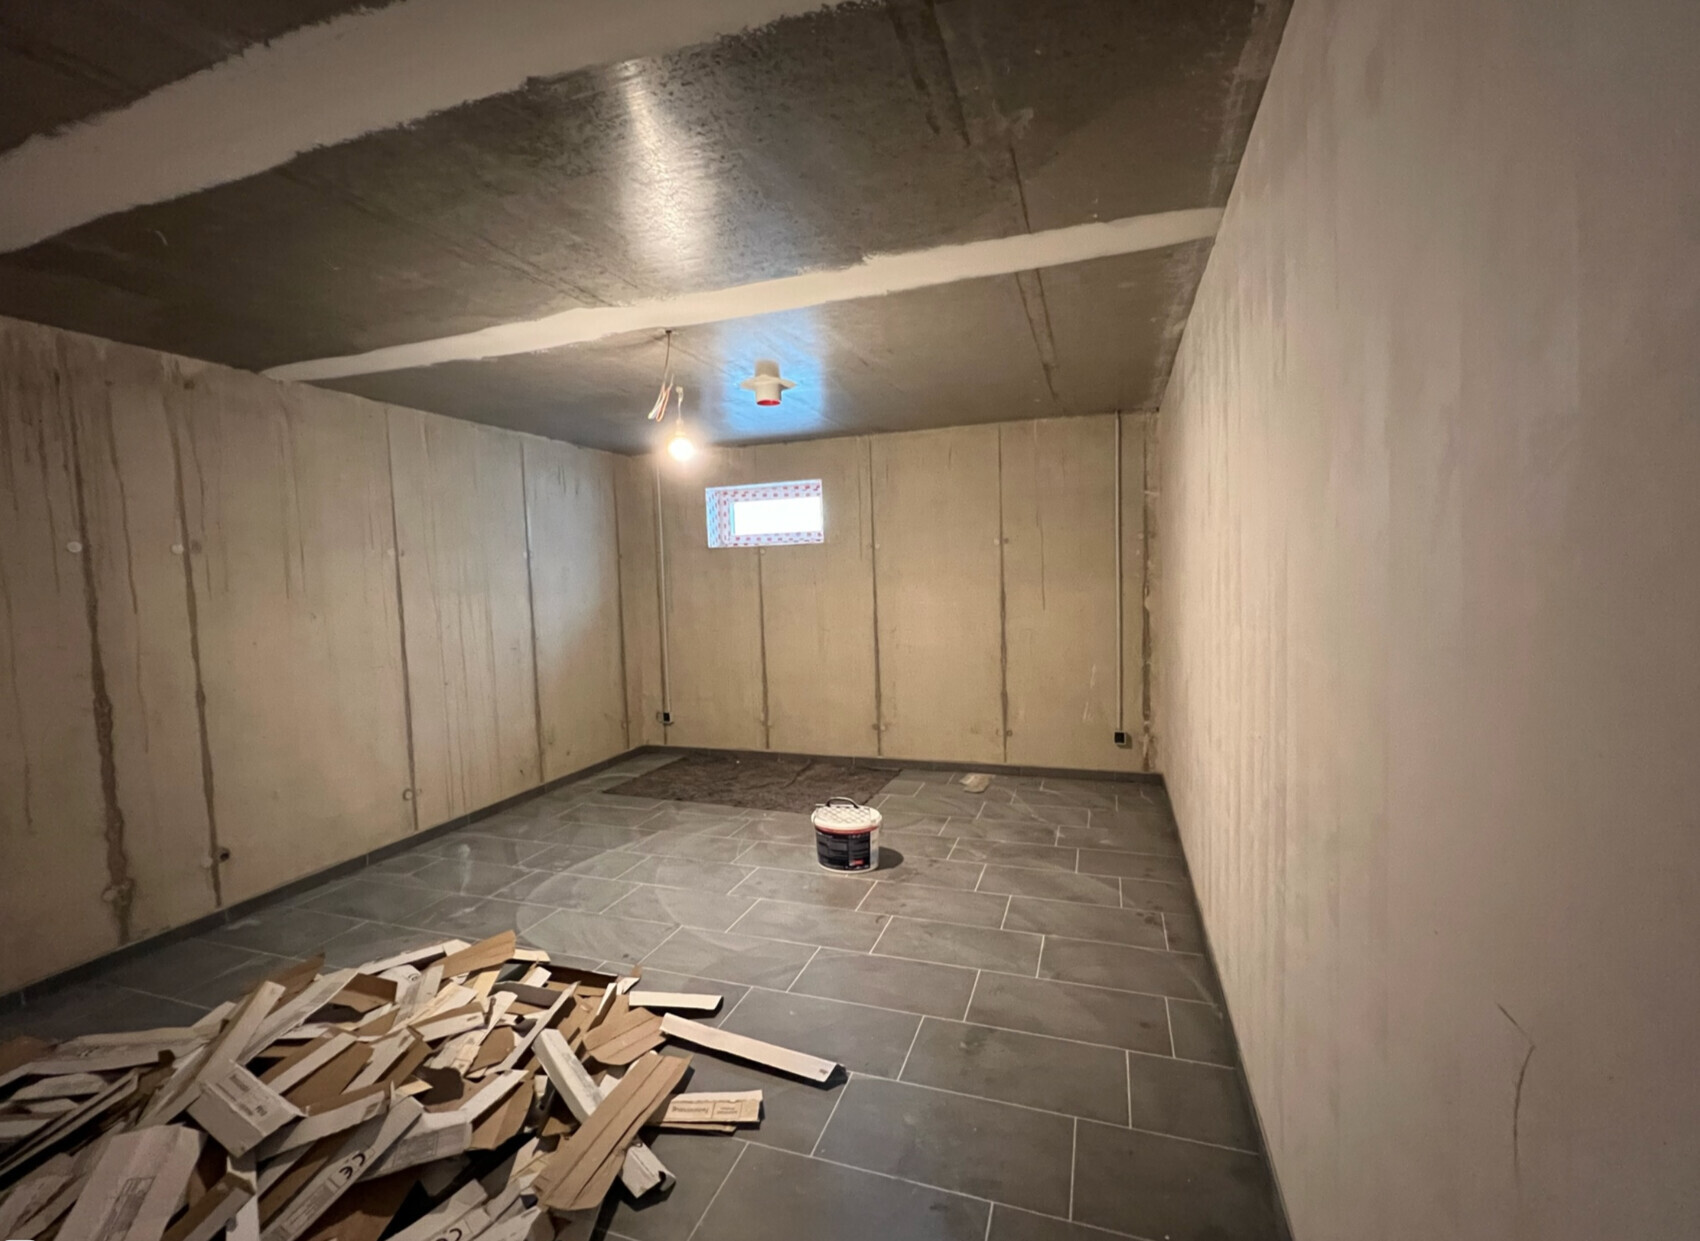
We have a waterproof concrete basement that we are painting ourselves. The basement concrete walls are untreated and will not be skim-coated.
Accordingly, the joints at the basement ceiling are also not skim-coated. The concrete naturally has many small air bubbles, which raises the question for me:
Do I need to fully skim-coat the concrete walls throughout the entire basement before painting, or can I possibly paint directly onto the surface with the right paint without significantly affecting the appearance?
I was thinking of only skim-coating the joints and corners, as the appearance would likely suffer noticeably if I didn’t do this.
Skim-coating four rooms entirely... I would like to avoid that effort if possible.
Does anyone have experience with this? Has anyone been in a similar situation and chosen one option or the other and can share the results?
OWLer schrieb:
I would definitely paint it. The holes don’t bother me at all in my storage room, boiler room, and utility room. My wife, however, really doesn’t like it. For the areas that are planned to be converted into living space later, we also had the walls plastered. Even I would find the holes too much there.
Before:
After:
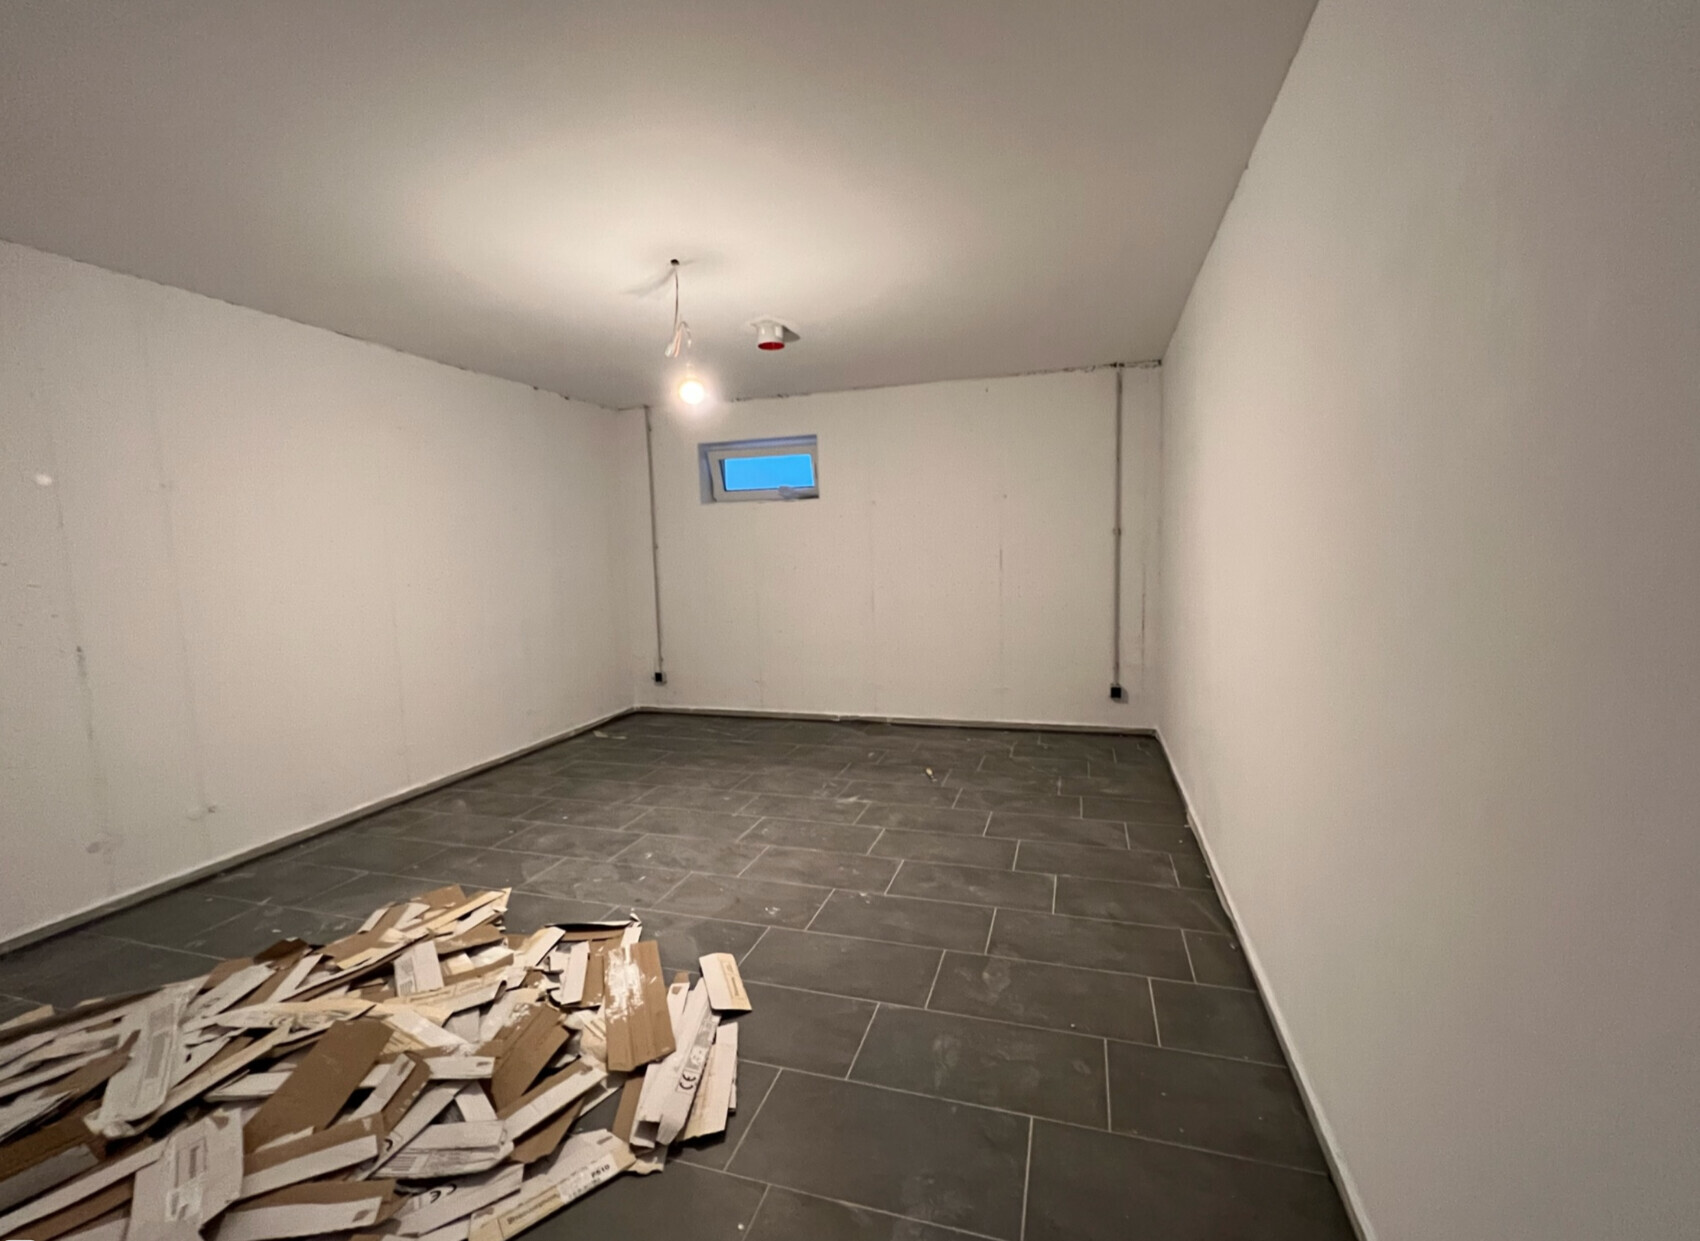
I would have been very annoyed if I hadn’t painted. I don’t mind the color or bubbles. The main thing is that it’s no longer a dark cave. Which paint did you use? Is this a type of textured paint? The result actually looks quite good, especially as you said, for a technical room.
Do it right from the start and make it reasonably “nice.” Later on, after moving in and once everything is filled up, it’s usually too late….
Here, I recommend the brush-on or roller-applied plaster, which some even recommend for living spaces. 😳 For the utility basement, this stuff is good enough.
The entrance area (stairs), basement room, and heating room are completely skim-coated and finished with the roller-applied plaster.
The garage, located in the basement, is partially plastered (one wall/ceiling) due to insulation (outside the thermal envelope).
To minimize effort while achieving the best possible result, it certainly makes sense to proceed in the following order:
1. Repair larger holes in the concrete with patching compound
2. Sand the entire concrete wall
3. Prime the concrete wall
4. Apply thick textured plaster with a roller
1. Repair larger holes in the concrete with patching compound
2. Sand the entire concrete wall
3. Prime the concrete wall
4. Apply thick textured plaster with a roller
 KingJulien10 Nov 2021 12:58
exto1791 schrieb:
2. grind the entire concrete wallTo still count this as "low effort," you’ll need a wall grinder with an extension arm plus a vacuum. Otherwise, it will get messy.I know what I’m talking about—I did everything (including the joints) with an angle grinder 😉
KingJulien schrieb:
To still classify this as "low effort," you’ll need a drywall sander with a vacuum. Otherwise, it won’t look good.
I know what I’m talking about—I used an angle grinder for all the joints 😉 A few months ago, I bought a drywall sander with a vacuum on eBay Classifieds; I think I could handle the work quite well with that.