ᐅ Drywall: Crumbling Edges and Gaps – How to Repair Them Properly?
Created on: 27 Oct 2024 12:17
3
3xit1887Hello everyone,
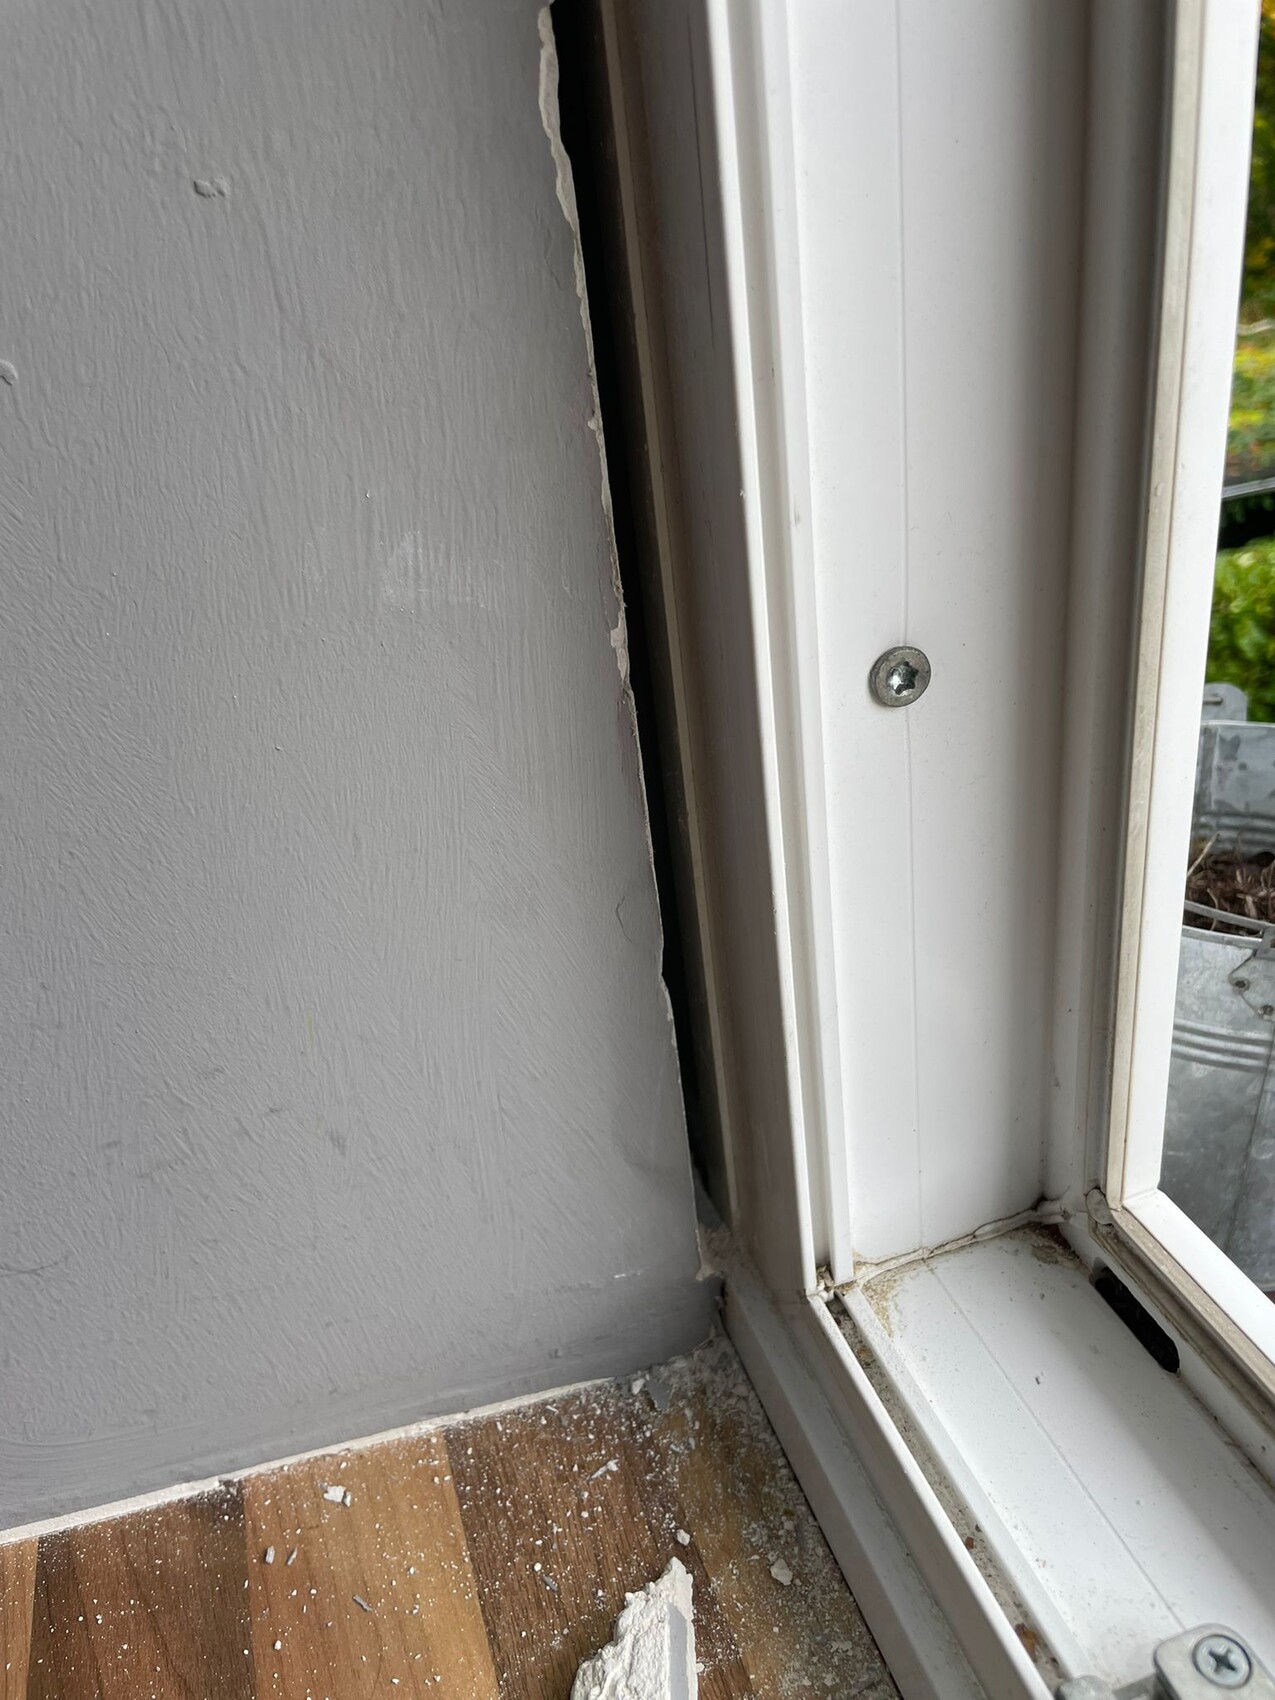
I’m currently repainting my girlfriend’s room, but I’m having an issue with a drywall (gypsum board) wall that was installed some time ago. The wall has been painted before, but at the edges (near the window and along the floor) a lot of the surface has flaked off. I’m not exactly sure what material has crumbled away, but it wasn’t very firm and came off with very little effort. Now there are larger gaps visible.
Since I don’t have much experience with filling and patching, I’d like to know the best way to repair this. Is it enough to fill the gaps with joint compound or filler, or should I use something to reinforce it? I want to do it properly this time so that it holds well. What else should I keep in mind to make sure the result looks professional?
Thanks in advance for your help!
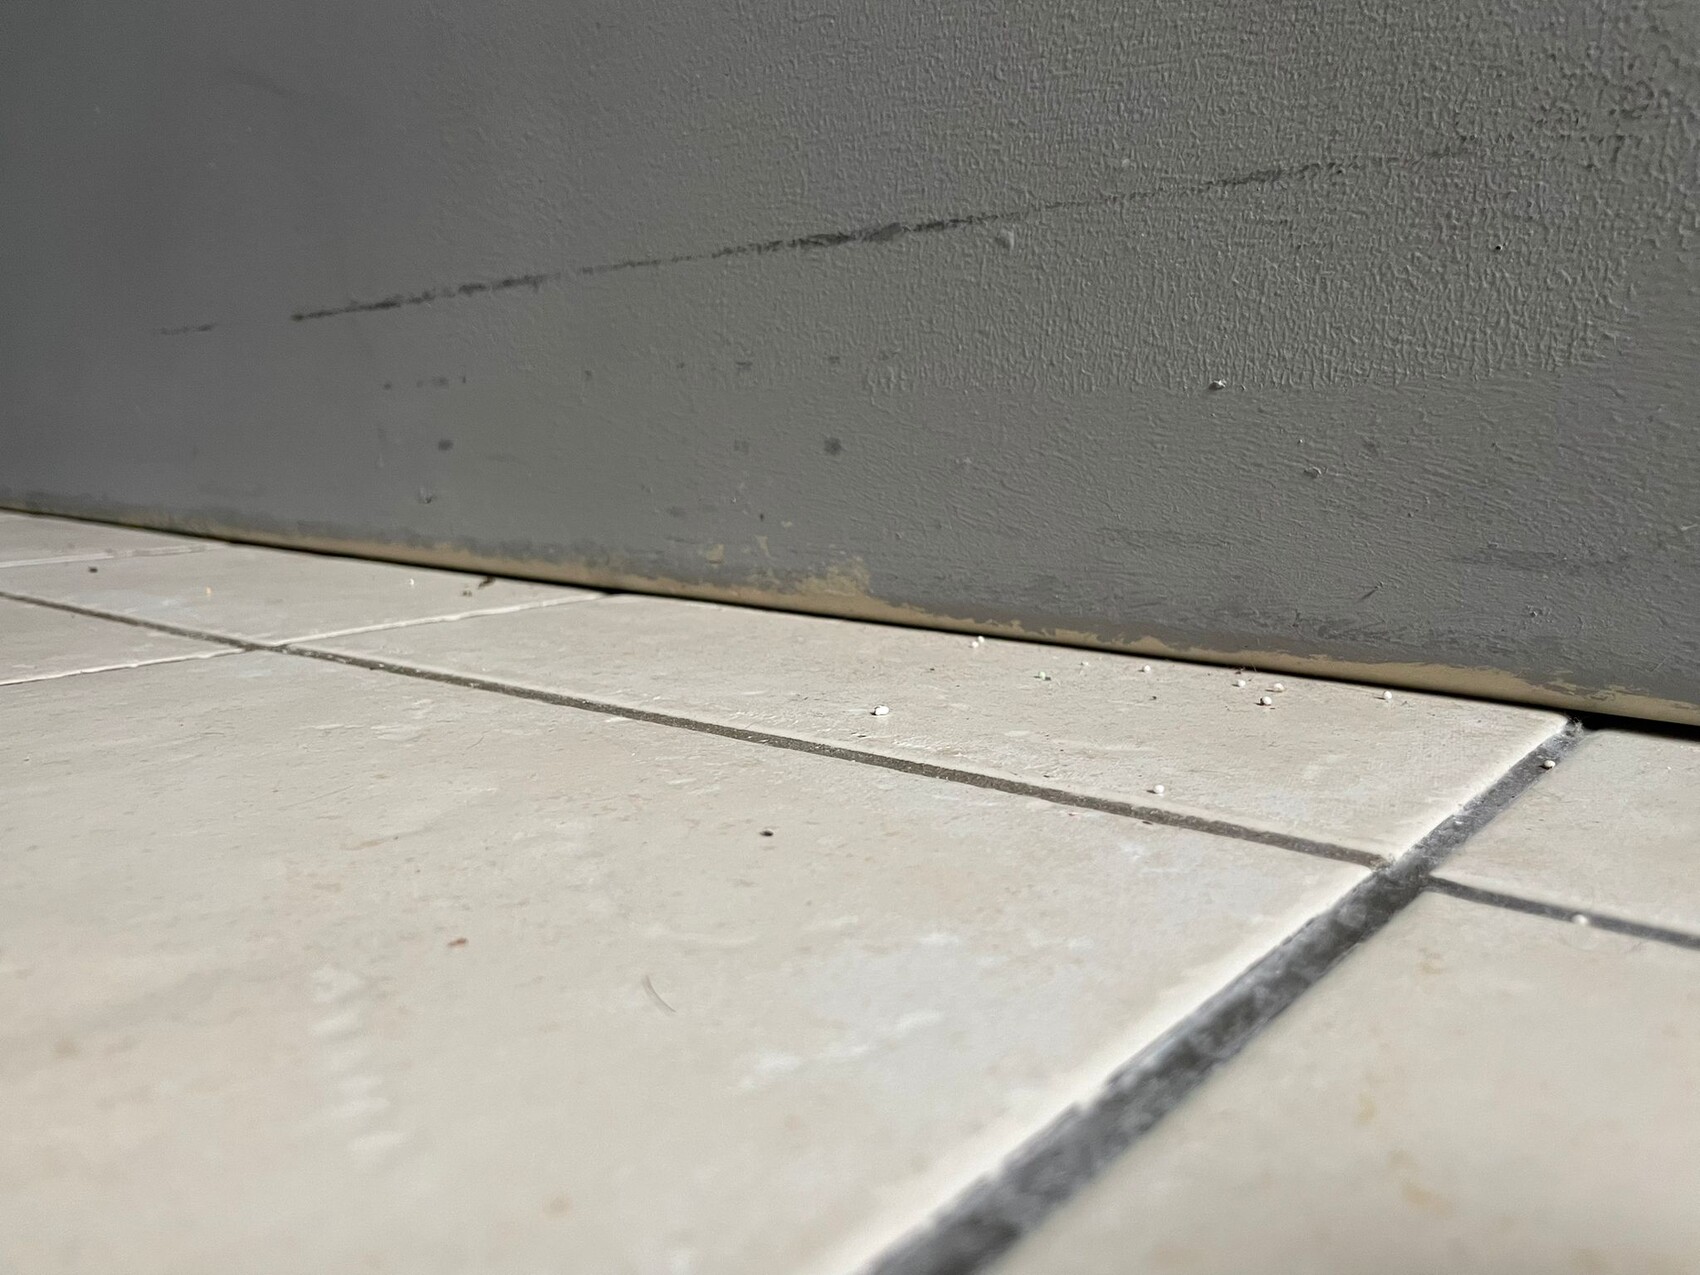
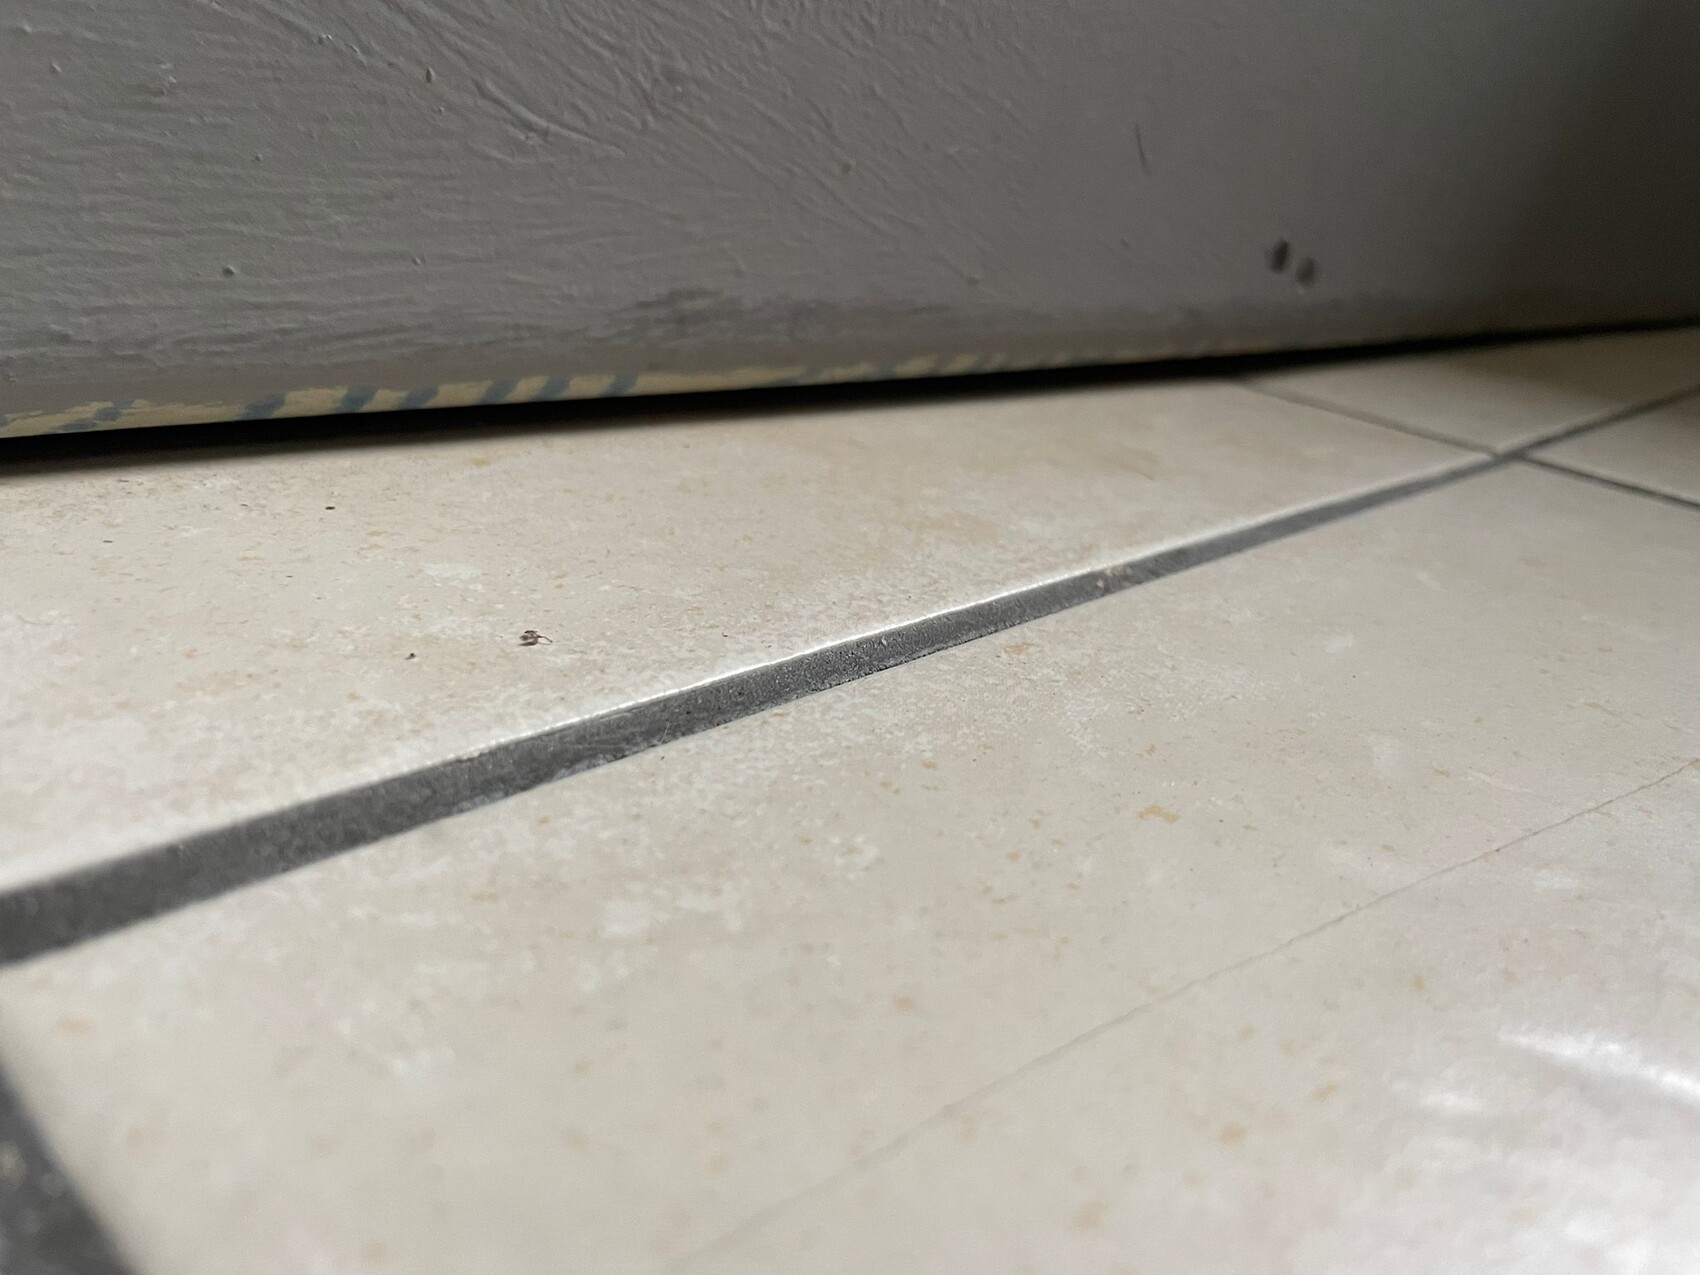
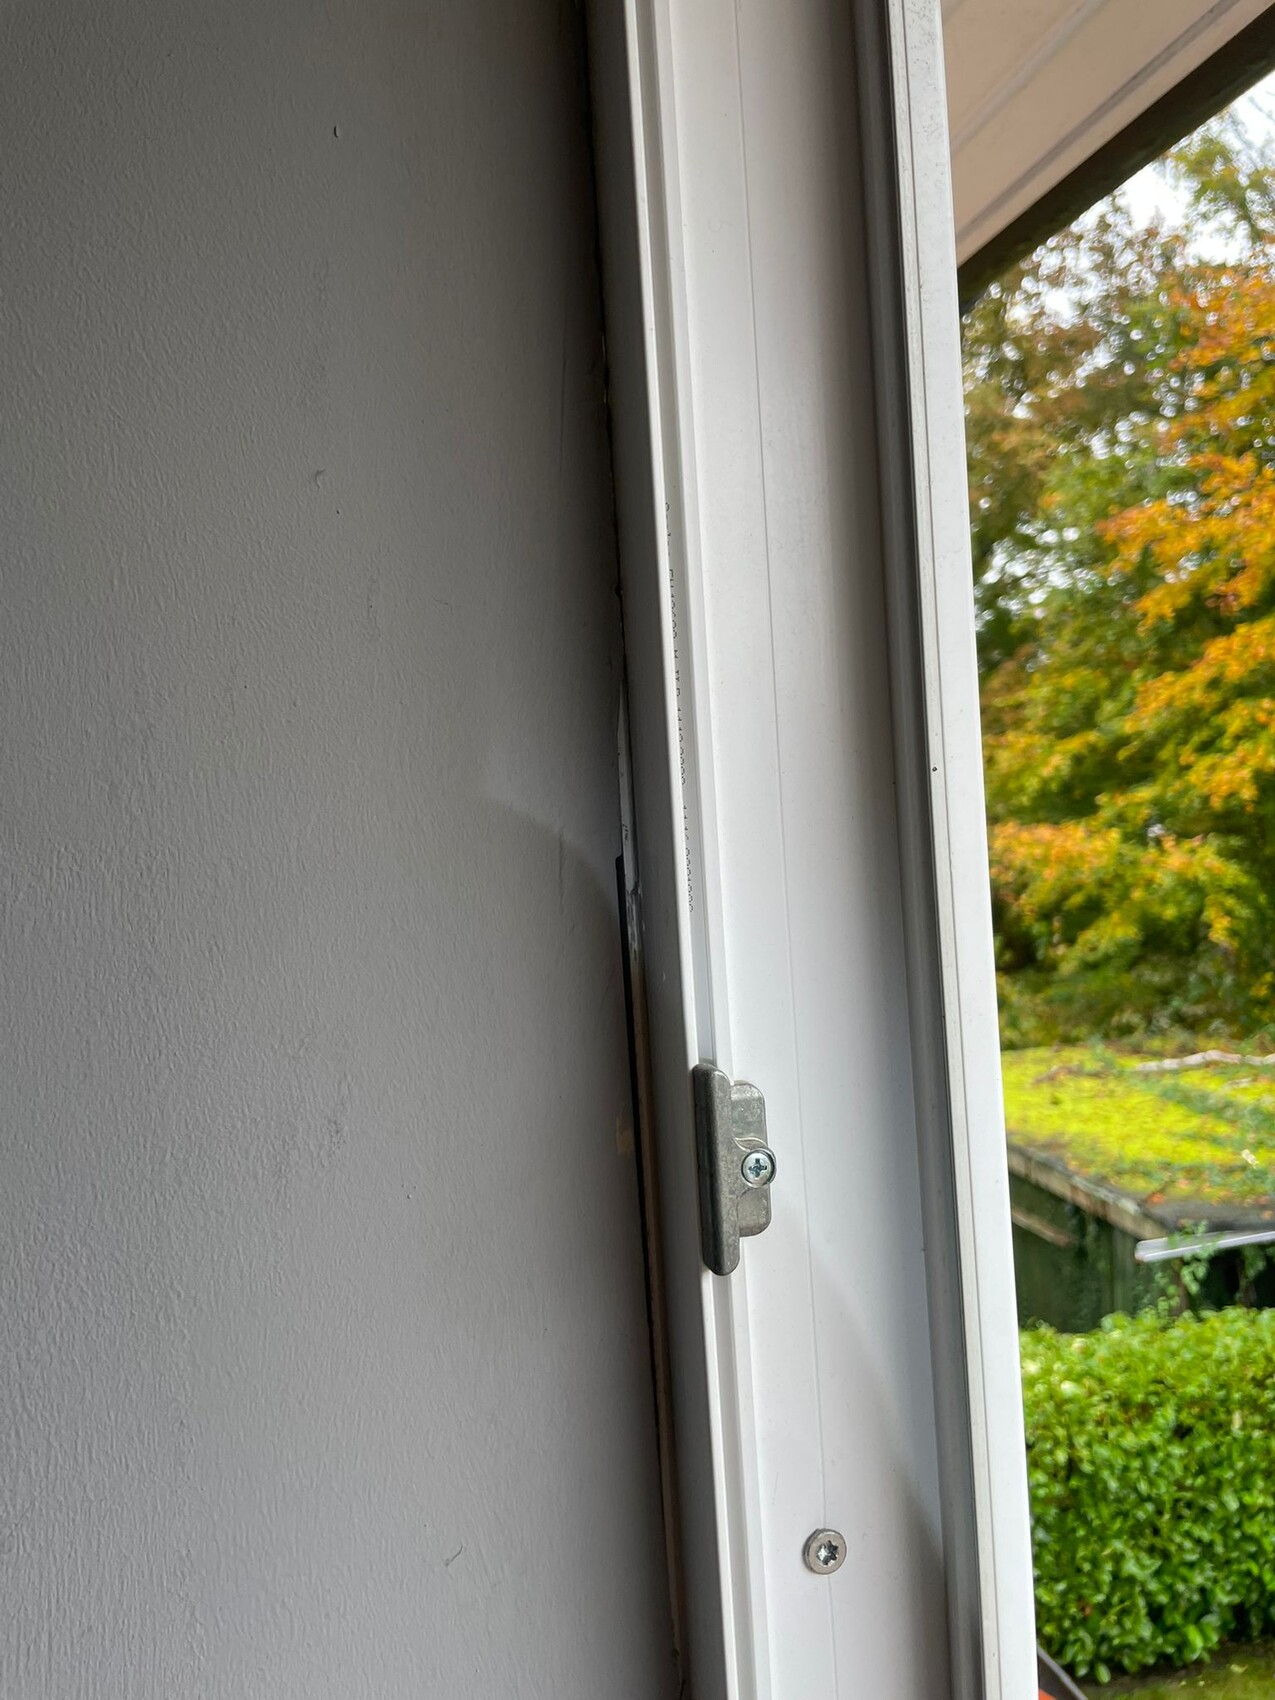
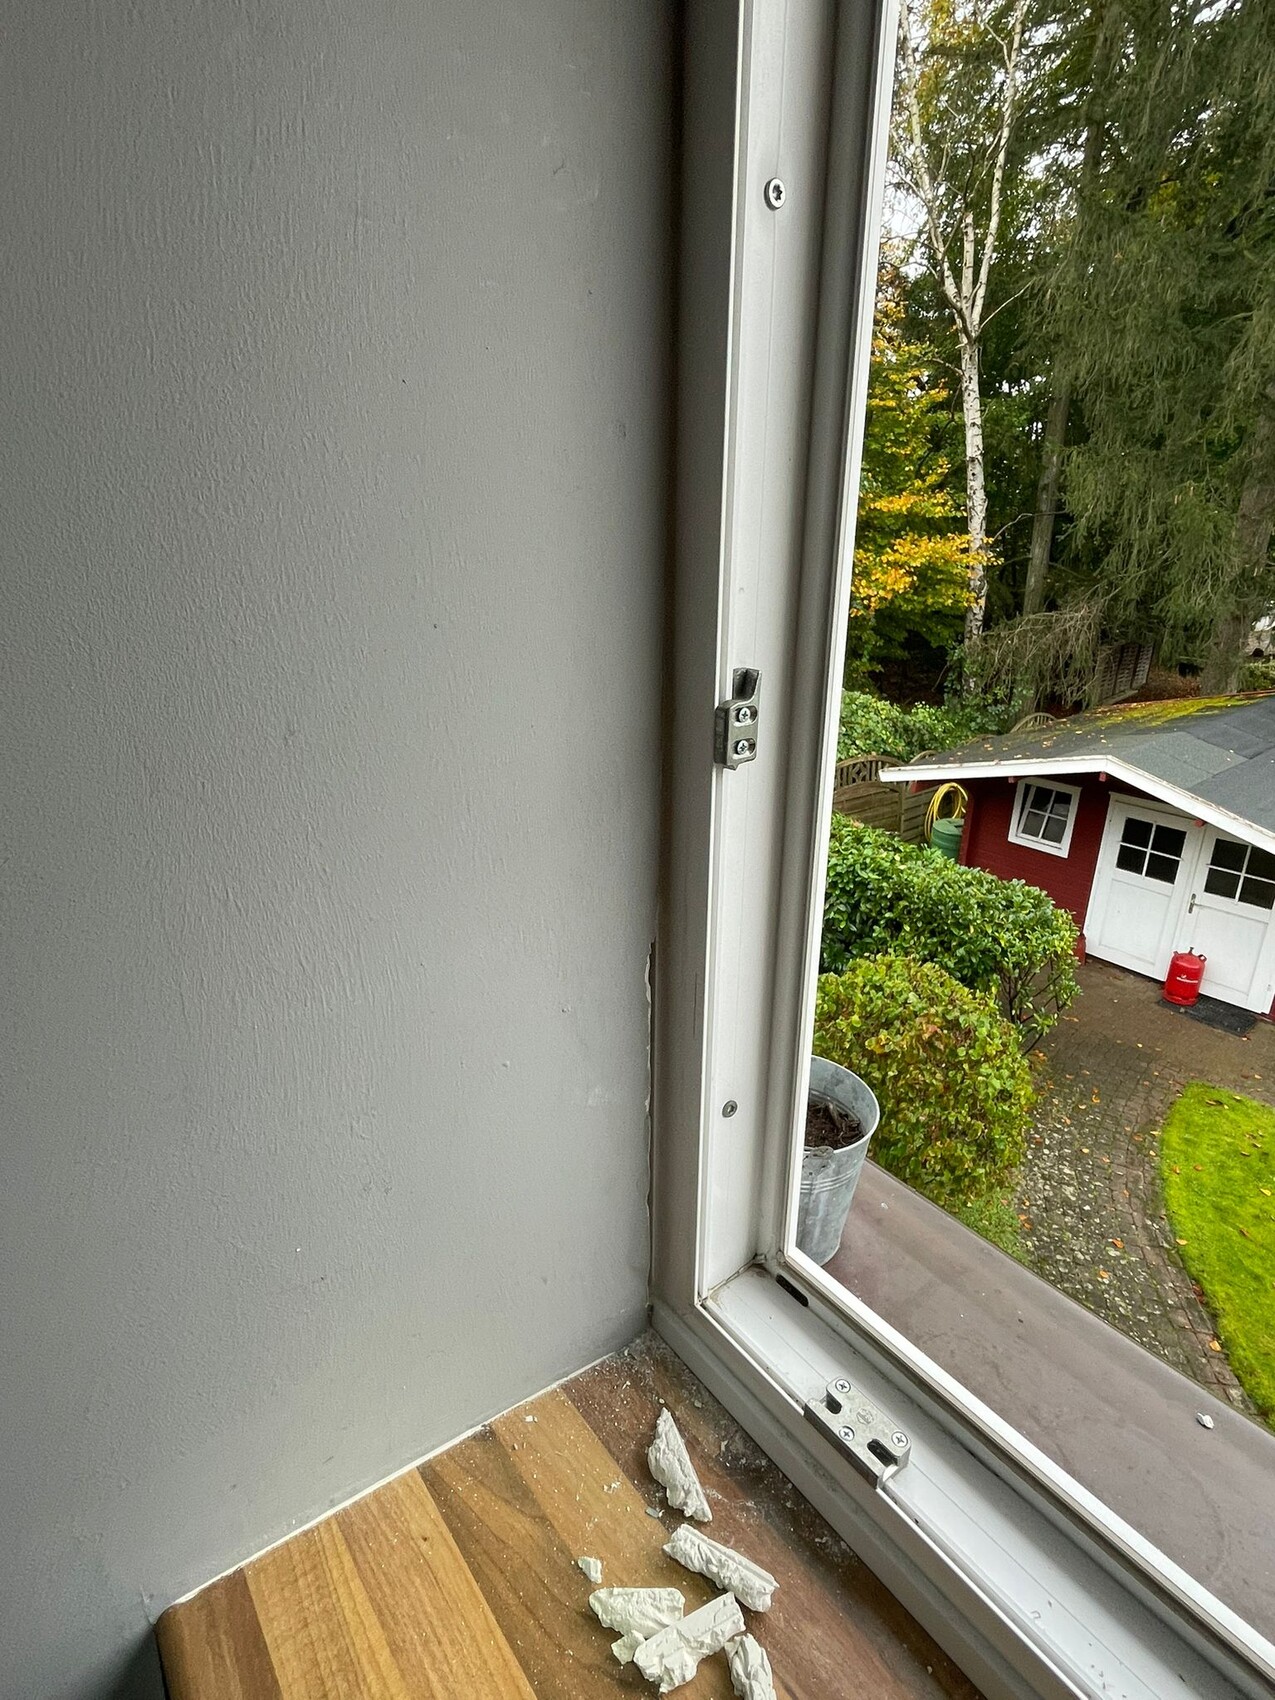
J
Jesse Custer28 Oct 2024 08:02I see two different issues:
- I would cover the one at the floor with a baseboard – this way you get a clean finish.
- At the window connection, I would also use a trim piece, since the work was done quite sloppily here – the panel was just cut straight, and the rest was simply filled in loosely from behind without support.
Everything else will start crumbling again sooner or later...
Jesse Custer schrieb:
I see two different issues:
- For the bottom edge, I would cover it with a baseboard – that way you get a clean finish.
- At the window connection, I would also use a trim piece because it was done quite poorly here – the panel was just cut straight, and the rest was simply filled in from behind without proper support.
Everything else will eventually start crumbling again... Can you do that today? I can imagine how to best handle the bottom edge with the baseboard. But what do you mean by just attaching a baseboard to the side?
J
Jesse Custer28 Oct 2024 09:27Also:
- For the baseboard at the bottom, I would choose a fixed board—something white, available as individual pieces (2,500 mm (98 inches) length, height and depth as needed) that can simply be cut to size. Use enough nails, white paint for touch-ups, and you’re done. I wouldn’t recommend self-adhesive ones, as they don’t last long on this kind of surface. Ideally, a baseboard with a substructure would be best, as the fasteners won’t be visible from the outside. You can find all of this at a hardware store.
- For the wall connection, I’d do it the same way—but with different dimensions, more flexible, and typically without a substructure. These are also available at hardware stores. You’ll need to check the dimensions to make sure you can properly fix it. This depends on where the “usable” material of the wall begins (i.e., where nails will hold). I’d look for a simple corner trim.
For the professionals: yes, of course, it could be done neater—but this approach also allows an amateur to achieve a decent result if they work carefully.
Similar topics