Hello everyone,
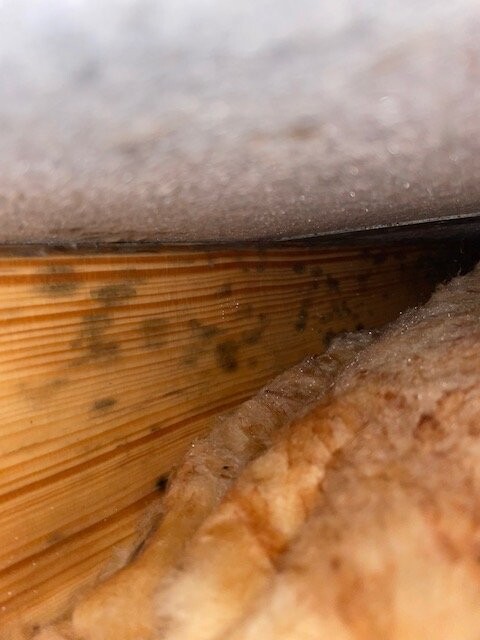
By chance, we noticed yesterday that condensation is forming between the roofing underlay and the insulation batt in our new build.
The insulation setup is as follows: roofing underlay, 22cm (9 inches) insulation batt with a thermal conductivity of 0.035 W/(m·K), vapor barrier.
All overlaps of the vapor barrier are taped, wall connections have been sealed with membrane adhesive, and roof penetrations are also sealed with tape.
Plastering was done in November and a flowing screed was installed shortly before Christmas.
The underfloor heating has been running for almost two weeks now.
The moisture on the roofing underlay has already started to leave marks on the rafters behind it. How would you proceed from here? We are running three construction dryers alongside the heating, which are collecting a significant amount of moisture. Unfortunately, due to the current weather conditions, the condensation is not likely to disappear on its own anytime soon...
A
Allthewayup13 Jan 2025 21:32Condensation does not belong behind the vapor barrier. If as much moisture accumulates there as it did for the original poster, to the point where mold develops, then there is a serious problem with the vapor barrier.
What I also don’t understand—based on what I gathered from the original poster—is that insulation was already installed before the screed was poured. Mineral wool and similar materials should only be installed after the screed, plaster, and other moisture-intensive work are fully completed. In the attic, for example, the vapor barrier must be elastically bonded to the plaster. For this, the plaster must already be dry.
Please provide more details about your current situation; maybe we can offer you some advice.
@Allthewayup Thank you very much for your message and your questions.
I think we now understand our mistake and our main question is how we can fix the current situation and what effort this will require.
Let me explain our current situation:
Basic information:
We have a mid-terrace house, built in 1975, with 4 floors (ground floor, 1st floor, 2nd floor, and the attic).
The roof is a gable roof with collar beams.
The attic is a full story (not just an attic space) with a concrete ceiling towards the 2nd floor, has a door for access, and is designed as a warm roof.
One side of the roof faces north, the other faces south.
On the south side, there is one window and photovoltaic panels covering the entire roof surface.
On the north side, there are two windows.
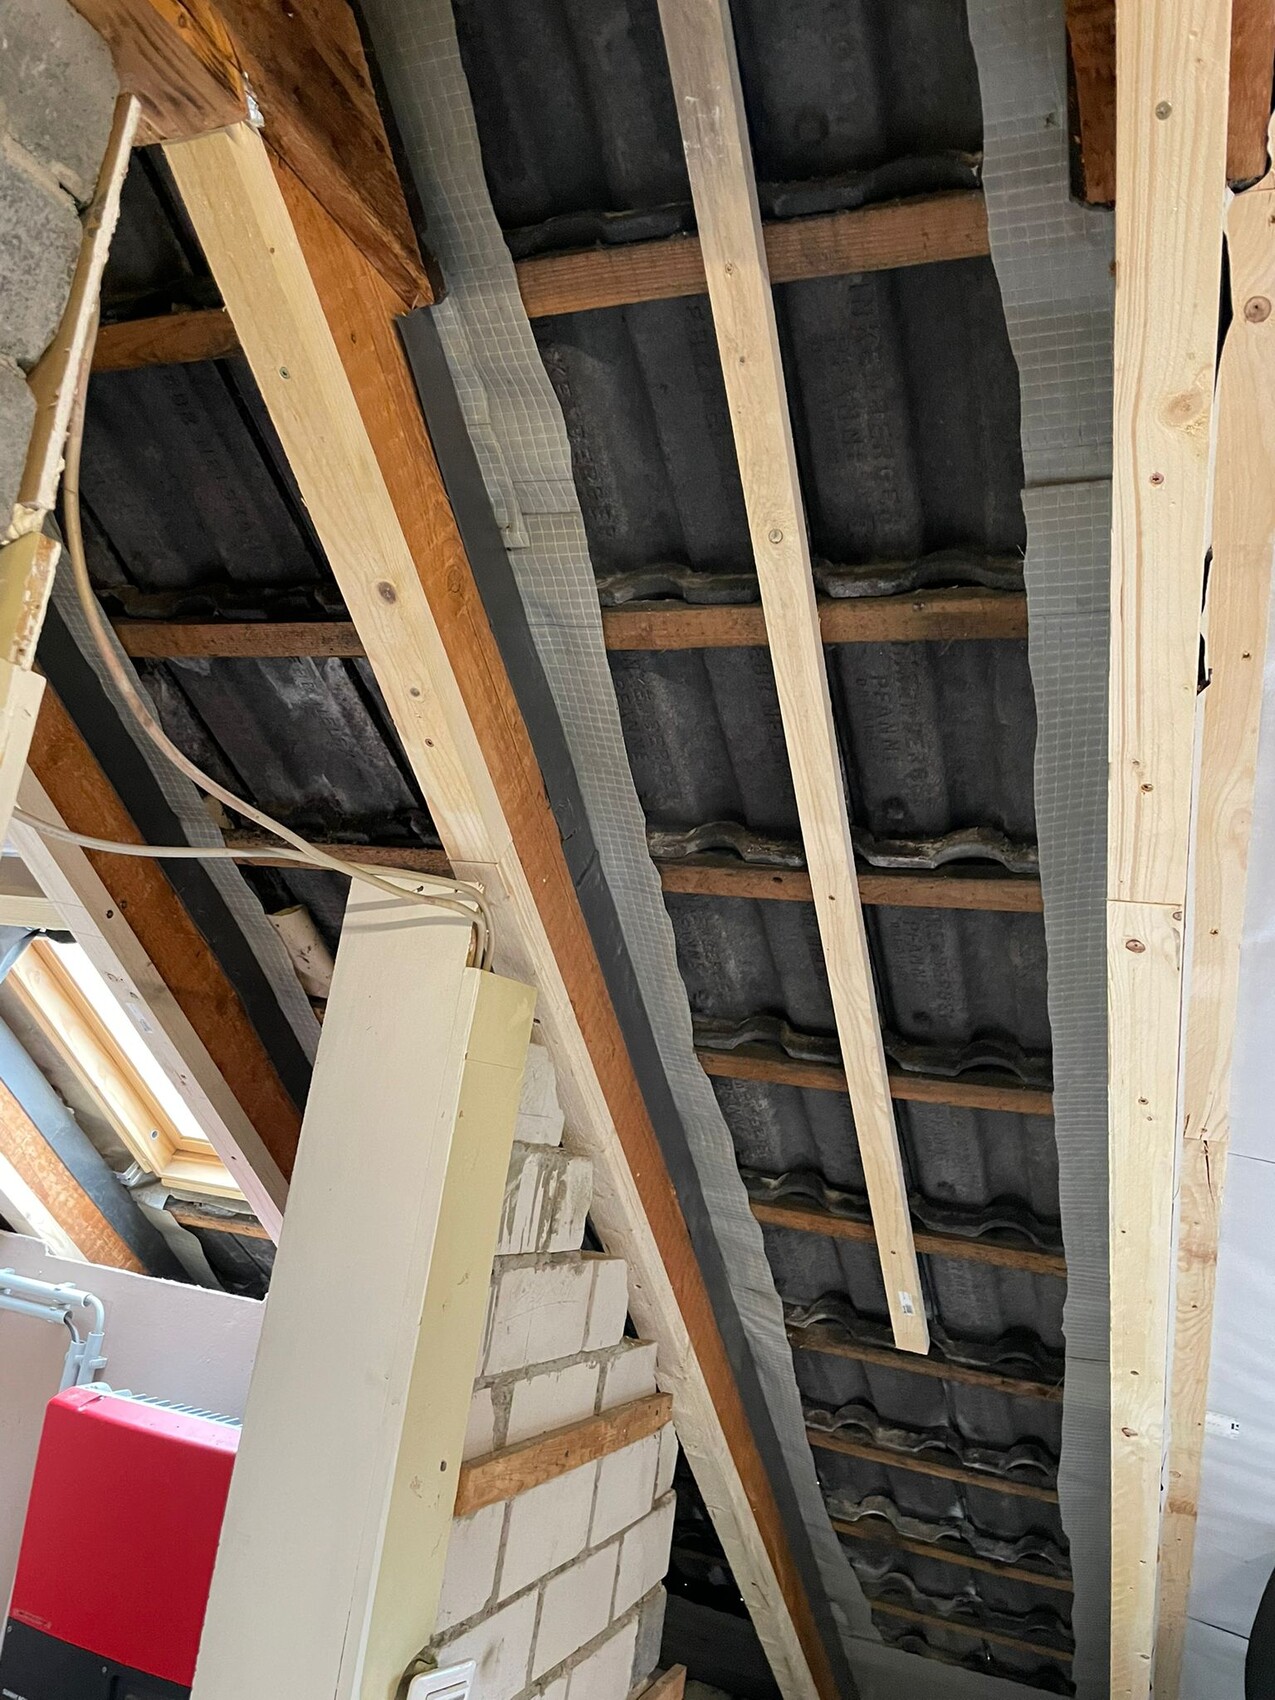
Current roof build-up:
- Clay roof tiles (Frankfurt profile)
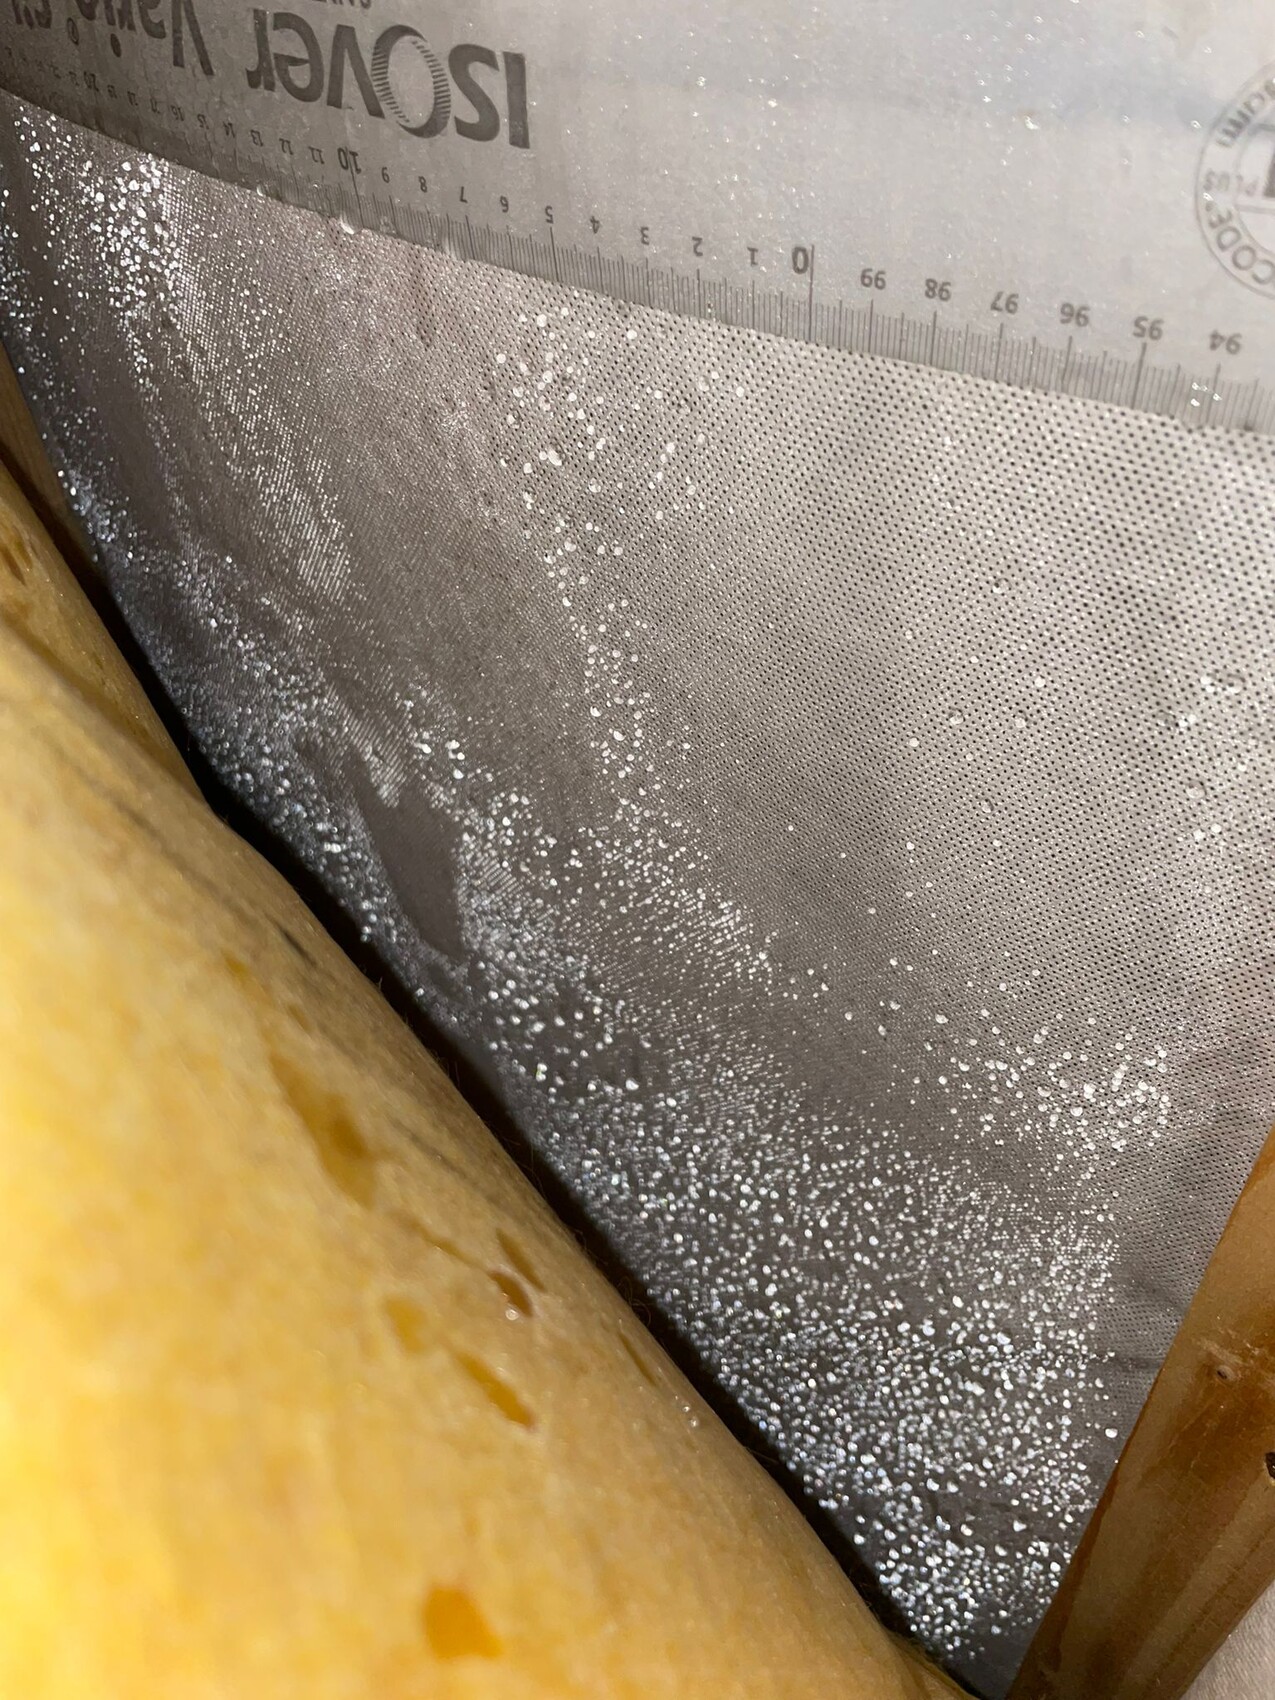
- Waterproof underlay membrane Isover Integra ZUB Light (vapor diffusion resistance sd-value approx. 0.03 m)
- Rafters reinforced to 160 mm (6 inches) depth
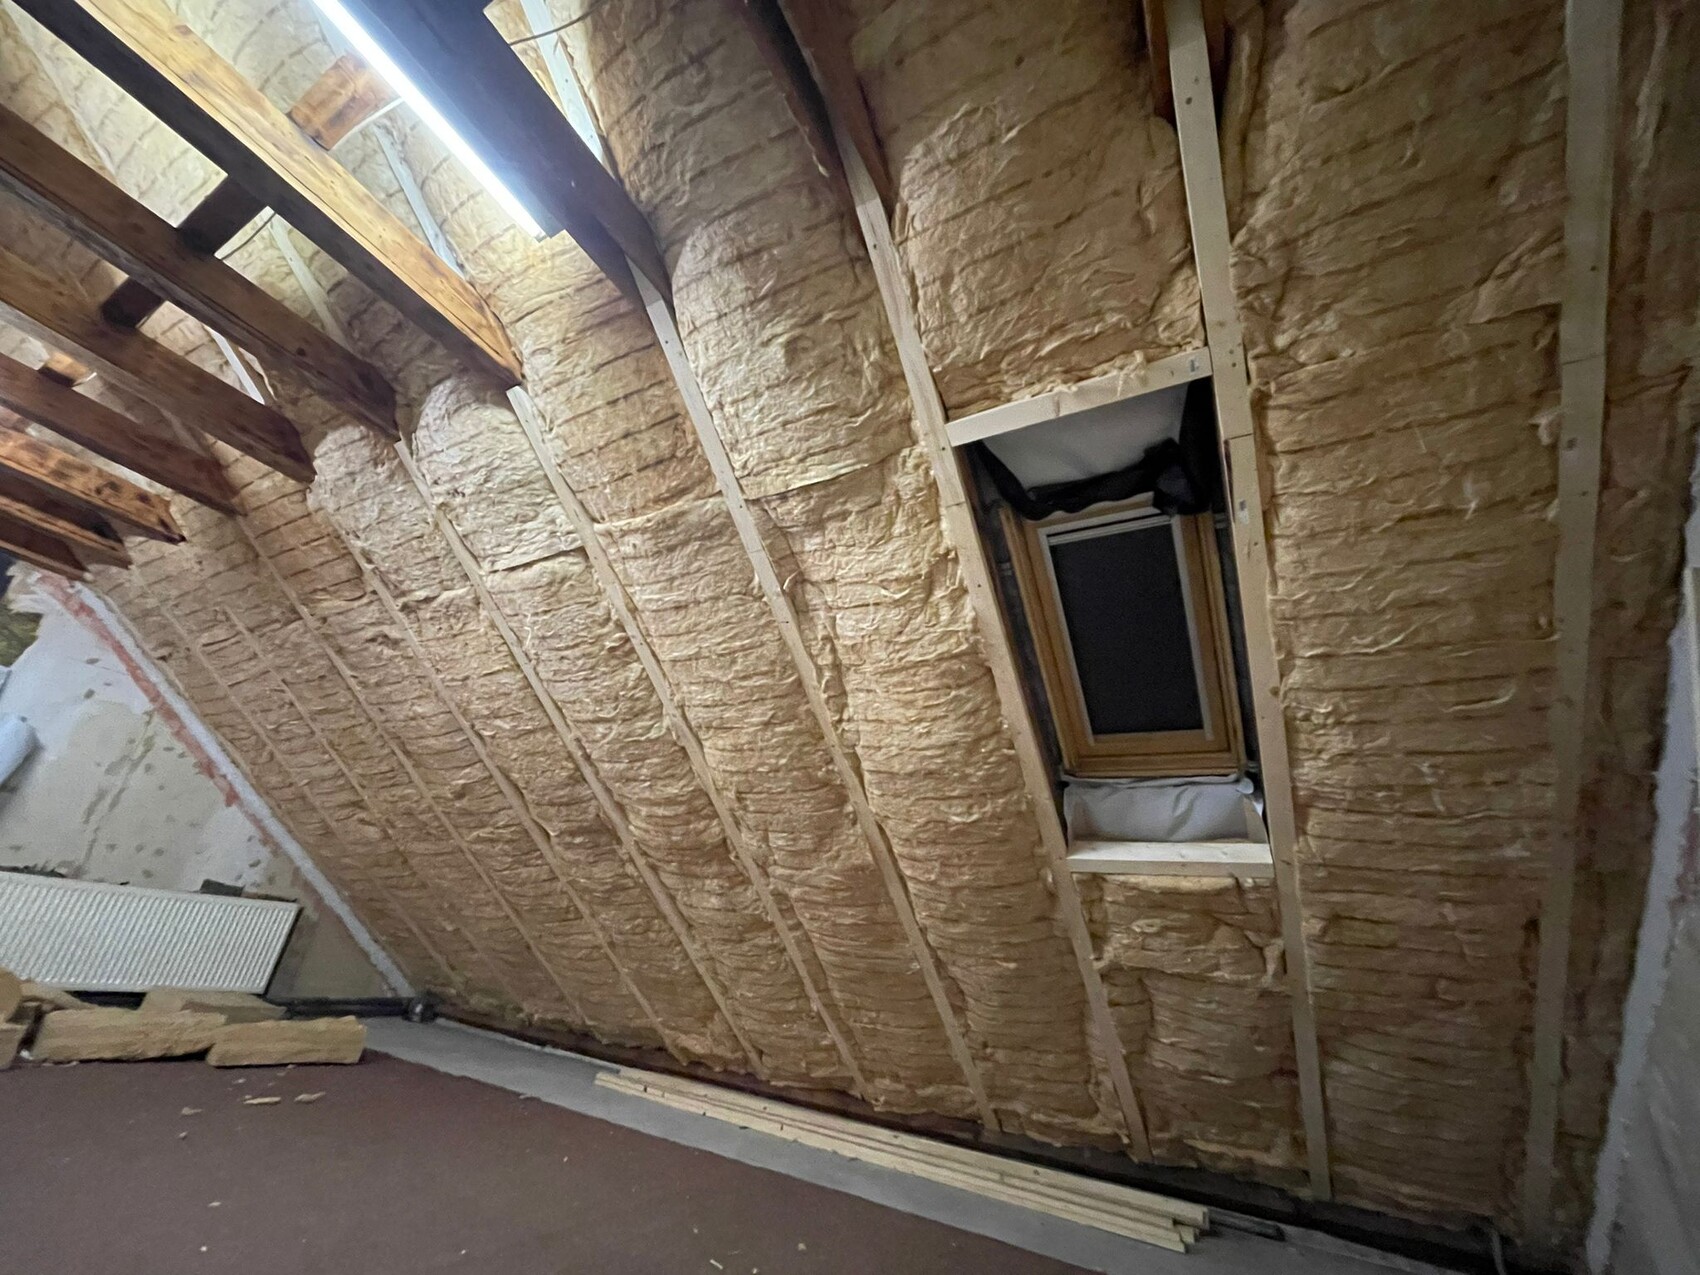
- Insulation between rafters: Isover Integra ZKF 1-032 glass wool, 160 mm (6 inches) thick (placed directly against the underlay membrane, no ventilation gap)
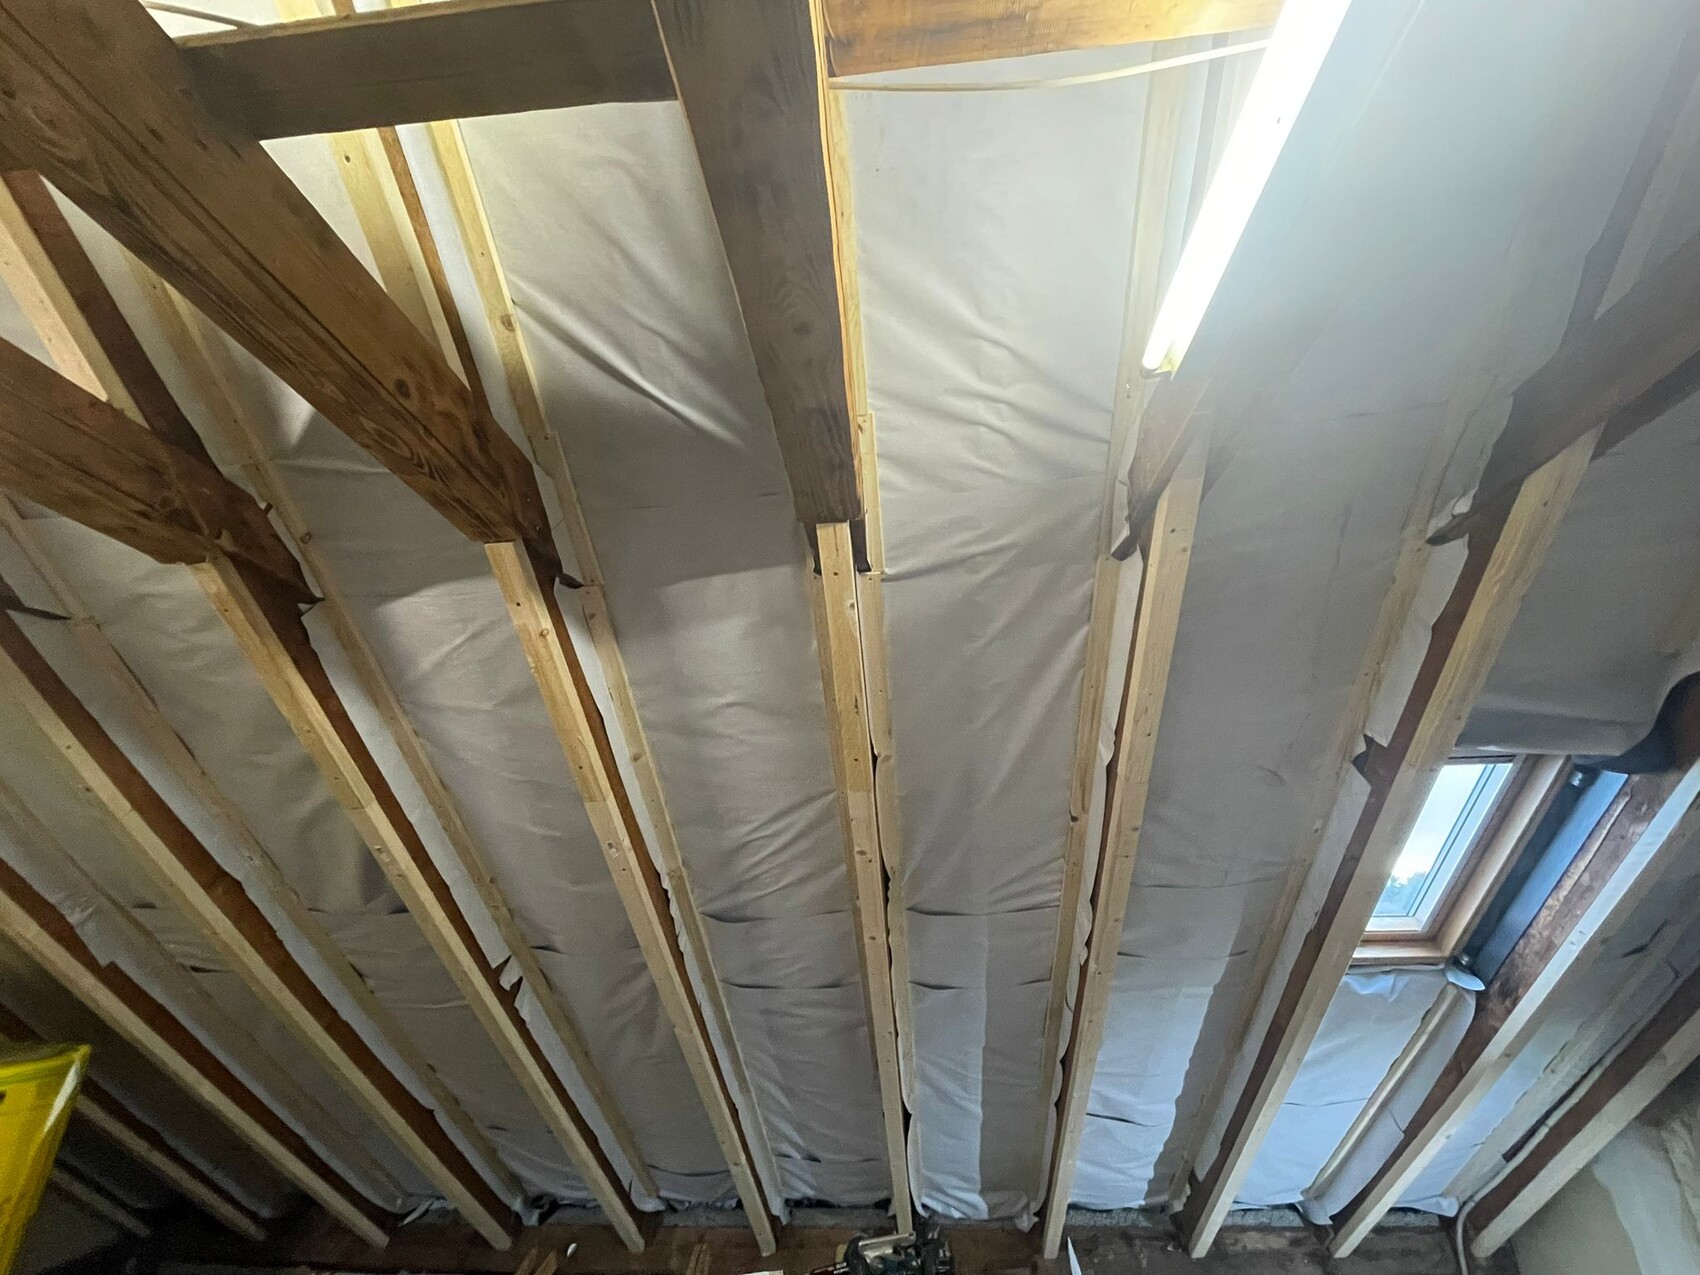
- Vapor retarder membrane Klimamembran Isover Vario KM Duplex UV (sd-value 0.3 – 5 m)
Detailed steps:
1. As part of a full renovation, we first tackled the roof from the inside.
Everything was removed (aluminum-faced mineral wool insulation including the old vapor-tight underlay, which on the south side was already falling apart).
2. Then, in August 2023, we installed the new underlay membrane from the inside per rafter bay, as recommended in some Isover guides and forums.
A batten was fixed in the middle of the rafter bay to create a slight channel for any condensed water to drain instead of running down the rafters.
Anti-spike fasteners were attached to the rafters, and the underlay membrane was firmly pressed onto the rafters with battens and screwed in place.
My husband took great care installing the membrane, thoroughly researching the topic; we also consulted a roofer.
We knew this was not standard practice, but a full roof renovation including a new membrane from outside was beyond our budget.
3. In June 2024, we installed the glass wool insulation between the rafters.
4. In November 2024, we installed the vapor retarder and carefully sealed everything as well as we could, also all pipe penetrations, wall and floor connections, and beams. We did not only use Isover tapes but also DoubleFit tape to achieve the best possible airtightness. We sealed the entire stairwell with plastic film and fitted the door with a dust protection plastic door – so not 100% airtight.
However, on each roof window, we cut a vertical slit in the vapor retarder so that the windows could be opened for ventilation.
This turned out to be a big mistake... We were not aware that the vapor retarder must be completely airtight at this stage and that various physical processes cause moisture to be drawn upwards. But moving on:
4. End of November 2024, the first layer of interior plaster was applied (the raw masonry was heavily plastered).
5. End of December 2024, the screed was installed on the 1st and 2nd floors (heated cement screed with additives = quick drying; approx. 7-8 cm (3 inches) build-up height; mostly above underfloor heating pipes with approx. 4.5 cm (2 inches) pipe coverage).
6. On January 6, 2025, our heating engineer started the heating protocol, and the underfloor heating on the 1st and 2nd floors was switched on, along with one radiator in the attic. The ground floor is currently unheated due to the lack of a radiator.
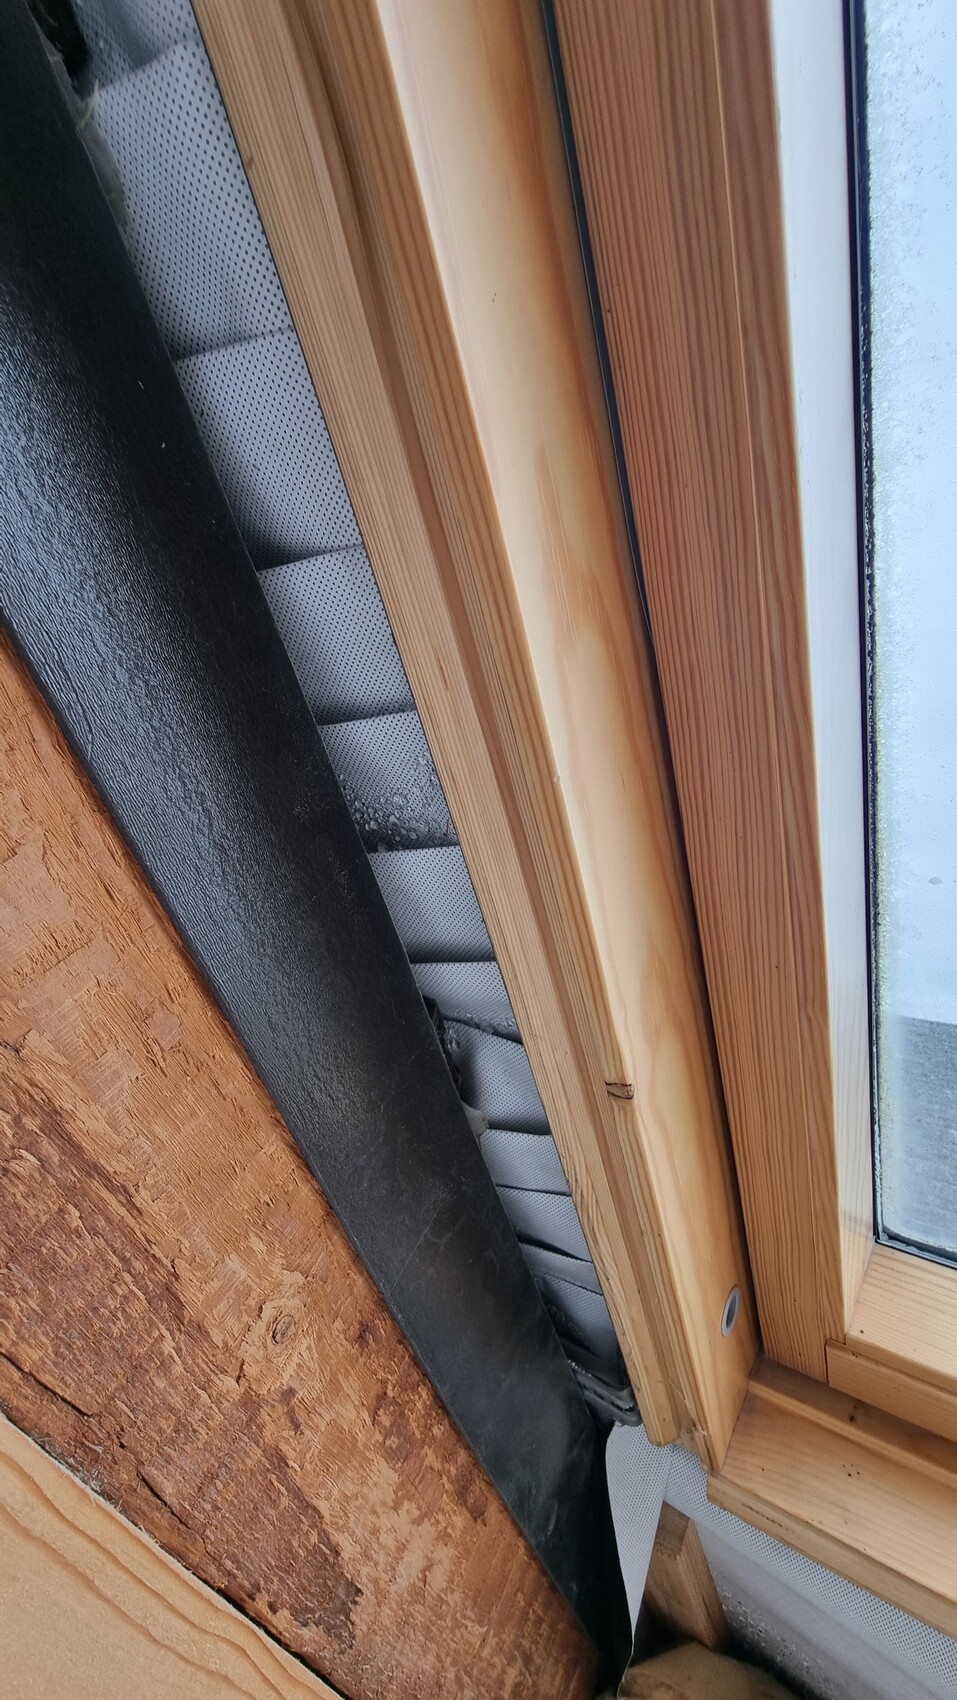
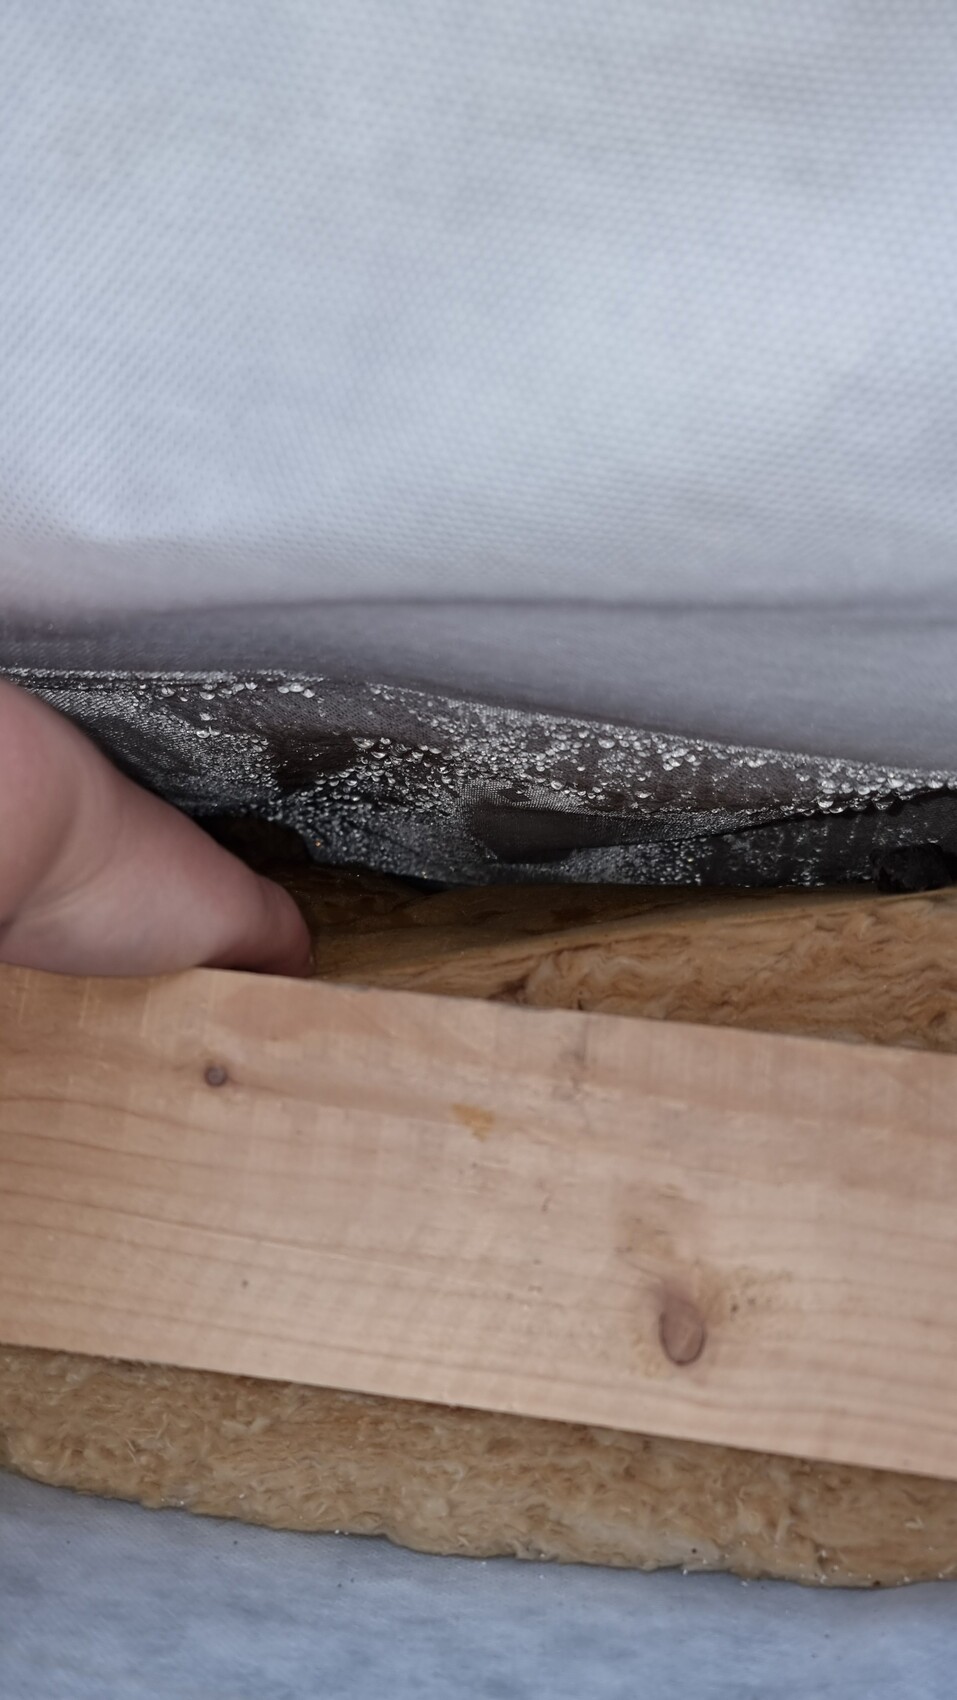
7. On January 12, 2025, while ventilating the attic, I accidentally noticed a spot beside one of the windows on the underlay membrane where thick water droplets had formed. At that time, temperatures had been around freezing for several days.
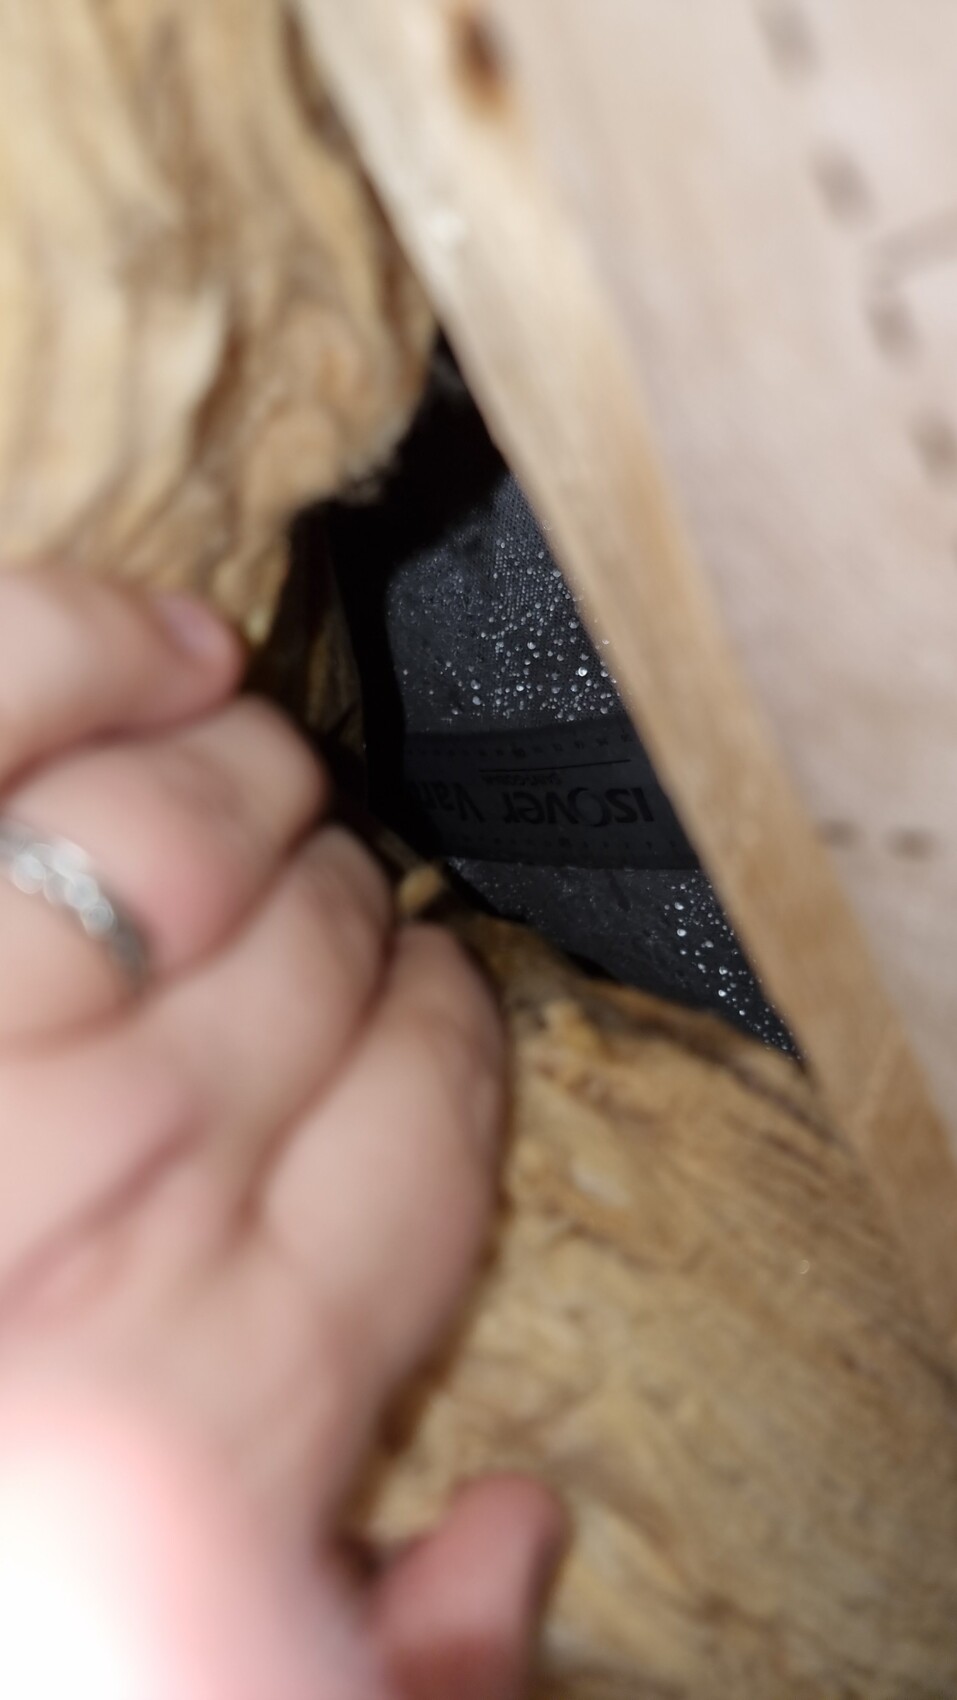
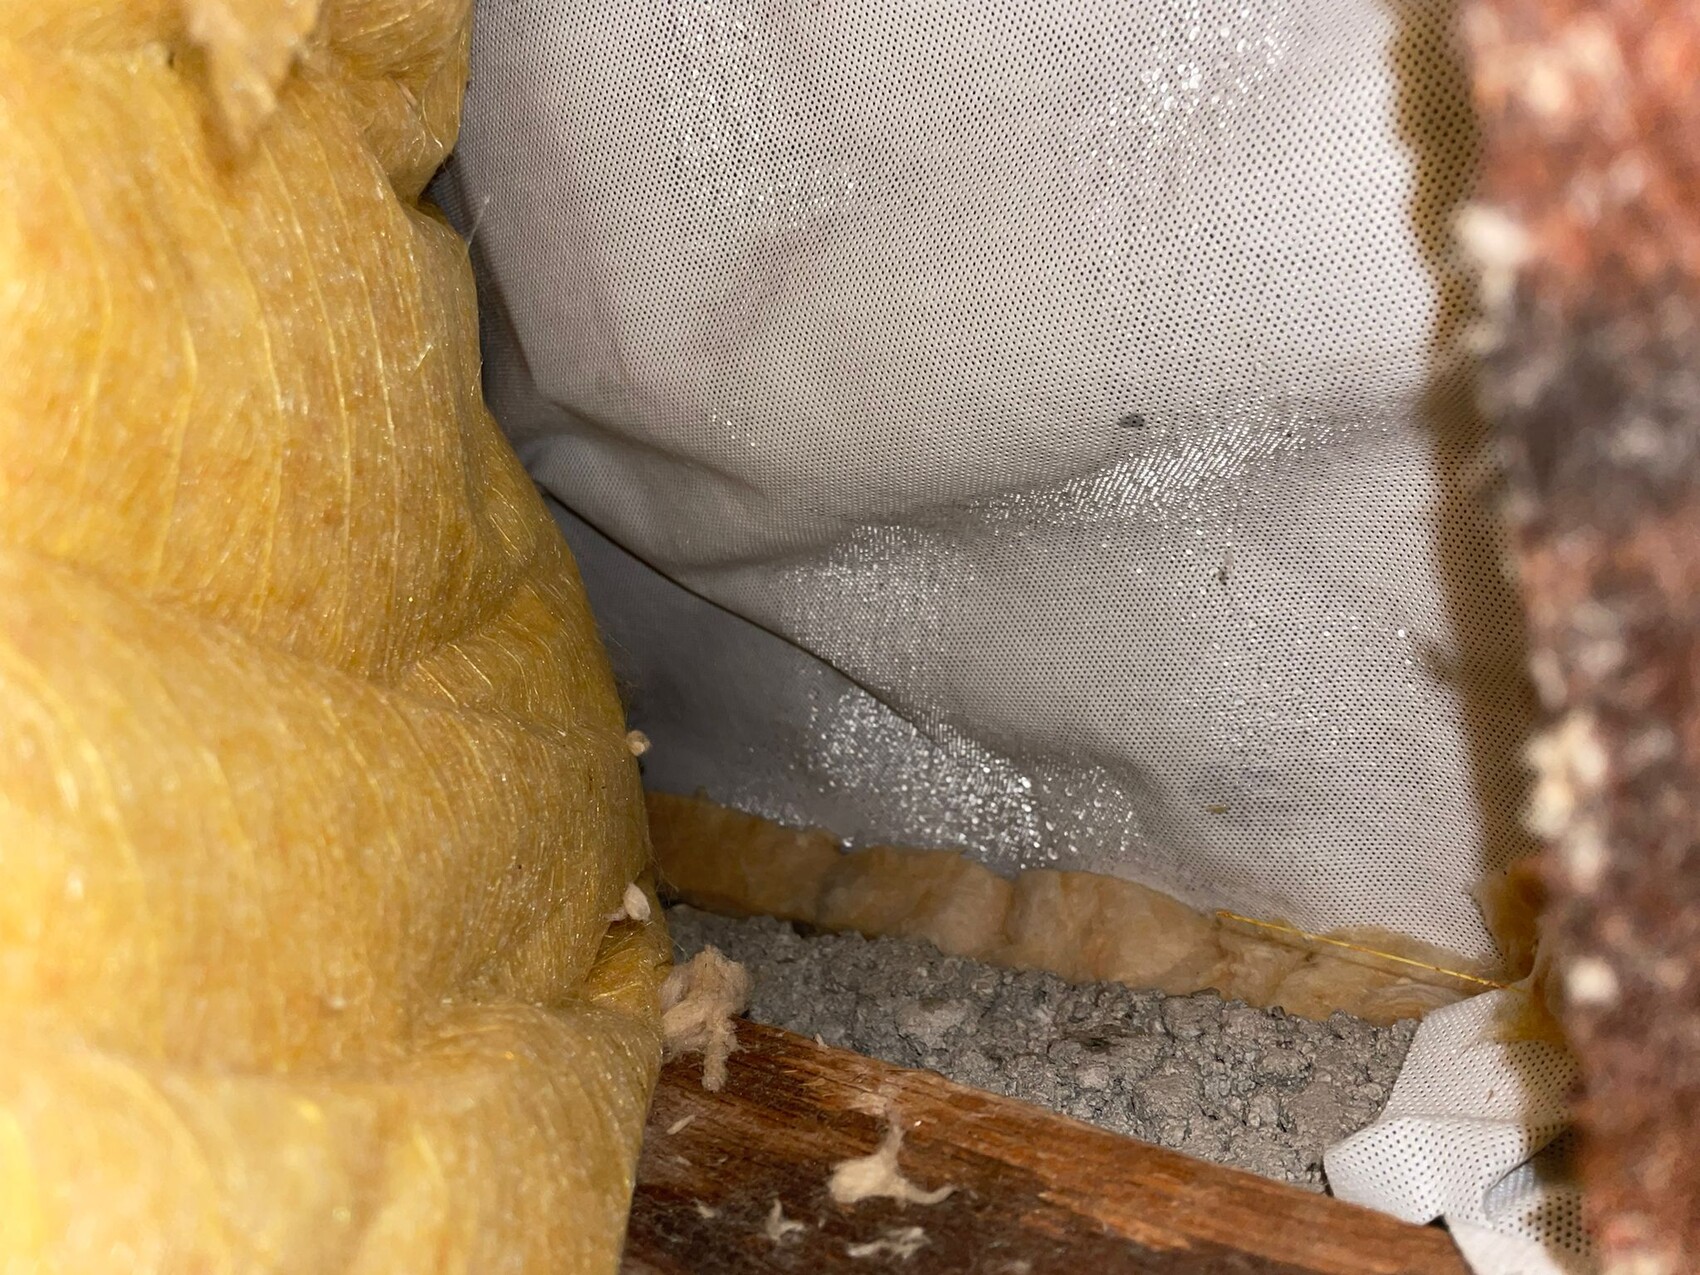
I then inspected further and found thick water droplets everywhere on the underlay membrane. I made an opening in the middle of the roof surface, pushed aside the insulation wool, and looked inside.
On the south side, about 5 meters (16 feet) away from the window, the same was visible, though with slightly less condensation.
Currently, there is NO visible mold or other staining, but we have no idea how quickly that might change.
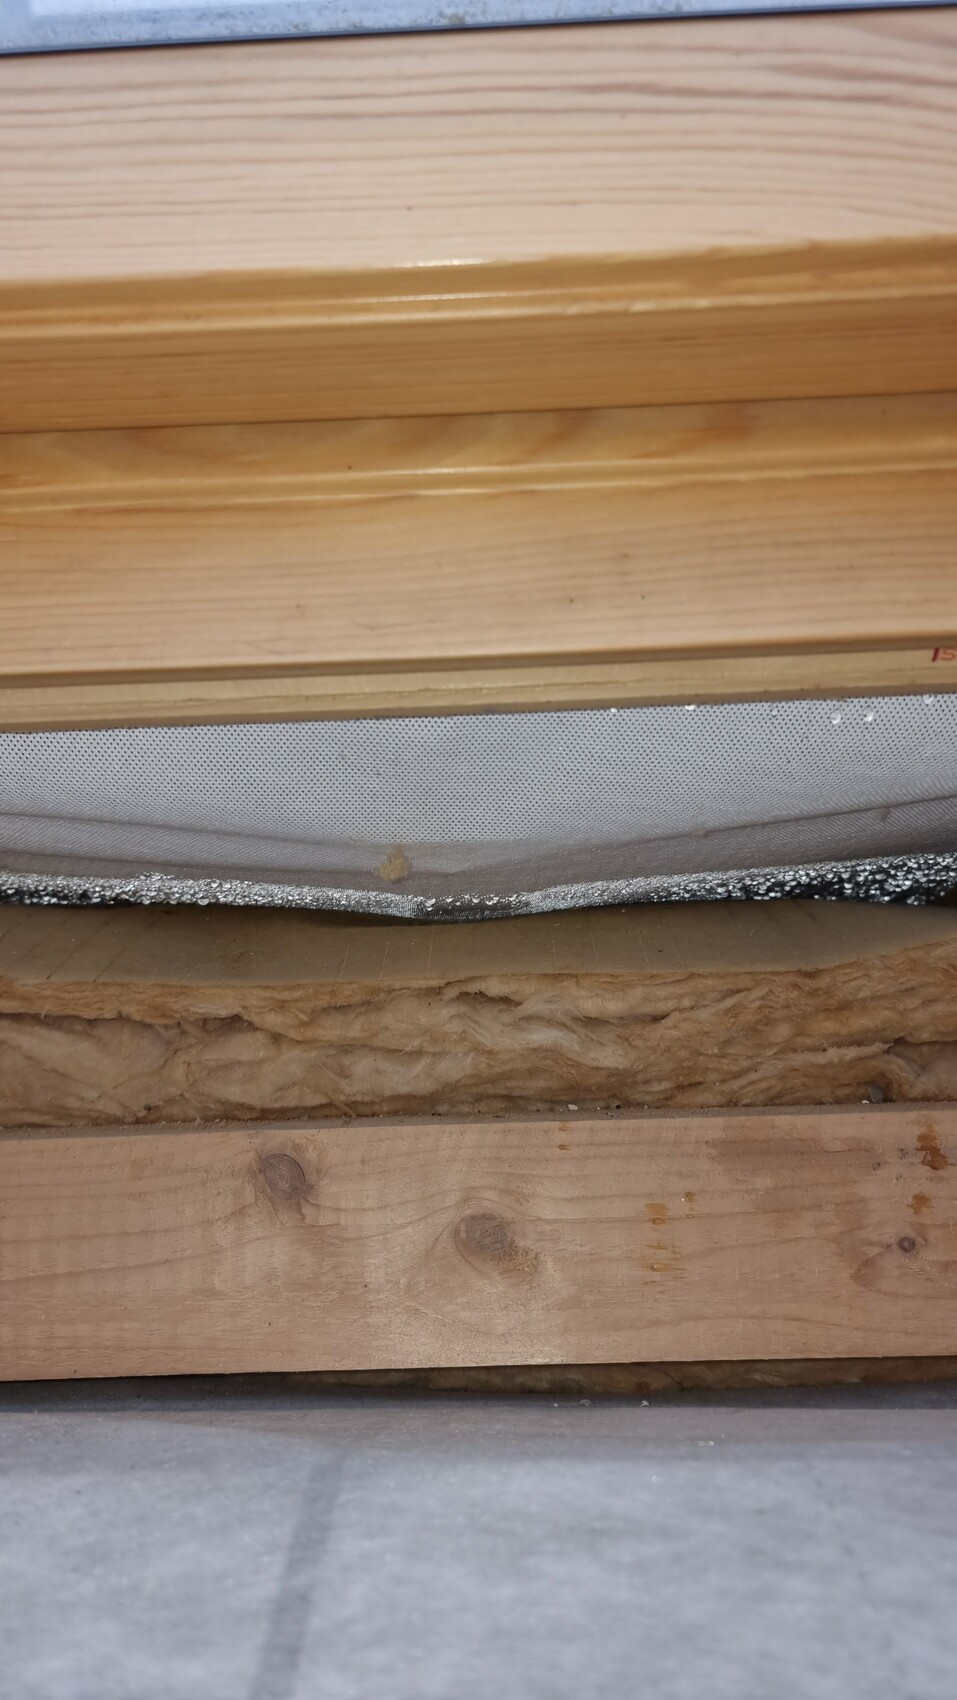
The insulation wool appears mostly only damp on the surface in the areas we could check. On the smooth surface of the wool, water beads up but of course can penetrate at the joints.
We now understand the cause: the vapor retarder should have been completely sealed.
We were not aware that the insulation should only be installed after the building moisture has dried out, despite much research.
There are several potential problem areas:
- Moisture penetrating wooden components or other absorbent materials (a few damp spots can be seen on rafters and battens, but very minor)
- Moisture slowly running down to the sole plate and accumulating there / possibly seeping into the lower floor through the concrete ceiling (we inspected two trial spots but found everything dry so far)
- Moisture accumulating between the membrane and insulation, possibly causing mold or spores (no visible mold or spores yet)
The question is, what can we and must we do now?
Is it enough to enlarge the window openings in the vapor retarder to allow proper cross-ventilation (so far there are only slits and air tends to flow through the insulation layer rather than into the room)?
Ventilate 3-4 times a day (current outside temperature is about -2°C (28°F) and very dry weather, approx. 45% humidity).
Is it good or bad to heat the attic (currently around 18°C (64°F), the rest of the house is about 23°C (73°F)), or is heating upstairs counterproductive?
Would it be helpful or even sensible to set up one or several building dryers?
Or do we need to remove the vapor retarder and all insulation, and possibly dry the underlay membrane by hand drying or wet vacuuming?
Another question is that presumably all wooden elements (rafters, battens, etc.) will gradually absorb water. How long and by which method would drying take, or would we need to wait for the summer for the moisture to be gone?
When would be the best time to reinstall insulating wool and vapor retarder?
Still in summer / autumn or earlier?
Would we need to perform certain measurements (e.g., measuring moisture in structural members/rafters)?
Ideally, we would like to keep it all inside and remove the moisture technically by building drying or ventilation, but we are unsure if that is physically possible to completely dry out every last corner when the insulation lies directly on the membrane.
If necessary, we will remove everything.
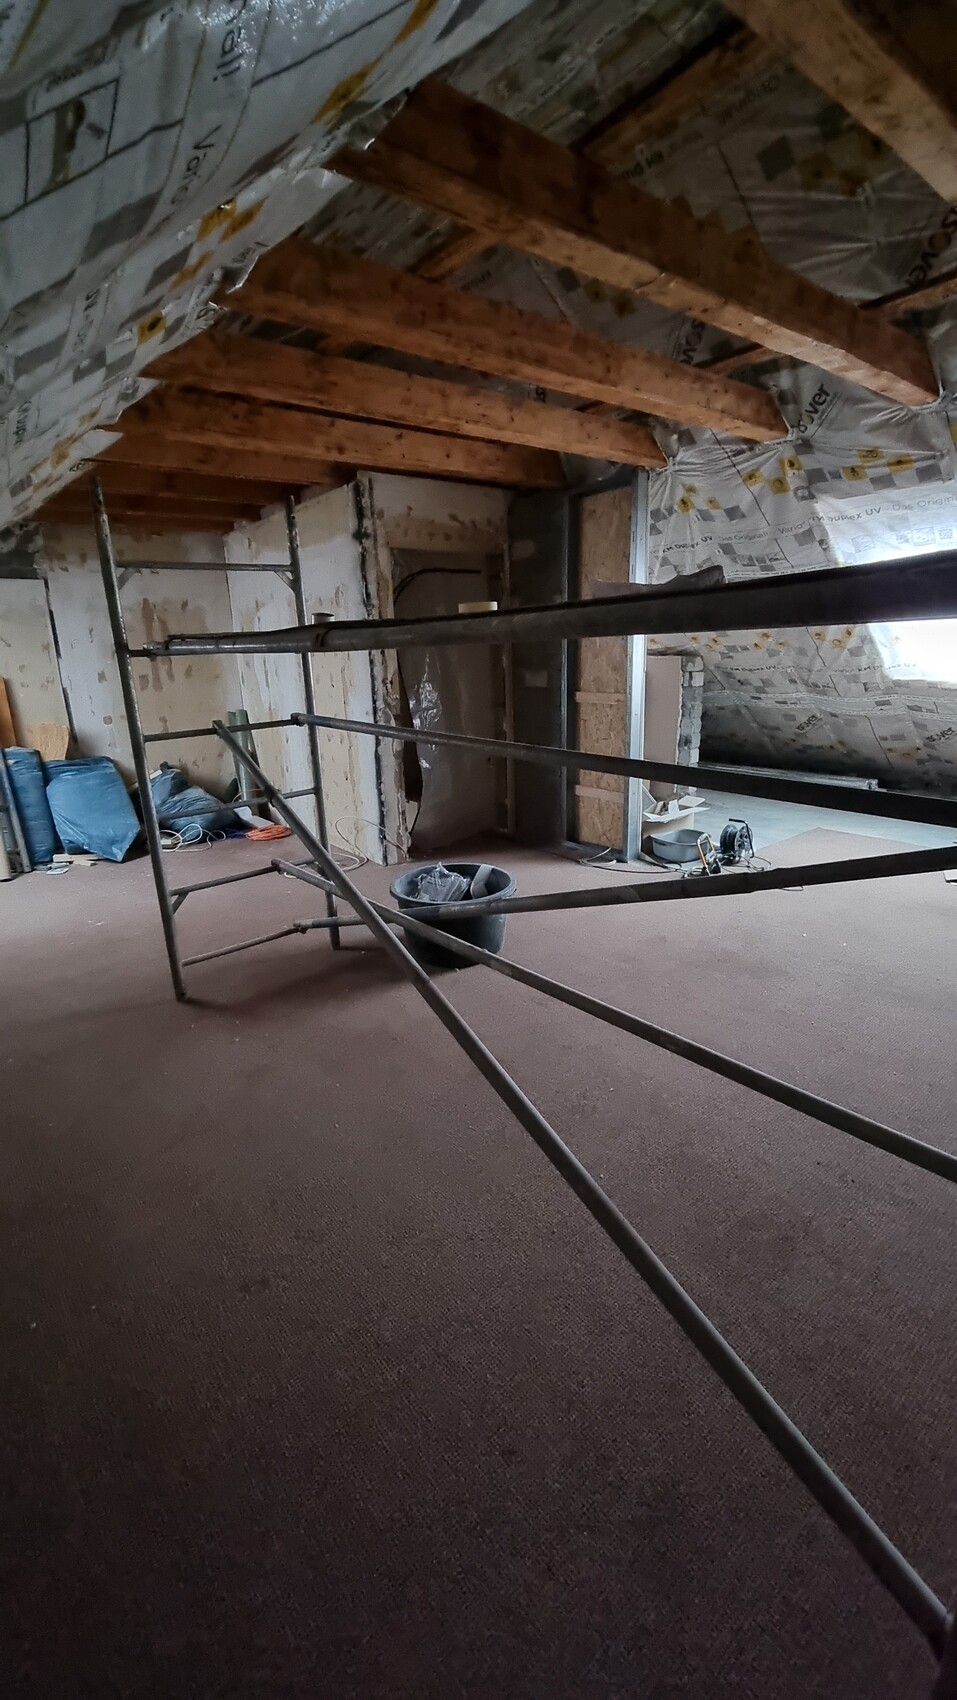
I’m attaching some pictures to help visualize the attic and details better.
Many thanks in advance and warm winter greetings!
Mira
I think we now understand our mistake and our main question is how we can fix the current situation and what effort this will require.
Let me explain our current situation:
Basic information:
We have a mid-terrace house, built in 1975, with 4 floors (ground floor, 1st floor, 2nd floor, and the attic).
The roof is a gable roof with collar beams.
The attic is a full story (not just an attic space) with a concrete ceiling towards the 2nd floor, has a door for access, and is designed as a warm roof.
One side of the roof faces north, the other faces south.
On the south side, there is one window and photovoltaic panels covering the entire roof surface.
On the north side, there are two windows.
Current roof build-up:
- Clay roof tiles (Frankfurt profile)
- Waterproof underlay membrane Isover Integra ZUB Light (vapor diffusion resistance sd-value approx. 0.03 m)
- Rafters reinforced to 160 mm (6 inches) depth
- Insulation between rafters: Isover Integra ZKF 1-032 glass wool, 160 mm (6 inches) thick (placed directly against the underlay membrane, no ventilation gap)
- Vapor retarder membrane Klimamembran Isover Vario KM Duplex UV (sd-value 0.3 – 5 m)
Detailed steps:
1. As part of a full renovation, we first tackled the roof from the inside.
Everything was removed (aluminum-faced mineral wool insulation including the old vapor-tight underlay, which on the south side was already falling apart).
2. Then, in August 2023, we installed the new underlay membrane from the inside per rafter bay, as recommended in some Isover guides and forums.
A batten was fixed in the middle of the rafter bay to create a slight channel for any condensed water to drain instead of running down the rafters.
Anti-spike fasteners were attached to the rafters, and the underlay membrane was firmly pressed onto the rafters with battens and screwed in place.
My husband took great care installing the membrane, thoroughly researching the topic; we also consulted a roofer.
We knew this was not standard practice, but a full roof renovation including a new membrane from outside was beyond our budget.
3. In June 2024, we installed the glass wool insulation between the rafters.
4. In November 2024, we installed the vapor retarder and carefully sealed everything as well as we could, also all pipe penetrations, wall and floor connections, and beams. We did not only use Isover tapes but also DoubleFit tape to achieve the best possible airtightness. We sealed the entire stairwell with plastic film and fitted the door with a dust protection plastic door – so not 100% airtight.
However, on each roof window, we cut a vertical slit in the vapor retarder so that the windows could be opened for ventilation.
This turned out to be a big mistake... We were not aware that the vapor retarder must be completely airtight at this stage and that various physical processes cause moisture to be drawn upwards. But moving on:
4. End of November 2024, the first layer of interior plaster was applied (the raw masonry was heavily plastered).
5. End of December 2024, the screed was installed on the 1st and 2nd floors (heated cement screed with additives = quick drying; approx. 7-8 cm (3 inches) build-up height; mostly above underfloor heating pipes with approx. 4.5 cm (2 inches) pipe coverage).
6. On January 6, 2025, our heating engineer started the heating protocol, and the underfloor heating on the 1st and 2nd floors was switched on, along with one radiator in the attic. The ground floor is currently unheated due to the lack of a radiator.
7. On January 12, 2025, while ventilating the attic, I accidentally noticed a spot beside one of the windows on the underlay membrane where thick water droplets had formed. At that time, temperatures had been around freezing for several days.
I then inspected further and found thick water droplets everywhere on the underlay membrane. I made an opening in the middle of the roof surface, pushed aside the insulation wool, and looked inside.
On the south side, about 5 meters (16 feet) away from the window, the same was visible, though with slightly less condensation.
Currently, there is NO visible mold or other staining, but we have no idea how quickly that might change.
The insulation wool appears mostly only damp on the surface in the areas we could check. On the smooth surface of the wool, water beads up but of course can penetrate at the joints.
We now understand the cause: the vapor retarder should have been completely sealed.
We were not aware that the insulation should only be installed after the building moisture has dried out, despite much research.
There are several potential problem areas:
- Moisture penetrating wooden components or other absorbent materials (a few damp spots can be seen on rafters and battens, but very minor)
- Moisture slowly running down to the sole plate and accumulating there / possibly seeping into the lower floor through the concrete ceiling (we inspected two trial spots but found everything dry so far)
- Moisture accumulating between the membrane and insulation, possibly causing mold or spores (no visible mold or spores yet)
The question is, what can we and must we do now?
Is it enough to enlarge the window openings in the vapor retarder to allow proper cross-ventilation (so far there are only slits and air tends to flow through the insulation layer rather than into the room)?
Ventilate 3-4 times a day (current outside temperature is about -2°C (28°F) and very dry weather, approx. 45% humidity).
Is it good or bad to heat the attic (currently around 18°C (64°F), the rest of the house is about 23°C (73°F)), or is heating upstairs counterproductive?
Would it be helpful or even sensible to set up one or several building dryers?
Or do we need to remove the vapor retarder and all insulation, and possibly dry the underlay membrane by hand drying or wet vacuuming?
Another question is that presumably all wooden elements (rafters, battens, etc.) will gradually absorb water. How long and by which method would drying take, or would we need to wait for the summer for the moisture to be gone?
When would be the best time to reinstall insulating wool and vapor retarder?
Still in summer / autumn or earlier?
Would we need to perform certain measurements (e.g., measuring moisture in structural members/rafters)?
Ideally, we would like to keep it all inside and remove the moisture technically by building drying or ventilation, but we are unsure if that is physically possible to completely dry out every last corner when the insulation lies directly on the membrane.
If necessary, we will remove everything.
I’m attaching some pictures to help visualize the attic and details better.
Many thanks in advance and warm winter greetings!
Mira
P.S. The interior plastering was done only from the ground floor to the second floor, not in the attic. There, everything will be covered with gypsum board. The vapor retarder was connected to the masonry (a strip of plaster was applied beforehand as an adhesion surface and has been dry for 8 months).
Similar topics