First, an overview of my planning:
I have designed an L-shaped kitchen with an additional island along the wall.
The long side features tall cabinets on both sides of the corner.
The short side under the window must not be as tall as IKEA units, otherwise it would block the window.
It also must not be as deep as IKEA units, otherwise it would obstruct the door.
Here is a top-down overview:

Please don’t mind the missing fronts; I couldn’t add suitable ones in the planner.
Also, the cabinet carcasses available do not have the desired fronts or internal layouts as I want them.
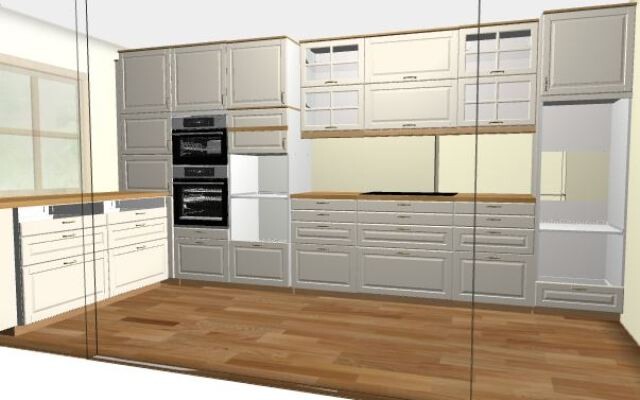
Regarding the long side:
From right to left...
- Vertical filler panel
- Tall cabinet consisting of a 20cm (8 inches) drawer, a 122cm (48 inches) high refrigerator with a 140cm (55 inches) front, and a 60cm (24 inches) compartment above
- Stove niche 200cm (79 inches) wide with wall cabinets, built-in hood, the light wall area is a niche
- Dishwasher placed high, 40cm (16 inches) drawer, dishwasher, 40cm (16 inches) compartment, 60cm (24 inches) compartment (the compartment above the dishwasher may still be adjusted)
- Tall cabinet with oven and combination microwave
- In the corner, the kitchen and coffee machine cabinet (more on this below)
- Vertical filler panel, 5cm (2 inches) wide
Around the corner, it continues with cabinet carcasses 70cm (28 inches) high.
In the corner, there will be a 60x60cm (24x24 inches) cabinet carcass, 220cm (87 inches) high. Next to it, I’ve included the oven tall cabinet for better visualization.

After the continuous plinth, there is an empty corner area. To finish it off, there will be a baseboard preventing anything from falling into the corner.
At countertop height under the window, there is a filler panel to close off the countertop and to gain some distance between the door and the countertop, as the door swings over the countertop.
The door, 40cm (16 inches) high, opens towards the wall, using the UTRUSTA hinge with a 153° opening angle.
Inside is a heavy-duty pull-out – not IKEA, as they do not have a suitable one – with a fixed bottom plate.
This can accommodate the kitchen machine, which I can pull out almost flush with the countertop using additional sliders on the bottom plate.
The next door, also 40cm (16 inches) high and also opening towards the wall with the UTRUSTA hinge 153°, inside another heavy-duty pull-out with fixed bottom plate fits the coffee machine, allowing it to be pulled out at eye level.
Above this, there will be a filler panel, possibly also between the two 40cm (16 inches) doors.
Above that, a 60cm (24 inches) compartment for infrequently used items.
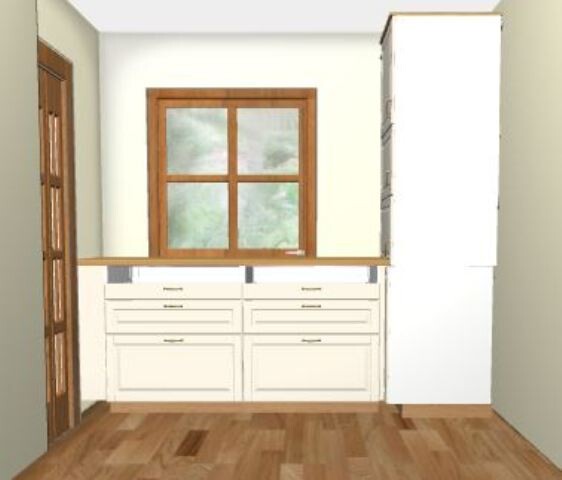
Under the window, the height to the bottom edge of the windowsill is about 83cm (33 inches).
Because there is a door on the left, I only have 57cm (22 inches) rough structural depth. The old door frame will be removed.
We will install a sliding door. The passage inside will be plastered generously, allowing me to gain a few centimeters (inches) of depth on the window side.
There, starting from the right, I want to install a filler panel to maintain clearance on the left side for opening the sliding doors. Then, two 80x60cm (31x24 inches) base cabinet carcasses will follow.
About 17cm (7 inches) of clearance will remain in the left corner for a filler panel.
We want to reduce the height of the carcasses by 10cm (4 inches) and, if possible, also reduce the depth.
The countertop depth will also be reduced (hence the 10cm (4 inches) gap shown in the image).
At the corner door, the sliding door finish will be integrated into the countertop, minimizing any overhang into the door opening.
I want to install drawers in the carcasses.
IKEA offers Maximera drawers in depths of 37cm (15 inches), 45cm (18 inches), and 60cm (24 inches). I would prefer the 60cm (24 inches) deep ones.
My question is:
Are these drawers really 60cm (24 inches) deep in actual drawer length (rail length), meaning that cabinet depth reduction is not possible? Is there maybe 1-2cm (about 1 inch) of play at the back?
After all, the internal accessories like the knife tray are only about 50cm (20 inches) deep.
I don’t want to give up over 20cm (8 inches) of storage depth along the entire width under the window because of 1-2cm (1 inch).
I want to avoid any stepped surface, as I have that currently and no longer want it.
Alternatively, would the Förvara drawers be an easier solution? These are listed with a depth of 52cm (20 inches).
Because of the 70cm (28 inches) height, I plan to install drawers of 40cm (16 inches), 20cm (8 inches), and 10cm (4 inches) height.
For Förvara, I would alternatively use three 20cm (8 inches) and one 10cm (4 inches) drawer.
A brief look at the sink island:
The partition wall hides the sliding doors. There is space in the middle to reach the plumbing as desired.
The island will be 80cm (31 inches) deep. Beside the regular cabinets, narrow cabinets will be installed on each side – 20x60cm (8x24 inches) on the left and 20x40cm (8x16 inches) on the right, shortened to fit.

Maybe someone has an idea for me.
Cheers, Sabine
I have designed an L-shaped kitchen with an additional island along the wall.
The long side features tall cabinets on both sides of the corner.
The short side under the window must not be as tall as IKEA units, otherwise it would block the window.
It also must not be as deep as IKEA units, otherwise it would obstruct the door.
Here is a top-down overview:
Please don’t mind the missing fronts; I couldn’t add suitable ones in the planner.
Also, the cabinet carcasses available do not have the desired fronts or internal layouts as I want them.
Regarding the long side:
From right to left...
- Vertical filler panel
- Tall cabinet consisting of a 20cm (8 inches) drawer, a 122cm (48 inches) high refrigerator with a 140cm (55 inches) front, and a 60cm (24 inches) compartment above
- Stove niche 200cm (79 inches) wide with wall cabinets, built-in hood, the light wall area is a niche
- Dishwasher placed high, 40cm (16 inches) drawer, dishwasher, 40cm (16 inches) compartment, 60cm (24 inches) compartment (the compartment above the dishwasher may still be adjusted)
- Tall cabinet with oven and combination microwave
- In the corner, the kitchen and coffee machine cabinet (more on this below)
- Vertical filler panel, 5cm (2 inches) wide
Around the corner, it continues with cabinet carcasses 70cm (28 inches) high.
In the corner, there will be a 60x60cm (24x24 inches) cabinet carcass, 220cm (87 inches) high. Next to it, I’ve included the oven tall cabinet for better visualization.
After the continuous plinth, there is an empty corner area. To finish it off, there will be a baseboard preventing anything from falling into the corner.
At countertop height under the window, there is a filler panel to close off the countertop and to gain some distance between the door and the countertop, as the door swings over the countertop.
The door, 40cm (16 inches) high, opens towards the wall, using the UTRUSTA hinge with a 153° opening angle.
Inside is a heavy-duty pull-out – not IKEA, as they do not have a suitable one – with a fixed bottom plate.
This can accommodate the kitchen machine, which I can pull out almost flush with the countertop using additional sliders on the bottom plate.
The next door, also 40cm (16 inches) high and also opening towards the wall with the UTRUSTA hinge 153°, inside another heavy-duty pull-out with fixed bottom plate fits the coffee machine, allowing it to be pulled out at eye level.
Above this, there will be a filler panel, possibly also between the two 40cm (16 inches) doors.
Above that, a 60cm (24 inches) compartment for infrequently used items.
Under the window, the height to the bottom edge of the windowsill is about 83cm (33 inches).
Because there is a door on the left, I only have 57cm (22 inches) rough structural depth. The old door frame will be removed.
We will install a sliding door. The passage inside will be plastered generously, allowing me to gain a few centimeters (inches) of depth on the window side.
There, starting from the right, I want to install a filler panel to maintain clearance on the left side for opening the sliding doors. Then, two 80x60cm (31x24 inches) base cabinet carcasses will follow.
About 17cm (7 inches) of clearance will remain in the left corner for a filler panel.
We want to reduce the height of the carcasses by 10cm (4 inches) and, if possible, also reduce the depth.
The countertop depth will also be reduced (hence the 10cm (4 inches) gap shown in the image).
At the corner door, the sliding door finish will be integrated into the countertop, minimizing any overhang into the door opening.
I want to install drawers in the carcasses.
IKEA offers Maximera drawers in depths of 37cm (15 inches), 45cm (18 inches), and 60cm (24 inches). I would prefer the 60cm (24 inches) deep ones.
My question is:
Are these drawers really 60cm (24 inches) deep in actual drawer length (rail length), meaning that cabinet depth reduction is not possible? Is there maybe 1-2cm (about 1 inch) of play at the back?
After all, the internal accessories like the knife tray are only about 50cm (20 inches) deep.
I don’t want to give up over 20cm (8 inches) of storage depth along the entire width under the window because of 1-2cm (1 inch).
I want to avoid any stepped surface, as I have that currently and no longer want it.
Alternatively, would the Förvara drawers be an easier solution? These are listed with a depth of 52cm (20 inches).
Because of the 70cm (28 inches) height, I plan to install drawers of 40cm (16 inches), 20cm (8 inches), and 10cm (4 inches) height.
For Förvara, I would alternatively use three 20cm (8 inches) and one 10cm (4 inches) drawer.
A brief look at the sink island:
The partition wall hides the sliding doors. There is space in the middle to reach the plumbing as desired.
The island will be 80cm (31 inches) deep. Beside the regular cabinets, narrow cabinets will be installed on each side – 20x60cm (8x24 inches) on the left and 20x40cm (8x16 inches) on the right, shortened to fit.
Maybe someone has an idea for me.
Cheers, Sabine
N
nachtvogel26 Aug 2016 02:30Looks pretty good already. What is the dishwasher standing on now?We dismantled a tall cabinet to make space for the dishwasher...
Measured down 1 meter (39 inches) from the top for the desired door height and cut off the cabinet carcass.
Inserted the bottom panel at the very bottom and additionally screwed it from the outside.
Added a spacer at the lower edge. Hung it on the rail.
From the remaining tall cabinet, we subtracted the height of the dishwasher and cut it accordingly.
For the lower part, we installed a heavy-duty shelf inside at the top and screwed it again from the outside.
We painted the cut edges and covered them with some sort of heavy-duty tape or similar.
At the top edge, there is also the dishwasher’s moisture barrier overlapping it.
At the bottom, we will add edge protection for a filler strip.
On the left side, the whole assembly is screwed to the next cabinet.
On the right side, a side panel covers everything. The carcass was also screwed there.
Make sure the screws are not too long.
There is a 1 meter (39 inch) door on top.
The dishwasher has an 80 cm (31 inch) front mounted on sliding rails.
At the bottom, there is a tall drawer with a 40 cm (16 inch) front.
This covers the 1.6 cm (0.6 inch) difference in height, as the dishwasher is taller than the 80 cm (31 inch) front.
Because the drawer front is slightly angled, we didn’t have to cut, angle, or adjust anything.
All the doors operate perfectly.
N
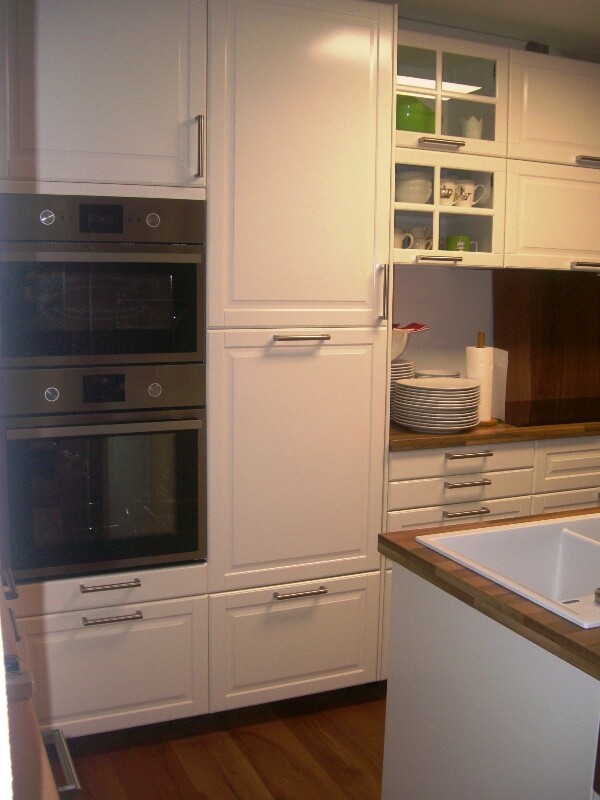
nachtvogel26 Aug 2016 02:44I’m very interested in the details. I have a refrigerator that is 103cm (41 inches) tall, and I would really like to use a 100cm (39 inches) door instead of a 120cm (47 inches) one.
How did you do it? How tall is your refrigerator? Could you post a photo with the refrigerator door open?We have the AVKYLD from Ikea (BAuknecht) with a height of 122cm (48 inches).
We used a tall cabinet carcass... The door was installed at the desired height at the top.
From there, we measured 122cm (48 inches) down—just below that height—so that the 122cm (48 inches) space remains free, and mounted a heavy-duty shelf there.
This shelf is not fixed in the standard Ikea holes but screwed in directly at the corresponding height.
We always put the shelves with the ventilation metal parts facing backward on them.
Below that is a deep drawer with a 40cm (16 inches) front.
When I open this drawer, I can see a bit of the refrigerator’s plinth.
You need to pay attention to where the actual refrigerator door ends.
Our refrigerator door isn’t 122cm (48 inches) high but is maybe around 110cm (43 inches).
So the top 120cm (47 inches) door front is still larger than the actual refrigerator door.
It’s important to check where the extra 3cm (1 inch) of your refrigerator is—how much taller it is than the door.
You need to fit it into the cabinet so that the 1m (39 inches) door aligns exactly with the refrigerator door.
Depending on the design, the shelf may be mounted slightly higher on top, or the space below may be a little smaller.
Of course, we measured this carefully... We had to adjust the door once—and then it fit perfectly.
You have to do this with every door or drawer anyway.
For the effort of having the refrigerator fitted so precisely, it wasn’t much trouble.
I didn’t want a tiny drawer of 20cm (8 inches) at the bottom or only a 40cm (16 inches) door at the top,
and then a pointless 20cm (8 inches) empty space just because my refrigerator is 2cm (1 inch) taller than the standard 120cm (47 inches) door.
It’s also important to ensure that the refrigerator’s ventilation is still sufficient.
We have a recess behind the refrigerator, so it has a bit more air circulation than if it stood directly against the wall.
I’ll take photos tomorrow.
Now I’m going to bed. It’s been a stressful few days.
N
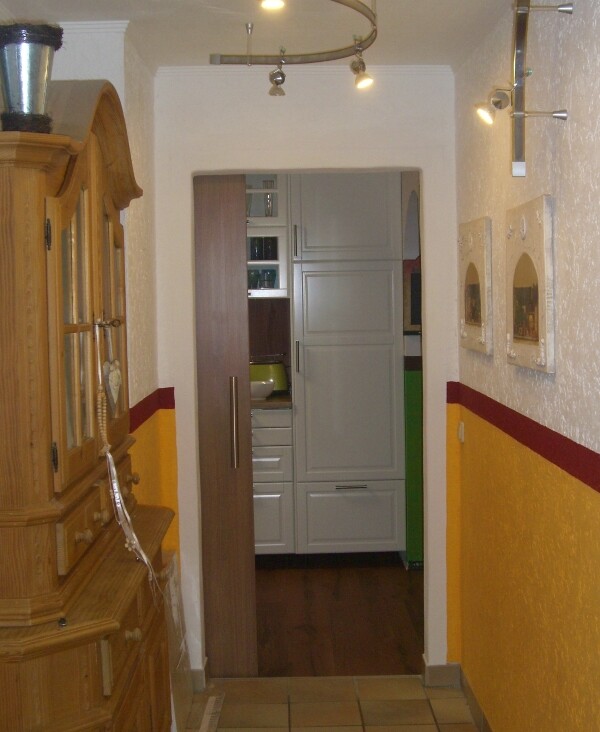
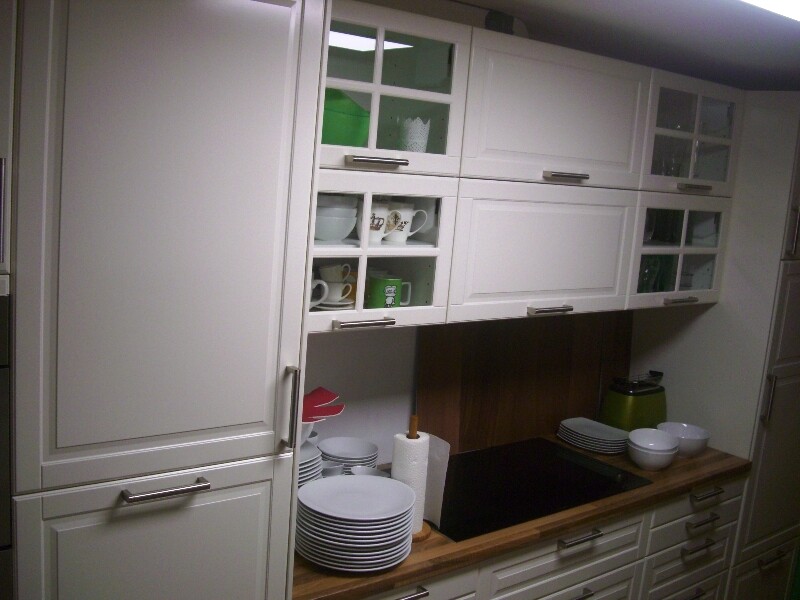
nachtvogel26 Aug 2016 02:49Just from the hallway into the new kitchen
or directly from the dining room
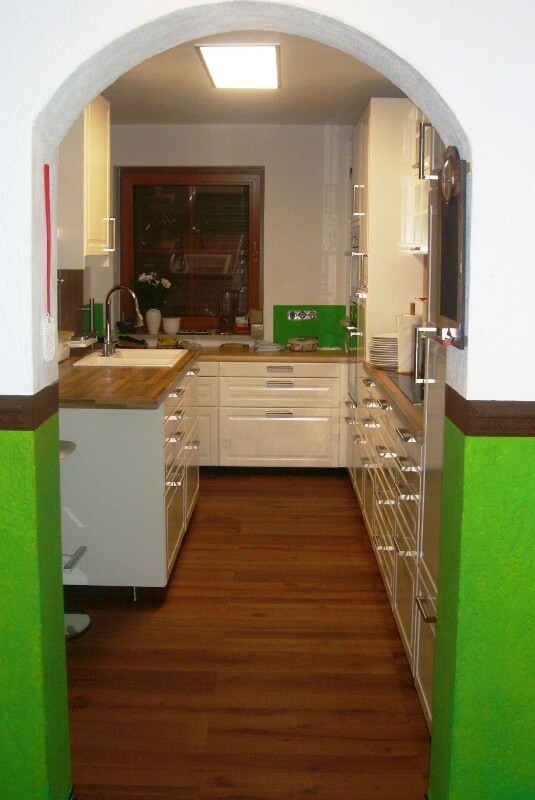
On the left, the sink area
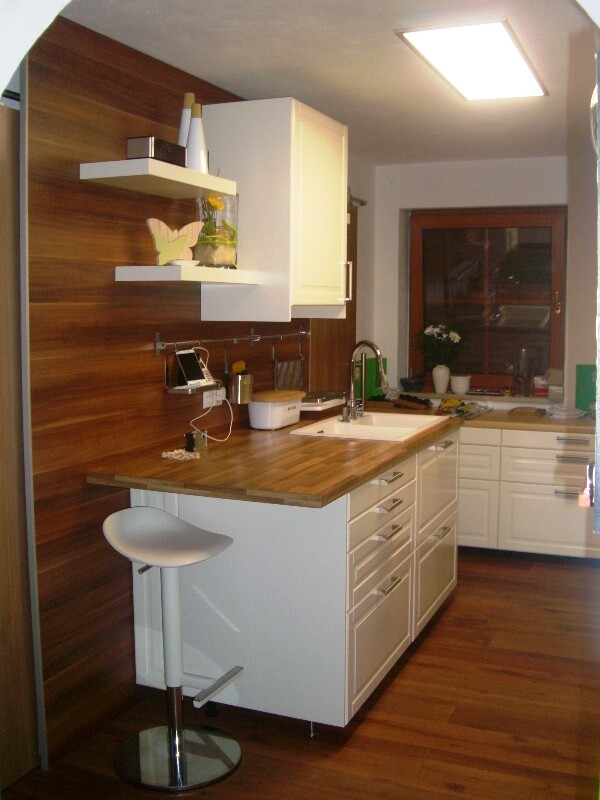

On the right, the cooking niche
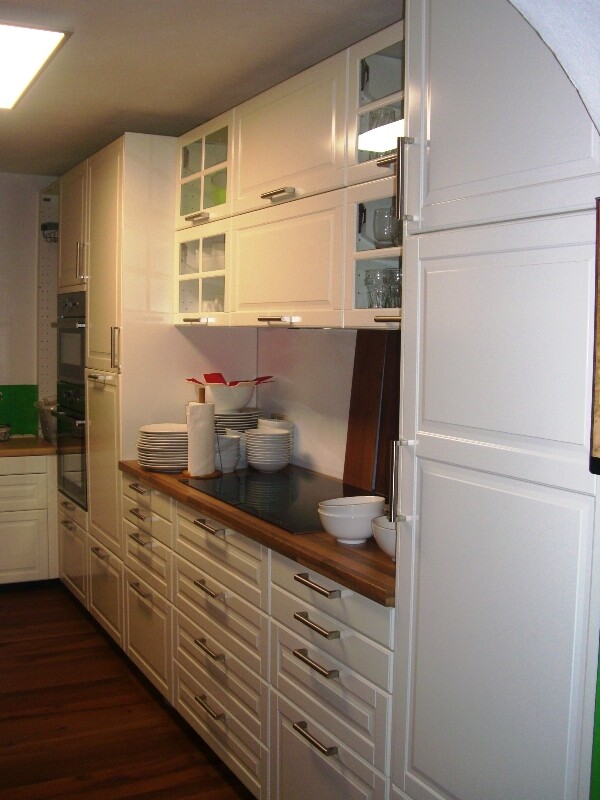
The backsplash is still missing here, and we are considering doing it with wood and glass in front... :no_idea:
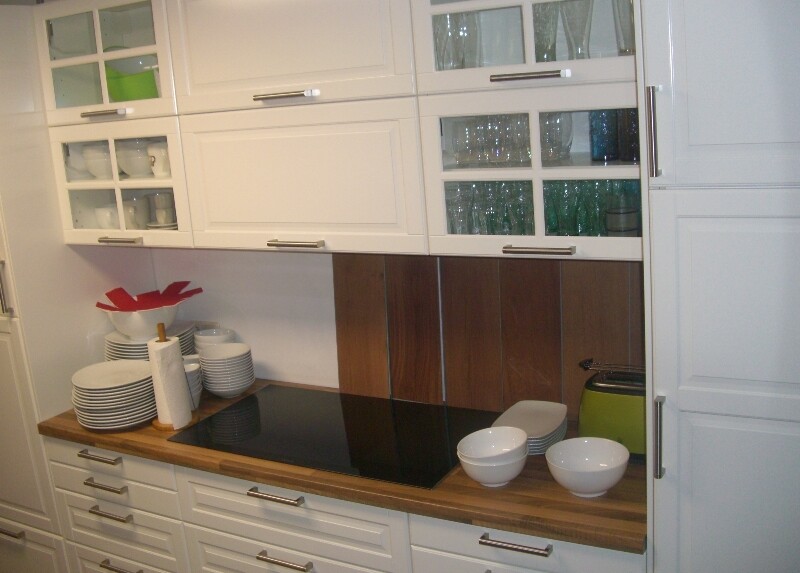
Currently loaded with dishes from the dining room cabinet that have been washed.
View from the pantry door.
The window side, lower than the rest of the kitchen.
Currently still with the temporary countertop. The final one is ordered.
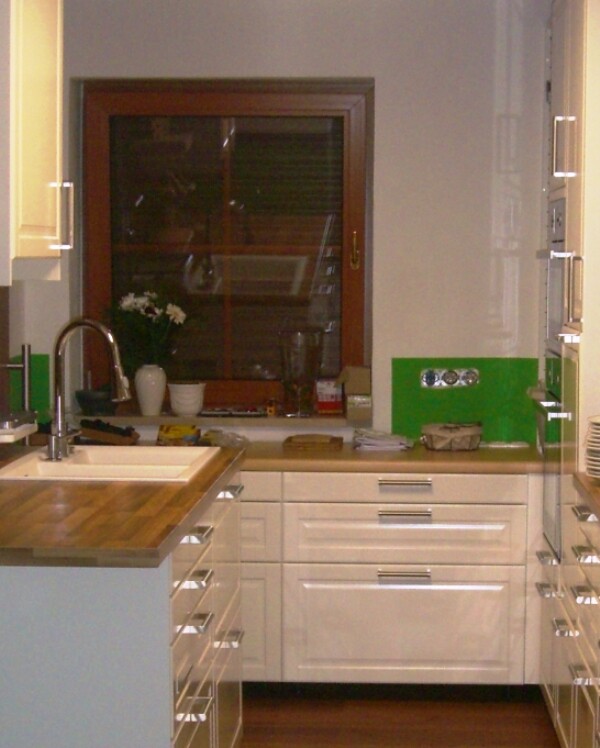
Another view towards the pantry door.
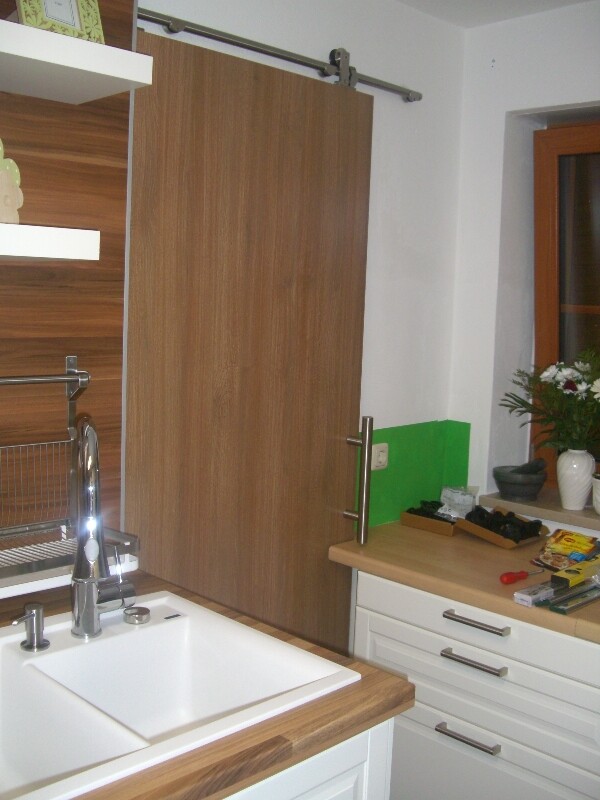
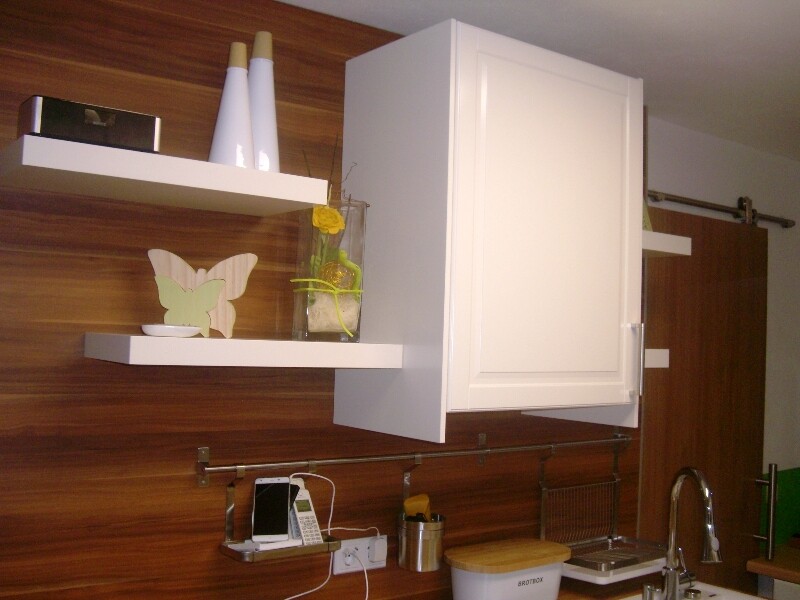
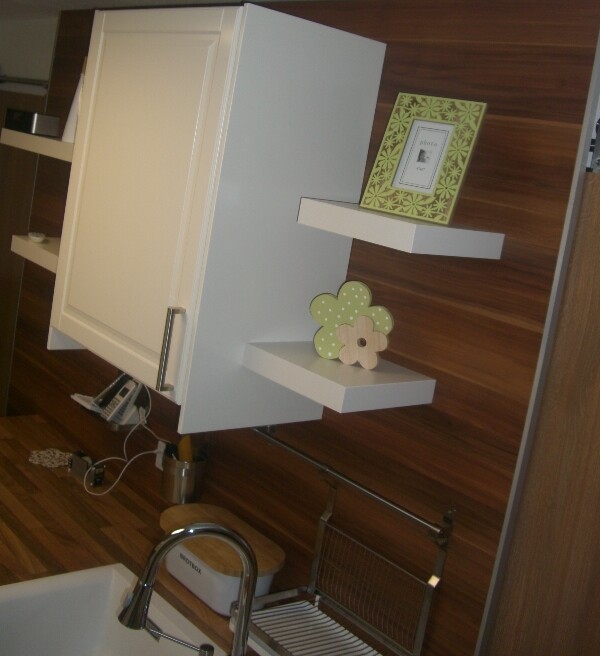
The wall cladding above the green area is not finished yet. The curtain is still missing...
Also indirect lighting, finishing strips under the wall cabinets, and the ceiling trim are still to be done.
So, quite a few small details left.
Oh, and of course the pull-outs for the coffee maker and kitchen appliances. That cabinet doesn’t have doors yet.
But we want to do that only once the countertop arrives, which should be around September 9th.
So, still plenty to do. I have also ordered some drawer organizers from Ikea, so the interior setup is not quite finished as desired. Everything depends on everything else...
But basically, the worst is over...
and I’m slowly getting comfortable with my new kitchen...
or directly from the dining room
On the left, the sink area
On the right, the cooking niche
The backsplash is still missing here, and we are considering doing it with wood and glass in front... :no_idea:
Currently loaded with dishes from the dining room cabinet that have been washed.
View from the pantry door.
The window side, lower than the rest of the kitchen.
Currently still with the temporary countertop. The final one is ordered.
Another view towards the pantry door.
The wall cladding above the green area is not finished yet. The curtain is still missing...
Also indirect lighting, finishing strips under the wall cabinets, and the ceiling trim are still to be done.
So, quite a few small details left.
Oh, and of course the pull-outs for the coffee maker and kitchen appliances. That cabinet doesn’t have doors yet.
But we want to do that only once the countertop arrives, which should be around September 9th.
So, still plenty to do. I have also ordered some drawer organizers from Ikea, so the interior setup is not quite finished as desired. Everything depends on everything else...
But basically, the worst is over...
and I’m slowly getting comfortable with my new kitchen...
Similar topics