Hello,
It would be really great if everyone here could just post one or a few pictures showing the current state of their house.
I'll start right away.
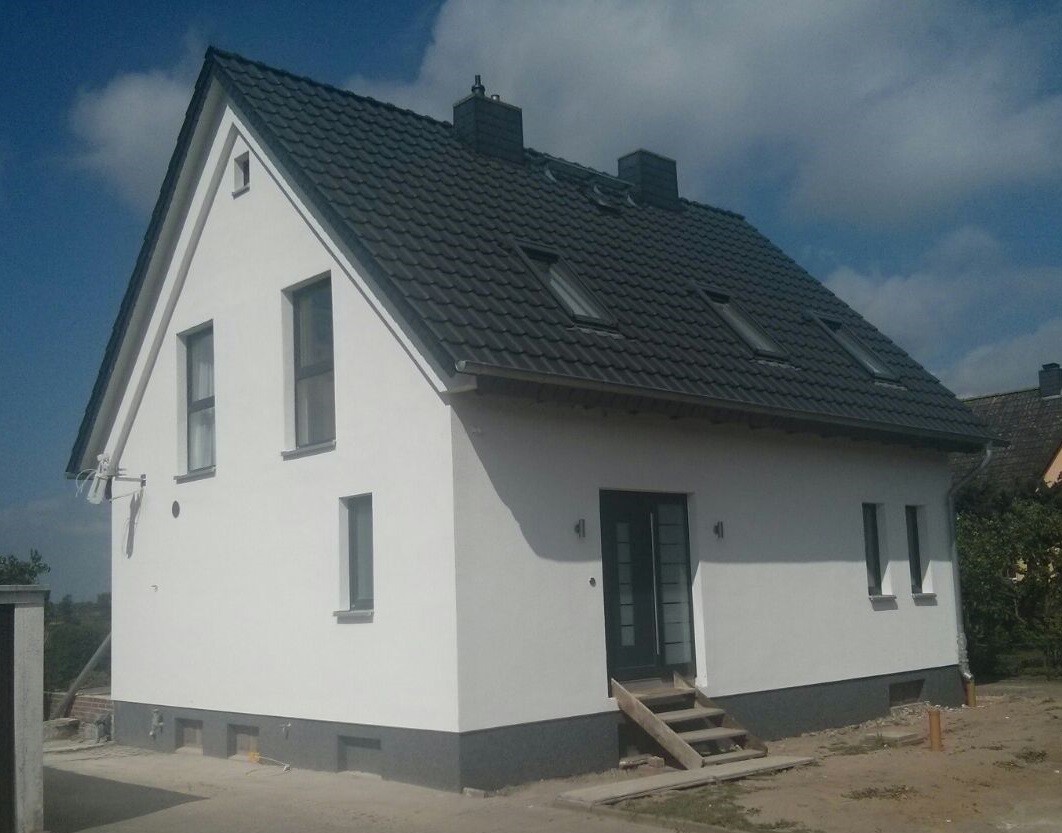
For renovations, it’s best to provide a comparison of before and after the remodeling.
Before March 2014:
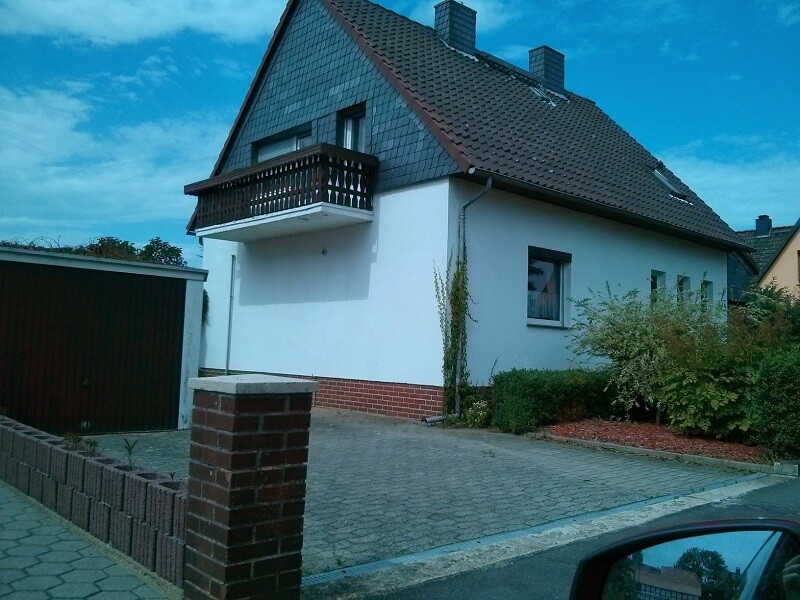
After May 2015:
It would be really great if everyone here could just post one or a few pictures showing the current state of their house.
I'll start right away.
For renovations, it’s best to provide a comparison of before and after the remodeling.
Before March 2014:
After May 2015:
 Holzhäuschen7 Sep 2022 14:16
Here we go again.
We spent two weeks at the house but barely managed to accomplish what we planned. I’m feeling really frustrated and utterly exhausted right now, and I just don’t feel like continuing at all. I’m sure that will change, but that’s the situation for now.
We had three tasks we wanted to complete.
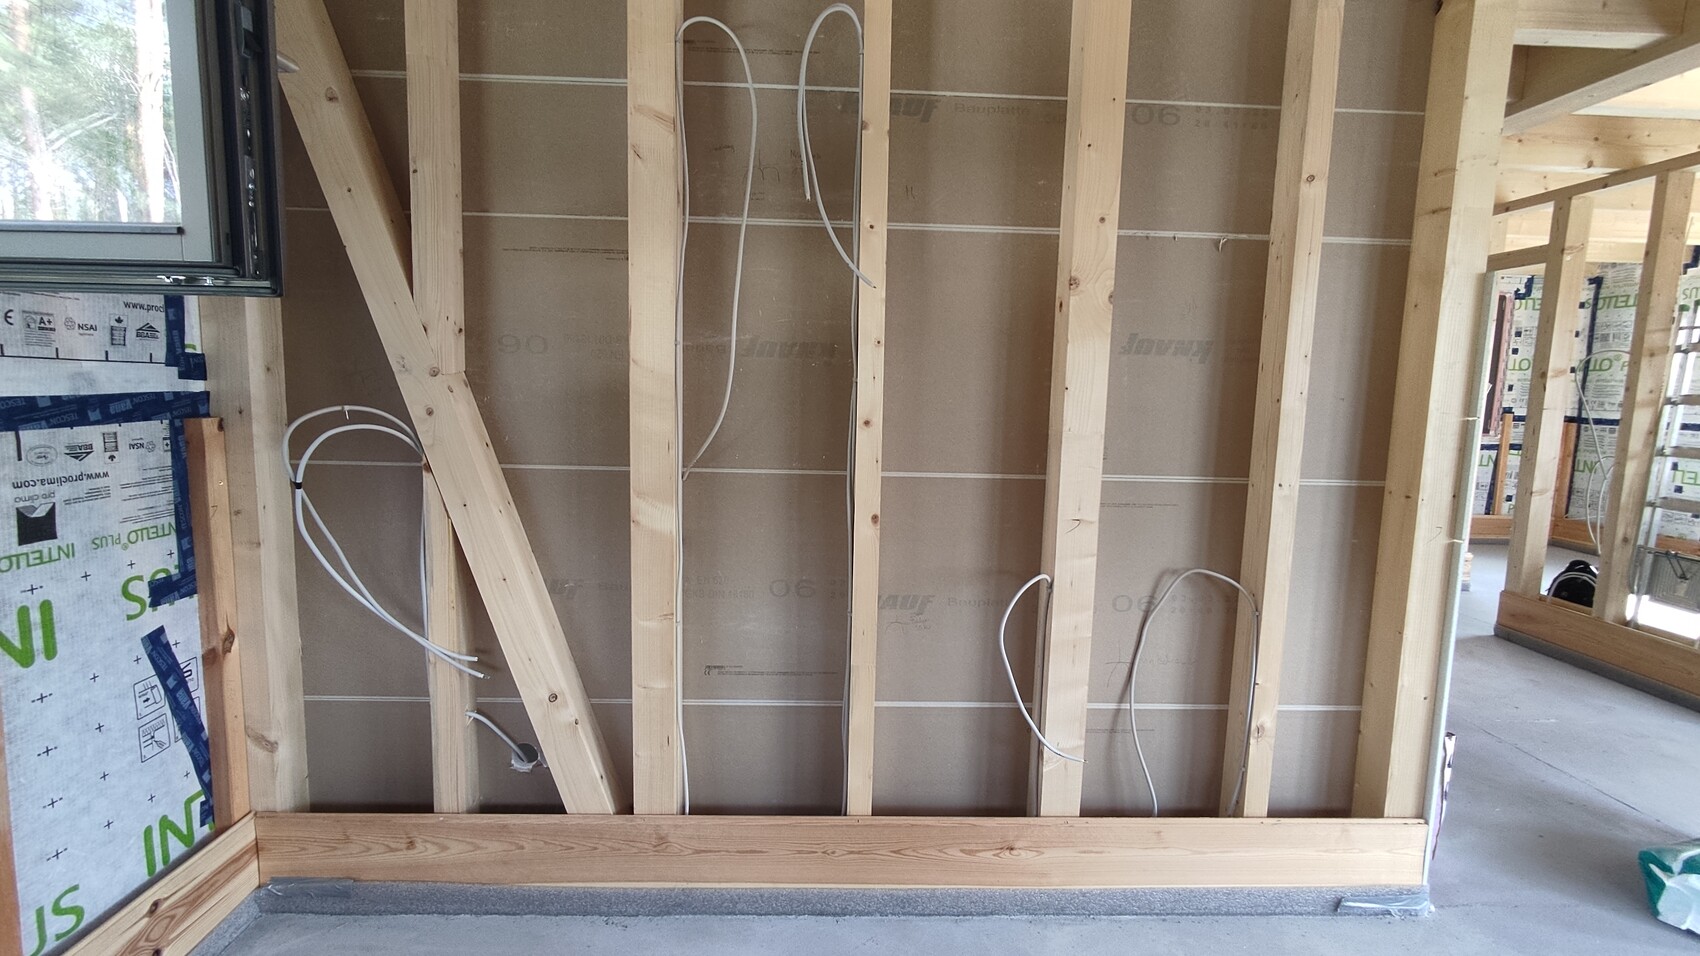
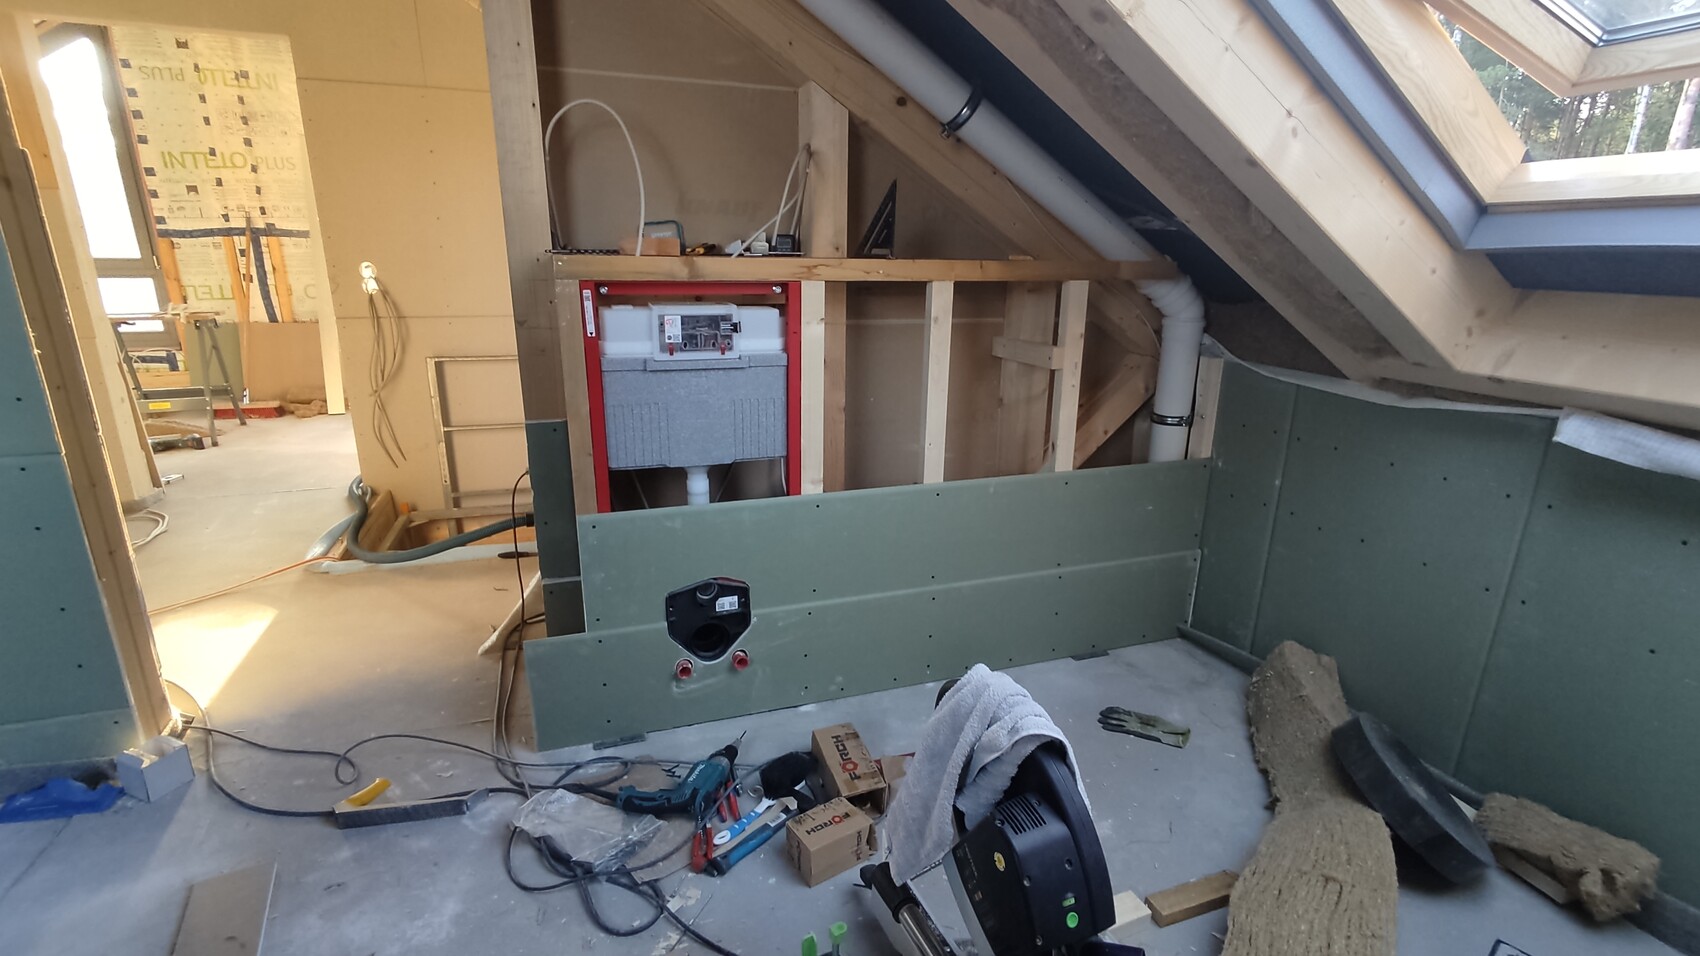
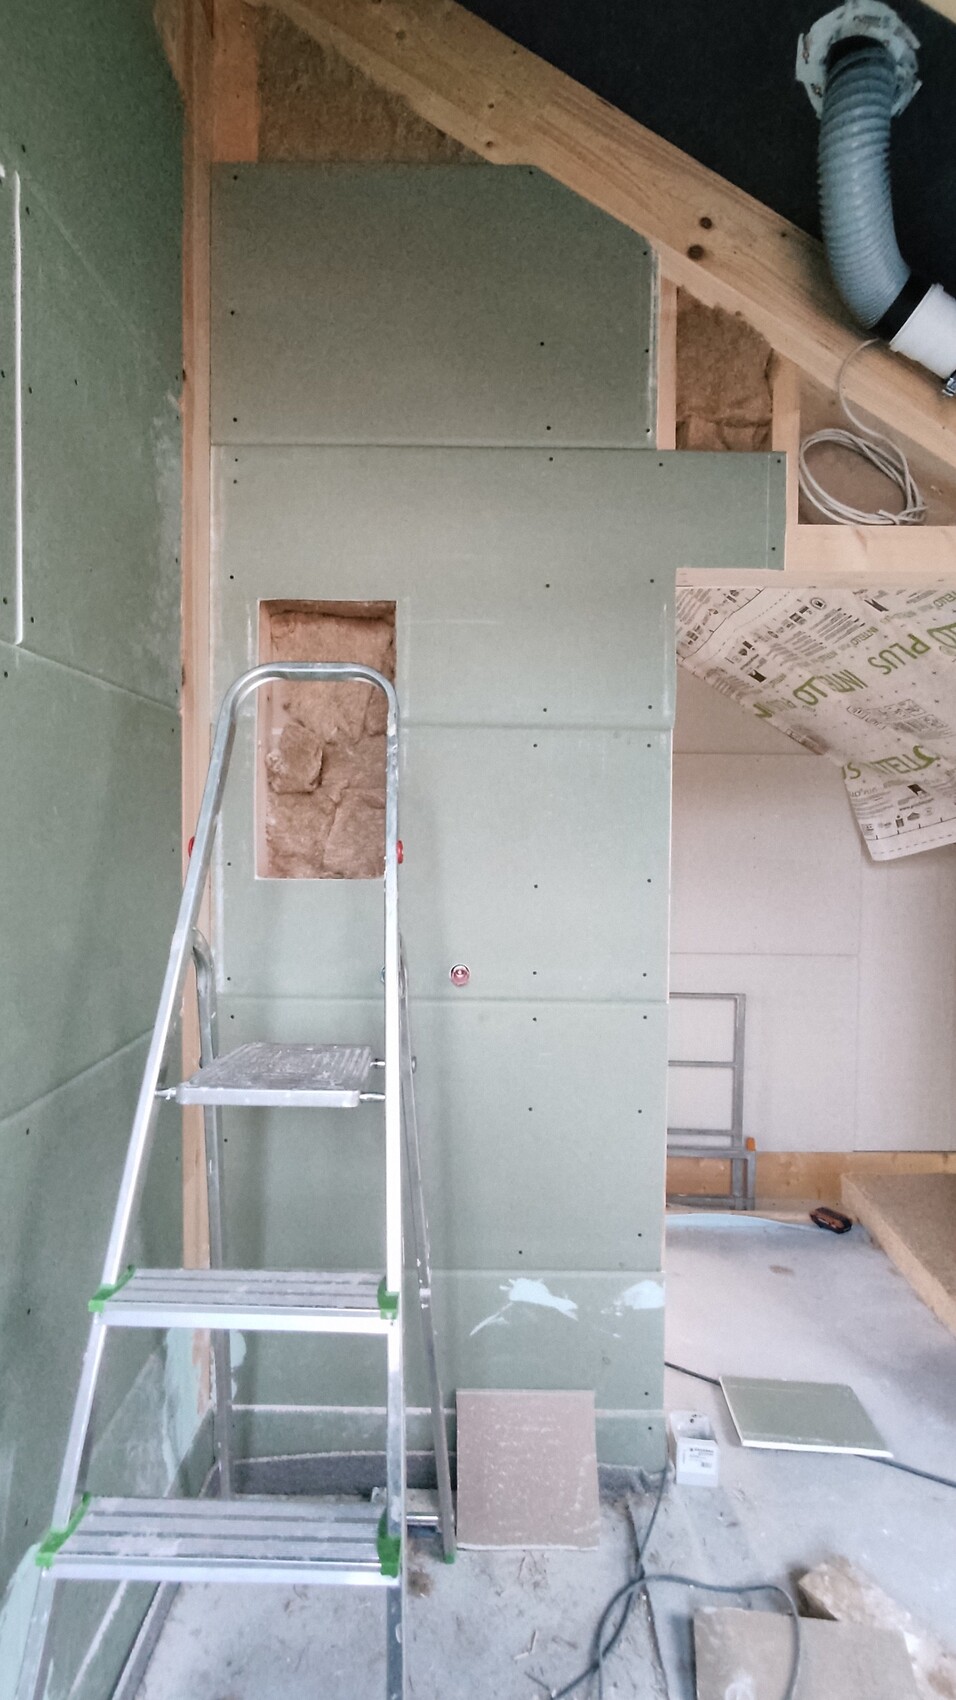
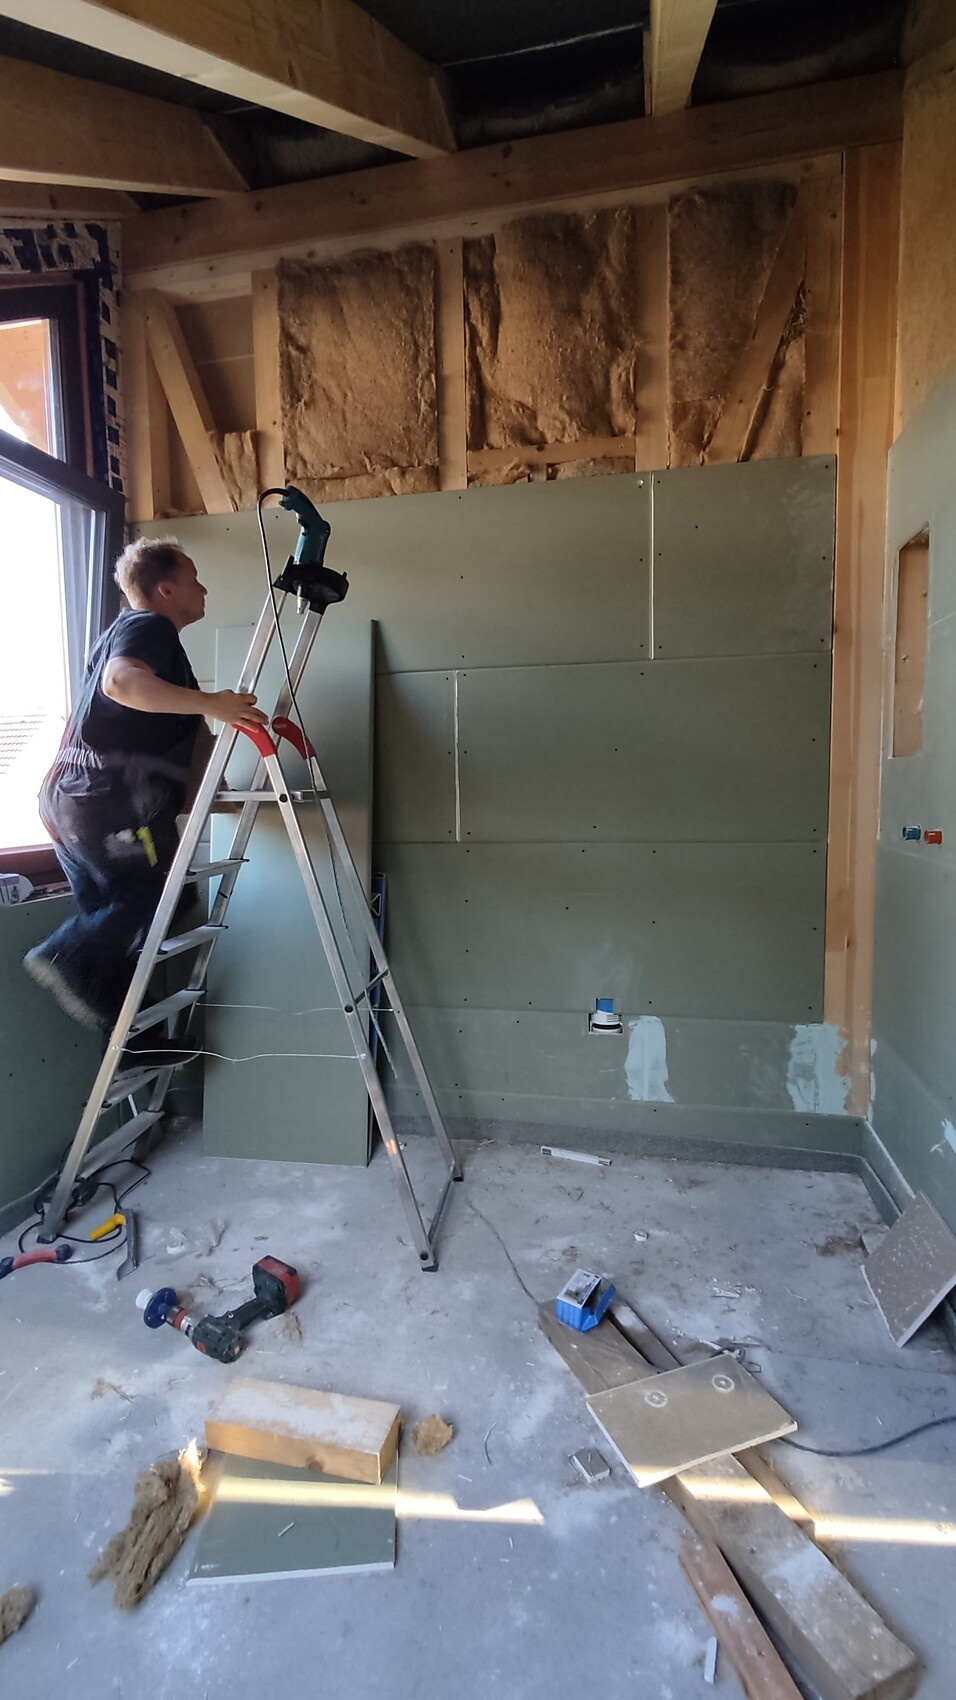
a) Insulate and cover the three kitchen walls with wood panels so the electricians could install outlets there. Then we could turn off the temporary power and get electricity directly into the house.
b) Fully insulate and panel the guest bathroom, build the drywall frame, panel it, and tile it. Also apply the Q2 or Q3 skim coat so we can paint or wallpaper the walls. Then the plumbers can install the toilet and sink, and we can get rid of the portable toilet.
c) Insulate and completely panel the main bathroom upstairs, install two drywall frames, and apply the first wood panel above the tiling (we will tile everything except the shower up to 120cm (47 inches), and above that we will put half panels). This must be finished by 01.10 so the tile setter (WE ARE FINALLY HAVING SOMEONE ELSE DO PART OF IT, YAY) can start work.
What we managed: For task a), we only completed two walls because the electrician forgot one outlet and only came back after 1.5 weeks to run the cable. For b), we’re missing a tile cutter, and we realized we spent ages on the tiny guest bathroom, so time for the upstairs bathroom was running short; therefore, no skim coat or tiling yet. For c), same as b).
So.
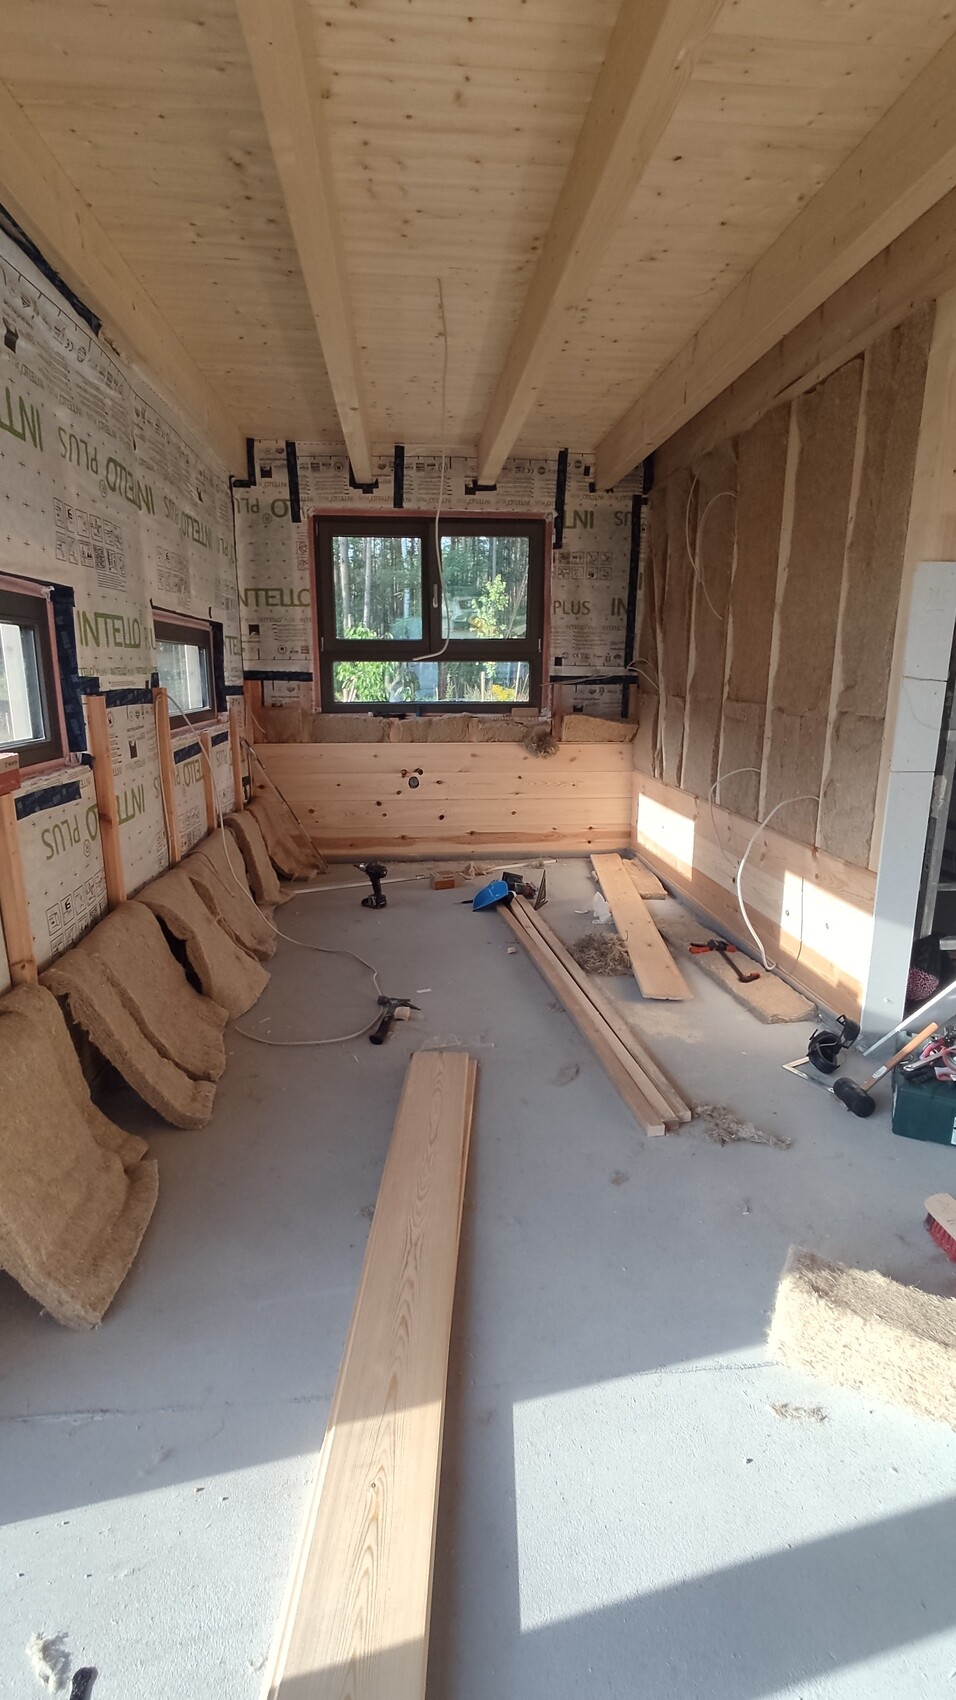
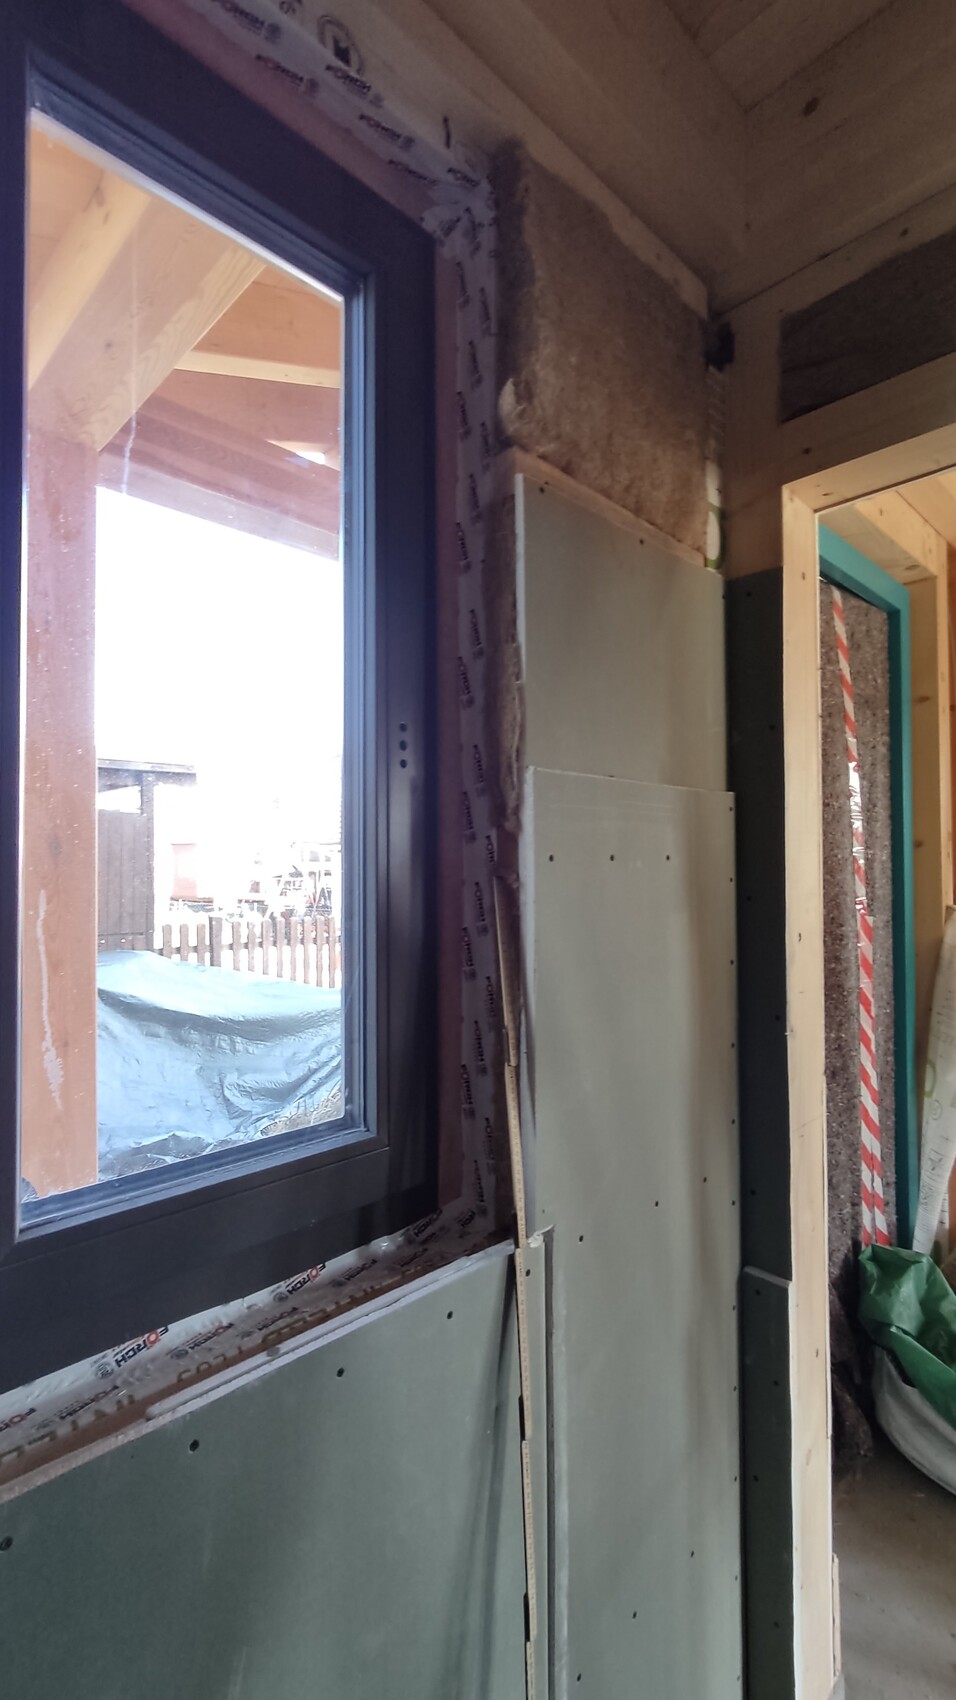
Task a) turned out to be complicated again. The water connection for the sink was placed awkwardly, so the outlet for the dishwasher didn’t fit in the right spot. We had many phone calls before finding a solution. Installing the wood panels so that the reveal trim would still fit afterward was tricky (we couldn’t do that at first because we made progress with the wood and didn’t know exactly where it would end, and the trim might have stuck out too far). We had to work around the window and attach the panels at the top without visible screws... ugh.
At the beginning:
Insulated and started on the window wall
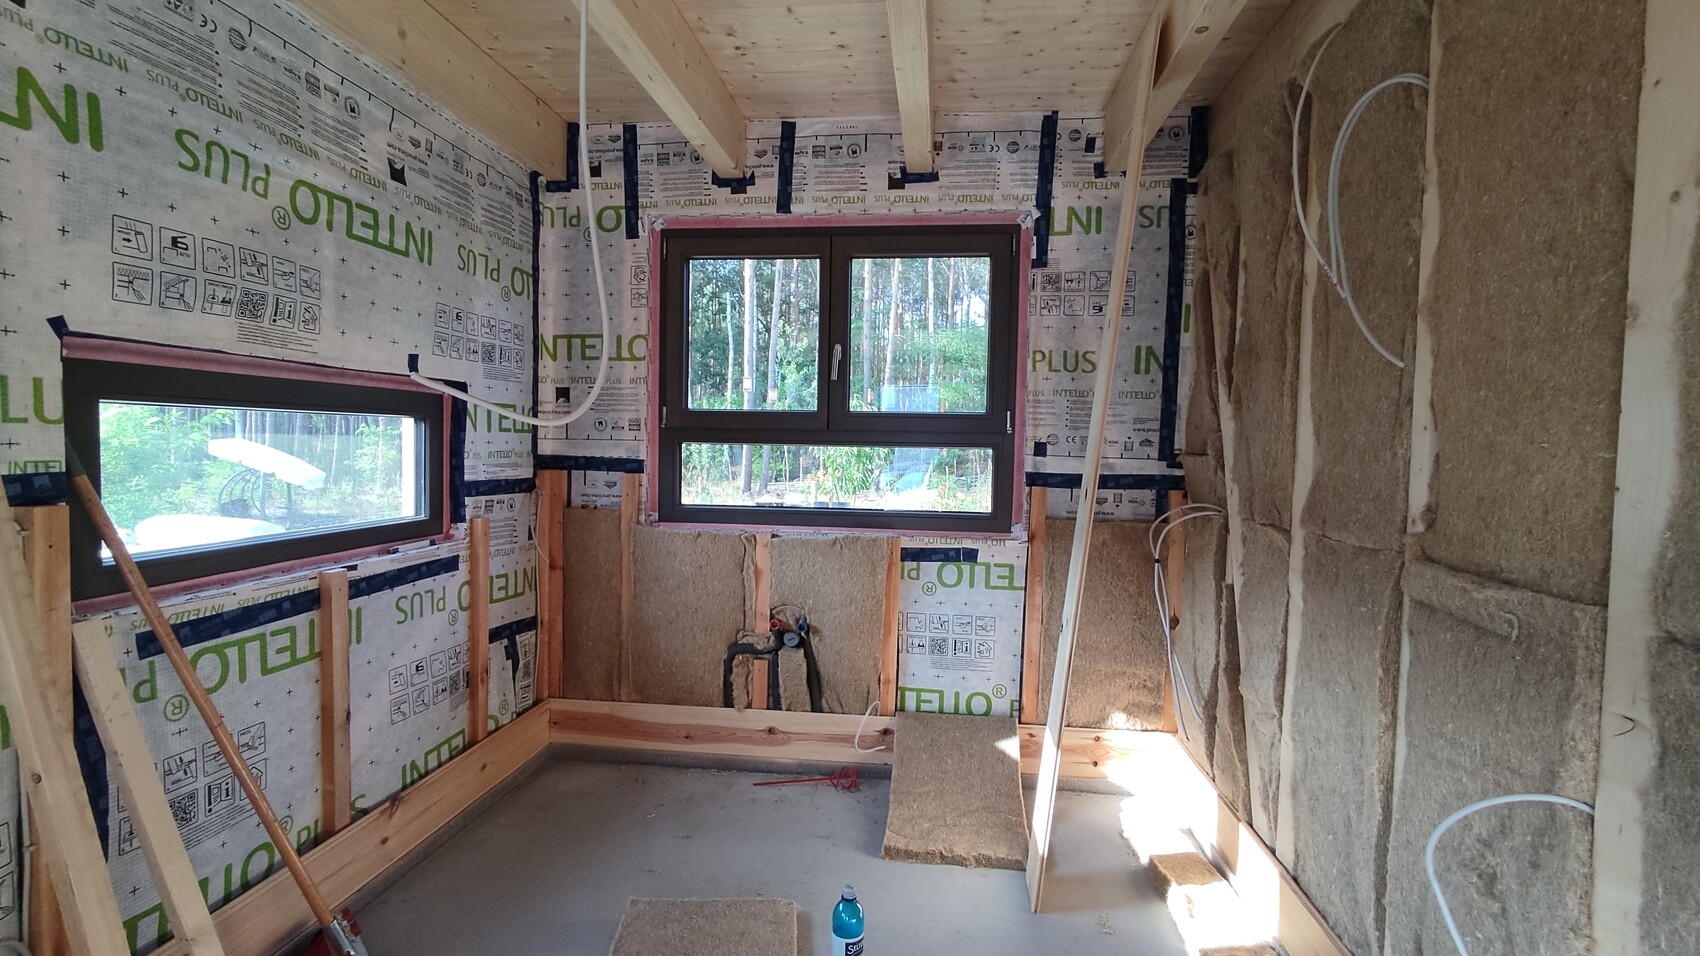
Window wall finished
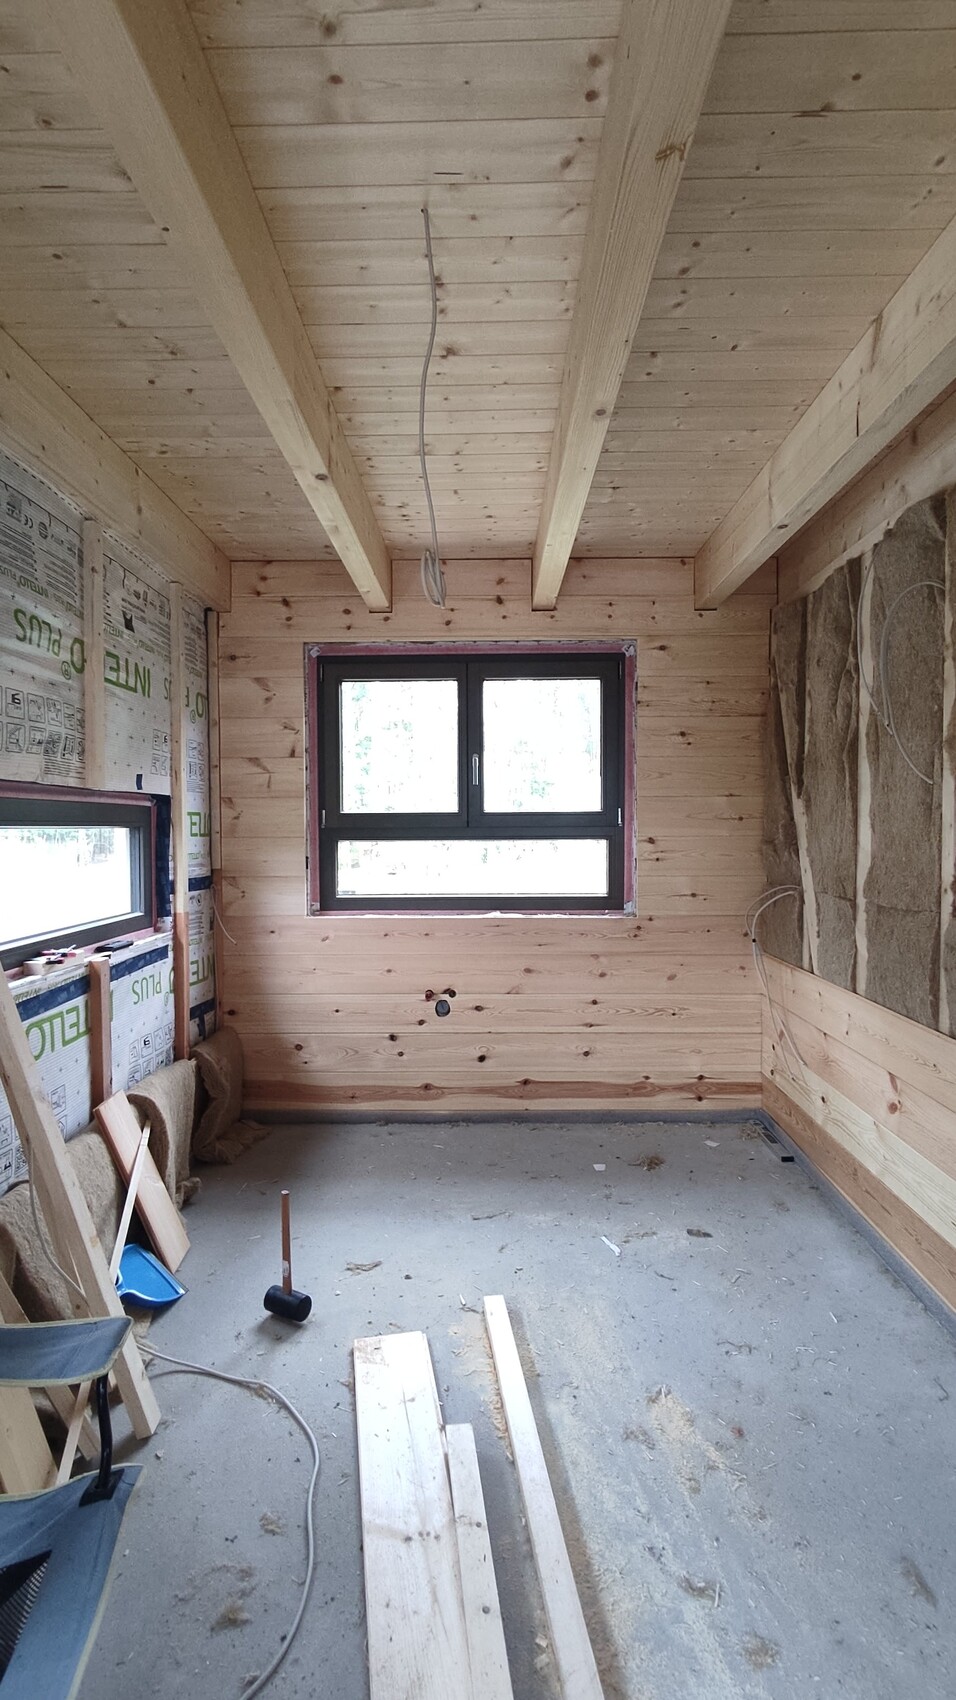
Then the interior wall afterwards
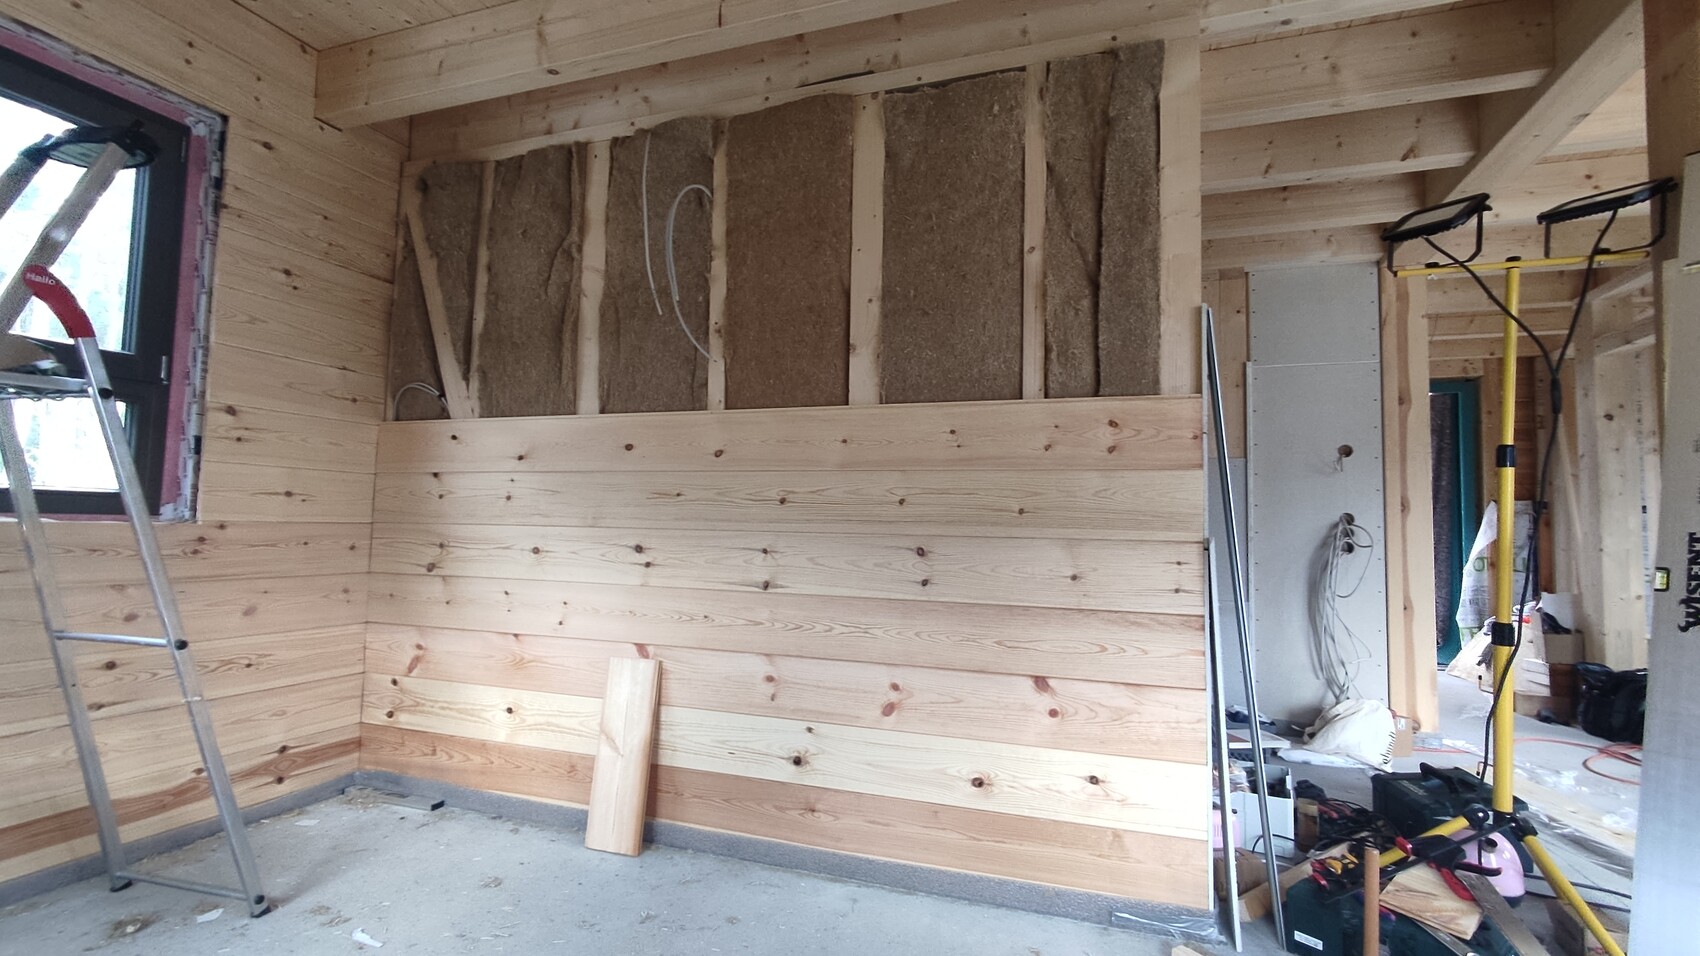
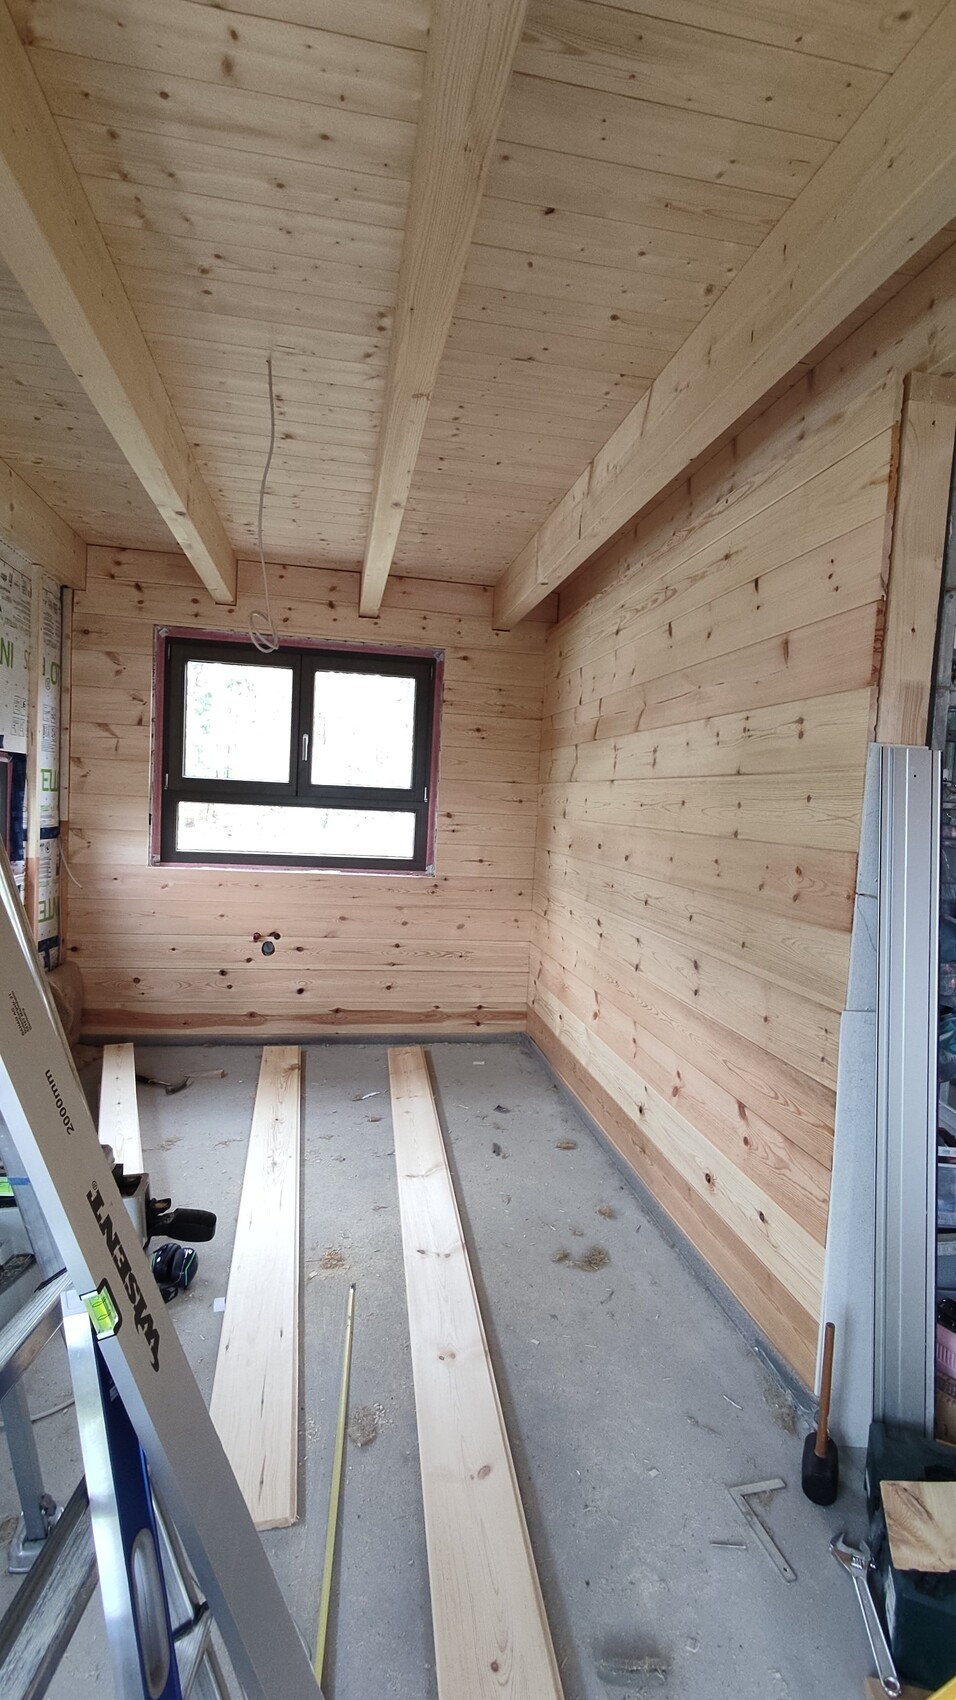
And all done
Later, we realized what it means that the wood moves. We were very careful to keep the gaps between the boards extremely small. But because the humidity was very high, the wood later shrank, and now you can see all the screws again... So next time, we’ll bring the wood inside earlier so it can acclimatize before installation.
We spent two weeks at the house but barely managed to accomplish what we planned. I’m feeling really frustrated and utterly exhausted right now, and I just don’t feel like continuing at all. I’m sure that will change, but that’s the situation for now.
We had three tasks we wanted to complete.
a) Insulate and cover the three kitchen walls with wood panels so the electricians could install outlets there. Then we could turn off the temporary power and get electricity directly into the house.
b) Fully insulate and panel the guest bathroom, build the drywall frame, panel it, and tile it. Also apply the Q2 or Q3 skim coat so we can paint or wallpaper the walls. Then the plumbers can install the toilet and sink, and we can get rid of the portable toilet.
c) Insulate and completely panel the main bathroom upstairs, install two drywall frames, and apply the first wood panel above the tiling (we will tile everything except the shower up to 120cm (47 inches), and above that we will put half panels). This must be finished by 01.10 so the tile setter (WE ARE FINALLY HAVING SOMEONE ELSE DO PART OF IT, YAY) can start work.
What we managed: For task a), we only completed two walls because the electrician forgot one outlet and only came back after 1.5 weeks to run the cable. For b), we’re missing a tile cutter, and we realized we spent ages on the tiny guest bathroom, so time for the upstairs bathroom was running short; therefore, no skim coat or tiling yet. For c), same as b).
So.
Task a) turned out to be complicated again. The water connection for the sink was placed awkwardly, so the outlet for the dishwasher didn’t fit in the right spot. We had many phone calls before finding a solution. Installing the wood panels so that the reveal trim would still fit afterward was tricky (we couldn’t do that at first because we made progress with the wood and didn’t know exactly where it would end, and the trim might have stuck out too far). We had to work around the window and attach the panels at the top without visible screws... ugh.
At the beginning:
Insulated and started on the window wall
Window wall finished
Then the interior wall afterwards
And all done
Later, we realized what it means that the wood moves. We were very careful to keep the gaps between the boards extremely small. But because the humidity was very high, the wood later shrank, and now you can see all the screws again... So next time, we’ll bring the wood inside earlier so it can acclimatize before installation.
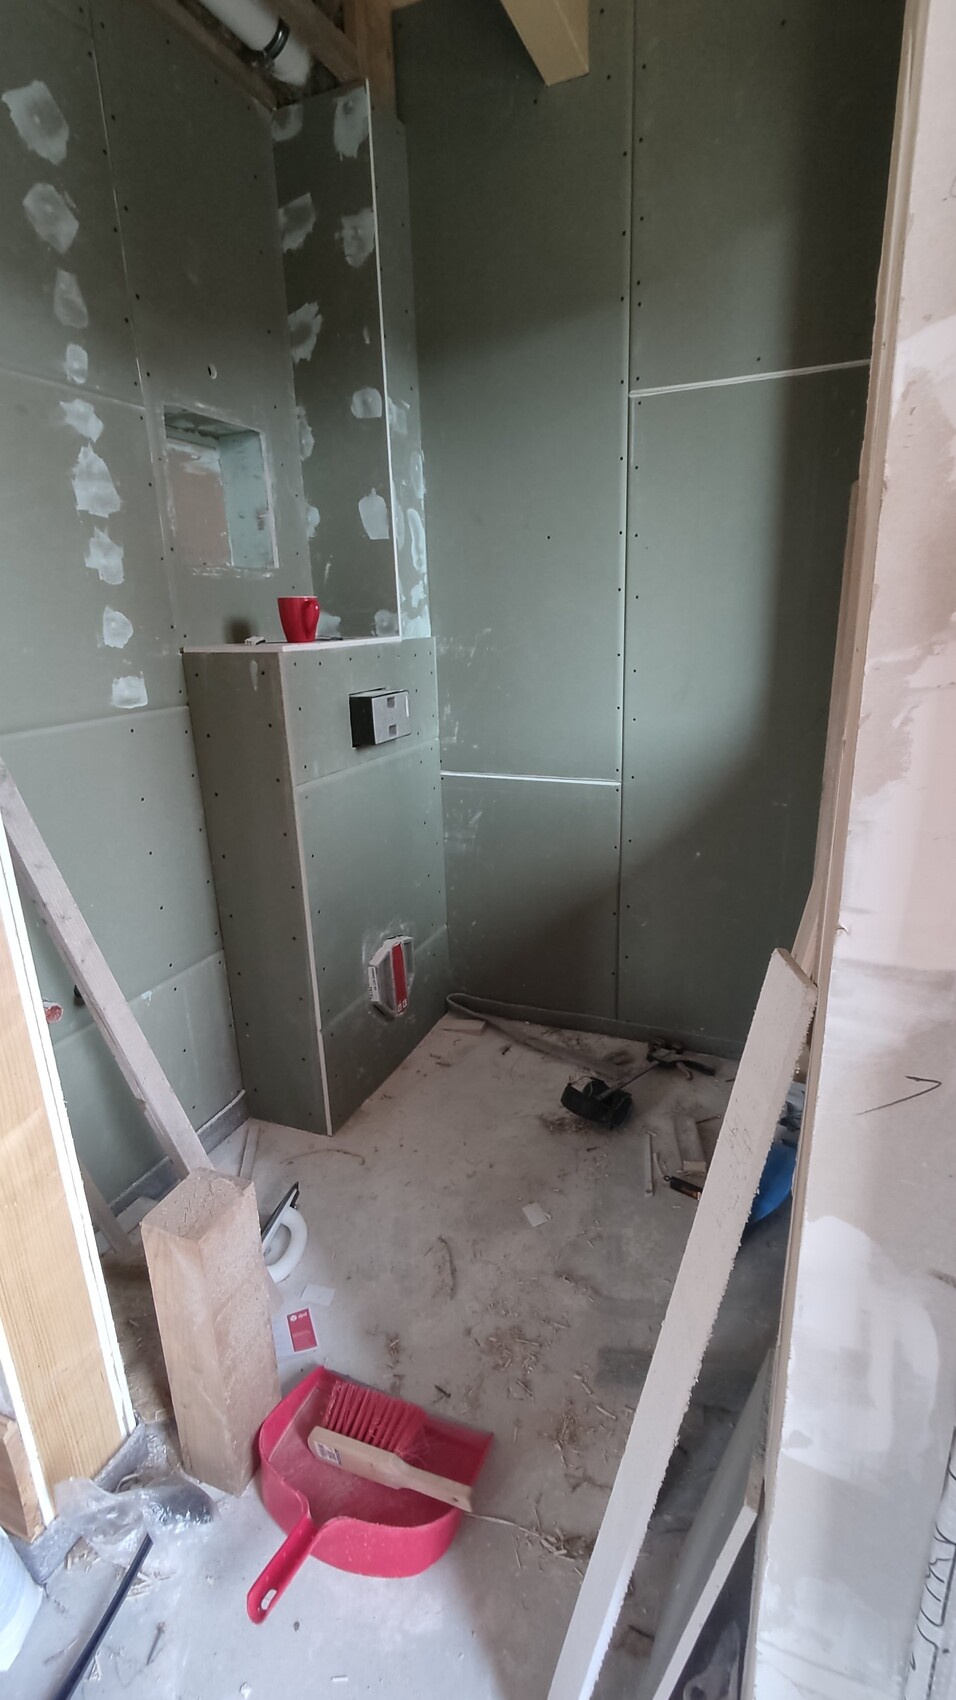
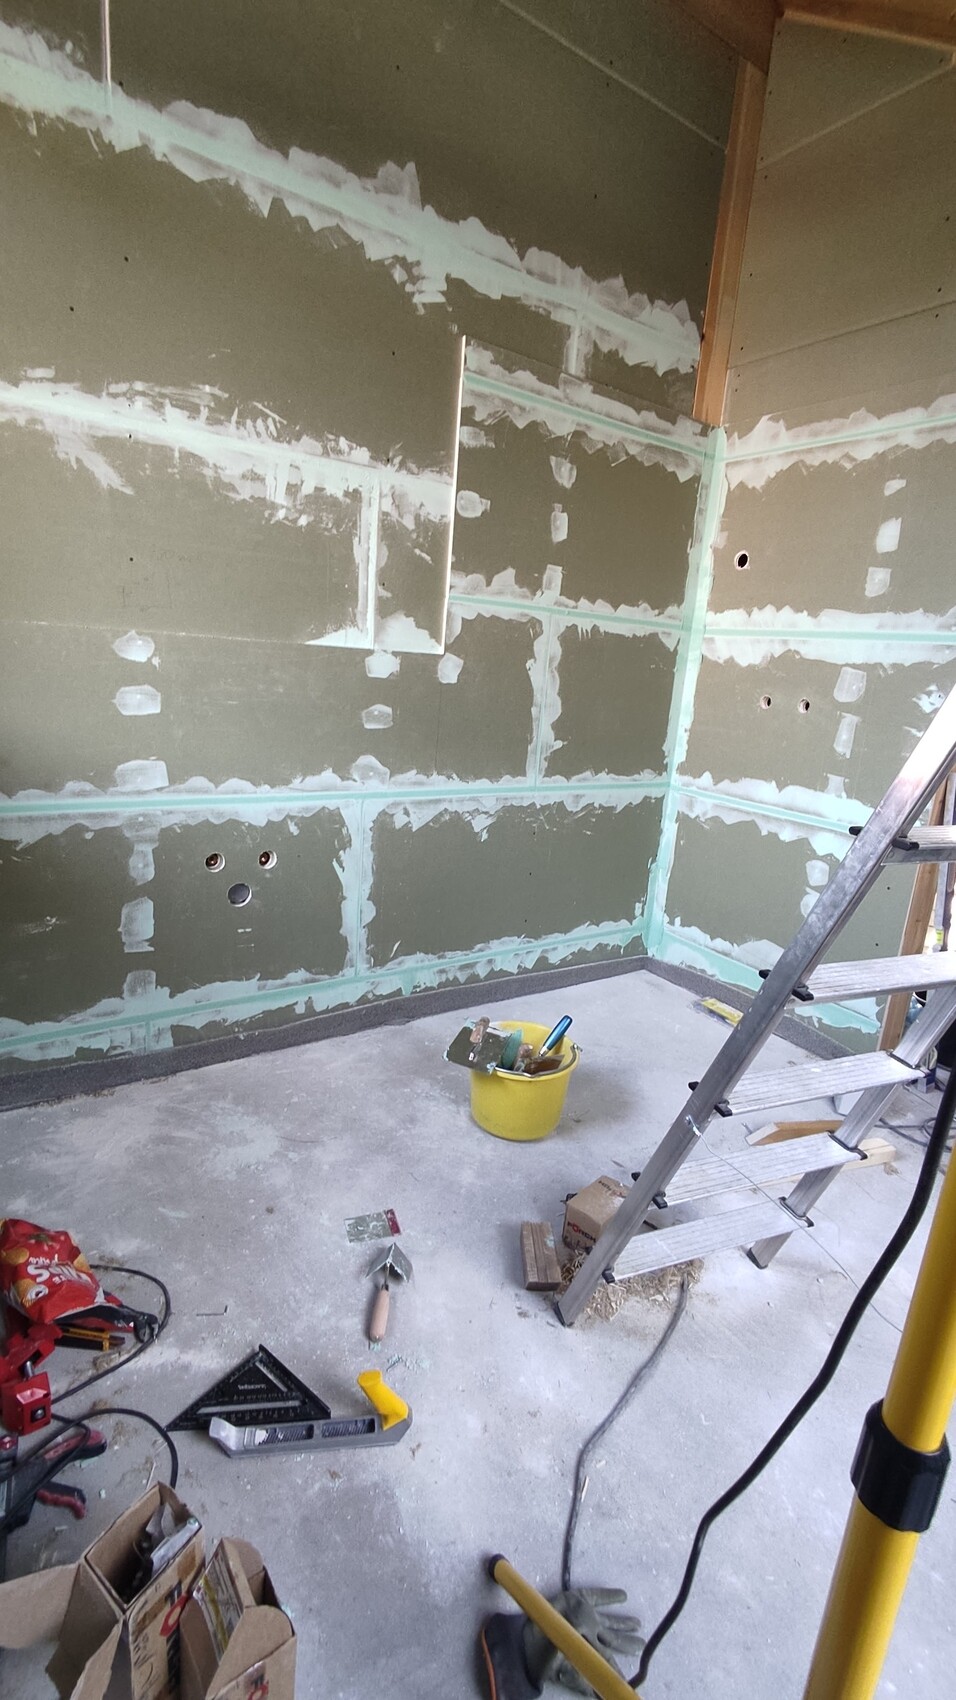
Holzhäuschen7 Sep 2022 14:27Project B was up next—the annoying guest bathroom. Initially, we planned to wallpaper all four walls.
But since only the stud wall is tiled, we didn’t want to use very expensive wallpaper behind the sink that might quickly look worn. So we decided to paint that area with clay paint, on the wall with the sink and the toilet.
Our starting point: walls are not fully covered yet; overall, 1 to 2 more layers of drywall are still missing, and some insulation as well.

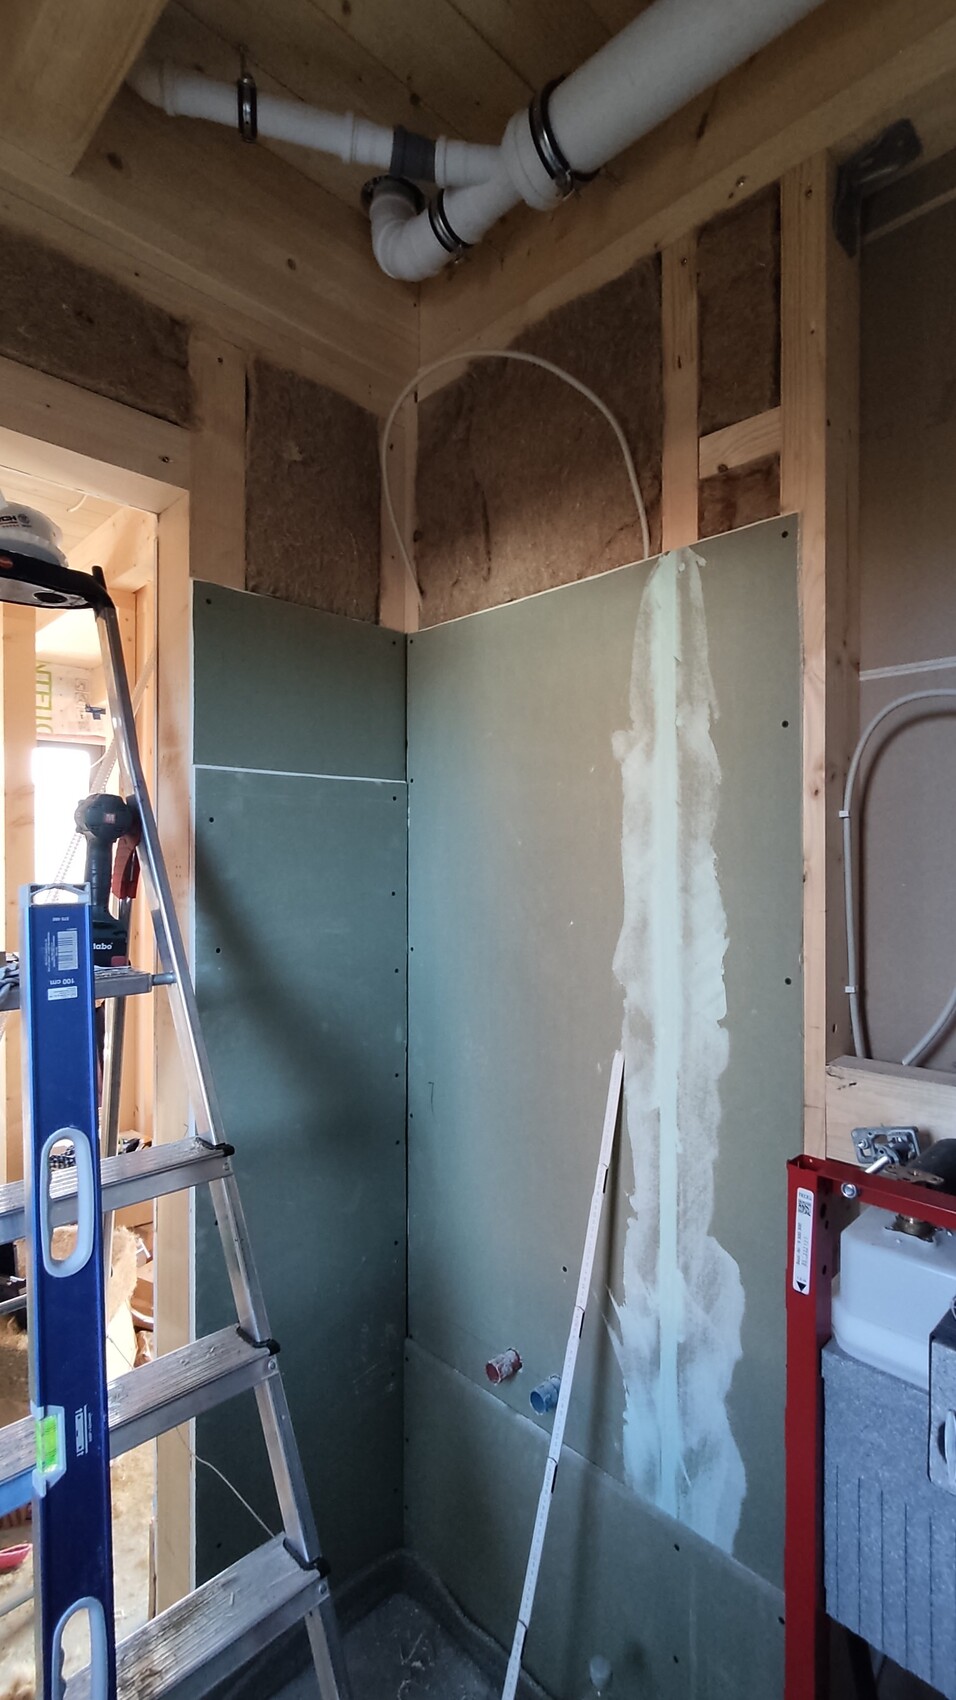
So first we had to build a stud wall (we still have plenty of wood). Sepp came up with the cool idea of installing a recessed shelf, which of course took a lot of time as well.
Cutting out the openings for the toilet fixtures from the drywall was also a real joy (not).
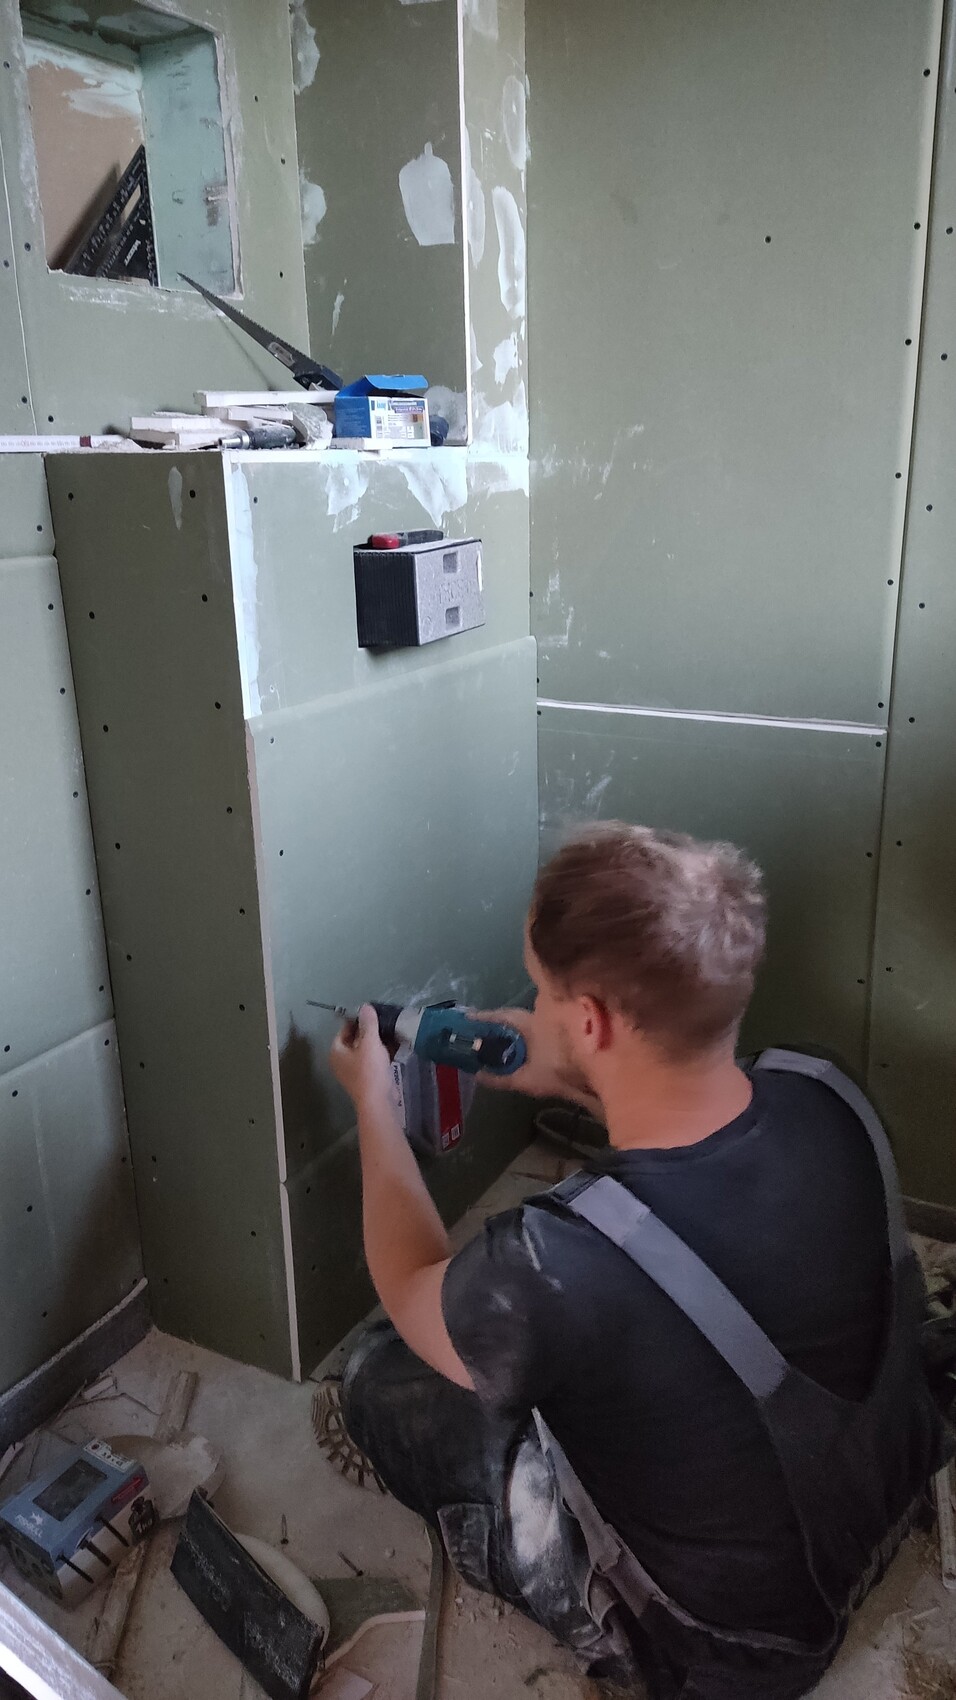
Here you can see the two recessed shelves; the second panel above them is still missing.
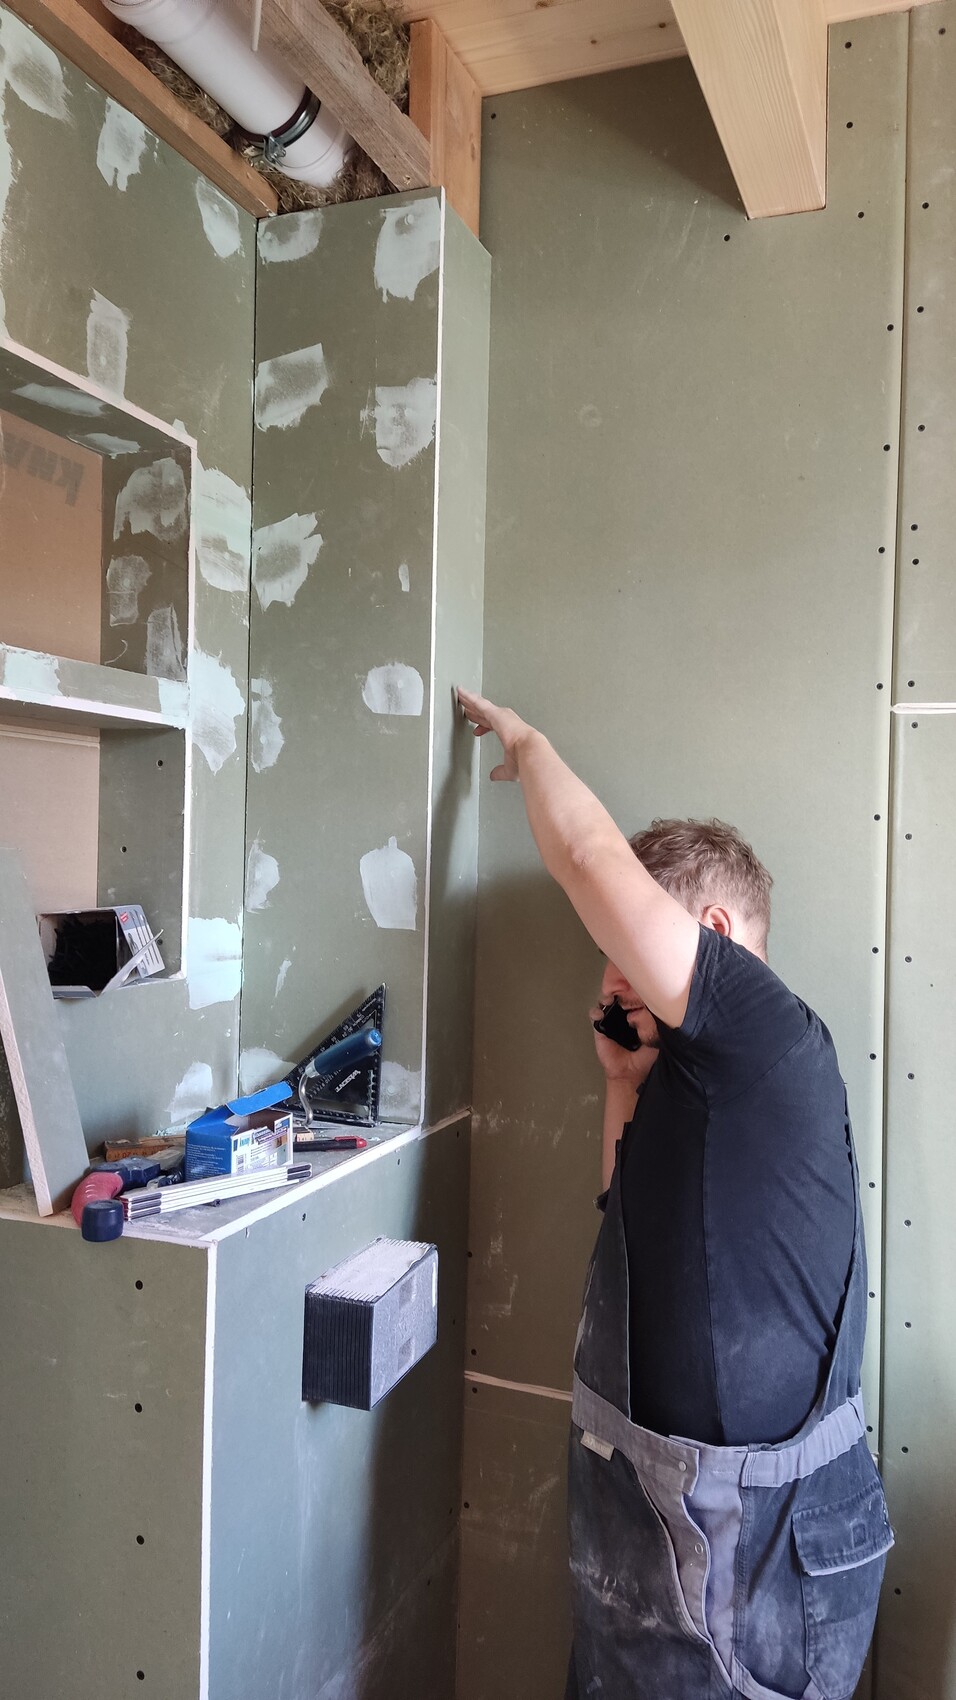
This is the current status: the top recessed shelf is not cut out yet; we are considering leaving a curved edge instead of a straight cut at the top.
Regarding the color scheme:
These are our tiles, and on 2 to 3 walls there will be the Oceania wallpaper from The Gap.
We will also paint with a shade of green, most likely Fern by Volvox.
The tile edge trim will be gold.
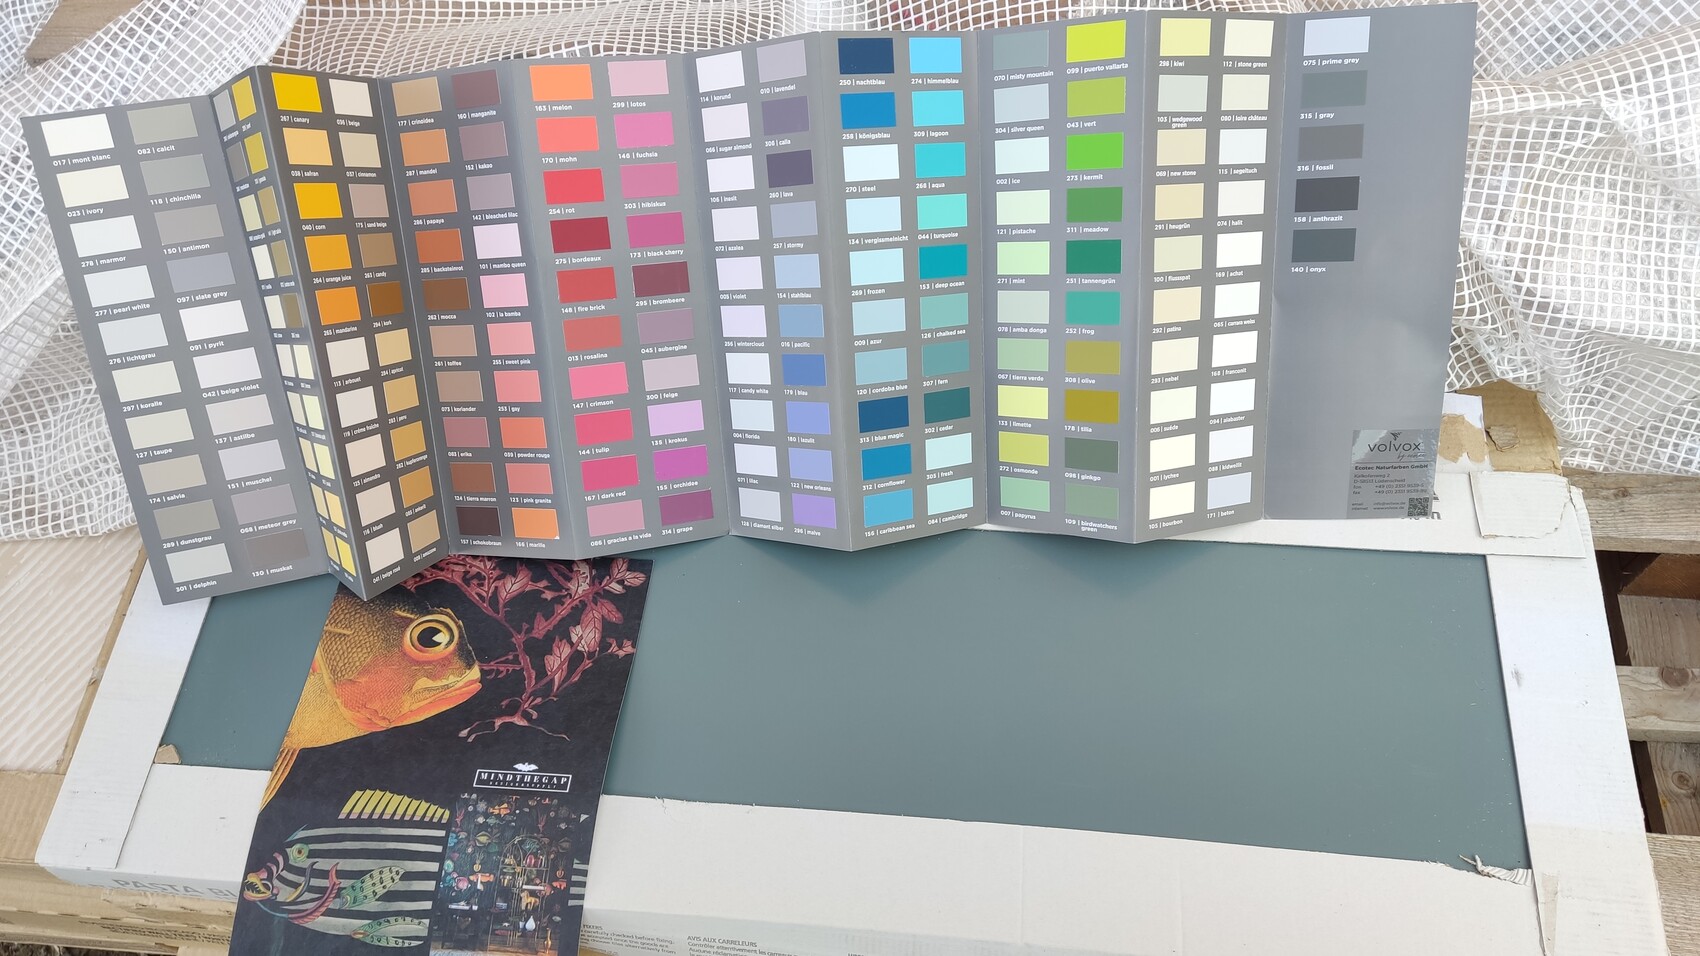
The wallpaper

Floor tiles will be Terrazzo Night.

So what's still missing: Q1 / Q2 finishing, possibly Q3 for the wallpaper, the tiles and the paint for installation.
Oh, and the pipes at the top still need to be enclosed with formwork boards...
But since only the stud wall is tiled, we didn’t want to use very expensive wallpaper behind the sink that might quickly look worn. So we decided to paint that area with clay paint, on the wall with the sink and the toilet.
Our starting point: walls are not fully covered yet; overall, 1 to 2 more layers of drywall are still missing, and some insulation as well.
So first we had to build a stud wall (we still have plenty of wood). Sepp came up with the cool idea of installing a recessed shelf, which of course took a lot of time as well.
Cutting out the openings for the toilet fixtures from the drywall was also a real joy (not).
Here you can see the two recessed shelves; the second panel above them is still missing.
This is the current status: the top recessed shelf is not cut out yet; we are considering leaving a curved edge instead of a straight cut at the top.
Regarding the color scheme:
These are our tiles, and on 2 to 3 walls there will be the Oceania wallpaper from The Gap.
We will also paint with a shade of green, most likely Fern by Volvox.
The tile edge trim will be gold.
The wallpaper
Floor tiles will be Terrazzo Night.
So what's still missing: Q1 / Q2 finishing, possibly Q3 for the wallpaper, the tiles and the paint for installation.
Oh, and the pipes at the top still need to be enclosed with formwork boards...
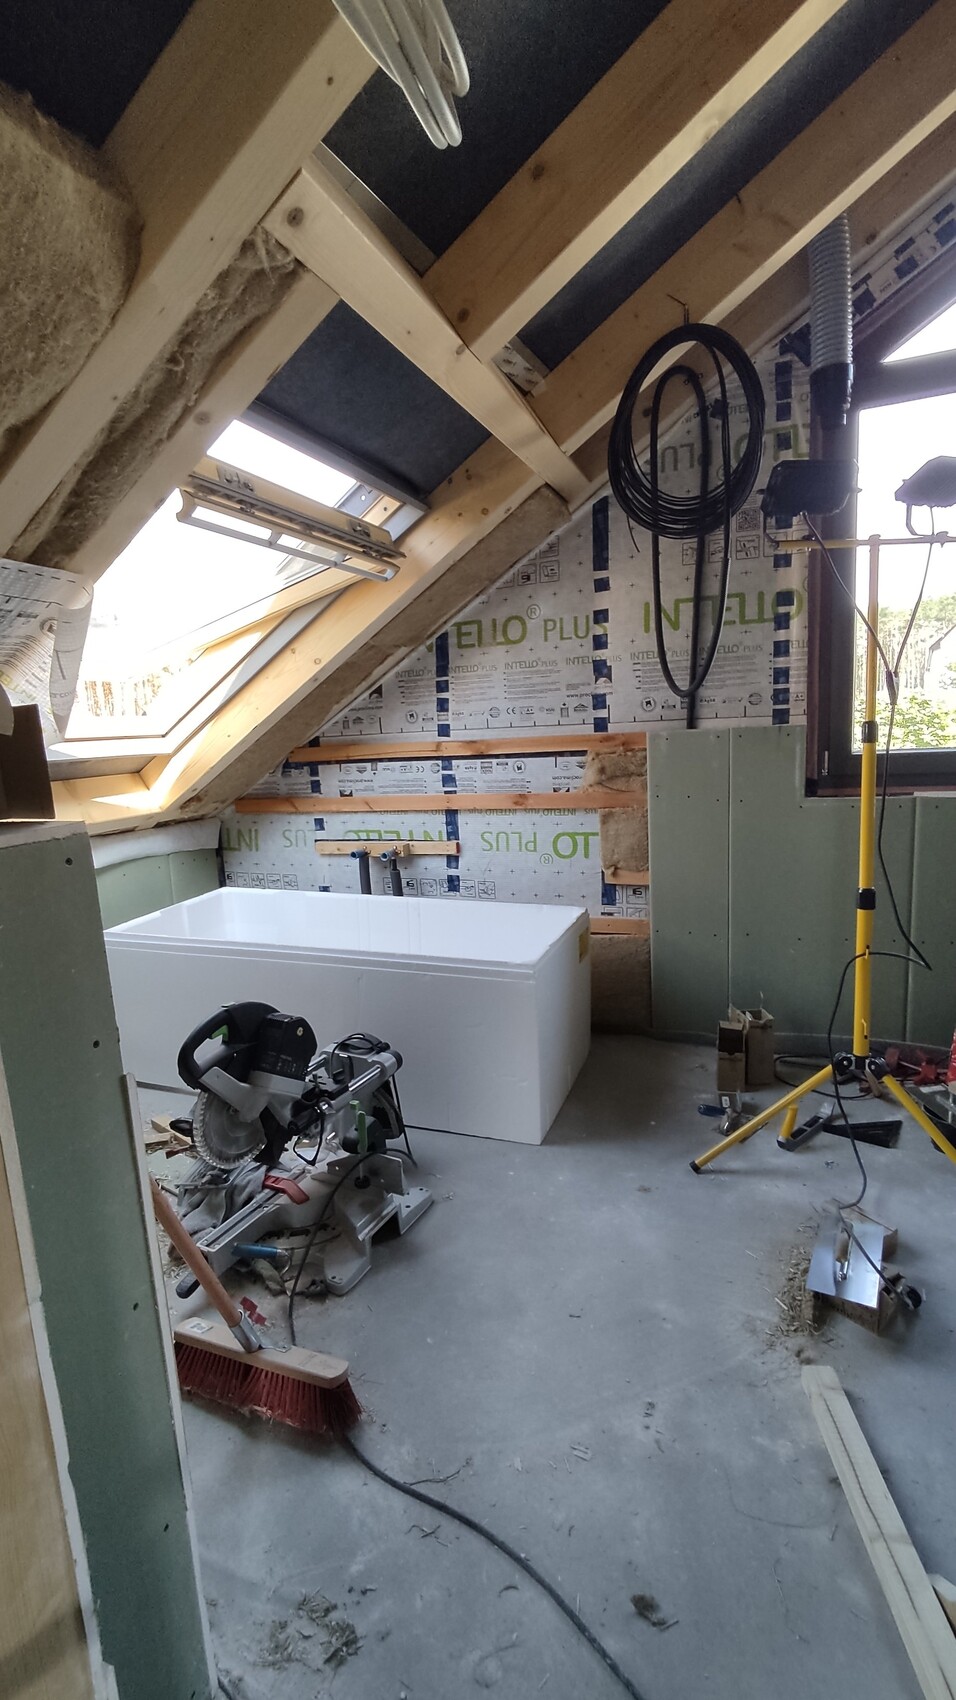
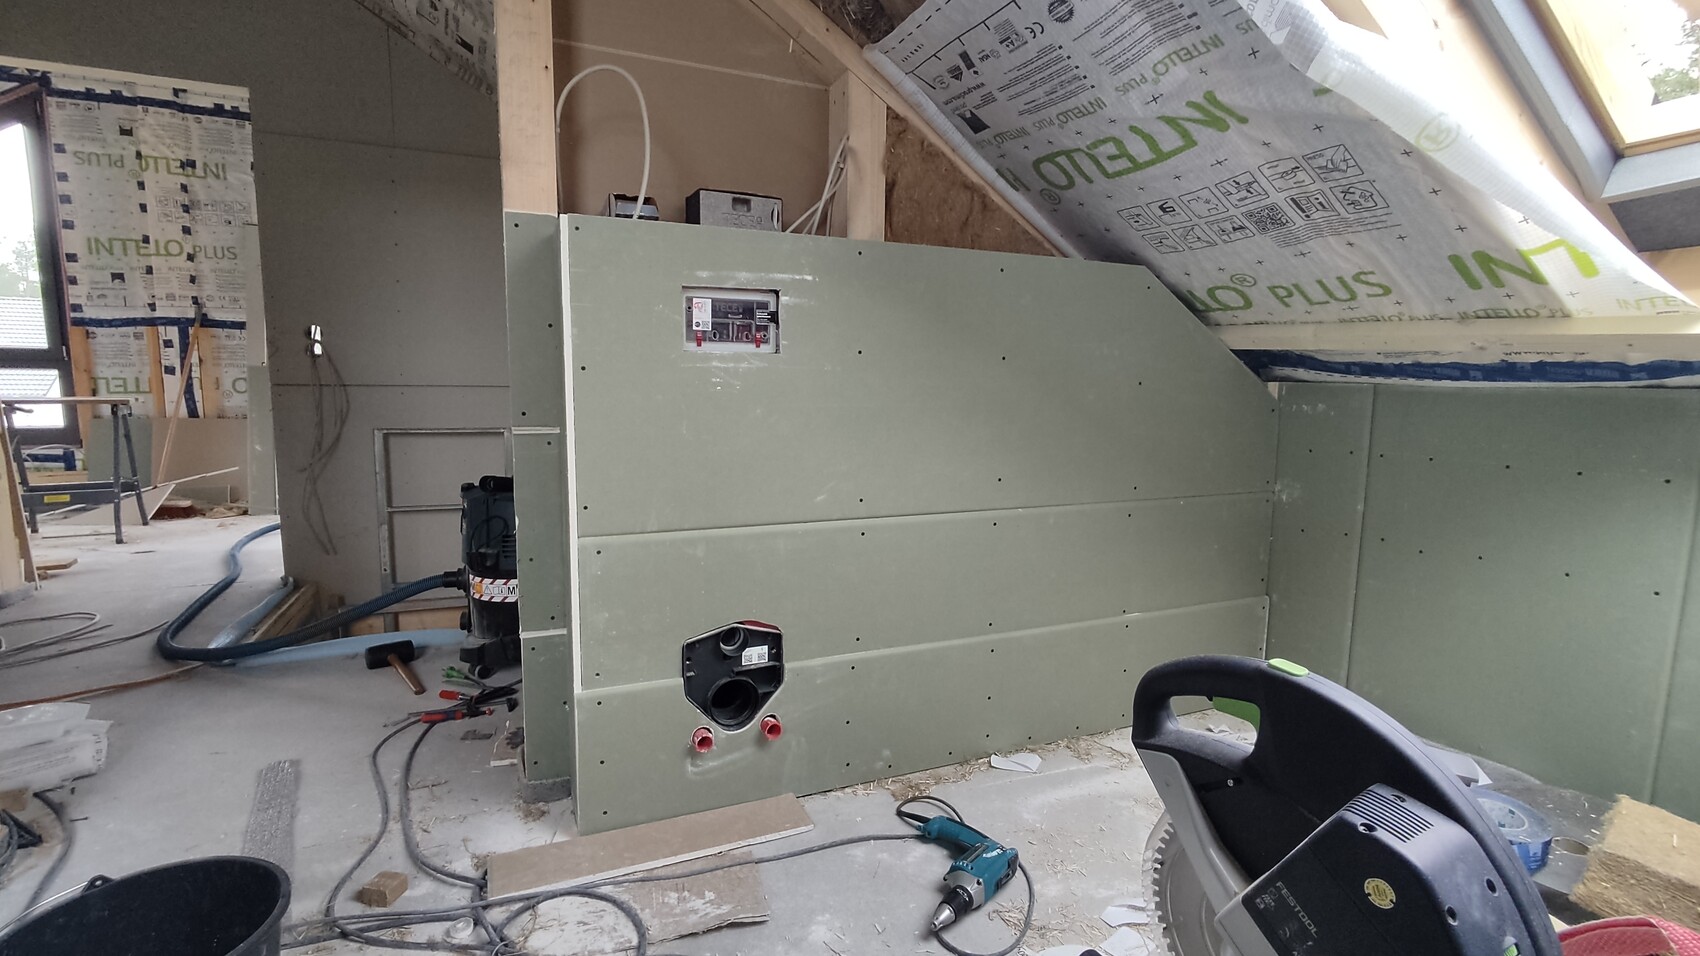
Holzhäuschen7 Sep 2022 14:45Project c) is the bathroom upstairs. We had some help on Sunday and made good progress there.
But first, we had to fix some mistakes and take new measurements from our plumbers and install additional wooden studs in the wall cavities so that everything can be properly fixed later. So much to keep track of...
Then we continued with the drywall installation and built the pre-wall for the toilet. With the bathtub, we couldn’t figure out the height of the carrier frame or how high we needed to build the pre-wall there. So, we had to wait again until we could talk to the plumber. He sent us the parts right away after we contacted him. He said he had three different size specifications from the manufacturers and the safest way was to measure the actual object ourselves. Okay.
Initial situation
Shower

Shower and sink

Bathtub area
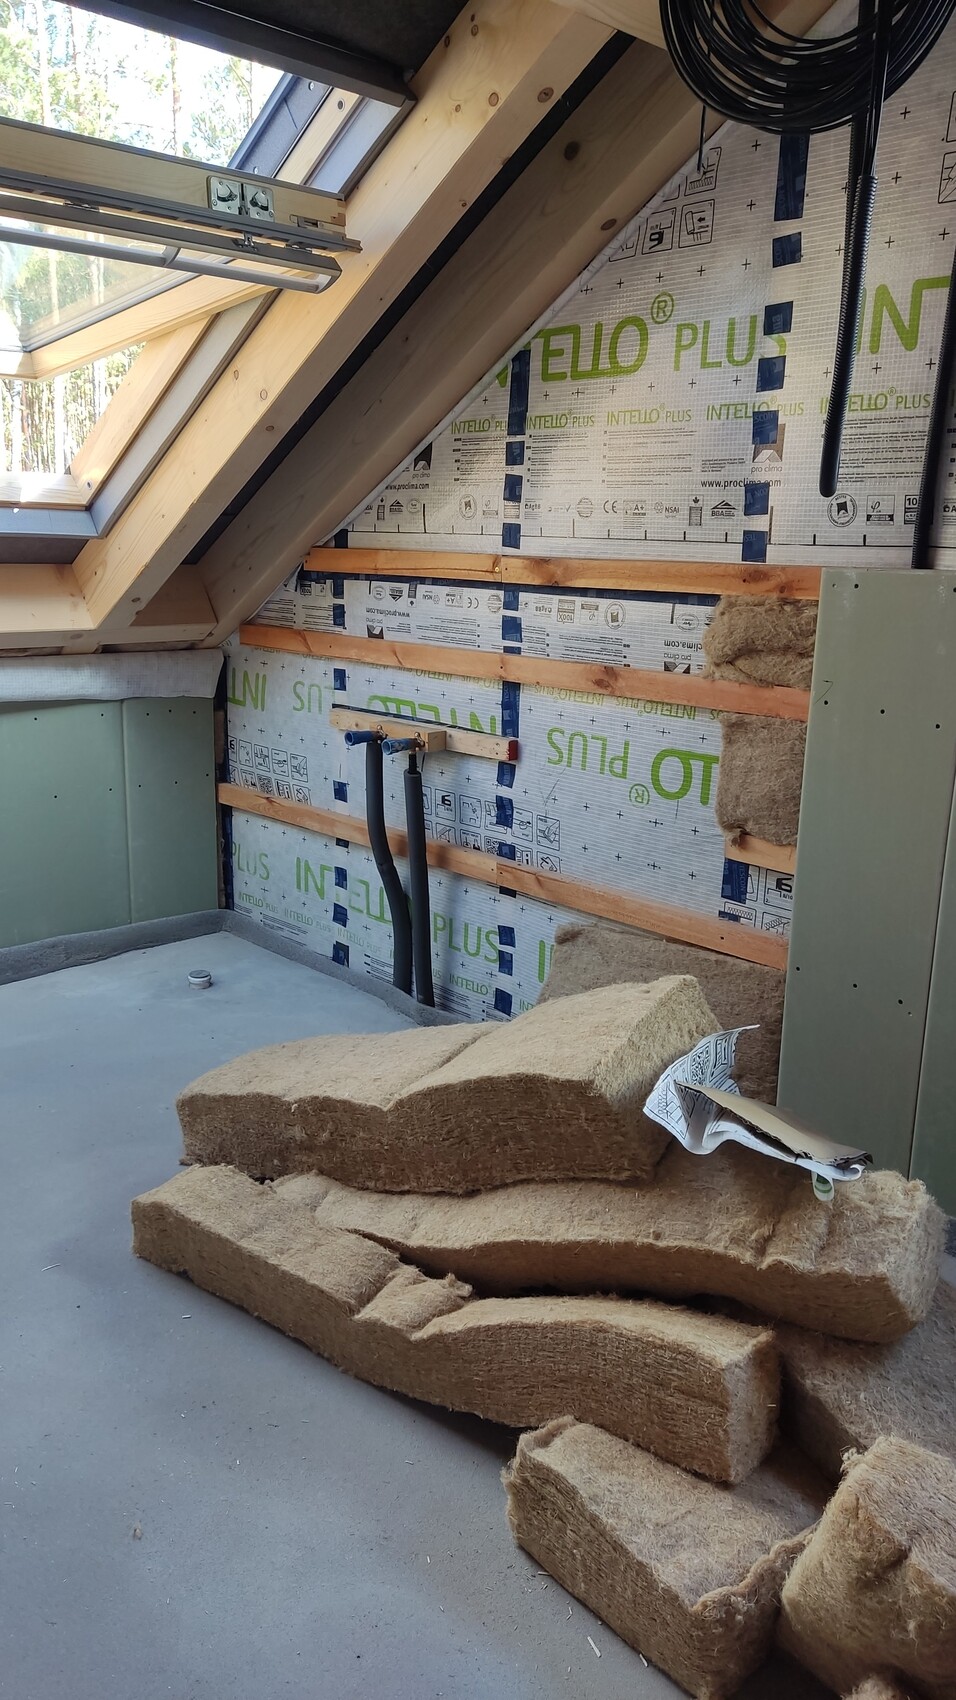
and toilet
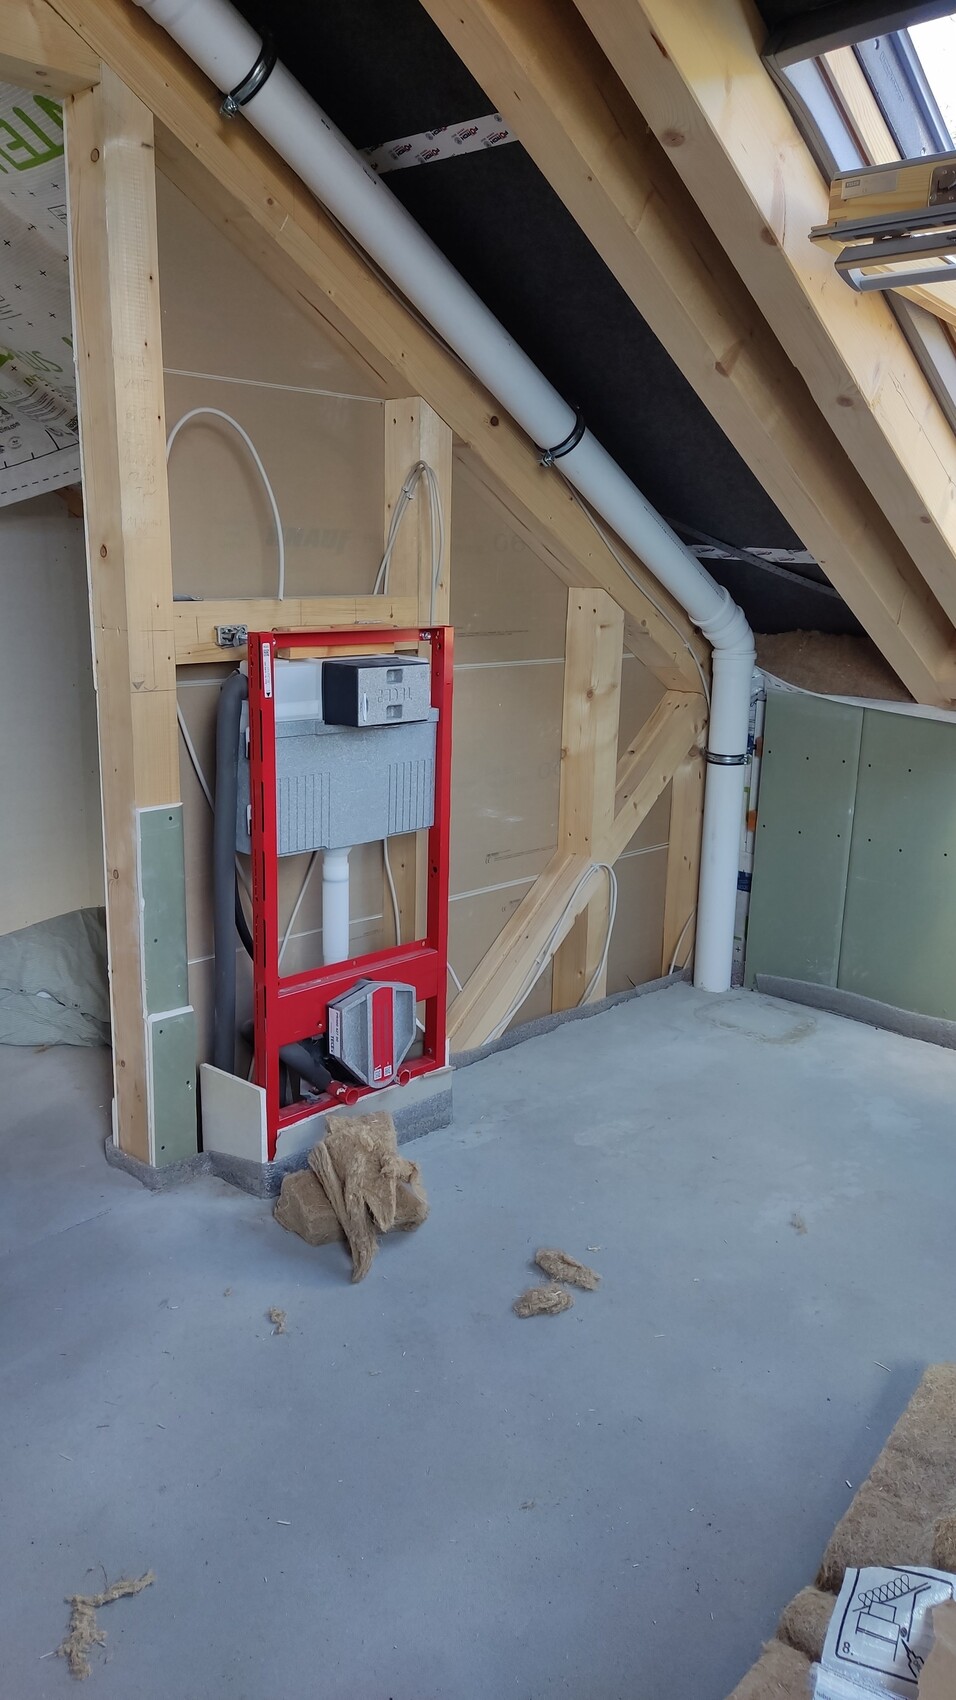
Progress update
Toilet
Shower
Sink and shower area
Final condition
Bathtub carrier placed in the room to get a feel for the space—feels super spacious to me compared to my previous tiny bathroom ;D
Shower and sink, drywall installed, partly taped and finished to level Q1.
Toilet also basically finished for now.
I HATE drywall and can’t wait to get back to working with wood.
We obviously have to finish the bathroom by early October. So hopefully we can manage that over the next two weekends.
After that, we can raise the third wall in the kitchen and also the living room wall so the electrician can drill holes for outlets.
But first, we had to fix some mistakes and take new measurements from our plumbers and install additional wooden studs in the wall cavities so that everything can be properly fixed later. So much to keep track of...
Then we continued with the drywall installation and built the pre-wall for the toilet. With the bathtub, we couldn’t figure out the height of the carrier frame or how high we needed to build the pre-wall there. So, we had to wait again until we could talk to the plumber. He sent us the parts right away after we contacted him. He said he had three different size specifications from the manufacturers and the safest way was to measure the actual object ourselves. Okay.
Initial situation
Shower
Shower and sink
Bathtub area
and toilet
Progress update
Toilet
Shower
Sink and shower area
Final condition
Bathtub carrier placed in the room to get a feel for the space—feels super spacious to me compared to my previous tiny bathroom ;D
Shower and sink, drywall installed, partly taped and finished to level Q1.
Toilet also basically finished for now.
I HATE drywall and can’t wait to get back to working with wood.
We obviously have to finish the bathroom by early October. So hopefully we can manage that over the next two weekends.
After that, we can raise the third wall in the kitchen and also the living room wall so the electrician can drill holes for outlets.
Holzhäuschen7 Sep 2022 14:47TmMike_2 schrieb:
Don’t get discouraged, the interior finishing always ends up taking the most hours.
It looks great!Thank you very much, we are complete beginners and have taught ourselves everything. It’s really encouraging to hear that. I just never want to stuff hemp (in any form) anywhere again or handle drywall panels xD but that will take a little longer.I can’t wait to continue raising the wooden walls. That’s actually a lot of fun.
Similar topics